About Universal Appointments and Time Reservations
This is an Odoo full-featured app to administrate, control, and improve service management workflow. The tool lets you organize flawless time reservations, control fulfillment, evaluate customer satisfaction, sale and upsell goods in almost any industry. With all options installed the tool represents a structured e-shop for your services.
A flexible module setup allows reflecting specifics of your business or even multiple businesses. There are 3 core objects that together help to reflect the company's workflows. These are Resource Types, Resources, and Services. Each object introduces certain settings for the flexible reservation process. Set up the structure of resources and services to reflect your company's workflows. Assign specialists and equipment manually or automatically. Flexibly manage appointment duration rules.
The module has a convenient backend menu, from which the appointment managers can create a new reservation in just a few clicks. The module's convenient single-view interface allows both: booking appointments right from the calendar and navigating through the appointments
The appointment scheduler allows making a new reservation in a few clicks. It is quick and simple but with full control over potential intersections.
The algorithm of the module allows making sure that only vacant time slots will be available for booking. The vacant slots for appointments are automatically generated based on working calendars, service peculiarities, and specifics of managed businesses.
Apply popup alarms, add success emails, and prepare SMS reminders to make sure the clients will not forget or miss an appointment.
Automatically request client reviews upon completion of the reservation and see. Collect the rating and check the quality of provided services.
The module provides a convenient menu to track and analyze the provided appointments through the appointments' report view. Choose a measure for the analysis.
It is possible to let portal partners and website visitors schedule an appointment through the configurable multi-step process of checkout and confirmation ().
Customize the way the appointments wizard is seen on the website. Turn on/off optional layout elements on the website. Introduce your own titles and welcome texts. Exclude booking steps ().
Generate a sale order automatically as soon as an appointment is scheduled. The resulting sale order can be either a draft (can be changed), automatically confirmed (cannot be changed), or sent quotation (ready to accept and pay) ().
Boost revenues by upselling accessories. If configured, Odoo will show the popup with suggested products for backend managers ()/website clients () immediately after reserving a time slot.
Appointment resources might be linked with employees. This way the calendar of the employee, his/her meetings, and own leaves will be used to generate the available time slots ().
Introduce custom fields for reservations, resource types, resources, and services (). You can place your custom fields in the backend on the appointments/resource types/resources and services cards, or make custom properties of resource types, resources, and services visible on the website ()
The app is configurable for multi companies and for multi-website environments.
Comfortable scheduling without conflicts
Innovative appointments calendar
Customer satisfaction and reports
Custom details and reminders
Concepts and Terms
Appointment/Reservation – a core object, that represents an arrangement to get a particular service at a particular time and place. The main elements of a reservation are: resource, client, time, and service.
Pre-reservation – an arrangement, that isn't yet confirmed. Usually, used to block a particular time slot of a particular resource. Appears after choosing a time slot and is valid until all details are confirmed or the time for the pre-reservation is out (see Pre-reservation).
Resource type – a core object that sets the specifics of the business and stores the related to the business settings. It also keeps information about related services and resources. This way, you can distinguish one group of services and resources from the other. For example, resource types might be particular businesses you manage ('Beauty Salon', 'Dental clinic', 'Hairdressers') or you can assign different addresses of the business as resource types (see Managing Resource types).
Resource – a core object that represents a facility or a person (), whose time is considered for allocation to provide a service. For example, in a language school, a classroom or a teacher may serve as a resource (see Managing Resources).
Service – a core object that defines what actually should be done. For instance, it can be a 'consultation', 'tooth surgery', 'classic hair cutting', 'car class C rent', etc (see Managing Services).
Time Requirements – time restrictions, when an appointment might be scheduled. This way you can specify the maximum and the minimum number of days before the appointment, and the time when an appointment can no longer be canceled or rescheduled. The time slots will be generated according to the time requirements (see Time Requirements).
Rounding Time – the rule to round time slots start to avoid calculating a start you do not like (see Rounding Time).
(Resource) Alias – a special type of resource that serves as an avatar for another resource. Usually, used to apply the same facility or employee for different kinds of work (resource type). Does not have its own calendar settings and responsible, and refers to the calendar and details of the prime resource instead (see Managing Resources).
Prime resource – a resource, that has one or several aliases, that use its calendar settings (see Managing Resources).
Responsible user – the user who manages and controls appointments of a particular resource; is chosen in the field 'Responsible user' of the related resource. For example, Mitchell Admin is a responsible user of the resource Hotel 5 stars. If an employee represents a resource (), then the user of the related employee is also a responsible user. For example, our dentist Anita Oliver is both the resource and the responsible person (see Managing Resources).
Working Calendars – a working time pattern, which is assigned to employees. If an employee represents a resource (), then his/her working time is used to generate available time slots (see Resource Calendars).
Alias Working Hours/Extra Alias Calendar – an additional working calendar, which is assigned to an alias to limit the time, when an alias is available for booking. The intersections between the main resource calendar and alias calendar will be used to generate the available time slots for an alias (see Extra Alias Calendar).
Odoo Calendar – a standard Odoo calendar, which is used for scheduling events or meetings with the delegates or among other employees in the organization (see Meetings Calendar).
Odoo Events – a meeting, registered through the Odoo standard events calendar, which, if configured, makes certain times unavailable for generating time slots (see Meetings Calendar).
Global Time offs – the time when the company doesn't work (see Resource Calendars).
Personal Time offs – the time when an employee takes a vacation/leave/day off (see Resource Calendars).
Resource allocation – the appointment distribution among the resources based on the chosen resource allocation method (see Resource Allocation).
Resource allocation method – the way/algorithm to distribute the appointments among resources. The distribution method is applied in cases where automatic resource selection is chosen. Or, when the client can't choose between the resources and selects several ones or all. You can configure and distribute resources by workload, appointment number, and order (see Resource Allocation).
Extra Resources – the additional resources to provide the service. When booking (both in the backend and in the portal), the system takes into account calendars not only of the main resource but also of the additional ones. In order, for the time slot to be available for booking, both the main and the additional resources should be free (see Extra Resources).
Extra Service Calendar – a calendar, that states the days and the time, when a service is available. The service will be available for booking at the intersection of the resource and service calendar (see Extra Calendar Restriction).
Service Duration – the time required for providing a particular service. Can be defined in hours and days (see Service Duration).
Manual Duration – the time for providing the service, which is chosen manually, during the scheduling process both in the backend and frontend (see Service Duration).
Slot Step – the step with which the timeslots are generated, allows booking the time flexibly (see Slot Step).
Checkout Period – the time required for completing the reservation, without the participation of the client. This setting allows showing the client what time he/she should finish receiving the service. At the same time, the resource will be blocked for the entire selected time (see Checkout Period).
Start&End Day Restriction – the set of days of the week and/or a set of specific dates on which the reservation cannot start/end. This way you can restrict the days when an appointment is allowed to start or end (see Start&End Day Restriction).
Rounding Time – the rule to round time slots start to avoid calculating a start you do not like (see Rounding Time).
Single View Interface - the functional interface for internal users to see and navigate through appointments and schedule new ones conveniently (see Appointments Calendar).
Scheduling wizard – a pop-up window, with functional elements, that allow selecting the details of the appointment and specifying the account details of the client (see Scheduling Appointments: Backend, Portal Control of Reservations).
Re-scheduling – is the process of changing the details of the existing appointment. It is possible to choose a different resource type, resource, service and time slot (see Scheduling Appointments: Backend).
Appointments Numeration – the numbering logic (suffix, prefix, step, etc.) of appointments (see Appointments Numeration).
Internal user – a user who has access to the Odoo backend and its functional apps. In order to access the appointments, the user should also have one of the related roles assigned (see Access Rights).
Portal user () – a registered user who has access to the Odoo portal, but cannot access the Odoo backend. Can access website appointments booking page, if configured. Sees only published resource types, resources, and services (see Access Rights).
Public user () – any website visitor, who hasn't logged into Odoo. Can access website appointments booking page, if configured. Sees only published resource types, resources, and services (see Access Rights).
Backend interface – the interface introduced for internal users with one of the appointment roles assigned to see and manage the appointments and configure the elements of the scheduling process (see Scheduling Appointments: Backend, Managing Appointments).
Website interface – website page introduced for portal and public users to schedule appointments conveniently (see Website Booking Process).
Portal interface – the interface introduced for portal users to navigate through scheduled appointments conveniently. The portal users can see and manage scheduled appointments and contact the company representatives (see Portal Control of Reservations).
Appointments Alarms – the pop-ups, emails, and SMS notifications, that remind the chosen groups of users about the upcoming appointment (see Appointments Alarms).
Success Email – the email that confirms the appointment and contains the details about it. It is sent when a manager / a client () books an appointment and when an appointment is re-scheduled (see Appointments Discussion).
Rating Email – an email, to request feedback from the customer. It is sent automatically as soon as the appointment is marked as completed (see Appointments Rating).
Followers – users, that want to keep updated and receive particular kinds of notifications about a certain appointment or all appointments of a certain object (see Appointments Discussion).
External Followers – followers that don't have access to the Odoo backend. For example, our clients (see Appointments Alarms).
Internal Followers – users who have access to the Odoo backend and its functional apps, and who are added as a follower to an appointment. For example, Abigail Peterson, our appointments manager (see Appointments Alarms).
All Followers – both internal and external followers (see Appointments Alarms).
Website booking – the scheduling process through the wizard on the appointments website page. The scheduling process is similar to the one in the backend (see Website Booking Process).
Website step – a certain level of the scheduling process, which requires making a certain choice or specifying details (see Website Booking Process).
Progress bar – a graphical control element used to visualize the progression of the scheduling process on the website (see Portal and Website: Customization & Settings).
Session duration – the time after which the client's choice on the website is cleared. Mainly relates to the first three steps of the website booking process (see 3. Choosing Service).
Pre-reservation timer – a timer that appears as soon as the time slot is chosen. It allows creating a pre-reservation on a certain time slot, so no one else can reserve it until the time is off, or the client confirms the reservation (see 4. Choosing Time).
Confirmation timer – a timer that may be configured to appear as soon as the reservation is confirmed. It allows making sure that the client uses real email/phone to book a reservation (see 6. Confirming Reservation).
Sale Order – is a document generated by the seller specifying the details about the appointment and optionally some complementary products ordered by the customer (see Universal Appointments: Sales).
Pricing method – are the way in which the price of appointments can be calculated. It is specified per each resource type. The possible options are: for the planned duration, tracked duration, and per unit (see Configuring Pricing Methods).
Pricelist – is an object that contains rules, according to which the company prices are adapted. It may contain a discount or a rule to show the price in another currency. Pricelists may be assigned to portal users (see Prices & Pricelists).
Complementary Products – are products related to a certain service, that may also interest the customer.
Add-ons Icons
Universal Appointments: Portal and Website
The optional module that introduces the website booking process and lets external users schedule appointments and control reservations in the portal.
Universal Appointments: Sales
The optional free module introduces service pricing information and links appointments with sales.
Appointments: Website Sales
The optional free module includes service price lists and prices in the reservation checkout process. (+)
Universal Appointments: Custom Fields
The optional module that lets you add and show custom fields for appointments and related objects.
Universal Appointments: Custom Fields for Website and Portal
The optional free module that shows custom fields on the website and portal pages (frontend). (+)
Universal Appointments: Time Tracking
The optional module that allows tracking time spent on each appointment.
Universal Appointments: HR Bridge
The optional free module that allows considering employees as appointment resources.
Universal Appointments: Gantt
The optional free extension that introduces the Odoo Enterprise Gantt view for appointments.
Appointments Management Structure
There are 3 core objects that together help to reflect the company's workflows. These are Resource Types, Resources, and Services. The layers have the following hierarchy: Resource Types > Resources > Services.
Each object introduces certain settings for the flexible reservation process.
The decision on what to consider as resource types, resources, and services is completely up to you. Such an approach lets you reflect on almost any service business.
The tool does not force you to have multiple instances for each layer. In simple cases, there might be just a single representative for each step. For example, Lawyers (Resource Type) – Attorney Chris Black (Resource) – Consultation (Service).
If there is a single option, the app will reflect that by simplifying appointment scheduling. Therefore, steps without actual choice are auto missed. For example, Layers (Resource Type) – Consultation (Service).
Managing Resource types
Resource type – is a core object that sets the specifics of the business and stores the related to the business settings. It also keeps information about related services and resources. This way, you can distinguish one group of services and resources from the other. For example, resource types might be particular businesses you manage ('Beauty Salon', 'Dental clinic', 'Hairdressers') or you can assign different addresses of the business as resource types.
Another approach is to consider a resource type as a group of particular resources. For example, if you have a car rental business, the cars may be divided into classes 'class B cars' and 'class C cars'.
Resource types contain main settings of how to organize service provision: how to allocate resources, how to calculate appointment total price, what are time restrictions, which services are possible, etc.
To create a resource type:
1. Open the module Appointments
2. Go to the tab Resources > Resource Types
3. Click 'Create'
4. Add a reference and optionally add the picture (It might also be visible on the website )
5. Choose a service method
Assign a particular service to be chosen automatically to skip the step services ('Service is always the same for all resources and appointments') or let users choose a service from the variety of them ('Service should be selected for resources and for appointment'). For example, if you provide the cars for rent, then there may be no choice of the service and it is always a 'Car Rent'. Or you can use different types of cars as services and in this case, let the clients choose the one they want, for example, 'Premium car rent', 'Electrocar rent', etc.
6. Choose the available services
Choose the services that will be associated with the resource type. One service may relate to several resource types. For example, in a Language school, the available services may be: Lesson, Consultation.
7. Choose a resource selection (see Resource Allocation)
Let users choose the resource ('Manual'), or automatically assign the resource ('Automatic'). For example, if you have a language school you may let clients choose the teacher or assign a teacher automatically.
8. Choose the resource allocation method (see Resource Allocation)
If you have chosen to automatically assign the resource, then choose the way the distribution will be decided. To spread the appointments equally, keeping in mind the resource duration, choose to distribute resources by the option 'Resource workload'. For example, it is useful if you have a dental clinic and want all dentists to have equal actual working time.
To spread the resources equally, based on the number of appointments, choose the option 'By appointments number'. For example, it is useful when you have a language school, where the lessons have a fixed time and you want the teachers to have an equal number of lessons.
To distribute resources on a queue basis, choose the option 'By order'. For example, it is useful if you have a car rental, and it doesn't matter which car is chosen for the appointment.
9. Choose how the total price will be calculated () (see Configuring Pricing Methods)
Choose the option 'Planned duration', when the appointment's time and the price is fixed. For example, a lesson in a language school.
Choose the option 'Tracked Duration' () if the time of the appointment may change and therefore only the price for the actual duration should be charged. For example, booking a room in a hotel with the possibility to extend the time of stay.
Choose the option 'Units', when the total price for the appointment equals the product's price. For example, a tour in a travel agency.
10. Set Time Requirements (see Time Requirements)
Set the time, at which it is possible to book an appointment. A user will not be able to book an appointment if before the appointment is left less time than is set in the line 'Reservation should be done in'. For example, allow booking a hotel room no later than 7 days before the appointment.
A user will not be able to book an appointment if the time before the appointment exceeds the time set in the line 'Reservation should not be done after'. For example, allow booking a lesson no earlier than a month before the appointment.
Set time, for which a user can cancel an appointment in the line 'Portal: Cancellation/Re-Schedule might be done in'. Set the time as 0, to forbid cancellation. For example, forbid canceling or re-scheduling a tour 15 days before the booked time.
11. Optionally, in the tab settings tick the box Calendar Events as Busy Time (see Meetings Calendar)
If the option is checked, then for periods when a responsible user has meetings (i.e., events assumed by the Odoo calendar), appointment booking will not be possible. For example, if we have a resource 'Room 5' with the teacher as a responsible user Anita Oliver, then the time, when the user has meetings will not be available for booking.
If the resource is set as Human (), then the working calendar of the employee is used to generate available time slots. And, if the option 'Calendar Events as Busy Time' is turned on, then the meetings of the employee are also considered. For example, the teacher Anita Oliver (both resource and responsible) has a meeting on Thursday at 4 pm on her calendar, that's why this time is not available for the lesson.
12. Optionally, in the tab settings, tick the box Appointments Customer Rating (see Appointments Rating)
If the option is turned on, then the rating request will be sent when an appointment is marked done.
13. If you work in a multicompany environment, in the line 'Company', choose the related one (see Multicompanies & Multiwebsites)
14. Optionally, in the tab 'Notifications', select 'Success Email' and 'Rating Email' templates.
A 'Success Email' will be sent to the client as confirmation of the appointment (see Appointments Discussion).
A 'Rating Email' will be sent to the client to get feedback after the appointment (see Appointments Rating).
15. Optionally, in the tab 'Notifications', set the default alarms (see Notifications)
Define who to notify: a responsible manager, external followers (clients), internal followers, or all followers. Keep in mind that pop-up alarms are only available for back-end users.
16. In the 'Description' tab, add the description to the Resource type
If the option 'Show types full details pages' () is turned on, then the description is shown on the full resource type page (the page might be edited on the website (see Portal and Website: Customization & Settings)) and in the selection of the website booking wizard (if not hidden by ticking the option 'Do not show website full description' in the tab Website on the resource type's card).
17*. Select the website, on which the resource type will be visible and optionally tick the box 'Do not show website full description' to make the description invisible on the website () (see Multicompanies & Multiwebsites).
18. Click 'Save'.
If you open the resource types' menu, you will find the list of the resource types. If you work in multicompany environment, then, here you will see only the resource types related to your company or to the companies selected in the systray, if you have the access to several companies (see Multicompanies & Multiwebsites).
On the resource type's card, you will see the list of its services, the total number of booked appointments, the number of resources, and rating.
Click on the three dots in the top right corner and choose 'Edit' to be redirected straight to the editing wizard. Click 'Delete' to delete the resource type. Here you can also choose the color to mark the resource type.
With the help of the search bar, you can find the resource type by the matches in the name or description and by the related resource and service.
Filter or group the resource types by way of resource distribution or by the service method to find the related ones quickly. When you group the resource types in the kanban view, you can also change the resource types settings by drag&drop.
Select multiple resource types in the list view to export, (un)archive, delete, and (un)publish () them.
If you open a Resource type, in the top right corner you can find functional buttons.
The first button is 'Appointments'. After making some appointments related to the resource type, on this button, you will see the total number of such appointments. Click on it and you will be redirected to the appointments calendar with the appointments filtered by this resource type.
The second button is 'Resources'. After creating some resources related to the resource type, on this button, you will see the number of such resources. Click on it and you will be redirected to the resource menu with the resources searched by this resource type.
If you tick the option 'Appointments Customer Rating' and receive feedback from clients, then the next button you see is the rating button, which shows the satisfaction in percentage. Click on it and you will be redirected to the menu 'Resource Types Rating', where you will see the chosen emoji and the information about it, including the client and the appointment of each rate.
If you have the module Universal Appointments: Portal and Website () installed, then on the resource type card, you also see the button 'Publish/Unpublished' to make the resource type available/unavailable for booking from the website.
Below is the created resource type, you will find a message thread, where you can discuss the resource type with colleagues, leave log notes, schedule activities, and add attachments. Follow the resource type and add the resource type followers to get the information about it, its resources, and new/rescheduled/canceled appointments timely (if you have set the 'Default Alarms' in the 'Notifications' tab for 'Internal followers' or 'All followers') (see Notifications).
Here you will find the list of resource type examples related to different business types:
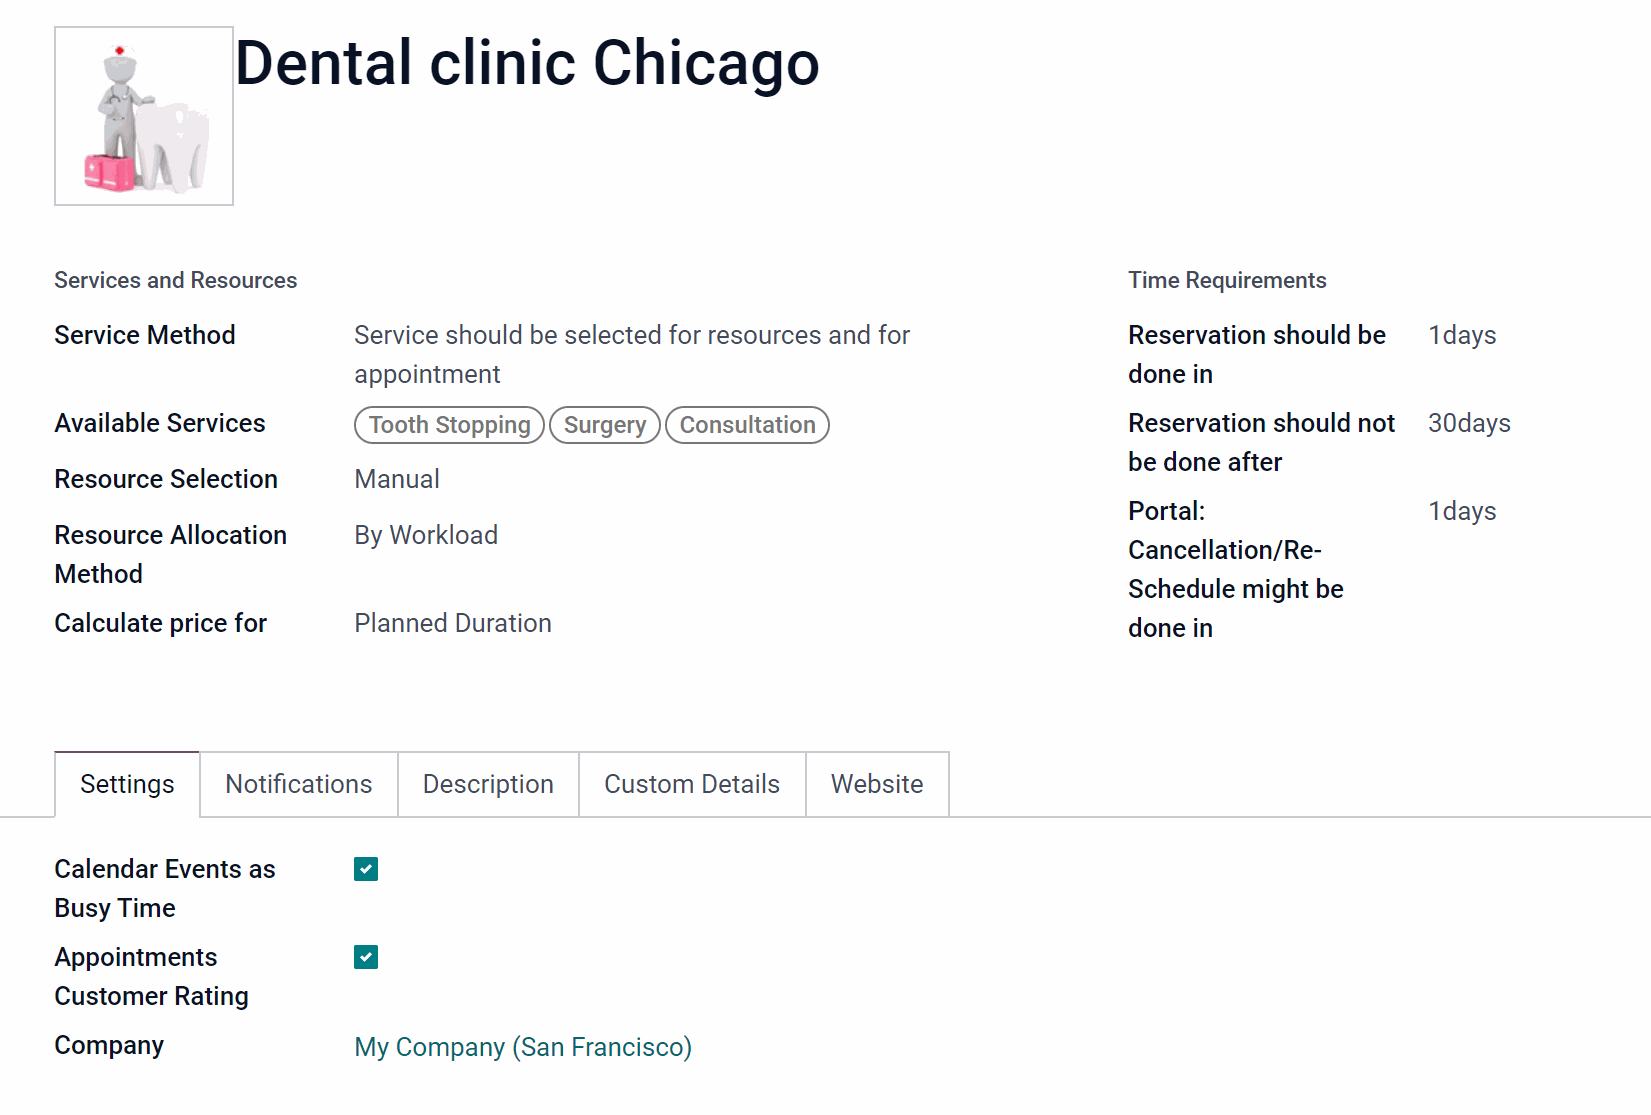
We have 2 dental clinics in different towns and want to manage the appointments to both from one website. We can use different addresses as resource types. So, let's create two resource types for dental clinics in New York and Chicago.
Services and Resources: As we have a variety of services for a client to choose the service method is chosen as: Service should be selected for resources and for appointment.
We want to allow our clients to choose the Dentist, so the Resource selection is set as: Manual. In this case, the option chosen as the Resource Allocation Method will be applied only if several or all resources are chosen.
As the related services always take the same time to complete and the price should be taken for the fixed time, the field Calculate price for is set as: Planned Duration.
Time requirements: We want our clients to book appointments at least the day before the time of the appointment and no more than 30 days before the appointment. The client may cancel or reschedule the appointment no later than a day before the appointment.
Settings: Since we have assigned the employees as resources for these resource types, we don't want the appointment to intercross with the planned meetings of employees, so ticked the box Calendar Events as Busy Time ().
We also want to get feedback from our clients, so we turned on the Appointments Customer Rating and choose the required template in the tab Notifications.

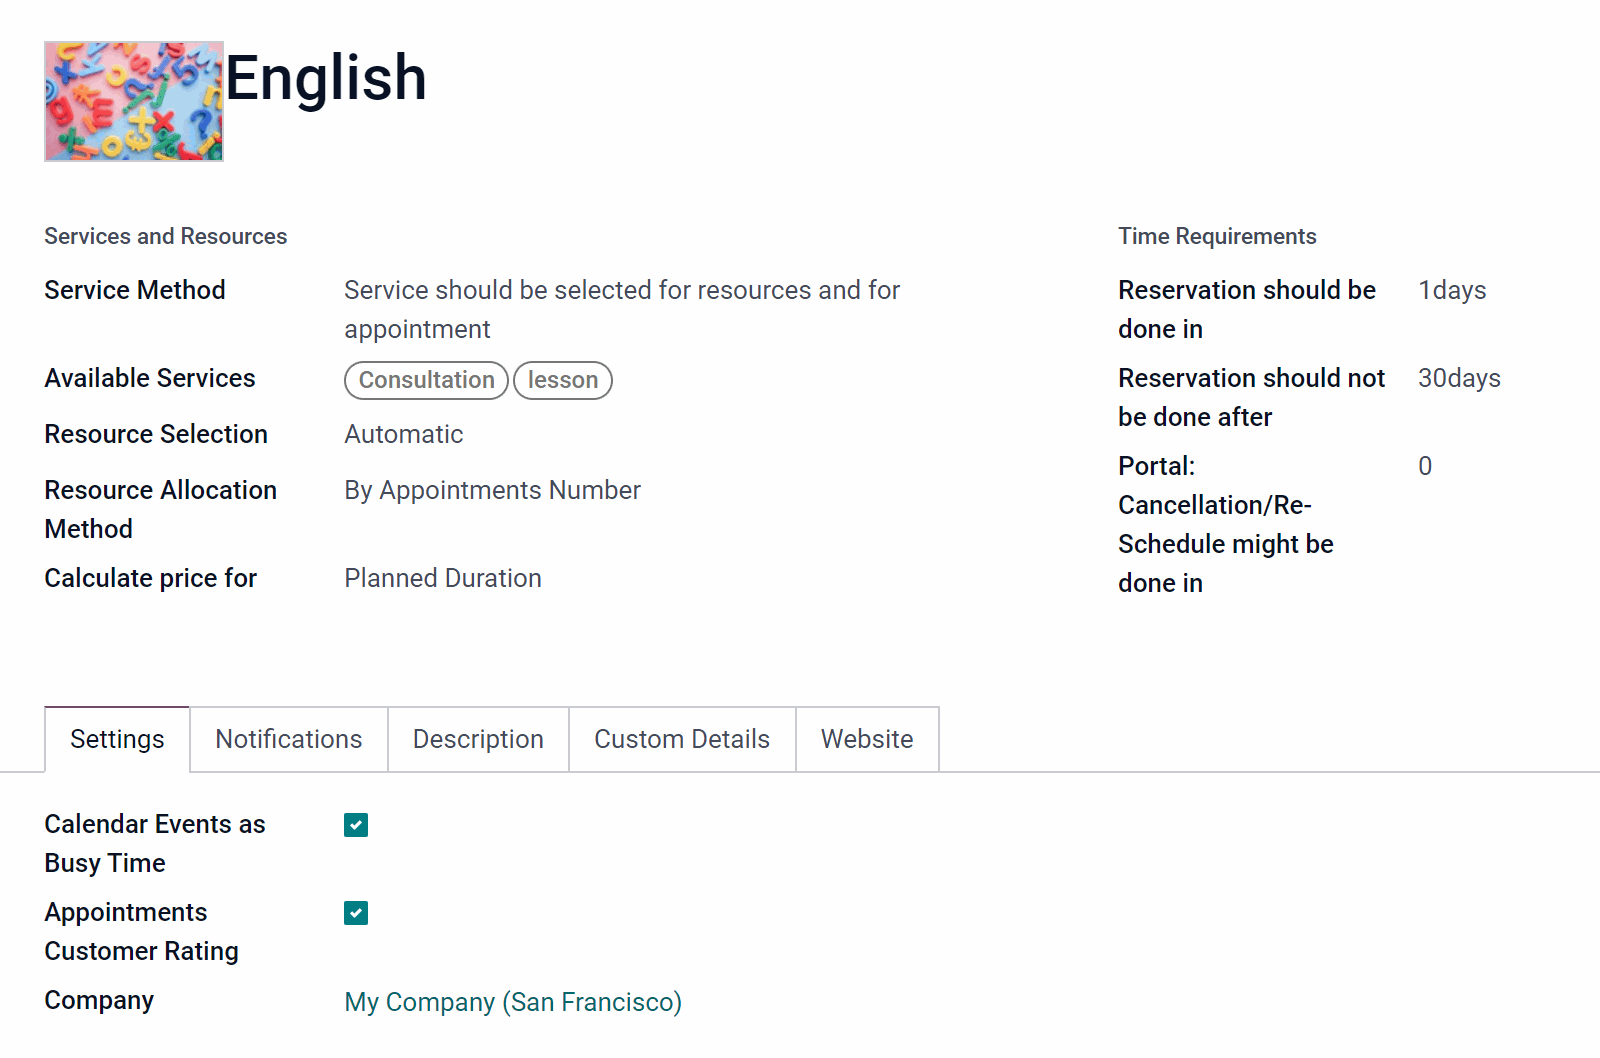
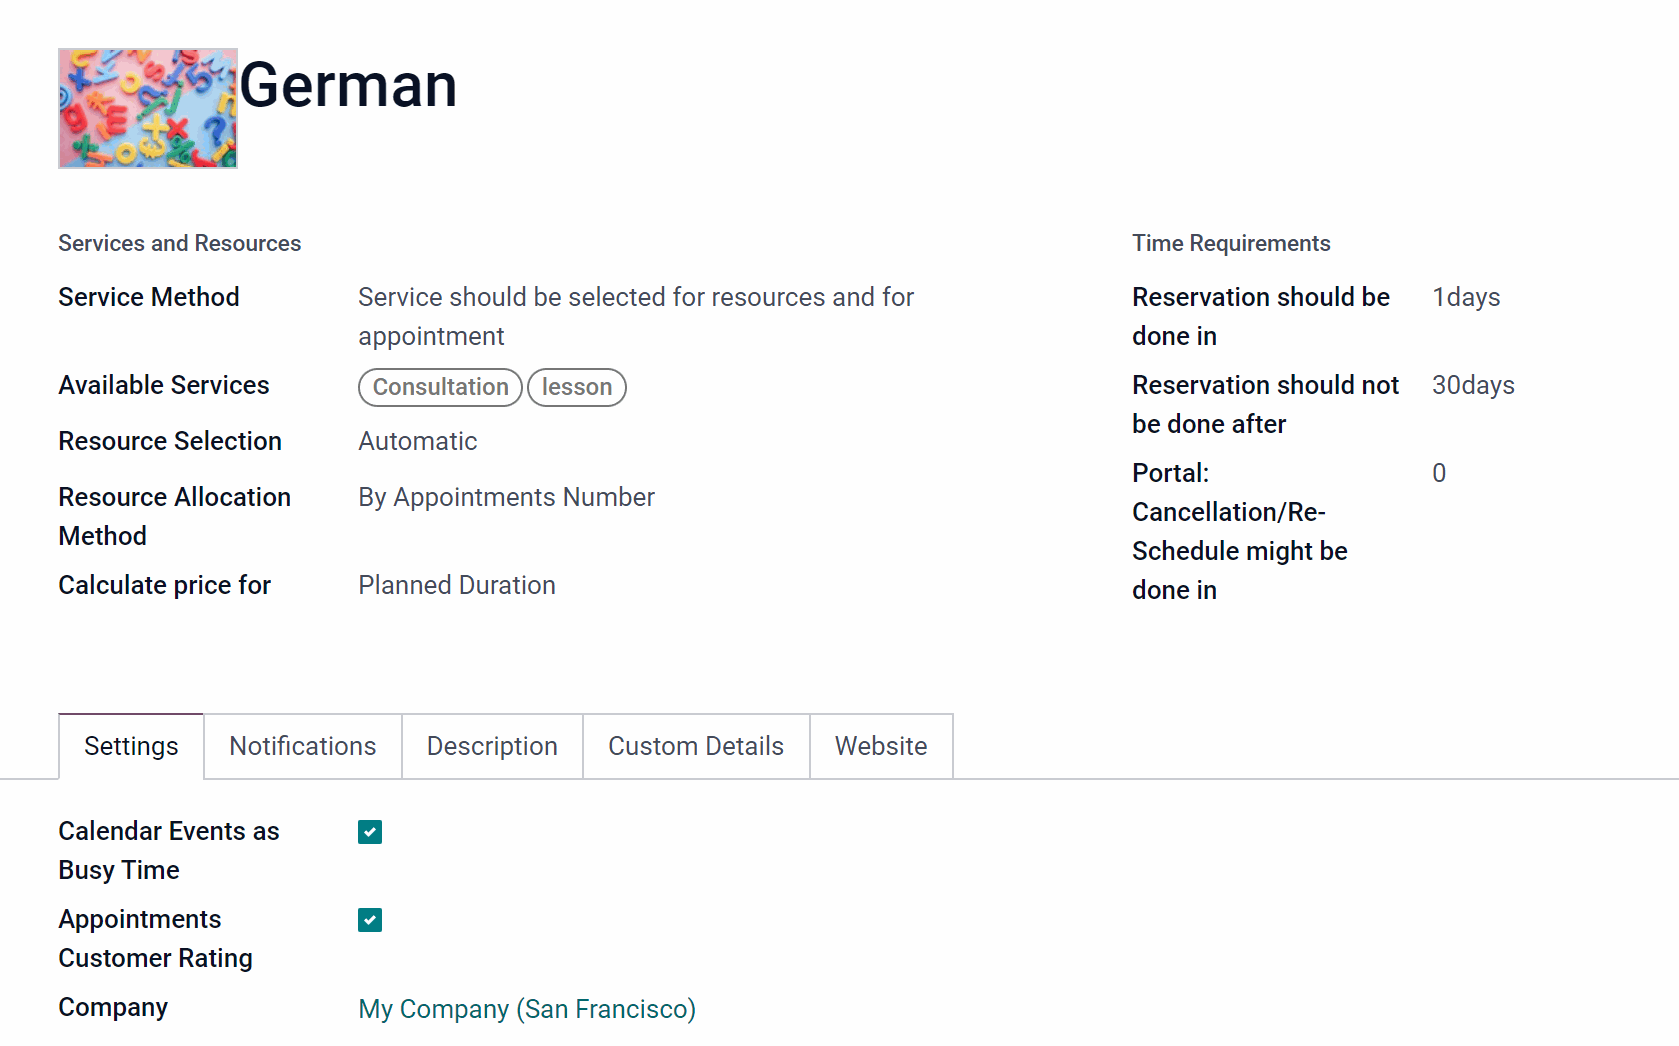
We have a language school, where several foreign languages are taught. We can use the languages as resource types. So, let's create two resource types for English and German.
Services and Resources: As we have two different services and the client can choose one of them, the service method is chosen as: Service should be selected for resources and for appointment.
We don't want to allow our clients to choose the teacher, so the Resource selection is set as: Automatic. We want the lessons to be distributed equally among our teachers and as the duration of a lesson is fixed as the Resource Allocation Method we choose: By Appointments Number.
As the related services always take the same time to complete and the price should be taken for the fixed time, the field Calculate price for is set as: Planned Duration.
Time requirements: We want our clients to book appointments at least the day before the time of the appointment and no more than 30 days before the appointment. It isn't allowed to cancel or re-schedule the lessons (0).
Settings: Since we have assigned the employees as resources for these resource types, we don't want the appointment to intercross with the planned meetings of employees, so ticked the box Calendar Events as Busy Time ().
Also, we want to get feedback from our clients, so we turned on the Appointments Customer Rating and chose the required template in the tab Notifications.
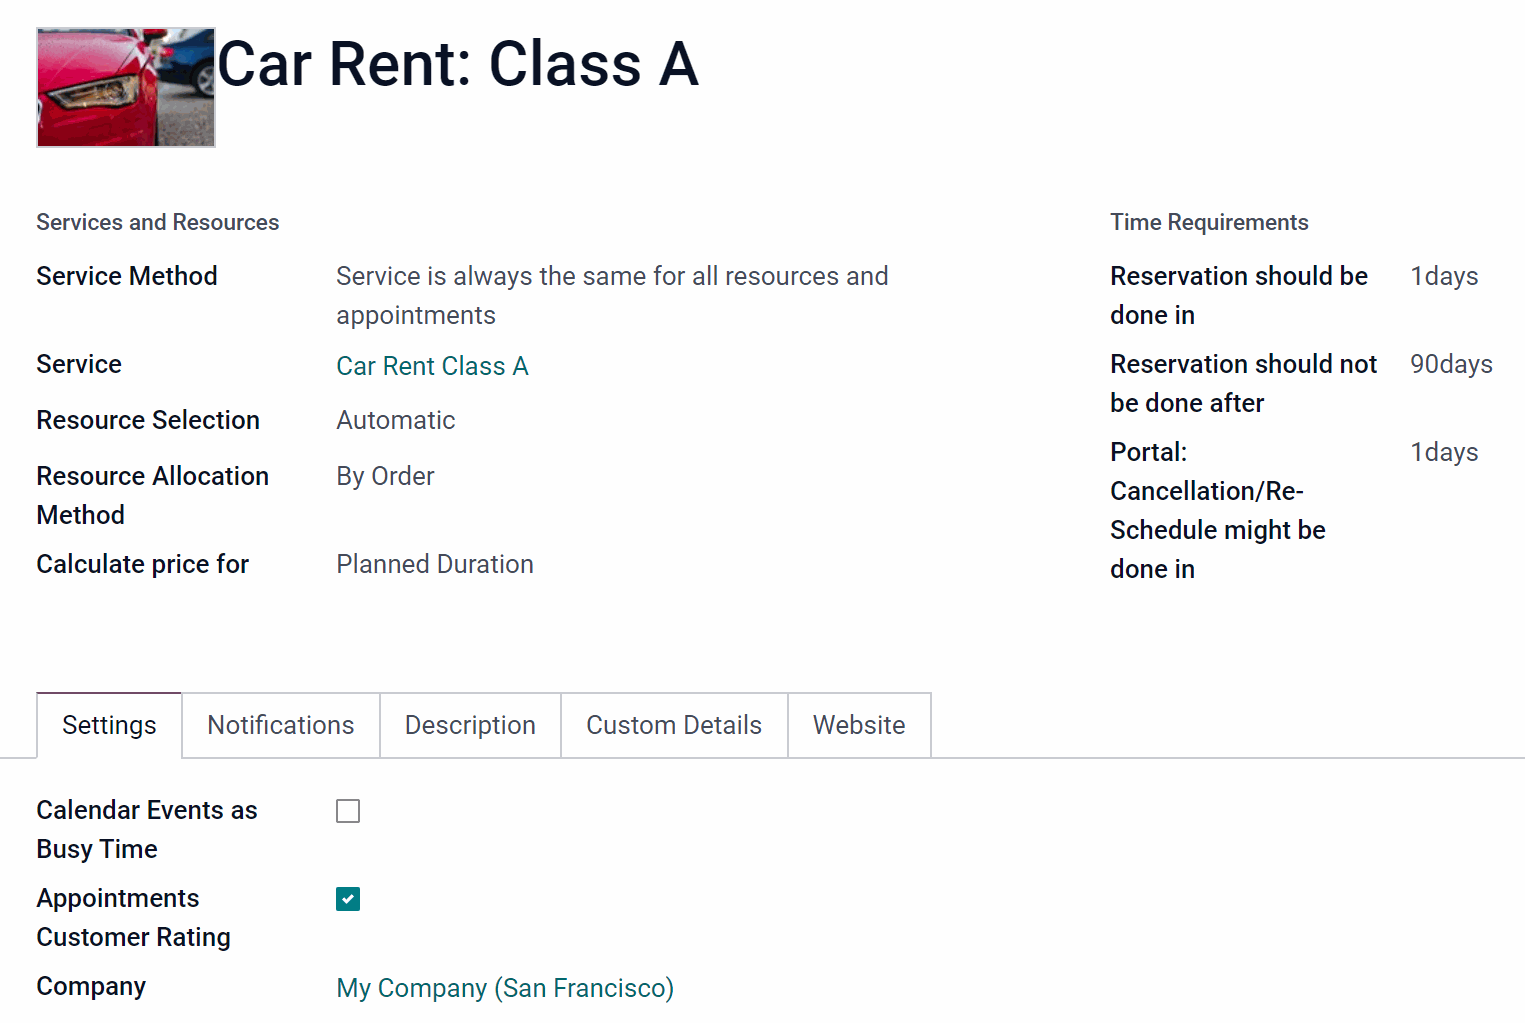
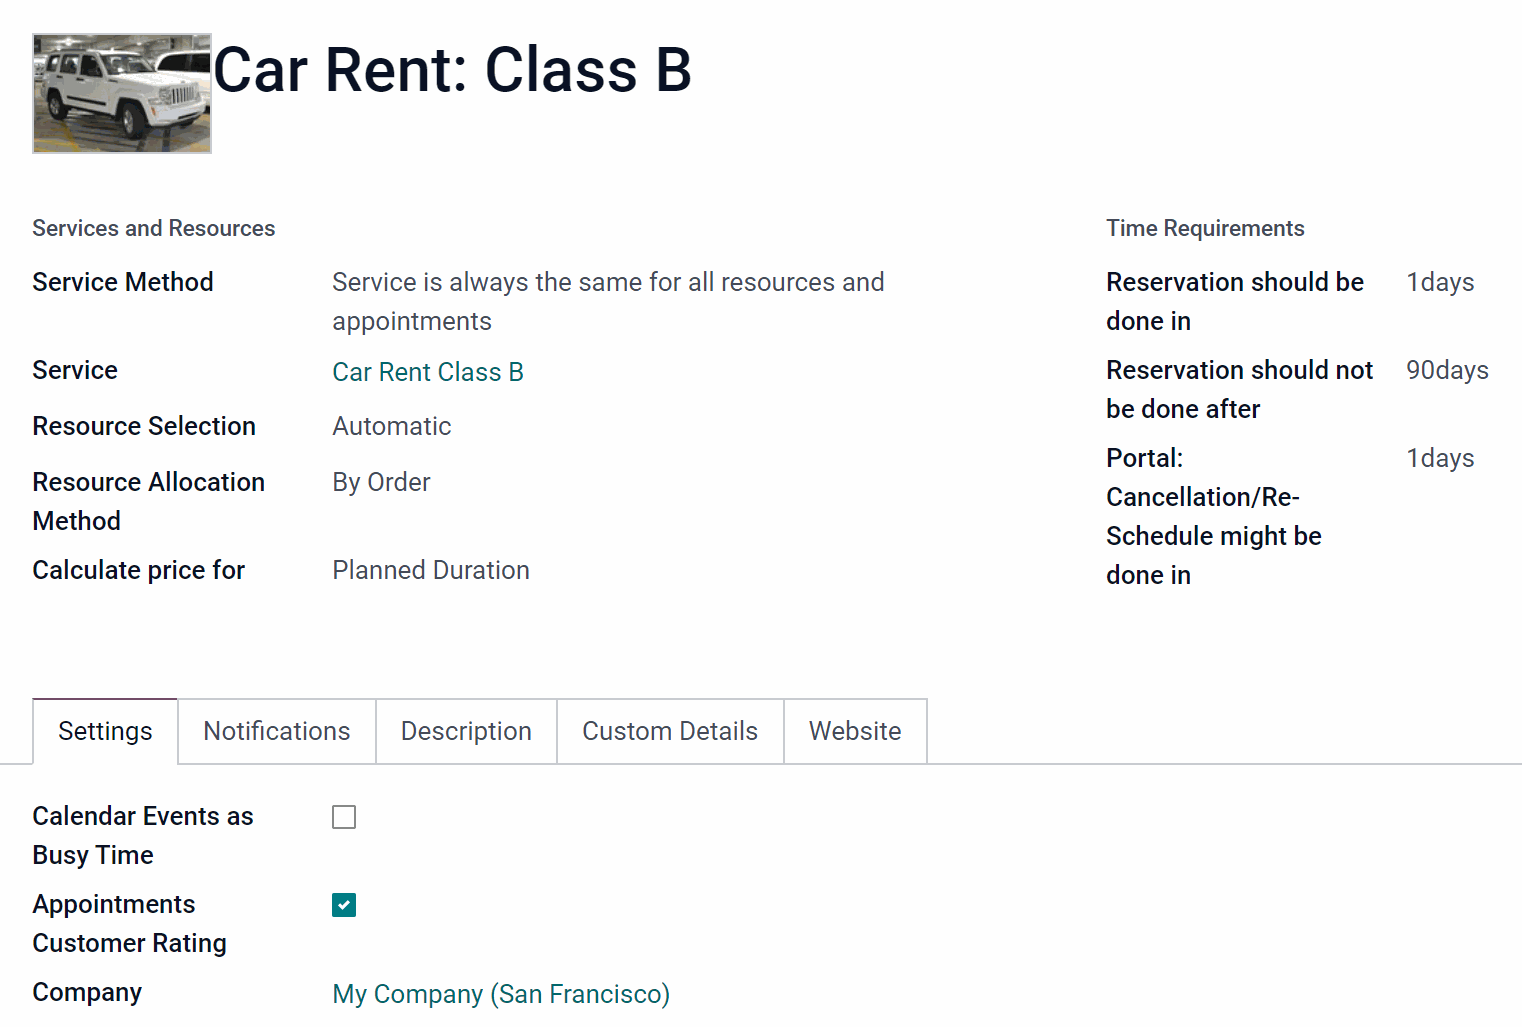
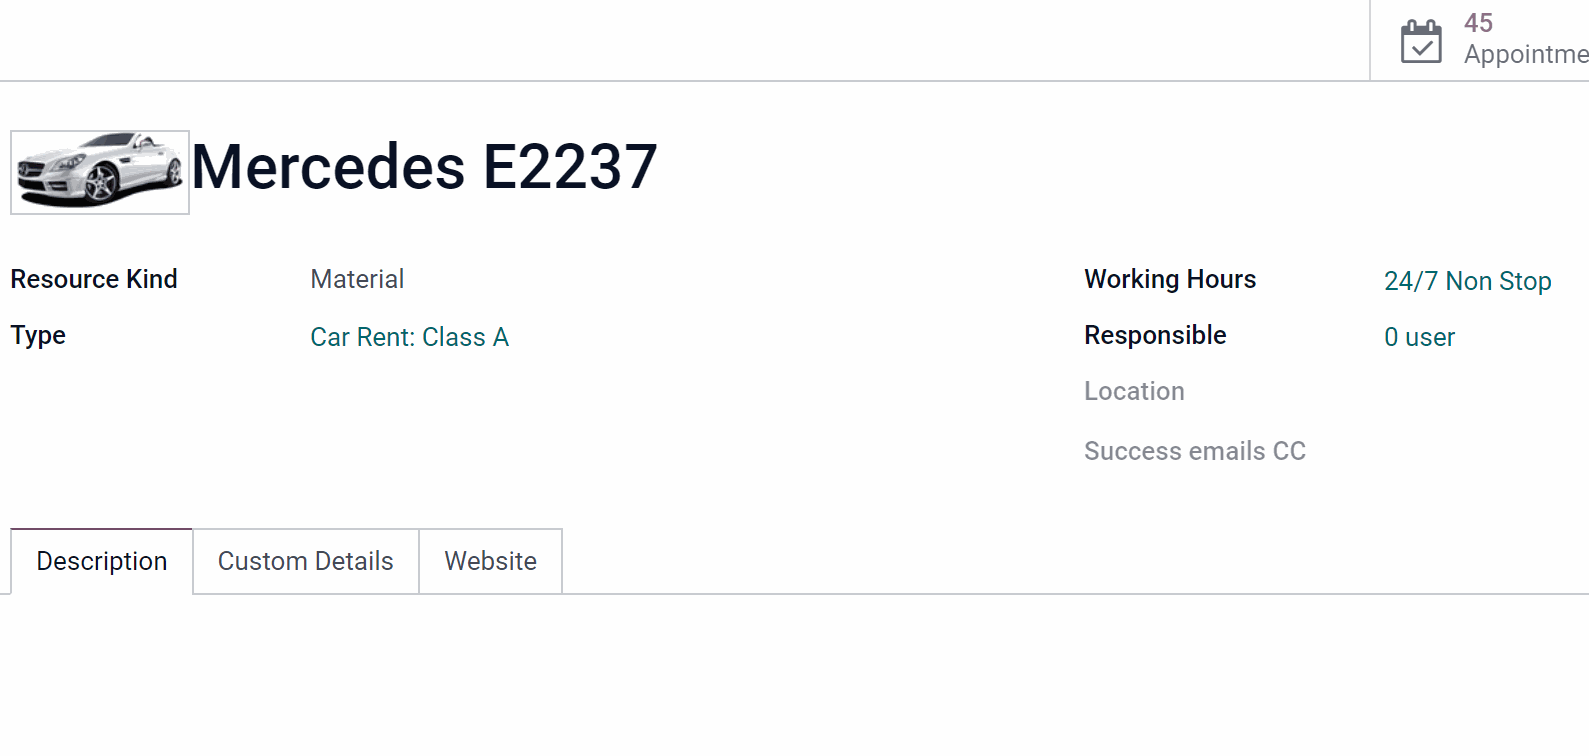
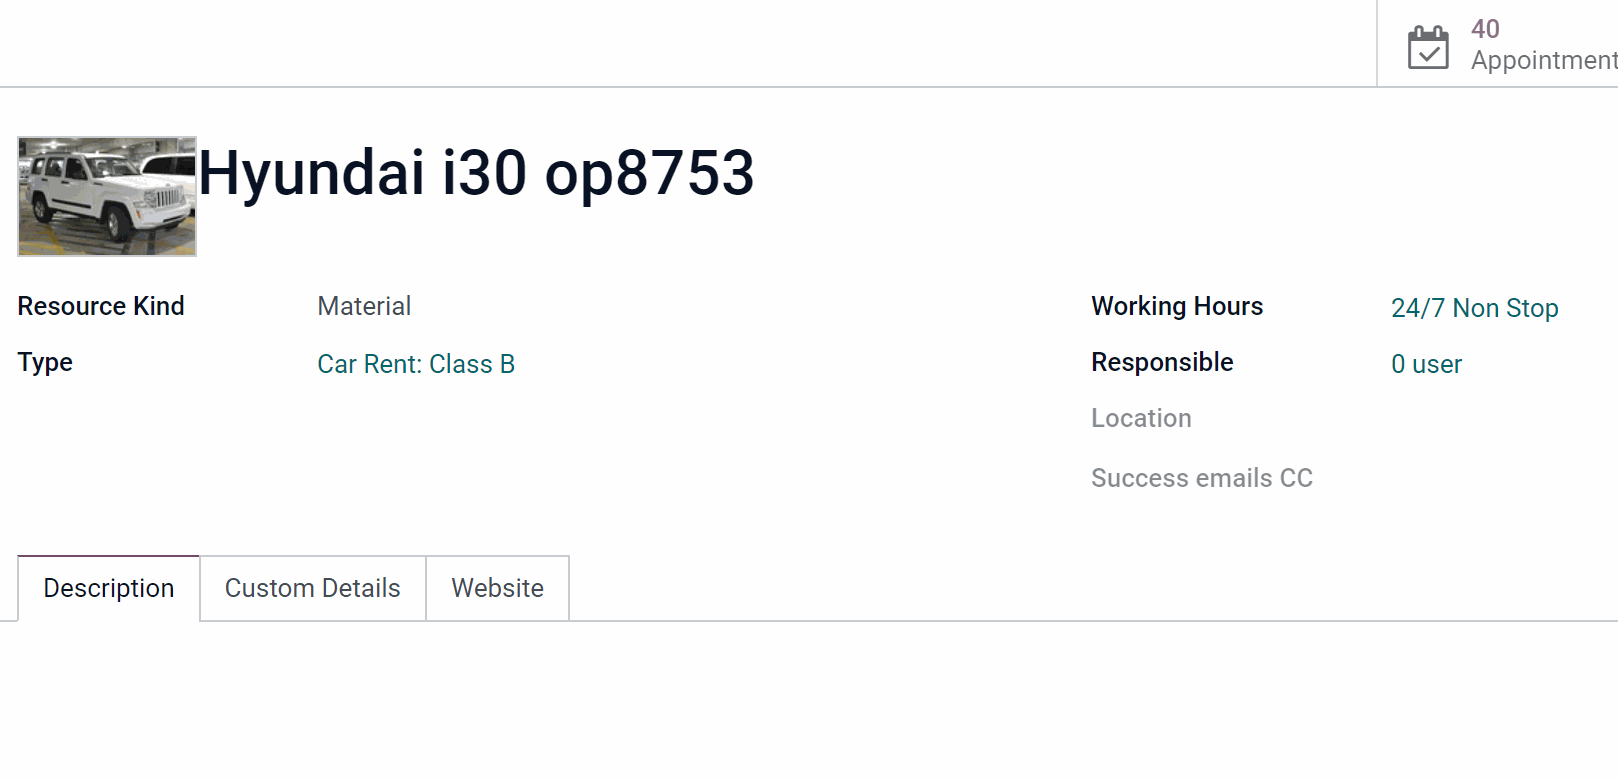
We have a Car Rent Business, where different classes of cars are presented (A,B,C). We can use those classes as resource types. So, let's create three resource types for Car Rent: Class A, Car Rent: Class B and Car Rent: Class C.
Services and Resources: As we have only one service (Car class) and the client can't choose, the service method is chosen as: Service is always the same for all resources and appointments.
We don't want to allow our clients to choose the exact type of the car as there isn't much difference between the cars of one class, so the Resource selection is set as: Automatic. There is no difference between what car is chosen, so as the Resource Allocation Method we choose: By Order. This way, if the first car on the list is available, it will be assigned for the appointment. If it isn't available, then the second car on the list will be assigned and so on.
Although the time of rent may be different, the client should specify the exact time before booking and rent the car for particular hours, so the field Calculate price for is set as: Planned Duration.
Time requirements: We want our clients to book the appointments at least the day before the time of the appointment and no more than 90 days before the appointment. The client may cancel or reschedule the appointment no later than a day before the appointment.
Settings: As we have assigned Material as the resource for these resource types, we didn't tick the box Calendar Events as Busy Time, as Material may not have any meetings ().
Also, we want to get feedback from our clients, so we turned on the Appointments Customer Rating and chose the required template in the tab Notifications.
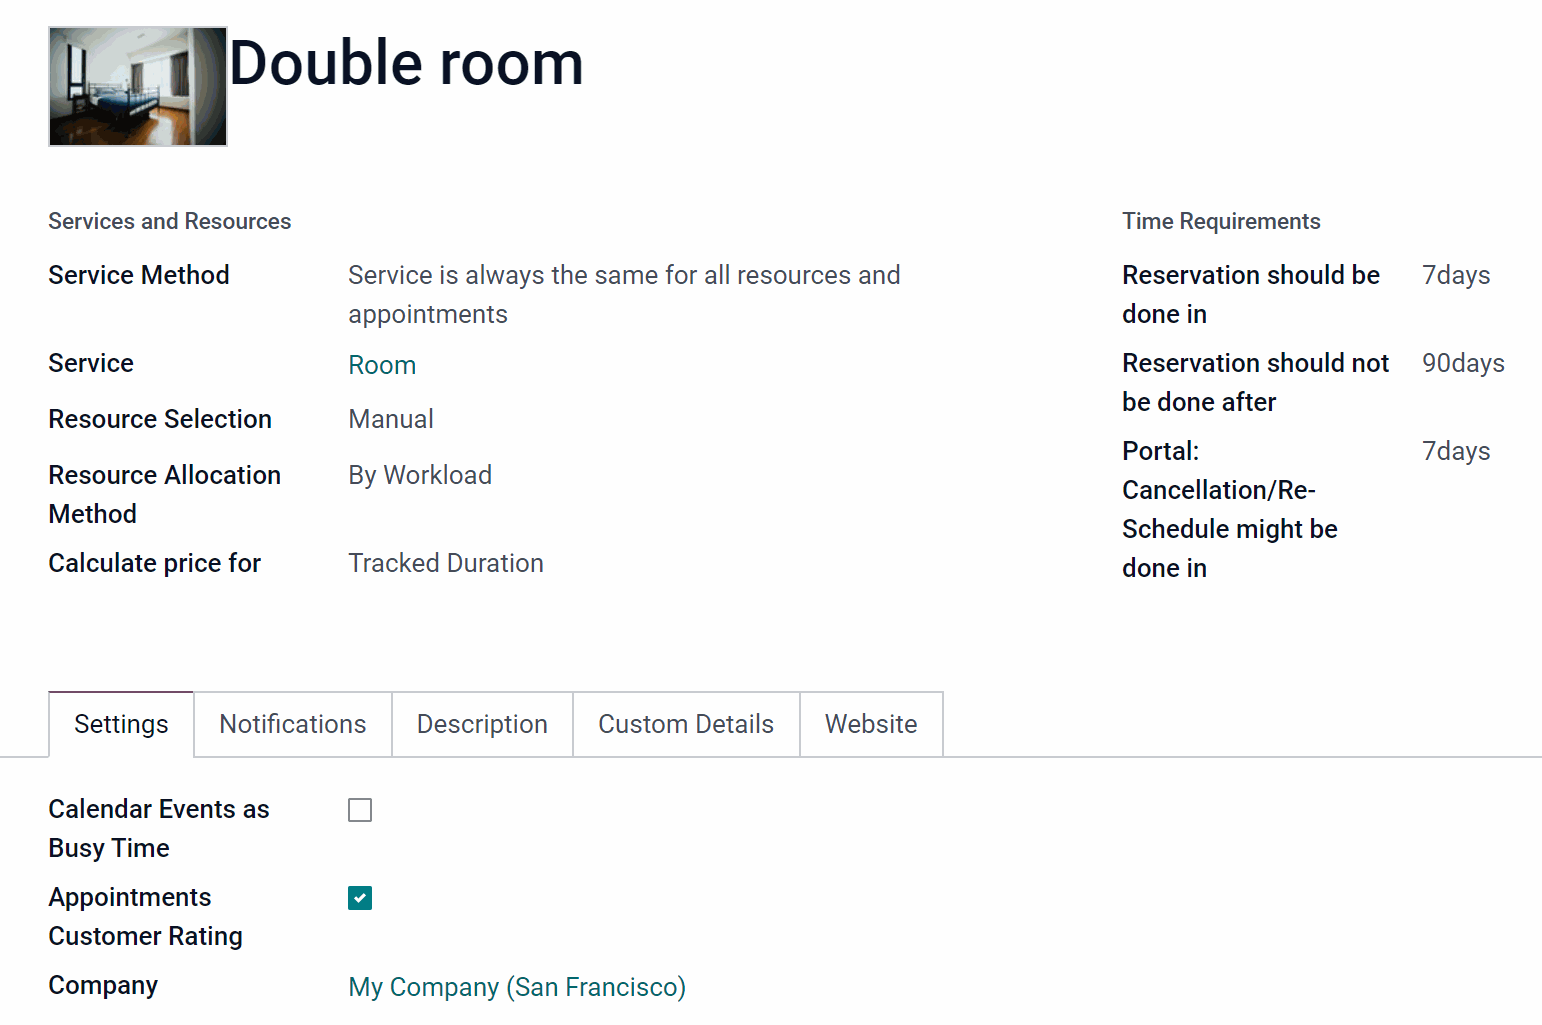
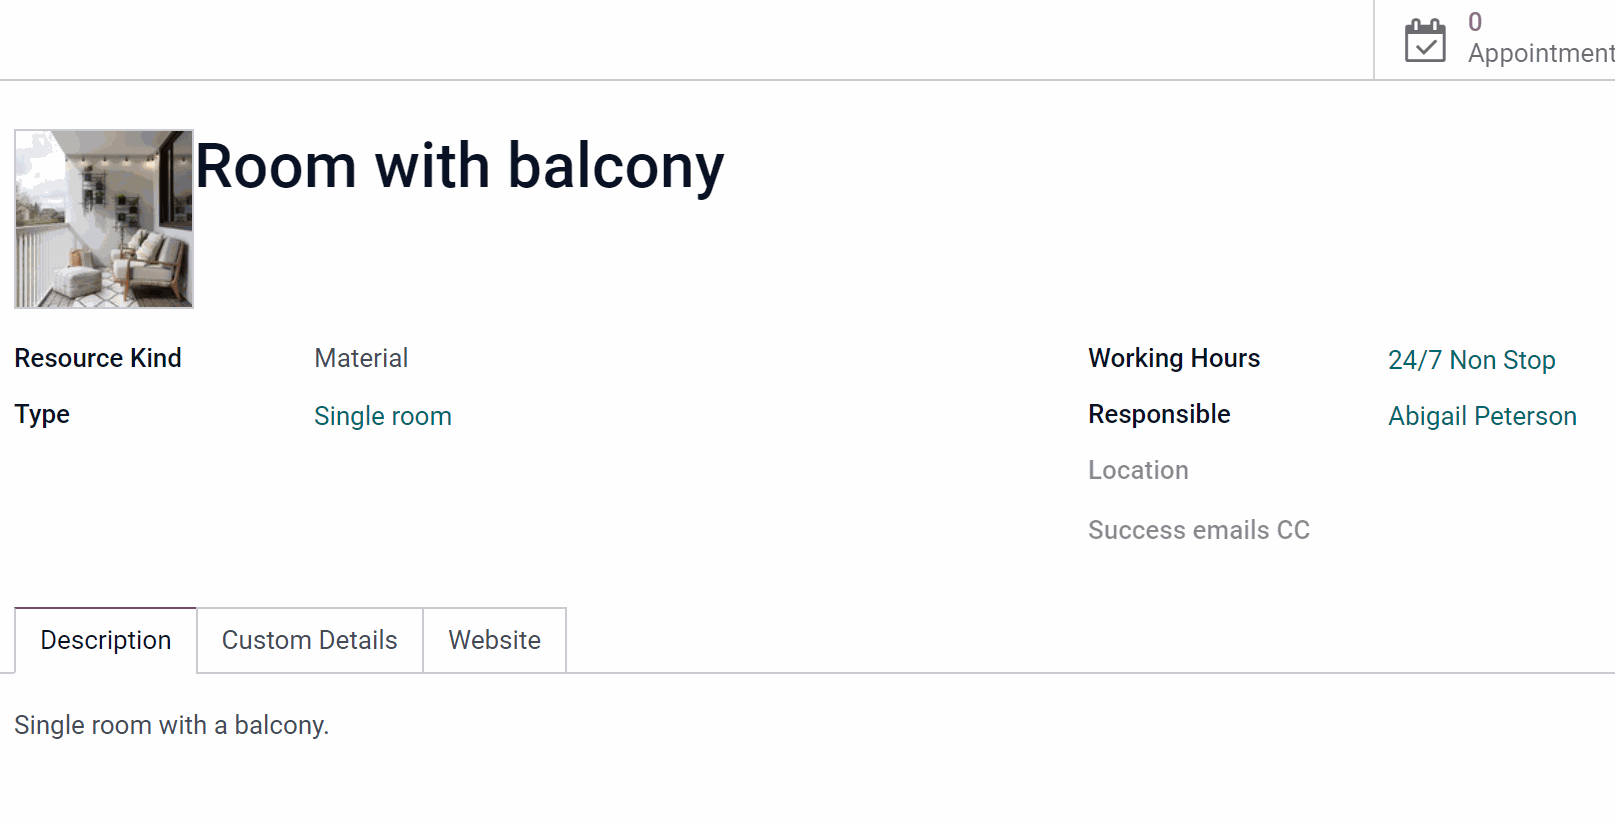
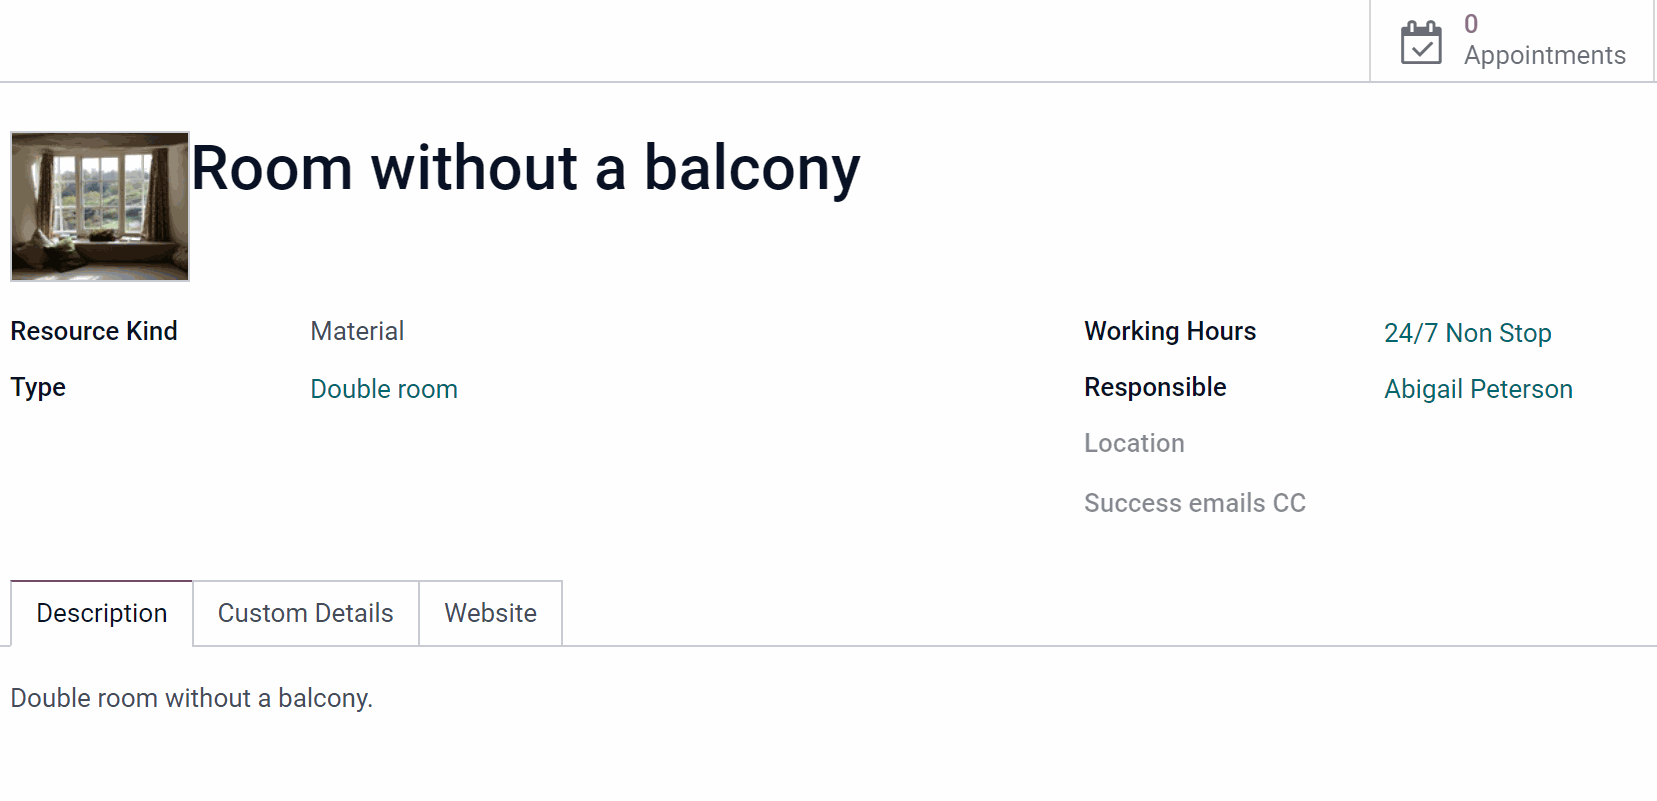
We have a small hostel, where there are two types of rooms: Single room and Double room. We can use room types as resource types. So, let's create two resource types for Single room and Double room.
Services and Resources: As we have only one service and the client can't choose, the service method is chosen as: Service is always the same for all resources and appointments.
We want to allow our clients to choose the room (with or without balcony), so the Resource selection is set as: Manual. In this case, the option chosen as the Resource Allocation Method will be applied only if several or all resources are chosen.
As the client may extend the duration of the stay, and the price should be taken for the exact time which may not be final at the moment of booking, the field Calculate price for is set as: Tracked Duration.
Time requirements: We want our clients to book the appointments at least the week before the time of the appointment and no more than 90 days before the appointment. It is allowed to cancel or re-schedule the room no later than a week before the appointment.
Settings: As we have assigned the Material as the resource for these resource types, we didn't tick the box Calendar Events as Busy Time, as Material may not have any meetings ().
We also want to get feedback from our clients, so we turned on the Appointments Customer Rating and choose the required template in the tab Notifications.

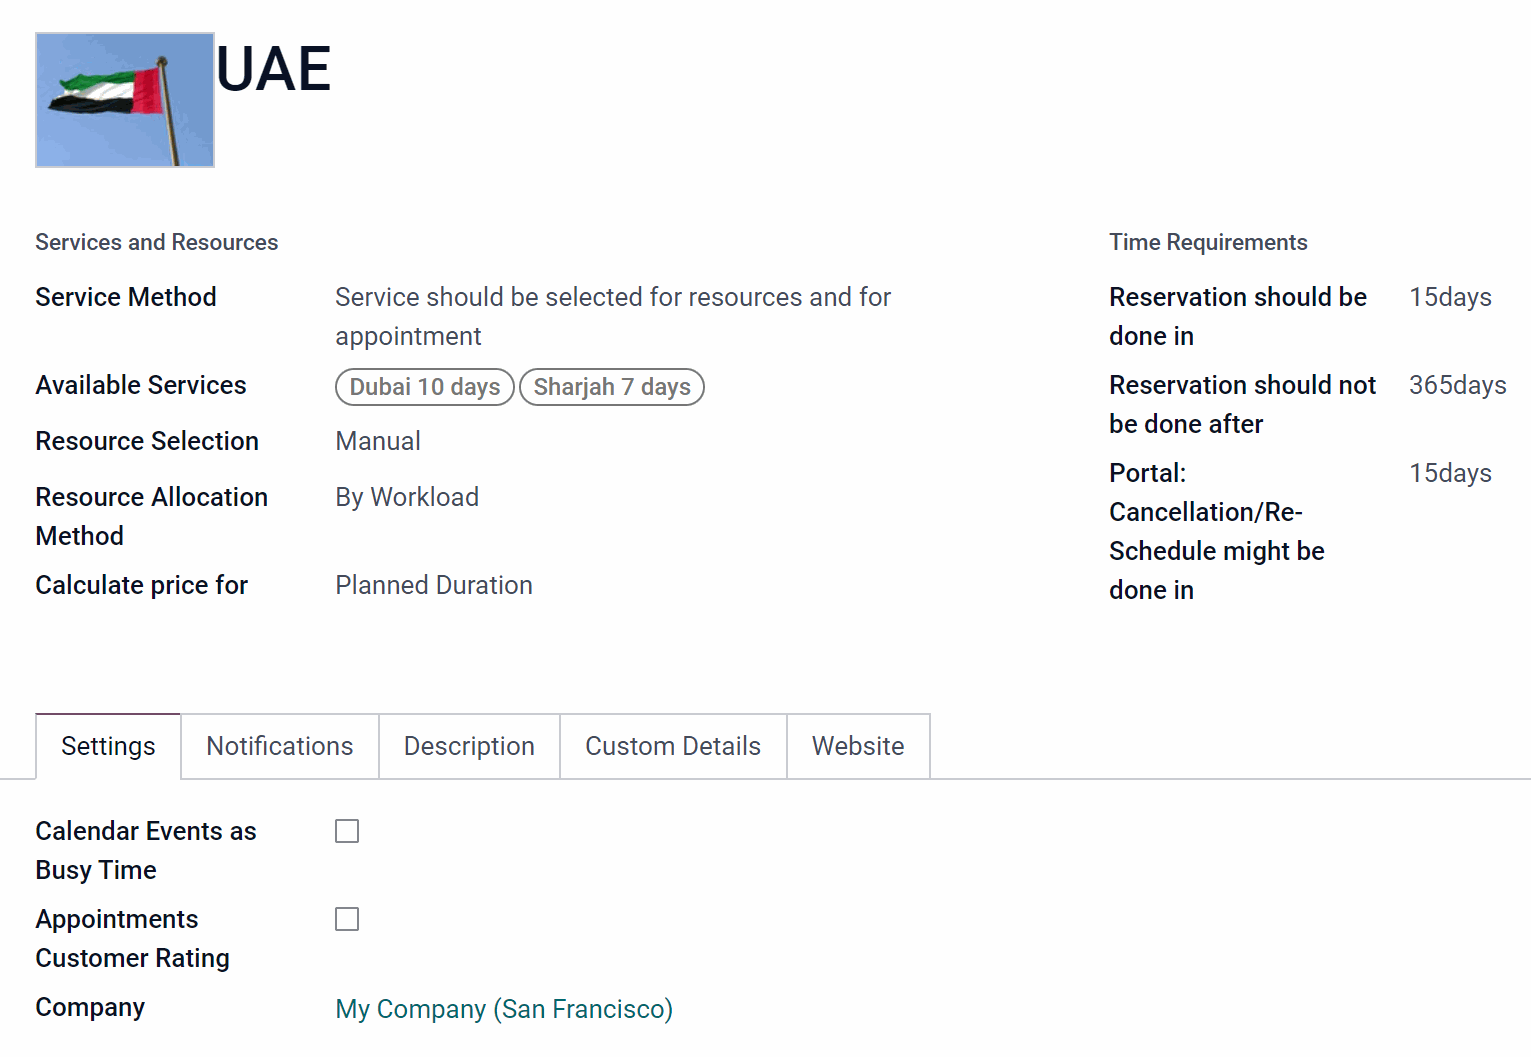
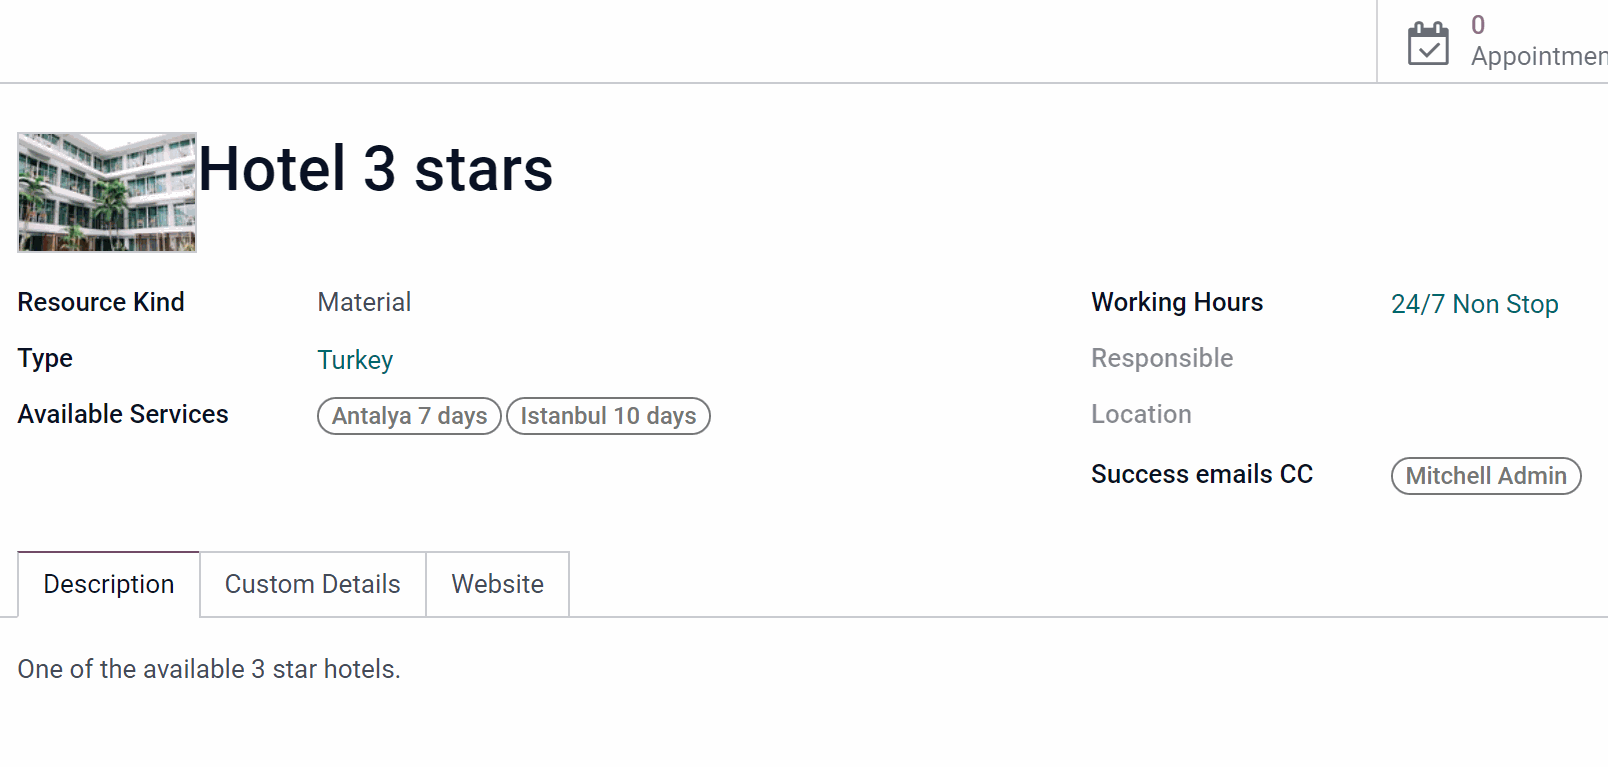
We have a travel agency, where the tours to various destinations can be booked. We can use the destinations as Resource types. So, let's create some resource types, for example Turkey and UAE.
Services and Resources: As we have various tours as services and the client can choose one of them, the service method is chosen as: Service should be selected for resources and for appointment.
We want to allow our clients to choose the resource, so the Resource selection is set as: Manual. In this case, the option chosen as the Resource Allocation Method will be applied only if several or all resources are chosen.
As the related services always take the same time to complete and the price should be taken for the fixed time, the field Calculate price for is set as: Planned Duration.
Time requirements: We want our clients to book appointments at least 15 days before the time of the appointment and no more than 365 days before the appointment. It is allowed to cancel or re-schedule the tour no later than 15 days before.
Settings: As we have assigned Material as the resource for these resource types, we didn't tick the box Calendar Events as Busy Time, as Material may not have any meetings ().
Also, we don't want to get feedback from our clients through email as we have our own form on the website for that, so we turned off the Appointments Customer Rating.

Managing Resources
Resource – is a core object that represents a facility or a person, whose time is considered for allocation to provide a service.
In some business models, the resource may be represented by a certain specialist: for example, 'Dentist John Brown', 'Hairdresser Anna Green'. In other companies it might be a piece of particular equipment or facility: for example, 'Mercedes A1231' for the Car Rent Business, 'Room 12' for a Hotel.
In resource settings, you can define available days, timetables and time off, responsible users, etc.
To create a resource:
1. Open the module Appointments
2. Go to the tab Resources > Resources (or click on the 'Resources' tab from the Resource Type's card and click 'Create')
3. Click 'Create'
4. Add a reference and optionally add a picture (it will also be visible on the website )
5*. Choose the resource kind
Resource kind can be either human () or material. The setting influences the way the working hours are applied. When choosing 'Human', then the working hours of a particular employee are taken into consideration. In the case of material, you can set a particular calendar with set working hours.
6. Choose the type
The field allows linking the resource with a particular resource type. The field is filled automatically when a resource is created from the resource type's card.
7. Choose or create working hours for the resource (see Resource Calendars)
Slots are generated according to configured resource business calendars. Each resource has its own calendar and time offs: it is impossible to schedule appointments for non-working hours. For example, when we choose a Human as a resource, the calendar of the employee is taken into consideration to calculate the available time slots (). The calendar of our dentist Anita Oliver is Standard 40 hours/week. In order to make the resource available the whole day (for example, a hotel room) you will need a 24/7 Non-Stop Calendar (see Resource Calendars).
8. Optionally, select the responsible person
It is extremely important to set the user, responsible for the resource, as it affects many aspects. In particular:
Set Default Alarms to notify about related appointments responsible for the appointments user (see Notifications).
The user with the access rights 'Only Own' will only be able to observe resources in which he/she is a responsible manager or which do not have such managers at all (see Access Rights).
When you choose the Employee as a resource, the field 'Responsible person' is filled automatically (). In this case, the employee's calendar will be considered for generating available time slots (see Universal Appointments: HR Bridge).
If on the related Resource Type you tick the option 'Calendar Events as Busy Time', then the time with the events related to the responsible user will not be available for booking.
For example, if the English teacher Doris Cole is set as a responsible person for the resource Room 5, then, we can set the notifications, so only Doris would receive them. Also, as we have ticked the option 'Calendar Events as Busy Time', her meetings are taken into consideration to generate the available time slots for English lessons with the teacher.
9. Optionally, write the location of the resource
It will be shown in the confirmation voucher. If the location of the service isn't stated, then the location of the resource will be written.
10. Optionally, choose the person who will receive a copy of the client success email (see Appointments Discussion)
If assigned, the success email would be also sent to those partners as a copy of the client success email.
11. In the 'Description' tab, add the description of the module.
If the option 'Show resources full details pages' () is turned on, then the description is shown on the full resource page (the page might be edited on the website (see Portal and Website: Customization & Settings)) and in the selection of the website booking wizard (if not hidden by ticking the option 'Do not show website full description' in the tab Website on the resource's card).
12*. Select the website, on which the resource will be visible and optionally tick the box 'Do not show website full description' to make the description invisible on the website () (see Multicompanies & Multiwebsites).
13. Click 'Save'.
Optionally make the resource an alias for another one. This way you will be able to use the calendar of the prime resource. It is particularly useful when one of your resources provides services from different areas. Any alias resource ceases to be independent in terms of calendar settings and responsible, i.e. it only displays the prime resource. Aliases cannot have an associated employee, but they can be of the Human type (if the add-on Universal Appointments: HR Bridge is installed). We can't create two stand-alone human resources () for a single employee, as then the already booked slots of one will not be taken into consideration while booking slots for another one. For example, Doris Cole (a human resource) is both a hairdresser and a teacher.
When generating slots for aliases, the working calendar of the main resource and its employment are taken into account. This way, one real object can be used in different places, but a single calendar will be generated for it. For example, we have two resource types 'Swimming lane for one' and 'Swimming lane for a team', which require the same resource 'Lane 1'. We can't use the same resource with 2 different resource types and can't create 2 resources as we only have 1 lane. So, we create an alias 'Lane for swimming', which refers to the working calendar ('Standard 40 hours/week') and employment of the resource 'Lane 1'. This way, when the resource 'Lane 1' is occupied, the resource 'Lane for swimming' is also unavailable and vice versa.
While creating a resource, as soon as you choose the prime resource, the fields 'Working hours' and 'Responsible' are removed to avoid confusion. At the same time, the field 'Alias working hours' is added.
Optionally, you can add the extra working calendar to the alias in the field 'Alias working hours'. Then, this calendar will be used to generate the time slots, when an alias is booked. In order, for a time slot to be shown, the related time should be available in both: the calendar of the main resource and the calendar of the alias. For example, we have a hairdresser Doris Cole with the working calendar 40 hours/week, who can also work part-time as a teacher on Monday and Friday. So, we have added the working calendar with the time Monday and Friday to her alias 'Teacher Doris Cole'. Then, when her lessons are booked, managers and clients see the available timeslots only on Monday and Friday (see Extra Alias Calendar).
Please, take into account that an alias cannot be available during the time when the main resource is unavailable, even if this time is specified in the alias calendar. Only, the time intersections are used to generate the available time slots for an alias. For example, the main resource 'Hairdresser Doris Cole' should have in her working hours Monday and Friday with the related time specified, so managers and clients could book the lessons from her alias 'Teacher Doris Cole' on these days (see Extra Alias Calendar).
The prime resource (employee (), equipment) can have several aliases with different settings. Alias requires configuring its own resource type, services, descriptions, and other settings (for example, sales settings). The prime resource 'Doris Cole' is used for the resource type 'Beauty salon' and provides only the services related to hair cutting/dying. The alias 'Doris Cole' is used for the resource type 'Language school' and provides only the services related to teaching.
To turn the resource into an alias, just start creating or editing a resource and in the field 'This resource in only alias for', below the title, choose the prime resource.
You can archive/publish an alias without doing the same with the prime resource and vice versa. If the prime resource is archived/has ceased to be public, its aliases will still be available in the backend and on the website (). The aliases will continue using the calendar and will consider the busyness of the main resource. However, it is recommended to avoid archiving the prime resource and unpublish it instead to prevent any inconsistent behavior.
If you choose the alias as an extra resource, then, during the calculation of the time slots, it will be replaced by the prime resource (see Extra Resources). For example, 'Room 303' is an alias for the resource 'Room'. When choosing the service 'Rent', in the scheduling wizard, we see the note that an extra resource 'Room' is required. After scheduling, in the field 'Extra resource', the resource 'Room' is shown.
Aliases allow you to use the same resource to provide different services in completely different areas, while taking into account the working hours and employment (meetings, time-offs, etc.) of the prime resource.
Once you open the resource menu, you will find the list of the resources. On the resource's card, you will see the related resource type, the list of its services, the working hours, the total number of booked appointments, the rating, and a photo of the responsible user.
Click on the three dots in the top right corner and choose 'Edit' to be redirected straight to the editing wizard. Click 'Delete' to delete the resource. Here you can also choose the color to mark the resource.
With the help of the search bar, you can find the resource by the matches in name, description, type, responsible user, working hours, and related employee and service.
Filter resources to see only alias or prime ones, by their kind or group the resources by resource type, responsible user, employee, resource kind, and working calendar. When you group the resources in the kanban view, you can change the resources settings simply by drag&drop.
When you search by resource in the calendar or filter the appointments in the calendar in the right navigation interface, you may see more reservations, than, when you search/filter only by the resource type. The appointments of the resource aliases are also shown. For example, if you select the resource type 'Dentist' you may not see any reservations, but if you select a particular dentist 'Anita Oliver', you may see the appointments of the resource alias 'Assistant' (Resource type 'Hospital').
When you filter the appointments by the resource alias, you will see only the appointments of the alias and not of its prime resource.
Select multiple resources in the list view to export, (un)archive, delete, (un)publish () them.
If you open a Resource, in the top right corner you can find functional buttons.
The first button shows the number of appointments created, that relate to this resource. The number also includes the reservations where this resource is an additional one (see Extra Resources). Click on it, and you will be redirected to the appointments calendar with the appointments filtered by the resource and related resource type.
If the resource is of the type 'Material', then the second button is 'Own Leaves'. If you click on the button, you can create the resource time off, so the resource will not be available for a certain time.
If you tick the option 'Appointments Customer Rating' on the related resource type card and received feedback from the clients, then on the resource's card you also see the button with the rating related to this resource. Click on it to see the detailed information about the rating.
If you have the module Universal Appointments: Portal and Website () installed, then on the resource card you will also see the button 'Publish/Unpublished'. To make the resource available/unavailable for booking from the website.
Here you will find the list of resource examples related to different business types:
For a dental clinic, we want to have dentists as resources. So, we have chosen the resource kind as Human ().
Then we have selected the related resource type and services.
We chose a particular employee whose working calendar will be taken into consideration while calculating available time slots (Standard 40 hours/week).
The field 'Responsible' was filled automatically with the same user, as it is the Employee responsible for providing related services.
Then, optionally we could add the address, but it was already stated as a Resource type.
We didn't assign any users to receive a copy of the client's confirmation email.

For language school, we want to have teachers as resources. So, we have chosen the resource kind as Human ().
Then we have selected the related resource type and services.
We chose a particular employee whose working calendar will be taken into consideration while calculating available time slots (Standard 40 hours/week).
The field 'Responsible' was filled automatically with the same user, as it is the Employee responsible for providing related services.
We didn't assign any users to receive a copy of the client's confirmation email.
For car rent, we want to have cars as resources. So, we have chosen the resource kind as Material.
Then we have selected the related resource type. As on the resource type's card we stated that the service is always the same, here we can't choose it.
We chose a working calendar as 24/7 Non-stop, as the car is rented on a daily basis, so all day should be available.
We have stated the responsible employee for providing related services.
We didn't assign any user to receive a copy of the client's confirmation email.
For hotel, we want to have the options with/without balcony as resources. So, we have chosen the resource kind as Material.
Then we have selected the related resource type. As on the resource type's card we stated that the service is always the same, here we can't choose it.
We chose a working calendar as 24/7 Non-stop, as the rooms are booked on a daily basis, so they should be available all day.
We have stated the responsible employee for providing related services.
We didn't assign any user to receive a copy of the client's confirmation email.
For a travel agency, we want to have placement options as resources. So, we have chosen the resource kind as Material.
Then we have selected the related resource type and services.
We chose a working calendar as 24/7 Non-stop as the tours are booked on a daily basis.
We don't state the responsible employee for providing related services.
We assigned a user to receive a copy of the client's confirmation email.

Managing Services
Service – is a core object that defines what actually should be done. For instance, it can be a 'consultation', 'tooth surgery', 'classic hair cutting', 'car class C rent', etc.
Services are not equal to Odoo products, but they are linked to each other to manage pricing details. Each service should have a related product assigned.
Services regulate the time settings of appointments (how long should it take and when it can be started) and they also may further restrict the time available for booking.
On the service card, you can also state the goods, which might be suggested as complementaries as the time slot is selected.
To create a service:
1. Open the module Appointments
2. Go to the tab Resources > Services (or start writing a service name in the field 'Available Services' on the Resource type's or Resource's card and click 'Create')
3. Click 'Create'
4. Add the reference and optionally add a picture (it will be also visible on the website )
5. Set the appointments default duration (It can be set in hours or days) (see Service Duration)
The slot generation algorithm takes into account the service duration. Available time slots have a duration depending on a chosen service. For example, if the default duration is an hour, then the available slots will be 8:00, 9:00, 10:00, etc.
6. Optionally, write the location of the service
It will be shown in the confirmation voucher. If the location of the service isn't stated, then the location of the resource will be written.
7. Choose a related product
The field allows the creation of a link between a product and a service. It allows you to use standard Odoo, for example, to manage the pricing details. For example, for the service 'Lesson' you can create a product with the same title and set the pricing information.
If you don't need to calculate the price of the service, then it is possible to use the same product for all the services.
8. Choose complementary products
After reserving a time slot by the manager from the backend (or when a client finishes scheduling an appointment ) a pop-up with the complimentary products will be shown. The pop-up allows both adding one / a few complementaries or missing the step if suggested products are not required. For example, for a hotel room, you can choose 'Breakfast' and 'Excursions' as suggested products.
9. Optionally, in the field 'Slot Step', choose the step for the time slots (see Slot Step)
The Slots Step field, allows generating time slots flexibly, including allowing overlapping ones. This way, you can set the step with which time slots will be created. You can choose the slot step for both services in days and hours. For example, if we reserve service with a duration of an hour and the step of the service is set as 0:30 min, then the generated slots will look the following way: 09:00-10:00; 09:30-10:30; 10:00-11:00, 10:30-11:30. After booking the time slot 9:30-10:30, the time slots 09:00-10:00 and 10:00-11:00 will be unavailable for further booking. It might be useful in a beauty salon with an unloaded schedule.
10. Optionally, in the field 'Start round', define how the appointment start time should be rounded (see Rounding Time)
Define how the appointment start time should be rounded. To avoid the calculation of unlikable start time. For example, an hour-long lesson starting at 12:23 is hardly good. To solve the problem, you can simply set up rounding for an hour (other available options are 5, 10, 30 minutes; 2 hours; midnight or midday tomorrow).
11. Optionally, specify the Checkout period (see Checkout Period)
Specify the time required for completing the reservation, without the participation of the client. This setting allows showing the client what time he/she should finish receiving the service. At the same time, the resource will be blocked for the entire selected time (the time for providing the service and the checkout period). For example, the room is reserved from 14:00 01.08 to 12:00 10.08 (10 days), where the start round is set as 14:00, and the checkout period is set as - 02:00 hours (14-2=12; that is, 12:00 - checkout time). At the same time, in the backend, the resource 'Room' is reserved for the service 'Rent' from 14:00 01.08 to 14:00 10.08 (i.e. full time).
12. Optionally, for the services with daily duration, set the Start/End day Restriction (see Start&End Day Restriction)
As you switch to the daily default duration of service, two extra fields are shown: Start Day restriction & End Day restriction. Each of the fields represents a rule, that keeps the information about the set of days of the week and/or a set of specific dates on which the reservation cannot start/end. For example, you can specify some special weekends or holidays.
13. Optionally, tick the box 'Allow manual duration', so the duration of the service can be chosen manually (see Service Duration)
Choose the duration of an appointment, while booking, and only after that, the available time slots will be generated for the chosen time. For example, a car might be rented for a different period of time, so it should be possible to choose the duration manually.
14. If you work in a multicompany environment, then you can choose the related service company (see Multicompanies & Multiwebsites).
15. Optionally, in the 'Extra Calendar Restriction' field, set an additional calendar of the service. (see Extra Calendar Restriction)
If selected, then the intersection of the resource and service calendar will be taken into account when calculating the available slots. For example: if the English lesson is available: Monday 10 am - 2 pm; and the teacher (resource) is available: Monday 8 am - 12 pm; then the available time for booking the lesson will be Monday 10 am - 12 pm.
16. Optionally, choose the additional resources to provide the service (see Extra Resources)
On the service card, it is possible to specify the additional resources to provide the service. Then, when booking (both in the backend and in the portal), the system will take into account calendars not only of the main resource but also of the additional ones. In order, for the time slot to be available for booking, both the main and the additional resources should be free. For example, in our language school, we have human resources (teachers). For the service 'Lesson', also another resource is required – 'Room'. When the room and/or teacher is busy, it isn't possible to book a lesson.
17. In the tab 'Description' add the description of the service.
If the option 'Show services full details pages' () is turned on, then the description is shown on the full-service page (the page might be edited on the website (see Portal and Website: Customization & Settings) and in the selection of the website booking wizard (if not hidden by ticking the option 'Do not show website full description' in the tab Website on the service's card).
18*. Select the website on which the service will be visible and optionally tick the box 'Do not show website full description' to make the description invisible on the website ()
19. Click 'Save'.
Once you open the services menu, you will find the list of the services. On the service card, you will see the linked-to-the-service product and rating.
Click on the three dots in the top right corner and choose 'Edit' to be redirected straight to the editing wizard. Click 'Delete' to delete the service. Here you can also choose the color to mark the resource.
With the help of the search bar, you can find the services by the matches in name, description, and by related product.
Add custom filters and groupings to find related services quickly. Group the services (for example, by resource) in the kanban view, and change the settings simply by drag&drop.
Select multiple services in the list view to export, (un)archive, delete, (un)publish () them.
If you tick the option 'Appointments Customer Rating' on the related resource type card and received feedback from the clients, then on the service's card you also see the button with the rating related to this service. Click on it to see the detailed information about the rating.
If you have the module Universal Appointments: Portal and Website () installed, then on the service card you also see the button 'Publish/Unpublished'. To make the service available/unavailable for booking from the website.
Here you will find the list of service examples related to different business types:
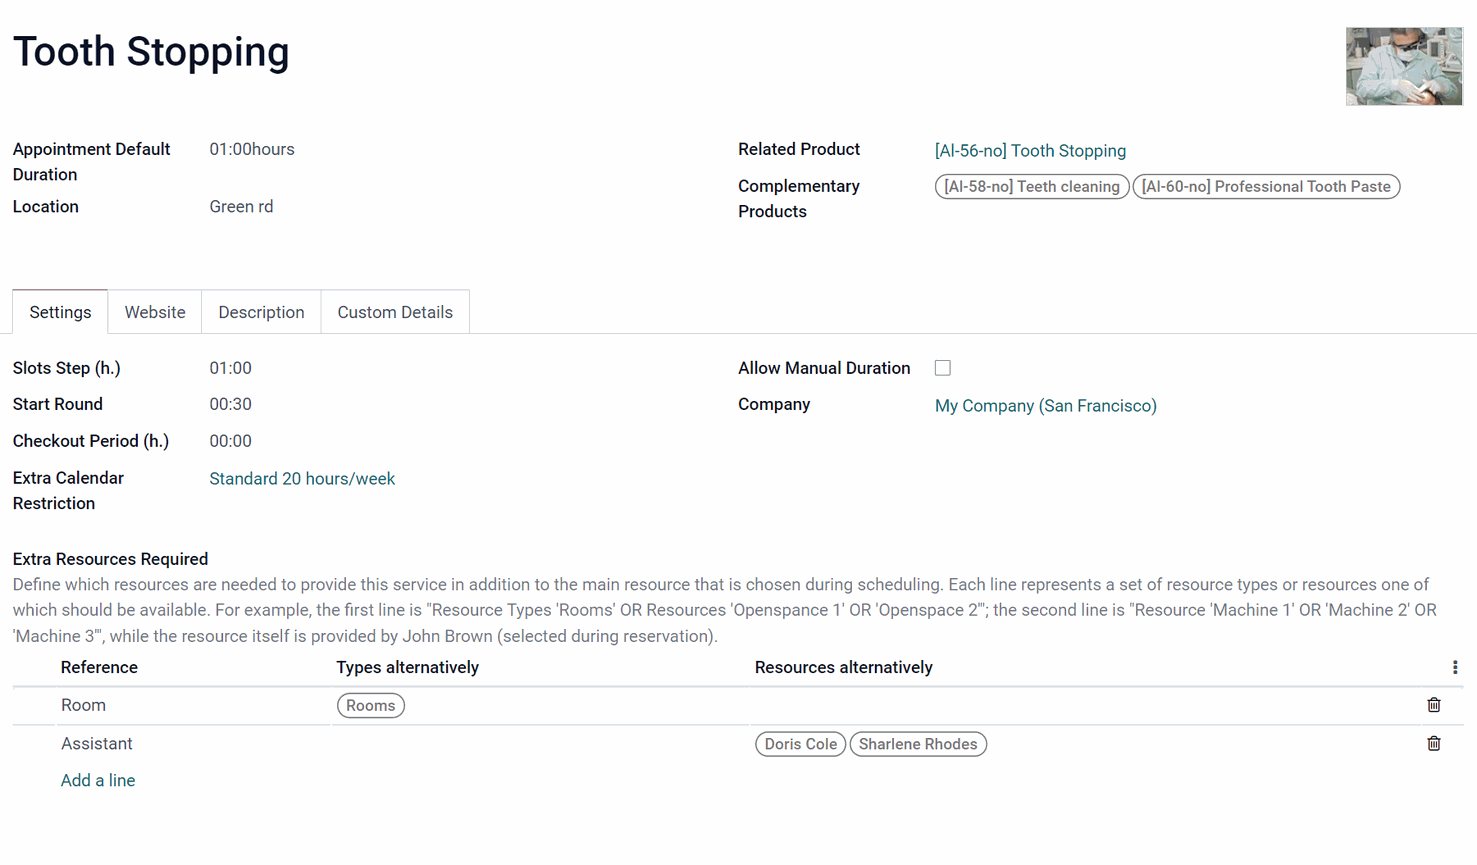
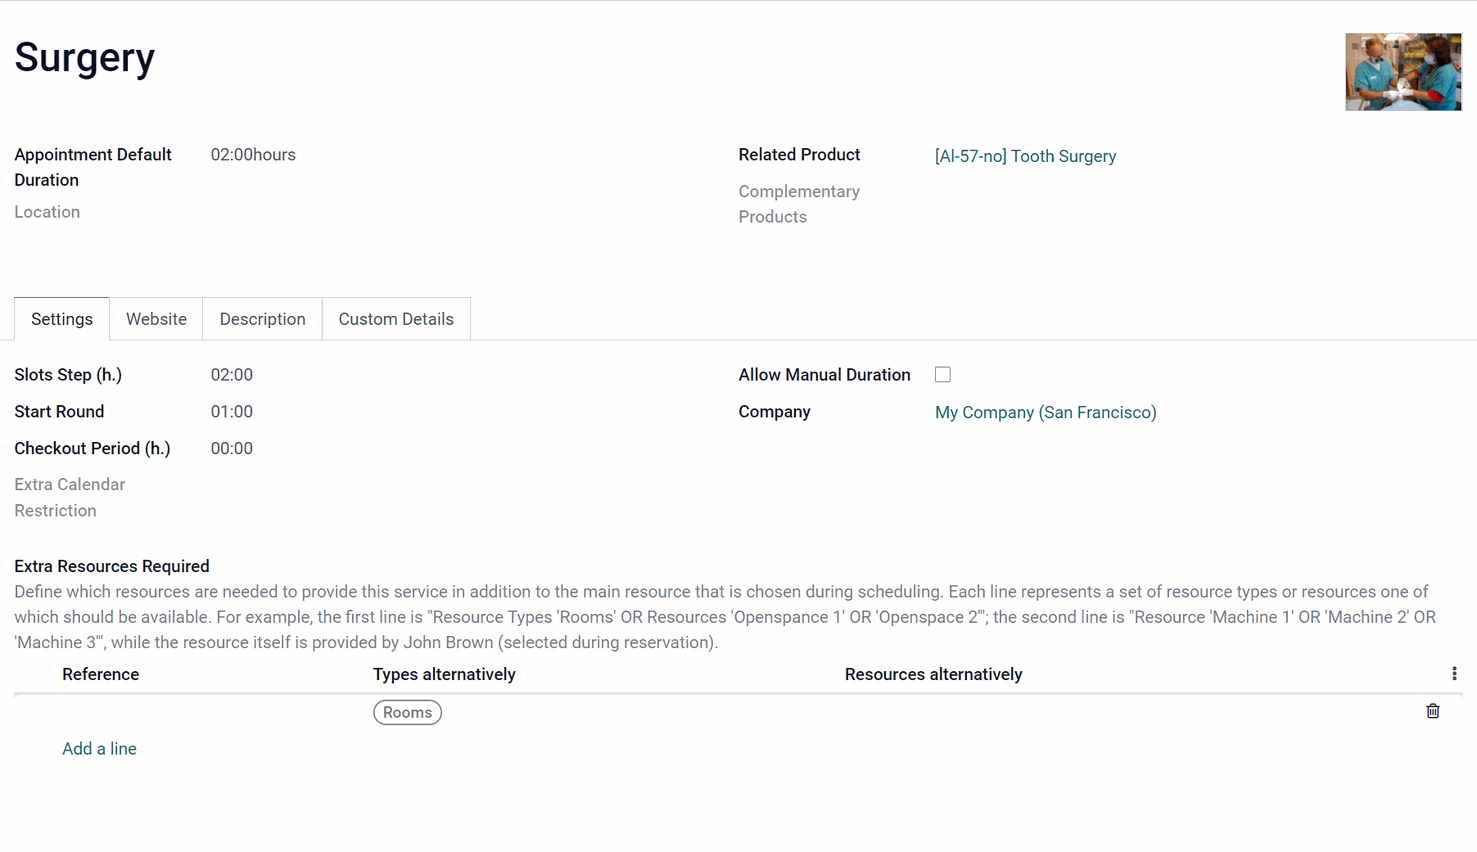
For dental clinic, we have created several services and specified their details.
We set the default duration of each service as: 1 hour for Tooth Stopping and 2 hours for Surgery.
Then, we chose the related product to each service to manage pricing details.
We have added products Teeth cleaning and Professional Tooth Paste as complementary products to the Tooth Stopping, that could be offered to the clients while booking.
We also set the Start Round as: 00:30 for Tooth Stopping and 01:00 for Surgery, to make sure that the time of start looks good. For example, instead of 14:12 to have 14:30 (Tooth Stopping) and 15:00 (Surgery).
We set the slot step as 01:00 for Tooth Stopping and 02:00 for Surgery, so the generated time slots will be equal the duration of the service.
We have added the Extra Calendar Restriction (Standard 20 hours/week) for the service Tooth Stopping as the clinic provides this service only in the morning.
We have added 2 extra resources to Tooth Stopping (a room and an assistant) and 1 extra resource for the surgery (a room).
And, we didn’t turn on the option Allow Manual Duration, as the time spent on the resource is fixed.
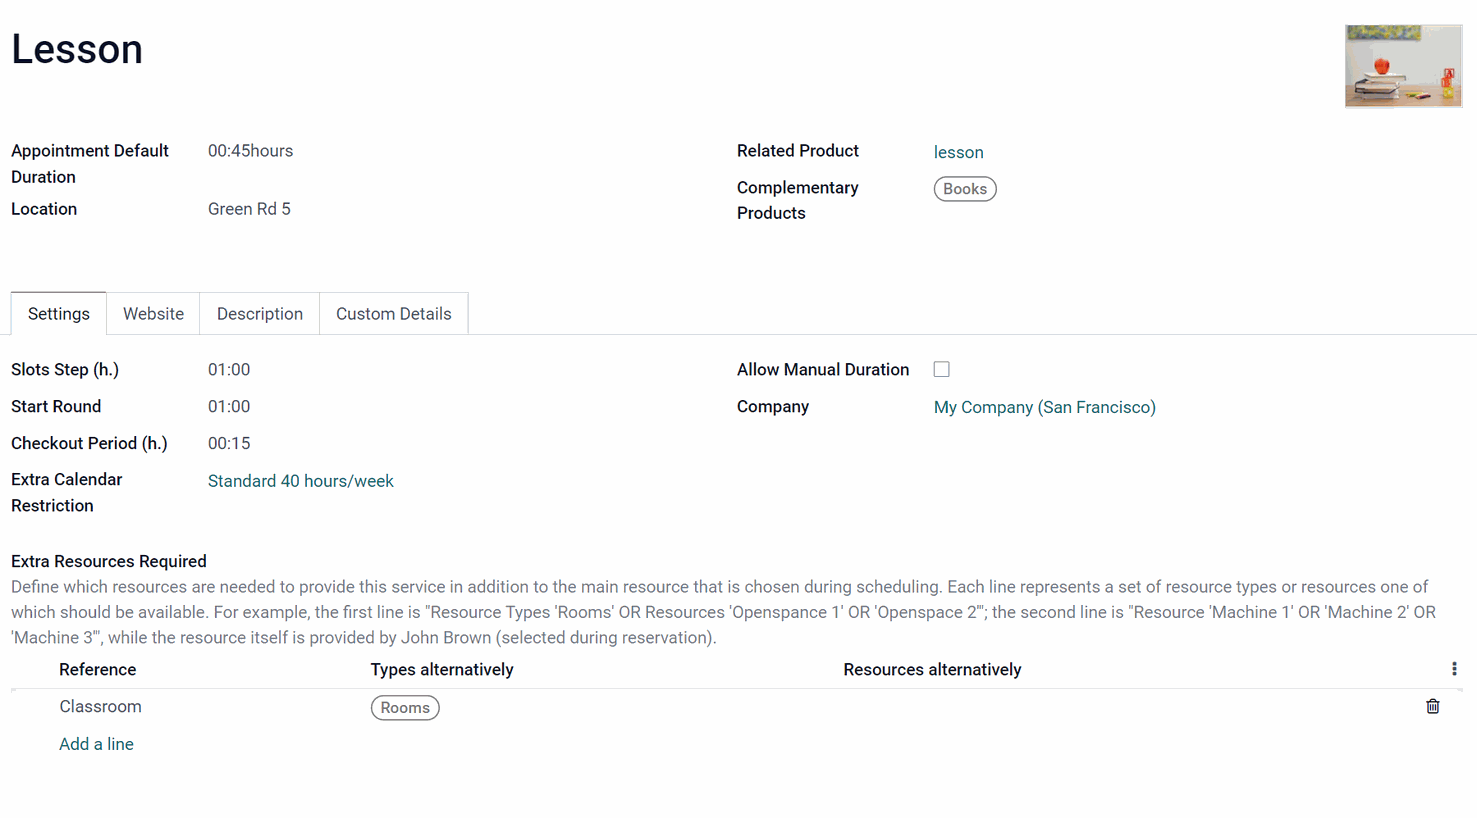
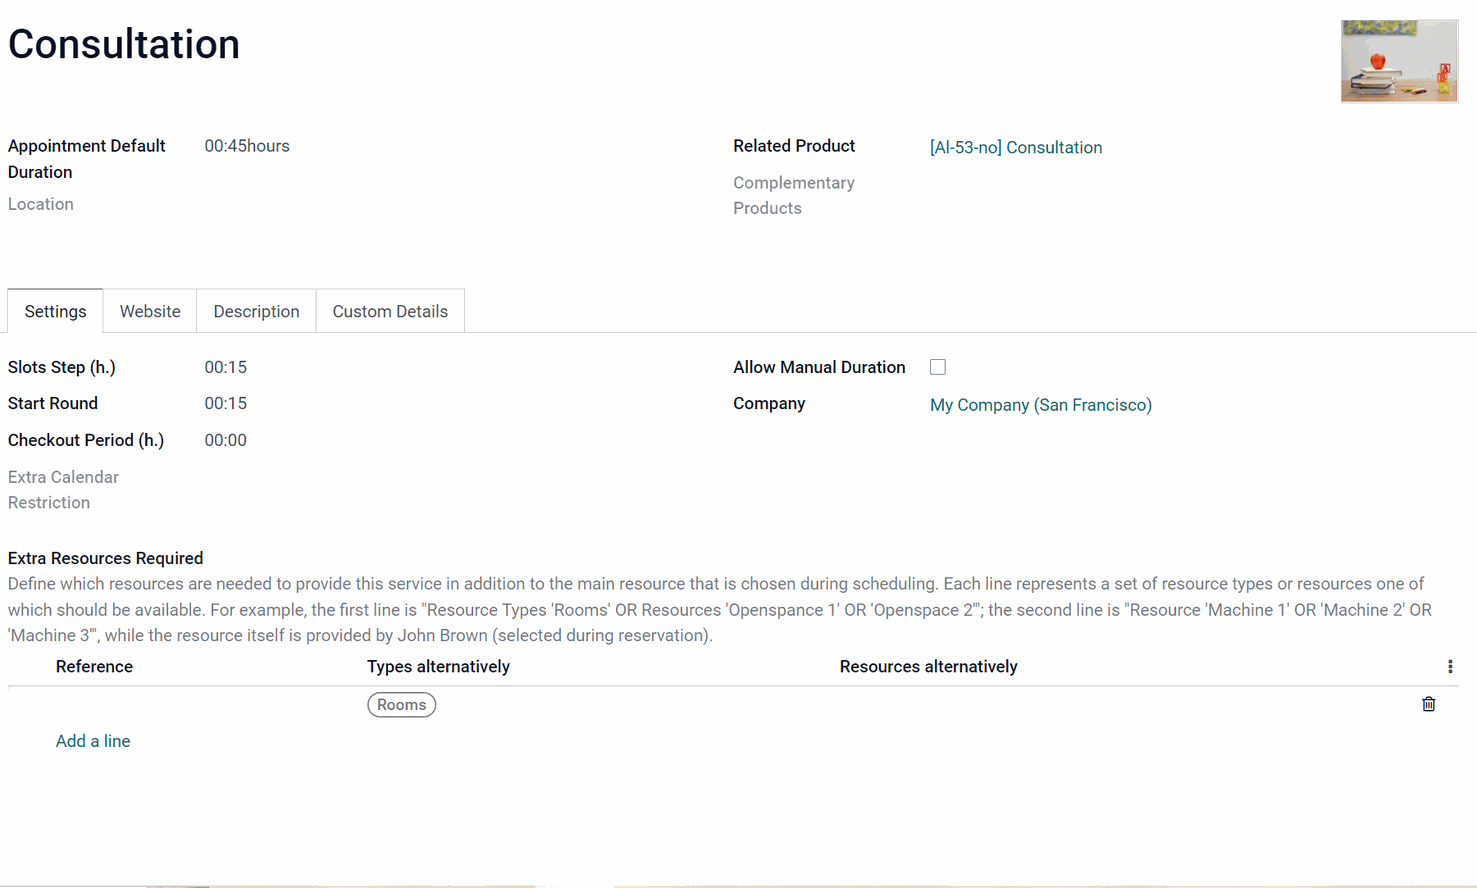
For language school, we have created several services and specified their details.
We have set the default duration for each service as: 00:45 minutes (option 'hours').
Then, we chose the related product to each service to manage pricing details.
We didn't add complementary products, that could be offered to the clients while booking.
Also, we set the Start Round as: 01:00 for Lesson and 00:15 for Consultation, to make sure that the time of start looks good. For example, instead of 14:40 to have 15:00 (Lesson) and 14:45 (Consultation).
We set the Slot Step as 01:00 for Lesson and 00:15 for Consultation, so the clients could book the time slots flexibly.
We didn't add Extra Calendar Restriction to fully rely on the related resource's calendar.
We have added an extra resource (a room) to the services.
We added the checkout period as 00:15 minutes to Lesson, so the teachers had a break between lessons. However, it wasn't necessary in this case, as the start round for the service is set as 01:00 and the lesson takes 00:45 min.
And, we didn’t turn on the option Allow Manual Duration, as the time spent on the resource is fixed.
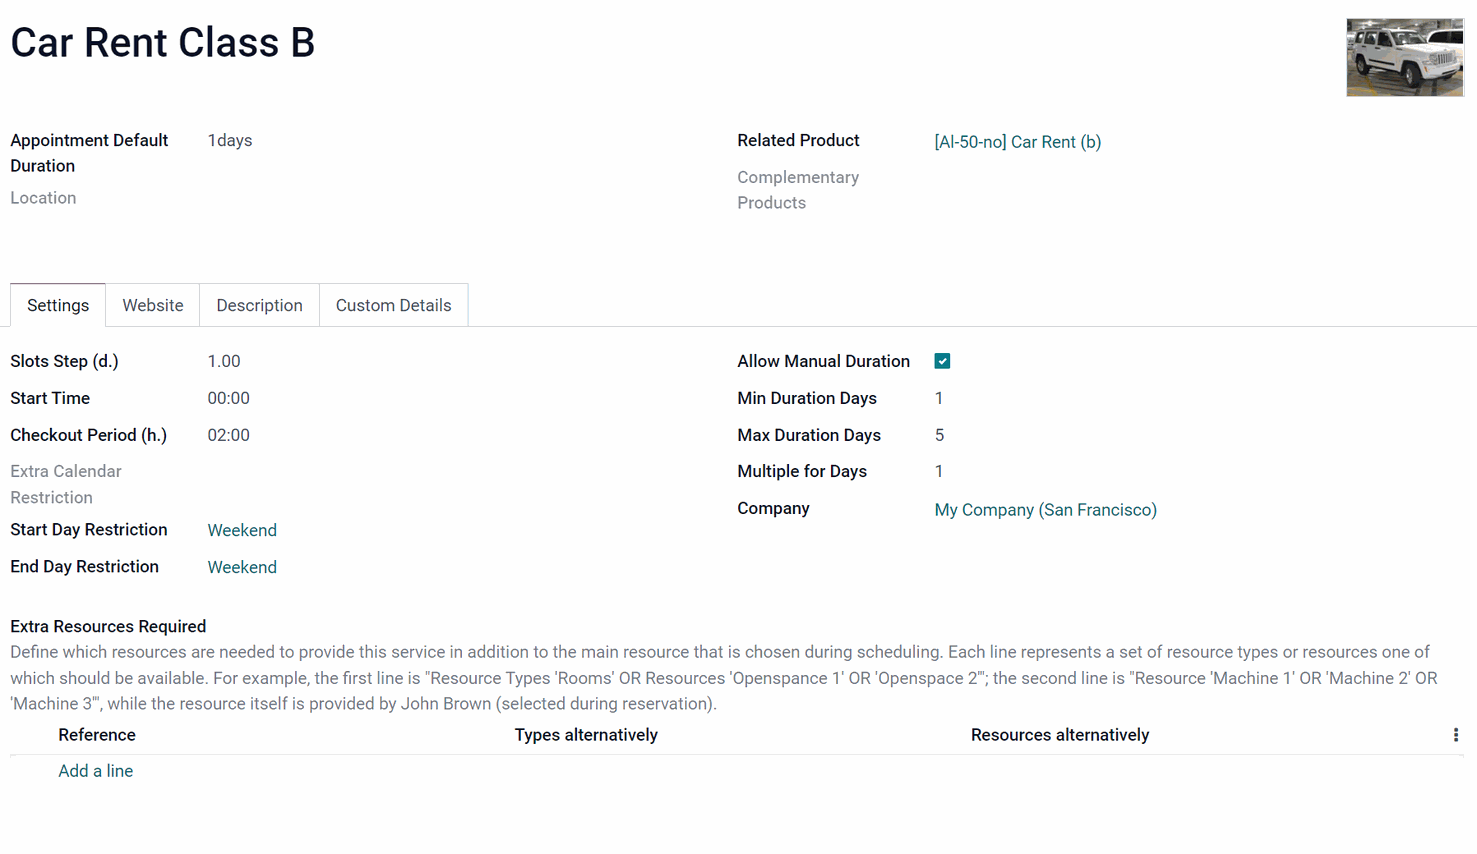
For car rent, we have created several services and specified their details.
We set the default duration of each service as: 1 day.
Then, we chose the related product to each service to manage pricing details.
We didn't add complementary products, that could be offered to the clients while booking.
The Slot Step is set as 1 day, so the generated time slots will be generated with the step of 1 day.
As the Start Time of the daily service, we have set 00:00, which means that we count days starting from 00:00 of the day of rent.
The Checkout Period is set as 2:00 hours, so the clients should return the car not at 00:00, but at 22:00, although the car will be booked for the whole period.
We didn't add Extra Calendar Restriction to fully rely on the related resource's calendar.
Although the weekend might be included in the booking. It isn't allowed to start/end booking during the weekend. So, we created a rule and specified the days of the week, when the reservation cannot start and end.
We also turned on the option Allow Manual Duration, as a client can rent the car for various number of days. A client can rent a car for a period from 1 to 5 days. The multiple for days is 1, so it is possible to rent the car for 1,2,3,4,5 days.

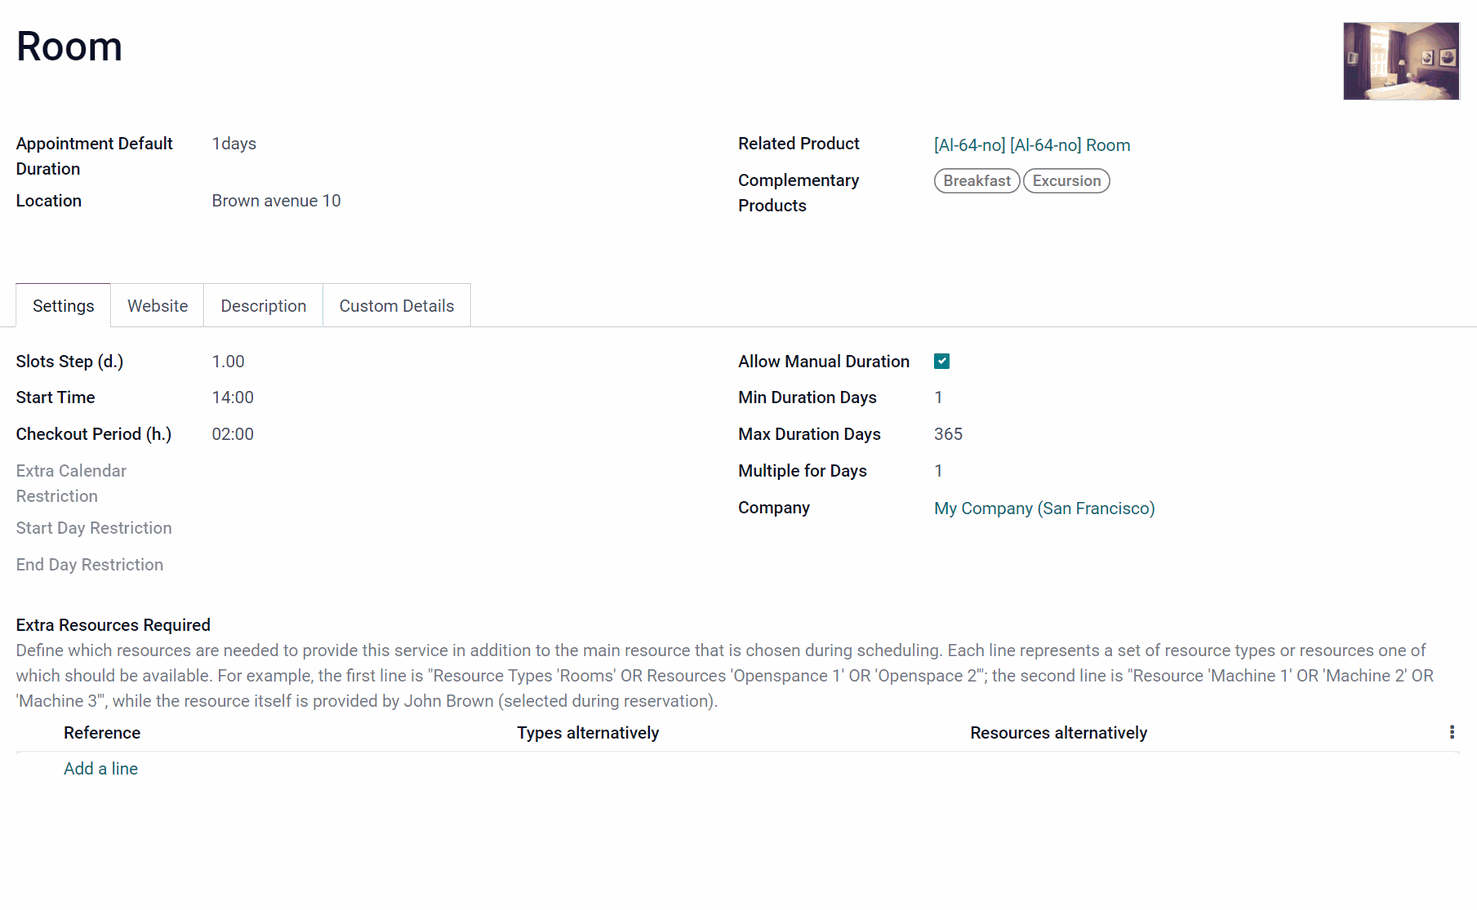
For hotel, we have created a single service and specified its details.
We set the default duration of each service as: 1 day.
Then, we chose the related product to the service to manage pricing details.
We have added products Breakfast and Excursions as complementary products, that could be offered to the clients while booking.
The Slot Step is set as 1 day, so the generated time slots will be generated with the step of 1 day.
As the Start Time of the daily service, we have set 14:00, which means that we count days starting from 14:00 of the day of booking.
The Checkout Period is set as 2:00 hours as we need the time to clean the room for the next guests. So the clients should move out at 12:00.
We didn't add Extra Calendar Restriction to fully rely on the related resource's calendar.
We also turned on the option Allow Manual Duration, as a client can book the room for various number of days. A client can book a room for a period from 1 to 365 days. The multiple for days is 1, so it is possible to book the room for any number of days within the limit.
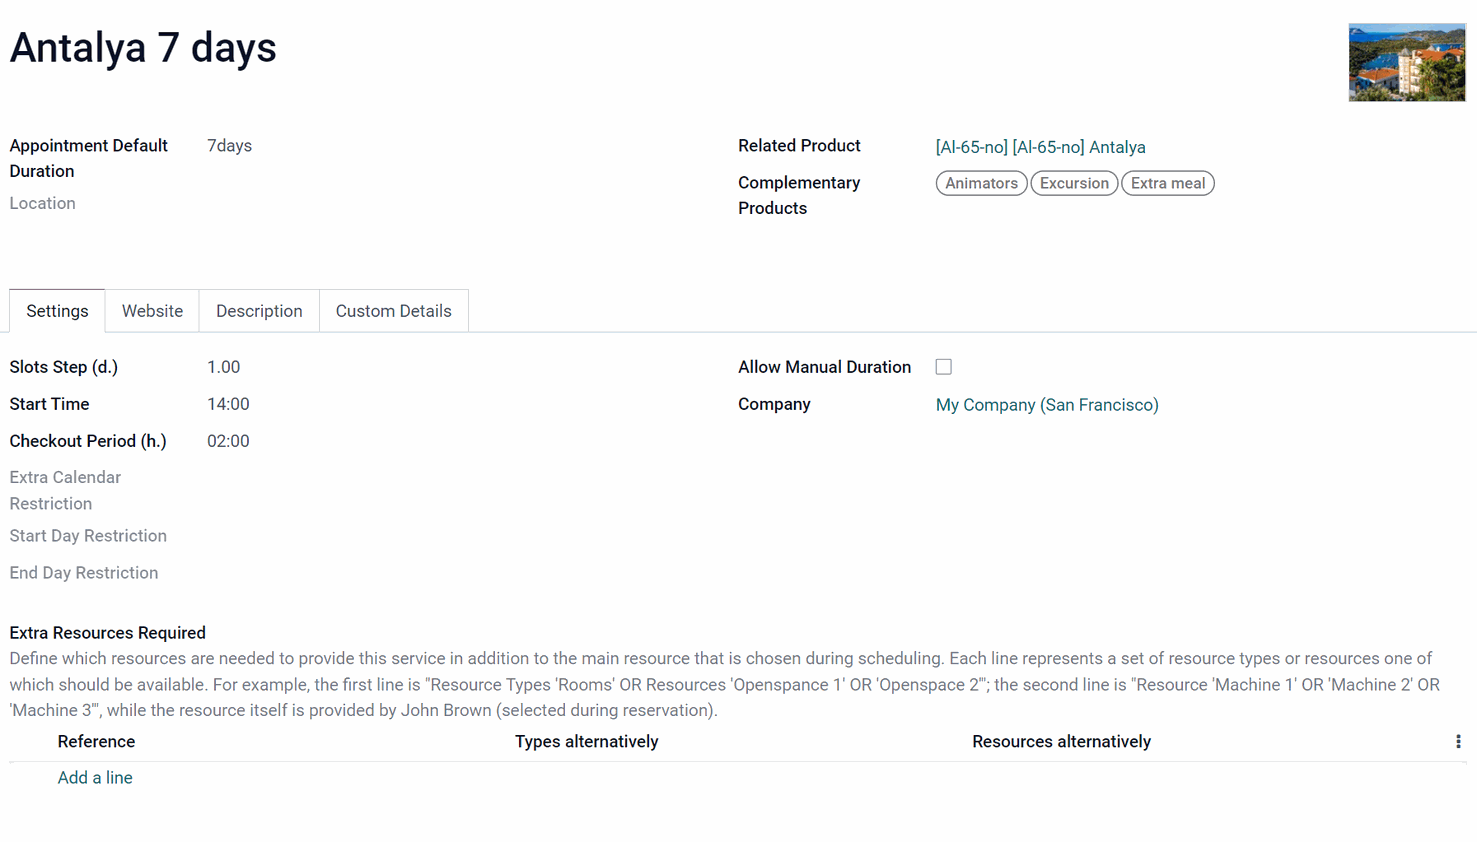
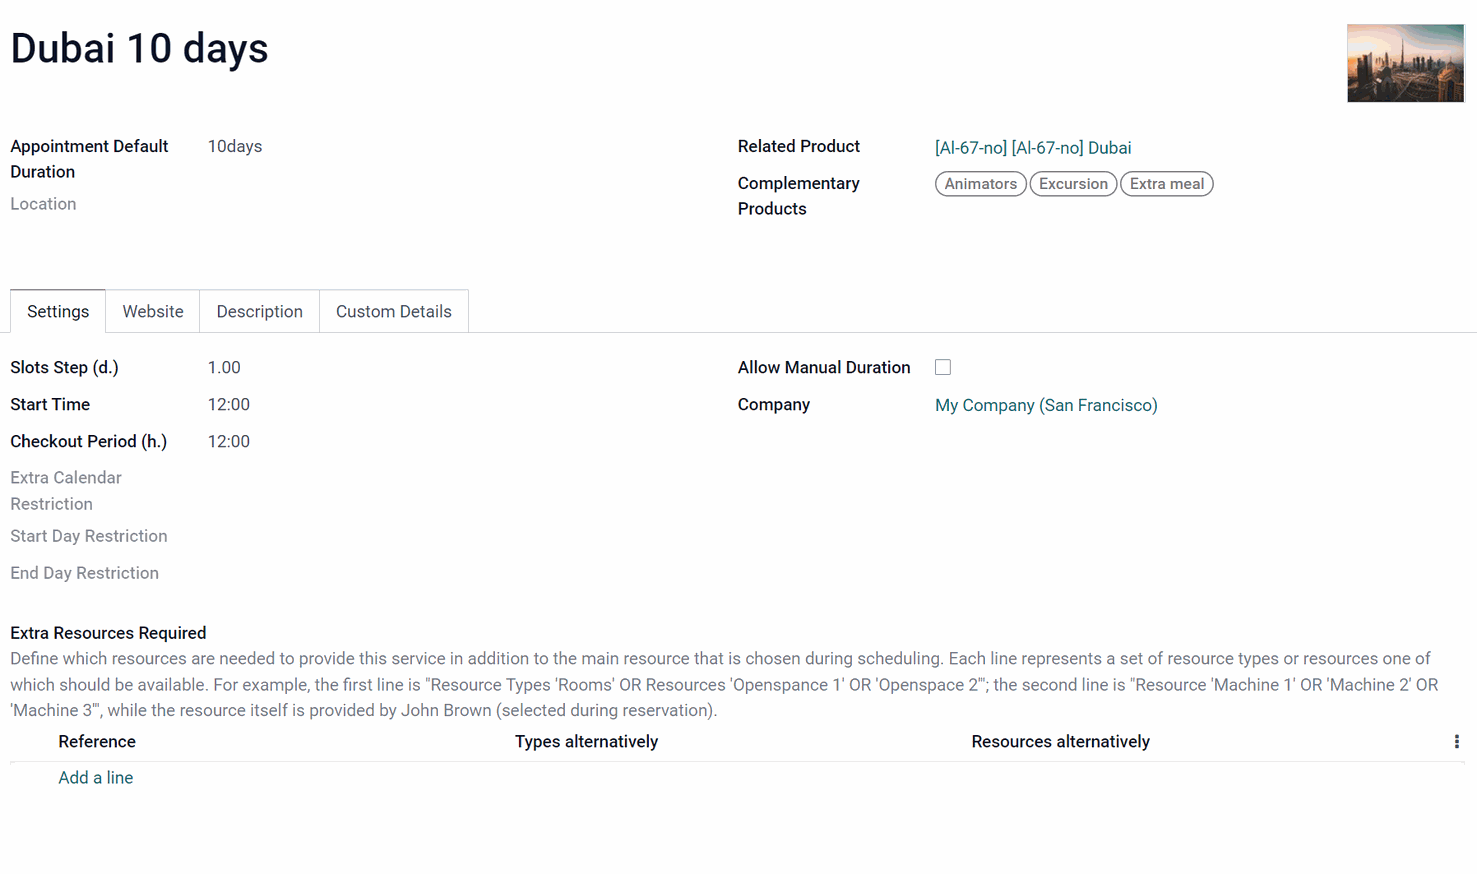
For travel agency, we have created a several services and specified their details.
We set the default duration of each service as: 7 days and 10 days.
Then, we chose the related product to the service to manage pricing details.
We have added products Extra meal, Animators and Excursions as complementary products, that could be offered to the clients while booking.
The Slot Step is set as 1 day, as the tours start every day.
As the Start Time of the daily service, we have set 12:00, which means that we count days starting from 12:00 of the day of booking. At 12:00 the tour starts and finishes at 12:00 on the last day of the tour.
The Checkout period is 12 hours as the last night isn't spend in the hotel. The clients must leave the hotel before the midnight and get to the flight.
We didn't add Extra Calendar Restriction to fully rely on the related resource's calendar.
The tours don't start at the weekend.
And, we didn’t turn on the option Allow Manual Duration, as the tours time is fixed.
Examples of Business Structures
The module can be used in various types of business. Here you will find examples of some business structures, that can be created with the help of our module.
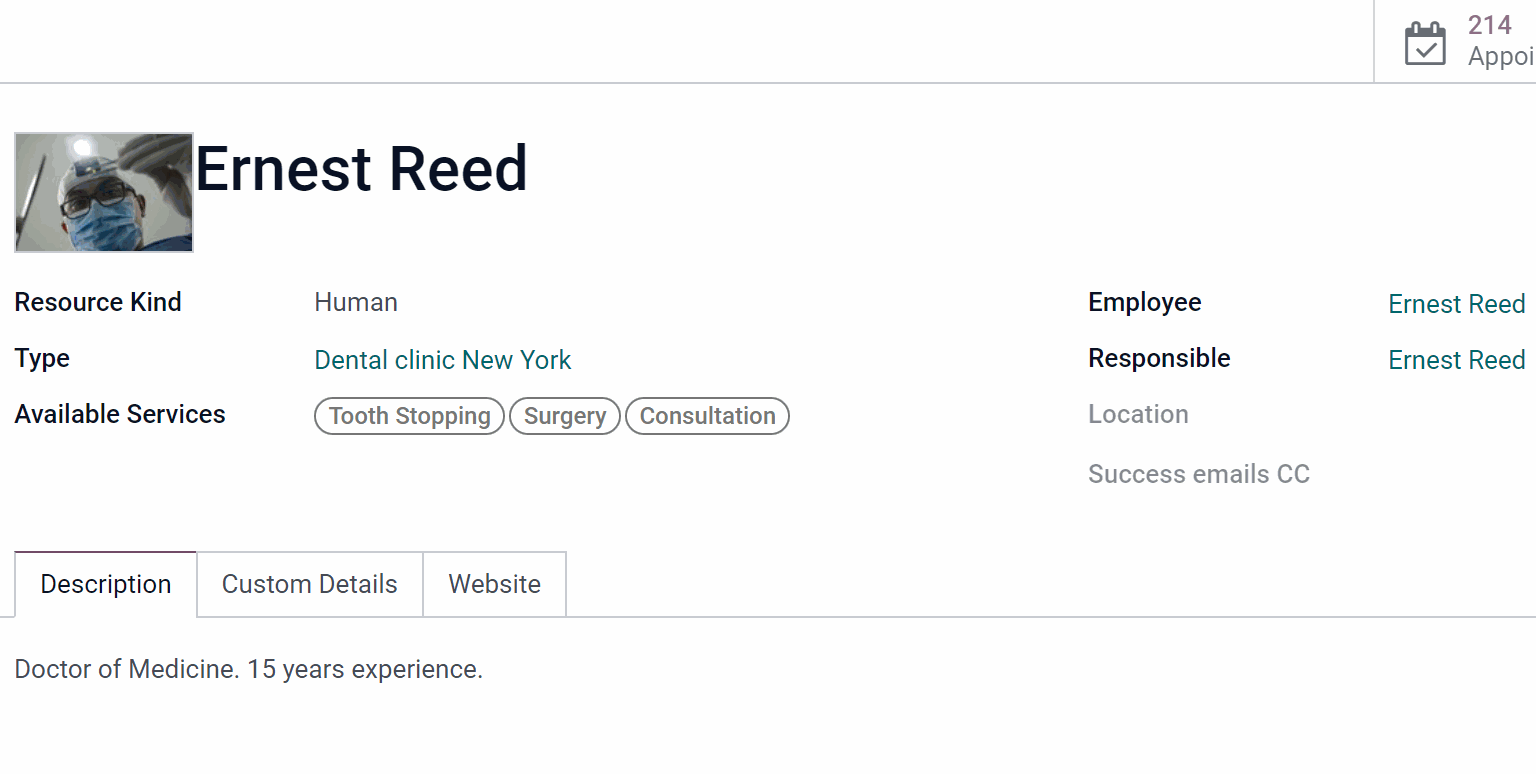
Dental clinics network:
Resource Type: Dental Clinic New York, Dental Clinic Chicago.
Resources: Anita Oliver (New York), Ernest Reed (Chicago) ().
Services: Tooth Stopping, Surgery.
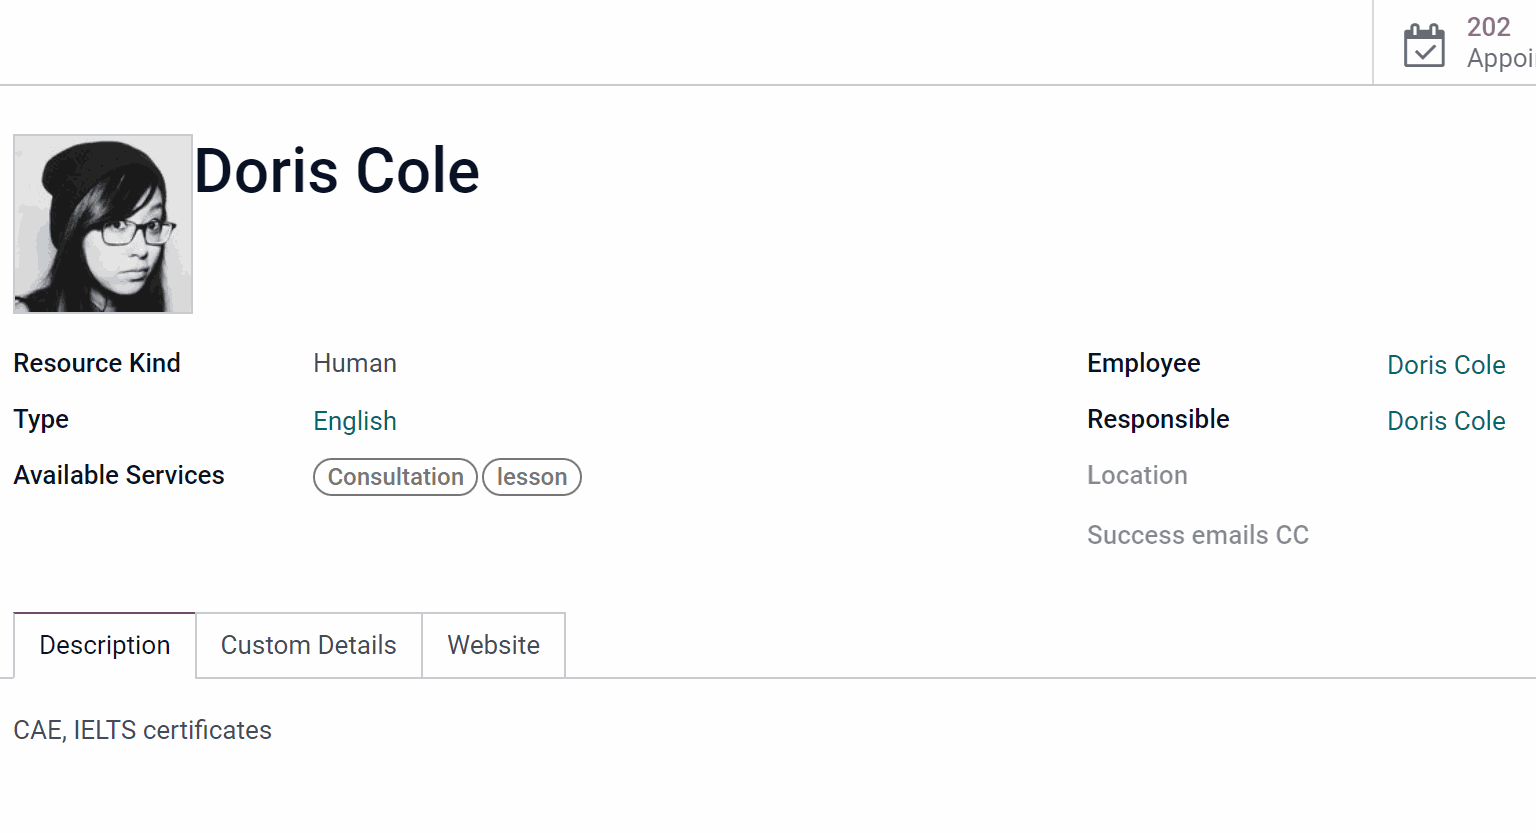
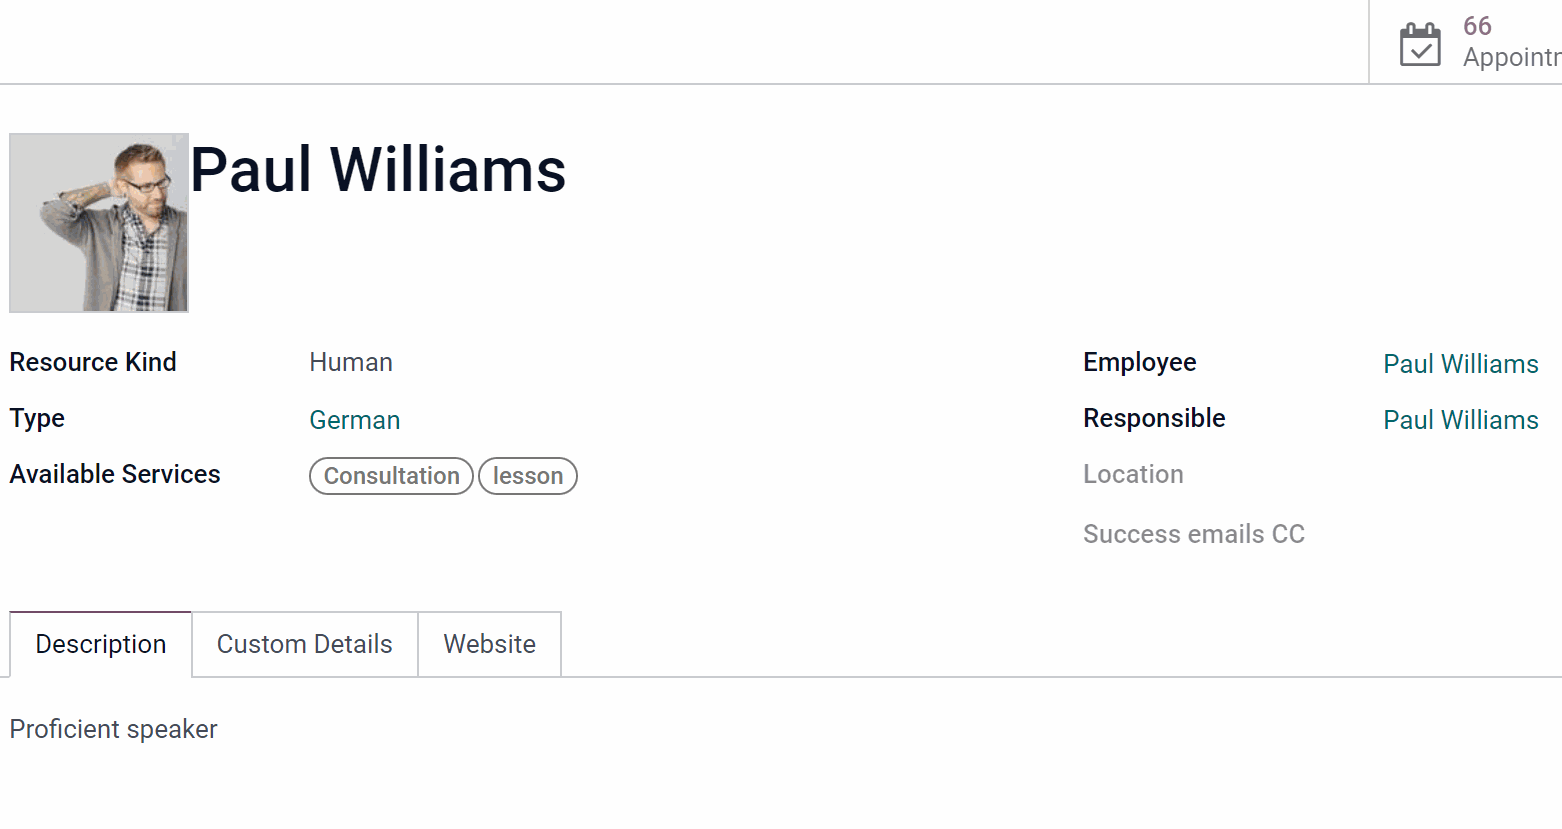
Language school:
Resource Type: English, German.
Resources: Doris Cole (English), Sharlene Rhodes (English), Paul Williams (German) ().
Services: Lesson, Consultation.
Car rent:
Resource Type: Class A, Class B, Class C.
Resources: various cars.
Services: Class A (car rent class A), Class B (car rent class B), Class C (car rent class C) (a single service specific for each class).
Hotel:
Resource Type: Single room, Double room.
Resources: Single room with balcony (Single room), Single room without balcony (Single room), Double room with balcony (Double room), Double room without balcony (Double room).
Services: Room (a service can be single if the price for the rooms is the same or you don't need to calculate the price while booking ()).

Travel agency:
Resource Type: UAE, Turkey.
Resources: various placement options (the price should be managed on the service level ).
Services: various Tours.
Keep in mind, that a single time slot can be booked only once. So, in this case after the user books a day, the related resource will not be available for other users on this day. So, the example above might be used to sell the group tours only.
Otherwise, if you need to make one timeslot available for multiple bookings, you need to create as many resources as there are places in each tour (see the example Car Rent).
Scheduling Appointments: Backend
Reservation is the process of assigning a particular time slot to the person (client) in order to provide a certain service. Usually, a reservation means that the service is no longer available for booking at the time of appointment.
Reservations can be made either from the backend by appointment managers or from the frontend by the client(). In order to be able to book an appointment from the frontend, a special add-on Universal Appointments: Portal and Website is required (see Website Booking Process).
In this article, we will see how to book an appointment from the backend.
The module has a convenient backend menu, from which the appointment managers can create a new reservation in just a few clicks. The module's convenient single-view interface allows both: booking appointments right from the calendar and navigating through the appointments with the help of filters, a mini calendar, a search bar, and specific appointment details (see Managing Appointments).
To create an appointment, in any calendar view (daily, weekly, monthly, yearly), just select the day or day range (by moving the mouse while holding the right click) and the appointments wizard will be automatically initiated.
If previously you have specified the resource type, resource, and service in the right functional panel of the single view interface, then those will be automatically specified in the initiated appointments wizard. For example, in the right functional panel, we have chosen the resource type as 'Dentist', the resource as 'Anita Oliver', and service as 'Surgery', then click on the day (15th of June), when we want to book the appointment and in the wizard, the fields resource type, resource, and service were filled automatically. Also, the available time slots are shown on the day 15th of June.
Even if you select a particular day/day range to launch the appointments wizard, you will be able to change the period of time for which the time slots will be generated. For example, a client calls the appointments manager and asks if it is possible to book the Tooth Stooping for Monday or Tuesday. The manager selects these two days by clicking the right side of the mouse and holding it while moving from Monday to Tuesday and the wizard is launched. Then the manager specifies the resource type, resource, and service and it turns out that there are no available time slots. The client then asks to check if there is any time on Wednesday and the manager changes the days to search in, in the field 'Search in dates'.
Available time slots cannot be limited by hours. So, even if you choose a particular time period on the calendar, this time will not be selected by default in the launched wizard. For example, if you open the single view interface in the daily view (25th of June) and click on the timeline at 11:00, then the appointments wizard will be launched. After specifying the resource type, resource and service the available time slots will be generated for the chosen day (25th of June), however, you still need to choose the time 11:00 among the available time slots.
To sum up, in order for an appointment manager to make an appointment, it is possible to set the filters on the right side of the interface. Otherwise, the manager should choose them right in the wizard and select the days' range in the calendar to initiate the appointments wizard.
After launching the appointments wizard, you need to:
1. Select the resource type
Resource type – is a key core object that sets the specifics of the business and stores the related to the business settings. It also keeps information about related services and resources (see Managing Resource Types).
Based on the selected resource type, the choice of resources and services will be limited to only the related ones. The resource type, if selected in the right panel of the single view interface, is set automatically, but you can switch to another one (see Managing Resource Types).
For example, we have several resource types including 'Dentist'. This resource type is selected on the right side of the single view interface, so we can see the related appointments in the calendar. When we click on the day the appointments wizard appears. In the appointments wizard, by default, applied the resource type 'Dentist'. When we click on the resource type's selection field, we see all the other available for us resource types that we can switch to.
2. Select the resource
Resource – is a core object that represents a facility or a person, whose time is considered for allocation to provide a service (see Managing Resources).
After choosing the resource type, the choice of resources becomes limited to only the related-to-the-resource-type ones. If you have previously selected one or several resources in the right panel of the single view interface, they will be set automatically. But you can change your choice.
It is possible to choose one resource. In this case, the resource will be assigned and its calendar will be chosen to generate the available time slots after selecting a service.
You can also choose several resources by adding them one by one. You can also click on the option 'Any' to choose all available resources. Then, you can remove the resources you don't need from the selection.
If a client chooses several resources, then one of those resources will be assigned automatically according to the chosen allocation method of the related resource type. For example, if a client can't select one between the two dentists he likes, then he can choose both and the most suitable resource will be chosen automatically by the app (see Resource Allocation).
For example, we have several resource types including 'Dentist', which is selected on the right side of the single view interface. We have 3 resources that represent the dentists. Two out of three are selected on the right side of the single view interface (Anita Oliver, Abigail Peterson), so we can see the related appointments in the calendar. As we select the day's range the appointments wizard appears. The appointments wizard, by default, applies the resource type 'Dentist' and selected 2 of our dentists: Anita Oliver and Abigail Peterson. We can still change the choice if needed, but, we proceed with the booking. This way, the appointment will be assigned automatically to one of the selected resources, Anita Oliver or Abigail Peterson, according to the selected allocation rule in the resource type's settings. In our case, the appointment was assigned to Anita as she had fewer appointments than Abigail and our allocation method is 'By appointments number' (see Resource Allocation).
The step is missed in case there is a single active resource or a chosen resource type that assumes automatic allocation.
3. Select the service
Service – is a core object that defines what, actually, should be done. For instance, it can be a 'consultation', 'tooth surgery', 'classic hair cutting', 'car class C rent', etc (see Managing Services).
In the wizard, you also need to select which service should be scheduled. The tool automatically checks and restricts viable options according to the previously chosen resource types and resources.
If you have previously selected the service in the right panel of the single view interface, it will be set automatically. But you can change your choice.
For example, we have several resource types including 'Dentist' and several resources including the dentist Anita Oliver, which are selected on the right side of the single view interface. There, we have also selected the related service 'Surgery', so we can see only the related appointments in the calendar. As we click on the time slot, the selected information from the right side of the single view interface is filled automatically and the time slots are generated. But we still can change the parameters and the time slots will be regenerated. As we don't want to change anything, we just proceed to the next step of booking an appointment.
4*. Optionally select the pricelist ()
Appointment prices are price list dependent. This means that a manager might select individual conditions during scheduling. To turn on the feature, in configuration, tick the box 'Multiple Services Prices'. In such a way, it will be possible to apply various currencies, discounts, and promos.
Set the pricelist to the appointment, and it will be assigned to the resulting sale order. The pricelist is applied to the wholesale order, including complementary or other products. For example, give a discount for booking appointments during a particular period (for example, a 10% discount for booking a lesson during the summer holidays). Then add the extra product students book (10$). In the generated sale order the discount will be applied to the total price (lesson + students' book).
5. Choose a time slot
As soon as the wizard details are filled out, the tool will generate and show available time slots (see Time Slots Generation).
The available timeslots are shown based on the Resource's calendar. This way, the time when the resource is unavailable or has time-off isn't shown (Resource Calendar).
When generating slots for aliases, the calendar of the main resource and its busy time is taken into account. This way, one real object can be used in different places, but a single calendar will be generated for it (see Managing Resources).
In case of automatic resource selection, or when there are several resources selected, the algorithm decides which resource the appointment should be assigned to, based on the resource allocation method (see Resource Allocation).
If the chosen service has an extra calendar assigned, then the time available for booking will be further restricted. The service will be available at the intersection of the resource and service calendar (see Extra Calendar Restriction).
If some extra resources are chosen, then, when booking (both in the backend and in the portal), the system will take into account calendars not only of the main resource but also of the additional ones. In order, for the time slot to be available for booking, both the main and the additional resources should be free. While scheduling an appointment for the service, that requires the extra resources, you will see the line that warns you about the additional resources. Hover over the line to see what resources are required (see Extra Resources).
The time slots will be divided based on the related service's default duration (see Service Duration).
Set the slot step with which time slots will be generated, to make the booking time flexible (see Slot Step).
Specify the time required for completing the reservation, without the participation of the client. Set, the checkout period, to show the client what time he/she should finish receiving the service, while the resource will be blocked for the entire selected time (the time for providing the service and the checkout period) (see Checkout Period).
Configure the Start Day&End Day Restriction to choose the set of days of the week and/or a set of specific dates on which the reservation cannot start/end (see Start &End Day Restriction).
A manager should merely select a desired one. Selection means that this slot is pre-reserved and cannot be used for other bookings (see Pre-reservation).
If on the related resource type's card the option 'Calendar Events as Busy Time is ticked, then for periods when a responsible user has meetings (i.e. events assumed by the Odoo calendar), appointment booking will not be possible (see Meetings Calendar).
Per each resource type, you can define when an appointment might be scheduled. The appointment should be booked no earlier and no later than the set time, for example, no earlier than a month before the day of the appointment and no later than 1 day before. Only the days available for booking will be shown (see Time Requirements).
If the start round is set in the service's settings, then the time slot start will be rounded accordingly (see Rounding Time).
Above the generated time slots, you will see the time zone in which the time is booked. Based on the settings it will be either default or available to choose manually. In the latter case, the time zone will be adjusted to the timezone of the system (computer) (see Multi Time Zones).
You may even allow scheduling a few appointments simultaneously. To allow multi-scheduling from the backend, on the configuration page tick the option Multi Scheduling, specify the maximum number of slots, that can be chosen per single booking, and save the changes. In the backend, you can select slots for different resources, resource types, and services in one wizard. For example, when a client wants to book several lessons, but of different languages and thus of different teachers, you will be able to choose the time slots, change the settings and then choose some more timeslots. This way all the required dates will be booked at once. The client will receive one success email for all reservations of a single resource. One sale order will be generated for all reservations ().
6. Optionally add complementary products
If there are complementaries defined for a booked service and the option 'Complementary Products for Reservation' is turned on, Odoo will show a pop-up with suggested products for backend managers immediately after reserving a time slot.
The pop-up allows both adding one / a few complementaries or merely missing the step if suggested products are not required. You can turn on/off the feature on the configuration page.
For example, a dental clinic may suggest toothpaste or a toothbrush as complementary products. To find out how to configure suggestions for complementary products, see Managing Services.
7. Select or create a contact
Choose the contact among the existing ones and all the required details will be taken from the contact's card. No further filling will be required and the other fields will be hidden. If the contact has a parent company, it will be written before the contact, for example, Azure Interior, Brandon Freeman.
If the client is not from the contacts list, you can create a contact right from the wizard. For that, just fill in the contact's name and once you submit the appointment, the contact will be created. This way you can create not only the contact itself but also a contact's company if it isn't yet in the list of contacts.
In order to submit a booking and create a contact, only one field is mandatory. That is the field 'Name'. However, it is strongly recommended to select email/mobile or phone to be in contact and send confirmations. Optionally, you can add other details and they will also be reflected on the contact's card.
The created contact/parent company can be found in the 'Contacts' menu. Simultaneously, the contact's card can be also accessed right from the appointments menu. For that, just click on the appointment in the calendar view and then click on the contact and you will be redirected.
The other available contact fields from the account details page in the appointments wizard are: the contact's title, email, phone, mobile, job position, address, and company name.
If you know the contact's title (Mr, Mrs, Doctor...), and want to make sure that the client is addressed politely, you can select it right after the contact's name.
Fill in the field email for effective communication with the client and to make it possible for the client to receive the notifications/rating email/success email about the appointment.
Fill in the fields phone and mobile to make sure the appointment managers will be able to contact the client by calling. For example, if the client is late, it is more likely that he/she will be able to reply orally, than in written form.
Fill in the address details, if some products or services require delivery. For example, in a car rental, we may get the car to the renter's address or to the airport parking lot.
If you know the job position of a contact, then you can also specify it here. It might be useful for further collaboration or to reflect the specifics of the service. For example, in the language school, we also provide lessons with native speakers to the teachers.
If you know the company name of a client, but the company isn't yet on your contacts list, then you can fill in the field 'Company name'. It will result in creating a company with the chosen name and the contact of the client will be linked to the company automatically.
Also in this step, if the option is turned on, you can still see the chosen pricelist and change it if necessary. If you choose a particular contact, then the contact's pricelist is applied instead of the previously chosen one, but you can switch to another one and it will not result in changing the contact's pricelist on the contact's card. For example, as we were creating the appointment, we chose the pricelist 'Christmas 5%', but then as we moved further and chose the contact 'Abigail Peterson', the pricelist changed to 'Extra 10%', as she is our regular client. So, in order to make the client happy, we decided to combine the discounts by creating and assigning a new pricelist 'Extra 15%' for this particular order. As we applied it on the account details step, after confirming the appointment it applied to the resulting sale order. It didn't change the contact's details, Abigail still has the price list 'Extra 10%' assigned (see Universal Appointments: Sales).
If the existing fields aren't enough and you want to add an extra field to the appointments, it is possible to create some custom fields (). To view the appointments field on the account details page, just choose the 'Input form placement' option, while creating a custom field, and, if you want to make filling in this field mandatory, tick the option 'Required to enter a value'. For example, for a language school, you can create a text field 'Learning preferences', to find out what the student likes before the lesson. This field will be added to the appointment, but not to the contact's card (Universal Appointments: Custom Fields).
After creating a contact through the appointments wizard, you will be able to edit it and add some more details to the standard app Contacts.
You will also be able to edit the contact right from the appointments calendar, for that, just click on any appointment and then on the external link icon by the contact's name.
Optionally, add some notes about the appointment.
8*. On this step, it is also checked if there are any other reservations that block the current by resource or additional resources, or by related contact. If there is another reservation or there are intersections with other contact reservations, then the warning will appear. The same contact cannot have 2 reservations by different resources at the same time. For example, if our portal user Azure Interior has a reservation for Tooth Stopping on the 4th of October at 16:00 (duration is 45 min) and then we try to book another reservation for Haircut at 16:30, then the second time slot will not be booked and the warning will appear as the contact already has a reservation at that time.
If several tabs are opened at the same time for the same user, and the same time slot for different reservations is chosen, the second one will not be booked: the pop-up warning will appear.
9. Click 'Confirm'.

After that, the appointment will appear in the appointments menu as a line at a particular time in the calendar. You can find it by applying the related filters or by opening the day for which the appointment was booked (it will be placed on the booked time). You will be able to see and manage its details by clicking on the appointment and then the button 'Edit'. Delete the appointment by clicking on the button 'Delete'. Easily re-schedule an appointment by launching the re-scheduling wizard through drag&dropping an event. From the wizard, you will be able not only to choose another available time slot but also to change the details of the appointment, such as resource type, resource, service, and pricelist of the appointment (see Managing Appointments).
Once configured, the sale order will be created (). The resulting sale order can be either a draft (can be changed), automatically confirmed (cannot be changed), or sent quotation (ready to accept and pay) (see Universal Appointments: Sales).
Time Slots Generation
The algorithm of the module allows making sure that only vacant time slots will be available for booking. The vacant slots for appointments are automatically generated based on working calendars, service peculiarities, and specifics of managed businesses. Here are all the factors that influence the time slots generation:
1. Resource calendars and time offs (see Resource Calendars)
The algorithm takes into account the working calendar of the resource. Each resource has its own calendar and time offs: global ones – when the company doesn't work; and own leaves - when an employee takes a vacation. It is impossible to schedule an appointment for non-working time. For example, our dentist Anita Oliver works according to the working calendar 'Standard 40 hours/week', but on Monday she had to go to a doctor, so took leave and the time slots on Monday were unavailable for booking.
When generating slots for aliases, the calendar of the main resource and its busy time are taken into account. This way, one real object can be used in different places, but a single calendar will be generated for it. For example, our teacher Doris Cole is also an interpreter. But, we can't create a second resource for her as the busy/scheduled time will not be shared. So, we create an alias 'Doris Cole', that refers to the working calendar ('Standard 40 hours/week') and employment of the resource 'Teacher Doris Cole'. This way, when one of the resources is occupied, the other is also unavailable (see Managing Resources).
2. Resource allocation (see Resource Allocation)
When there are several resources that relate to the same service, the time slot for the service will be available until each related resource's time is occupied. For example, there are 3 cars in the car rental. Two cars were booked on Monday, but the time slot 'Monday 24.06' is still available as there is one more car for booking.
3. Extra Alias Calendar (see Extra Alias Calendar)
Aliases of both human and material type may have their own working calendar assigned. This time will be used to generate the available time slots for the aliases. At the same time, an alias cannot be available during the time when the main resource is unavailable, even if this time is specified in the alias calendar. Therefore, the time intersections of the main resource's calendar and the extra calendar of the alias will be used to generate the available time slots for the alias. For example, we have a hairdresser Doris Cole with the working calendar 40 hours/week, who can also work part-time as a teacher on Monday and Friday. So, we have added the working calendar with the time Monday and Friday to her alias 'Teacher Doris Cole'. Then, when her lessons are booked, managers and clients see the available timeslots only on Monday and Friday.
4. The Extra Calendar of services (see Extra Calendar Restriction)
If defined on the service card, then this service would be available only in intervals that simultaneously suit this calendar and appointment resource calendar. For example, the tooth stopping is available Monday 10 am - 2 pm and the dentist Anita Oliver works Monday 8 am - 12 pm. Then, the available time to book the service will be Monday 10 am - 12 pm.
5. Extra Resources of service (see Extra Resources)
If defined, then, when booking (both in the backend and in the portal), the system will take into account calendars not only of the main resource but also of the additional ones. In order, for the time slot to be available for booking, both the main and the additional resources should be free. For example, in our language school, we have human resources (teachers). For the service 'Lesson', also another resource is required – 'Room'. When the room and/or teacher is busy, it isn't possible to book a lesson.
6. Service Duration (see Service Duration)
The algorithm takes into account service duration. Available time slots have a duration depending on the chosen service or one entered manually. For example, if a lesson in a language school lasts for 45 minutes, then the available timeslots will be 8:00, 8:45, 9:30, 10:15, etc.
7. Slot Step (see Slot Step)
With the help of the field 'Slot Step', you can set the step with which time slots will be created. You can choose the slot step for both services in days and hours. For example, if we reserve service with a duration of an hour and the step of the service is set as 0:30 min, then the generated slots will look the following way: 09:00-10:00; 09:30-10:30; 10:00-11:00, 10:30-11:30. After booking the time slot 9:30-10:30, the time slots 09:00-10:00 and 10:00-11:00 will be unavailable for further booking. It might be useful in a beauty salon with an unloaded schedule.
8. Checkout Period (see Checkout Period)
Specify the time required for completing the reservation, without the participation of the client. For example, the room is reserved from 14:00 01.08 to 12:00 10.08 (10 days), where the start round is set as 14:00, and the checkout period is set as - 02:00 hours (14-2=12; that is, 12:00 - checkout time). At the same time, in the backend, the resource 'Room' is reserved for the service 'Rent' from 14:00 01.08 to 14:00 10.08 (i.e. full time).
9. Start&End Day Restriction (see Start&End Day Restriction)
Set the Start Day&End Day Restriction to choose the set of days of the week and/or a set of specific dates on which the reservation cannot start/end. For example, the resource 'Boat rent' is available 24/7, but the beginning and end of its service 'Boat m21' cannot fall on weekends (Sat, Sun). If the service lasts 3 days, in accordance with the restrictions of the current date, the nearest start of the service may be 28.07 at 13:53. But according to the rounding of the service 00:00, the closest available time is on Friday, 29.07 00:00.
10. Pre-reservations (see Pre-reservations)
Reserved and pre-reserved time slots are not available for booking and will not be available for selection. Pre-reservation WILL be canceled if not done within a specified period (you may change this limit on the configuration page). For example, a client started booking a car for Monday, so pre-reservation appeared and the time slot became unavailable for booking. According to our settings, the pre-reservation was canceled as it wasn't finished for 30 minutes and the time slot became available again.
On the website, when a time slot is booked by a logged in user (portal user), time slots where he/she has reservations by any resource will not be shown.
If the user logged in after choosing a time slot, then at the end of the reservation, the system will transfer him/her to the slot selection page.
11. Meetings Calendar (see Meetings Calendar)
Once configured, the app will also consider simple meetings of resources' responsible users as busy for generating time slots. For example, if our dentist Anita Oliver has a meeting on her Odoo calendar, this time will not be available for booking.
12. Time Requirements (see Time Requirements)
Per each resource type, you can define when an appointment might be scheduled. For example, in a hotel, we can set the generating time slots so, our clients will be able to book the appointments at least the week before the time of the appointment and no more than 90 days before the appointment.
13. Rounding Time (see Rounding Time)
The algorithm takes into account service rounding time if set. So, you can avoid the cases, when the start time doesn't look good, for example, 15:12 or 08:17. Also, it might be useful to make sure that there is a break between appointments. For example, if a lesson in a language school lasts for 45 minutes and the rounding is set as 01:00, then the available timeslots will be 8:00, 9:00, 10:00, 11:00, etc.
14. Multi Time Zones (see Multi Time Zones)
Available time slots are generated for a specific time zone. You can either choose it on the configuration page or let choose a timezone while booking, so the time slots will be recalculated accordingly. For example, a hotel room might be booked by foreigners, that live at a different timezone, so we let them choose it on the website.
Resource Calendars
The module uses standard Odoo working calendars, based on which, when added to the resource, slots are generated. Each resource has its own calendar and time offs: it is impossible to schedule appointments for non-working hours. For example, when we assign the calendar 'Standard 40/hours week' to the resource 'Room 5', then the services related to the resource will be available for booking only during this time.
The working time may be seen and managed in the menu 'Workings Calendars'.
To create a working calendar:
1. Go to Configuration > Working Calendars
2. Click 'Create' or choose a calendar to edit
3. Write the title
4*. If you work in the multicompany environment, then choose a company
5. Optionally switch to 2 weeks calendar by clicking the related button
Useful, in case, the working pattern is similar not for each week, but for every 2 weeks.
6. Click 'Add a line' to add a day, write its title and specify the working day and time
7. Click 'Save'.

The module adds a unique calendar 24/7, that is particularly useful for daily bookings, as it allows you to make resources available throughout the day. For example, when a person books a room or rents a car, it might not be convenient to track the duration in hours. The standard Odoo calendar doesn't allow adding the full day as working hours, which would result in the impossibility to calculate the time slots for the daily services.
If you choose the 'Resource kind' as 'Human' (), then the working calendar of the employee is used to generate the available time slots. For example, the calendar of our dentist Anita Oliver is Standard 40 hours/week. So the related resources 'tooth stooping' and 'surgery' are available only during this time.
Not only the calendar affects generated time slots, but also the Time-offs. Time-offs can be either global (the time, when the company doesn't work) or own Leaves (when an employee takes a vacation).
You can see and manage global time offs right from the working hours card. To do that, just click on the 'Public Time off' button.
You can view and manage all employees' own Leaves right from the working hours card. For that, just click on the button 'Time Off'.
Not only the resources of the Human kind can have the time off. It is also possible to create time off for the resources of the Material kind. For example, for the maintenance period. You can create the time off right from the working hours card. To do that, just click on the button 'Time Off' and then 'Create'.
In order to use the working calendar to generate the available services. It should be applied to the related resource. For that:
1. Go to Resources > Resources
2. Start creating or editing a resource
3. Choose the calendar in the field 'Working Hours' or create a new one by writing the title and clicking 'Create'/'Create and Edit'
4. Click 'Save'.
If you want to use one resource with its working hours and employment for different resource types/ services, then you can create some alias resources for the prime one. Any alias resource ceases to be independent in terms of calendar settings and responsible, i.e. it only displays the prime resource.
Aliases cannot have an associated employee, but they can be of the Human type (if the add-on Universal Appointments: HR Bridge is installed). We can't create two stand-alone human resources () for a single employee, as then the already booked slots of one will not be taken into consideration while booking slots for another one. For example, Doris Cole (a human resource) is both a hairdresser and a teacher.
When generating slots for aliases, the calendar of the main resource and its employment are taken into account. If you schedule an appointment for the prime resource, then this time will become unavailable for the alias as well and vice versa. During the time-offs and busy times of the prime resource, the alias is also unavailable for booking. This way a single calendar is generated for both the prime resource and its aliases. For example, we have two resource types 'Swimming lane for one' and 'Swimming lane for the team', which require the same resource 'Lane 1'. We can't use the same resource with 2 different resource types and can't create 2 resources as we only have 1 lane. So, we create an alias 'Lane for swimming', which refers to the working calendar ('Standard 40 hours/week') and employment of the resource 'Lane 1'. This way, when the resource 'Lane 1' is occupied, the resource 'Lane for swimming is also unavailable and vice versa.
To turn the resource into an alias, just start creating or editing a resource and in the field 'This resource in only alias for', below the title, choose the prime resource (see Managing Resources).
Resource Allocation
If there are several resources related to the same service, then there might be a necessity to specify the way the appointments should be distributed among them. There are 2 general approaches introduced by the app: manual resource selection and automatic one. You can set the way the resources are distributed on the related resource type's card. For that:
1. Open the module Appointments
2. Go to the tab Resources > Resource Types
3. Start creating or editing a resource type
4. In the field resource selection, choose either manual or automatic
Manual resource selection may be applied in case each resource is unique, and you prefer to give clients a right to select among those. For example, a customer would like to be consulted by a certain doctor or to be serviced by a definite hairdresser.
Automatic allocation is configured per each resource type depending on your business specifics.
5. Choose the way the resource will be assigned in the field 'Resource Allocation Method'
The distribution method is applied in cases where automatic resource selection is chosen. Or, when the client can't choose between the resources and selects several ones or all.
You can configure and distribute resources by workload, appointment number, and order.
Automatic distribution by resource workload lets assigning appointments according to the total planned duration of all open appointments. For example, it might be fair in beauty salons to equally spread tasks.
Automatic allocation by appointment number does not take into account real duration, but only absolute quantity. For example, it might be suitable for tire mounting where the price is set up not per duration but per unit.
Automatic distribution by order means that each resource has its own priority, and allocation is done on a queue basis. Thus, the resource with the highest priority would always be chosen until it has available slots for the target moment. After that, the second-important resource is under consideration until it is also occupied, and so on. For example, such an approach might work for facilities booking or car rental.
6. Click 'Save'.
When an automatic allocation is chosen, the step 'Choose resource' is skipped. Automatic allocation - applied when all resources are considered equally good for clients. For example, customers would hardly compare Opel Astra 1234 vs. Opel Astra 1235.
Even if you chose the manual resource allocation, it is still not necessary for the managers/clients to choose a particular one. If they aren't sure which resource to choose, then they can select several resources (so the algorithm assigns one of them based on the resource allocation method).
If one resource is chosen for several services, then, when the time is booked by one service, it will not be available for further booking by another service as well.
Extra Alias Calendar
For each resource alias, of both material and human kind, you can set the "Extra Alias Calendar". The calendar will be used to generate the available time slots for aliases. The alias will be available for booking at the intersection of the main resource and extra alias calendar. For example:
- The main resource is available: Monday - Friday 10 am - 6 pm;
- The alias is available: Monday 8 am - 12 pm; Friday 10 am - 4 pm
- So the available time to schedule the appointment for the alias will be Monday 10 am - 12 pm and Friday 10 am -4 pm.
If the extra alias calendar is not set, then the reservation of the alias will be done in the usual way, based on the available time of the main resource.
To set Extra Alias Calendar:
1. Go to Universal Appointments > Resources > Resources
2. Start creating or editing an alias
3. In the field 'Alias Working hours' choose a working calendar among the available ones or create a new one.
This way, the same resource may relate to different resource types and be available either at the same time, or at different times, depending on your choice.
Extra Calendar Restriction
For each service, you can set the "Extra Calendar Restriction", which If selected, further limits the time available for booking. The service will be available for booking at the intersection of the resource and service calendar. For example:
The service is available: Monday 10 am - 2 pm; Tuesday 4 pm - 6 pm
The resource is available: Monday 8 am - 12 pm; Tuesday 10 am - 4 pm
So the available time to book the service will be Monday 10 am - 12 pm.
If the extra calendar restriction is not set, then the reservation will be done in the usual way, based on the available time of the resource.
To set Extra Calendar Restriction:
1. Go to Universal Appointments > Resources > Services
2. Start creating or editing a Service
3. In the 'Settings' tab find the line 'Extra Calendar Restriction'.
4. Choose a working calendar among the available ones or create a new one
5. Click 'Save'

Extra Resources
On the service card, it is possible to specify the additional resources to provide the service. Then, when booking (both in the backend and in the portal), the system will take into account calendars not only of the main resource but also of the additional ones. In order, for the time slot to be available for booking, both the main and the additional resources should be free. For example, in our language school, we have human resources (teachers). For the service 'Lesson', also another resource is required – 'Room'. When the room and/or teacher is busy, it isn't possible to book a lesson.
A single resource can serve both as the main one and as an additional resource for another one. If the main resource is already booked for a particular time, then it cannot serve as an additional one at this time and vice versa. For example, the resource 'Room' is the main resource for the resource type 'Rent'. If it is booked, then that time becomes unavailable for booking the lesson as well.
To assign extra resources to provide a service:
1. Start creating or editing a service
2. In the tab 'Settings', find the section 'Extra Resources Required'
3. Click 'Add a line'
4. Optionally, write the reference, to explain what the line stands for
5. Optionally, choose the resource type/types alternatively
6. Optionally, choose the resource/resources alternatively
7. Optionally, choose one more required resource by adding another line (rule)
8. Click 'Save'
When there are several resources to choose from, but you need only one of them to provide a service add them in one line. When you choose a resource type in the table, then one of its resources will be used as an additional one, upon booking the service. If several resource types are selected in a single line, then one of the related resources will be used as an additional one, upon booking the service. For example, for the service Tooth Stooping, we also need a room. Add extra resources 'Room 1' and 'Room 2'. Then, upon scheduling an appointment, one of them will be also booked.
When several resources must be available add them in different lines. The time of all the required resources will be checked to generate the available time slots. For example, for the service Tooth Stooping, we need both a room and an assistant. Then, upon scheduling an appointment, both a room and an assistant will be booked.
Change the order of the lines/ options inside the line, to change the priority of the resources. For example, if we have chosen two rooms in one line in the order (Room 1, Room 2), then the availability of the resource 'Room 1' will be prioritized and checked first. If there is a second line with the assistant, in the order (John, Eva), then, John will be prioritized over Eva and the additional resource 'Room' will be prioritized over 'Assistant'. The order of checking will be (Room 1, John), (Room 2, John), (Room 1, Eva), (Room 2, Eva).
It is necessary that at least one combination is possible. Otherwise, there will be no available time slots. Keep in mind, that one and the same resource cannot serve as both primary and additional resources for the same service. So John can't be a dentist and his assistant at the same time. Such combinations are excluded from time slots.
While scheduling an appointment for the service, that requires the extra resources, you will see the line that warns you about the additional resources. Hover over the line to see what resources are required. The most suitable combination is assigned automatically according to the chosen allocation method of the resource type related to the extra resources.
In case, it isn't possible to book any of the required resource types/ resources from a single line, then the app will show a warning. Such a situation may appear when the required resource types/resources are archived. In order to show the available time slots, at least one combination of extra resources should be available.
If you didn't finish the appointment, but the pre-reservation was created, then on the pre-reservation card you will also see the resources that will be booked additionally upon completing the scheduling.
As you finish scheduling an appointment, on the appointment's card, you will see the field 'Extra resources' with the additionally booked resources.
When you search by resource in the calendar or filter the appointments in the calendar in the right navigation interface, you may see more reservations, than, when you search/filter only by the resource type. The appointments, where the resource is used as an extra resource are also shown. For example, if you select the resource type 'Dentist' you may not see any reservations but is you select a particular dentist 'Anita Oliver', you may see the appointments if she takes part in them as an additional resource.
On the resource card, you can see the number of reservations related to this resource. The number also includes the reservations where this resource is an additional one.
Service Duration
The duration of the service is the time required for providing a particular service. Duration is applied per each service individually according to the set of rules. Duration is defined either in hours (for example, it might be suitable for consultations, and lessons) or in days (for example, applicable for room, car, or equipment rental).
The duration of the service can be either fixed or applied manually according to the preset rules.
The fixed/rigid duration for service is the one used by default when generating time slots. This cannot be changed in the process of booking. For example, it may be useful in a language school, where the lesson always lasts 45 minutes, or in a dental clinic, where the standard tooth stopping takes an hour.
It is also possible to let clients/managers select the duration of service manually while booking. It is particularly useful for hotels and car rental business types. For example, a hotel room might be booked for a various number of days.
For the manual duration, it is possible to apply restrictions: what is the maximum/minimum order, and what should be the multiplier. For instance, you can simply apply the rule: a service should last not less than an hour, not more than 8 hours, but the duration should be always multiplied by 30 minutes (1:20 is not possible, while 01:00 and 01:30 are fine).
To set the duration of the service:
1. Go to Universal Appointments > Resources > Services
2. Start creating or editing a Service
3. Find the field 'Appointment Default Duration', and define whether appointments should be scheduled for hours or for days, and set the time
This time will be applied by default when generating the available time slots, even if the manual duration is allowed. For example, if I try to book a room and the default duration will be 2 days, then after getting to the step with the time slots, the available slots will be calculated for 2 days (06/23/2022 - 06/25/2022; 06/25/2022 - 06/27/2022).
4. Optionally, allow manual duration by ticking the box 'Allow Manual Duration' in the 'Settings' tab
After that, you will see the fields to set the rules for the manual duration.
In the field 'Min Duration in Hours/Days', set the shortest period of time which should be available for booking. For example, if you set it as 2 days for a hotel room, then it will not be possible to book the room for a day.
In the field 'Max Duration in Hours/Days', set the longest period of time which should be available for booking. For example, if you set it as 14 days for a hotel room, then it will not be possible to book the room for more than 2 weeks.
In the field 'Multiple for Hours/Days', define how manual duration should be rounded. For example, if you set it as 2 days for a hotel room, then it will not be possible to book the room for 1, 3, 5, 7, etc... days. Instead, the room will be available for 2, 4, 6, 8... days.
5. Click 'Save'
Slot Step
The Slots Step field, allows generating time slots flexibly, including allowing overlapping ones. This way, you can set the step with which time slots will be created. For example, if we reserve service with a duration of an hour and the step of the service is set as 0:30 min, then the generated slots will look the following way: 09:00-10:00; 09:30-10:30; 10:00-11:00, 10:30-11:30. After booking the time slot 9:30-10:30, the time slots 09:00-10:00 and 10:00-11:00 will be unavailable for further booking. It might be useful in a beauty salon with an unloaded schedule.
If the step is equal to the service default duration, then it will not be overlapped (in case the manual duration is disabled). For example, if we reserve service with the duration of an hour with the step 01:00 hour, then the generated slots will look the following way: 09-10; 10-11; 11-12. It might be useful if there is no need to have breaks between the appointments, for example, in the rental business.
If the step is bigger than the service duration, that will result in the breaks between the available for booking a time slot. For example, if we reserve service with the duration of an hour with the step 02:00 hour, then the generated slots will look the following way: 09-10; 11-12. It might be useful to manage a hospital when after certain procedures, it is required to prepare the room and tools for the next client.
It is possible to set the slot step for both services with the duration in days and hours. For example, if we have a service '7 days tour', and choose the slot step as 1 day, then the available time slots will be 01.08 - 08.08, 02.08 - 09.08, etc. In order to avoid intersections, make the slot step equal to the service duration. For example, if we have a service '7 days tour', and choose the slot step as 7 days, then the available time slots will be 01.08 - 08.08, 09.08 - 17.08, etc.
The slot step can be assigned on the service card, the tab 'Settings', field 'Slots Step'.
Checkout Period
Specify the time required for completing the reservation, without the participation of the client. This setting allows showing the client what time he/she should finish receiving the service. At the same time, the resource will be blocked for the entire selected time (the time for providing the service and the checkout period). The selected while booking time slots will show the time for the client, and the time on the appointments card in the backend will show the real booking time.
It is particularly useful, in a hotel business, when some additional time is required for the room cleaning, before making it possible for further renting. For example, the room is reserved from 14:00 01.08 to 12:00 10.08 (10 days), where the start round is set as 14:00, and the checkout period is set as - 02:00 hours (14-2=12; that is, 12:00 - checkout time). At the same time, in the backend, the resource 'Room' is reserved for the service 'Rent' from 14:00 01.08 to 14:00 10.08 (i.e. full time).
It is possible to set the checkout period for both daily and hourly services. You can set the checkout period on the service card, in the tab 'Settings', field 'Checkout Period'.
Start&End Day Restriction
As you switch to the daily default duration of service, two extra fields are shown: Start Day restriction & End Day restriction. Each of the fields represents a rule, that keeps the information about the set of days of the week and/or a set of specific dates on which the reservation cannot start/end. For example, you can specify some special weekends or holidays. When creating a new reservation, these rules are taken into account, and the application doesn't show the slots, where the beginning or end is prohibited.
To create a rule, on the service card, in the tab 'Settings', just start writing the reference in one of the fields Start Day restriction/End Day restriction, and choose the option 'Create&Edit'. You can add several rules in one field. The rules can be further reused for other services.
For example, the resource 'Boat rent' is available 24/7, but the beginning and end of its service 'Boat m21' cannot fall on weekends (Sat, Sun). If the service lasts 3 days, and the current date (20.08 Sat), the nearest start of the service may be 22.08 (Mon). The service cannot start on Thursday and Friday, as in this case, the end will fall on the weekend.
It is also important to keep in mind the time requirements of the related resource type. For example, if according to the requirements we cannot make the reservation later than a day before the appointment, then if the current date is 21.08(Sun) and the time is 15:00, then the closest available for the booking date will be 23.08 (Tue), as the start time of the service is 12:00 and it would be less than a day before it.
In case the 24/7 service starts at 00:00, the module would remove a second, to make it possible to book the day before the End Restricted Days. For example, we have a daily service 'Boat m21', and restricted starting it during the weekend. In order to book the whole day, we need 24 hours available. At 00:00 already starts another day. That would make it impossible to book on Friday, but the module removes one second (00:00 - 23:59), so the only booked day is Friday.

Pre-reservation
When a manager/client starts reserving service and chooses a time slot, pre-reservation occurs. The pre-reservation is an appointment that wasn't confirmed. When the time slots are generated, pre-reserved slots, as well as reserved ones, aren't shown or available for selection.
Pre-reservation is canceled automatically. By default, the time for pre-reservation is set as 30 minutes, and after that time, if not completed, the slot is unblocked. It is possible to set a different time for the reservation. For that:
1. Open the Appointments app
2. Go to Configuration>Configuration
3. Find the section Business Appointments Options
4. In the 'Maximum Period for Pre-Reservation' set the time
When a client chooses a timeslot (), above the form appears the timer (with the time you have set). During this time, the client should complete the appointment process by filling in the details and confirming the appointment. Once the time is over and the booking process isn't completed, then the slot becomes unblocked and available for further bookings.
If a manager chooses a time slot in the backend, that also results in a pre-reservation. It is particularly useful, in case, there are several managers to avoid booking the same time slot. As soon as one of them reserves the time slot, it will no longer be available for selection.
Even if, the managers will generate the same slots simultaneously, as soon as one of them chooses a particular time slot, the second one will not be able to select the same one.
If the manager returns to the previous steps by clicking the 'Cancel' button, or by clicking the cross in the top right corner - the pre-reservation will be canceled.
If the manager is unable to complete the reservation, for example, if the page is refreshed or closed, then the time slot will remain pre-reserved. After the set time, it will be canceled.

You can see all pre-reservations valid at the moment by clicking on the tab 'Pre-reservations' in the systray. It is a technical menu, which is shown for informational purposes only. The history of pre-reservations is not kept, so, if there aren't any active pre-reservations, then the menu is empty.
Meetings Calendar
Also, the resource type card has the option 'Calendar Events as Busy Time. If the option is ticked, then for periods when a responsible user has meetings (i.e. events assumed by the Odoo calendar), appointment booking will not be possible. For example, when we have resource 'Room 5' with the teacher as a responsible user Anita Oliver, then the time, when the user has meetings will not be available for booking.
If the resource is set as Human (), then the working calendar of the employee is used to generate available time slots. And if the option 'Calendar Events as Busy Time' is turned on, then the meetings of the employee are also considered. For example, our dentist Anita Oliver has two meetings on her calendar. The first meeting is on the 13th of July, she organizes the meeting and it lasts the whole day. So, the date is unavailable for booking. The second meeting is on the 20th of July 10:00 - 11:00, and she is an attendee. This hour will be unavailable for booking an appointment. Anita has another meeting on the 2nd of July, but it will not be taken into consideration for booking time slots as it is on Saturday and it isn't a working day for Anita.
Time Requirements
Per each resource type, define when an appointment might be scheduled. This way the time slots will only be generated for these days. For that:
1. Go to Universal Appointments > Resources > Resource Types
2. Start creating or editing a Resource type
3. Find the section 'Time Requirements'
4. Set a time after which the slot will not be available for booking in the field 'Reservation should be done in'
You can set a time, after which a time slot will no longer be available for booking. The time can be set in minutes, hours, days, weeks, months, or years. For example, when there are only a few minutes left before the lesson's time, a teacher will hardly be ready for it.
5. Set the time available for booking in advance in the field 'Reservation should not be done after'
You can set a time in which the time slot can be booked. The time can be set in hours, days, weeks, months, or years. For example, it is hardly a good idea to book a dentist appointment a year in advance as during this time many things may change.
6. Set the time available for cancellation and rescheduling in the field 'Portal: Cancellation/Re-Schedule might be done in'
You can set a time after which it will not be allowed to cancel or reschedule an appointment. The time can be set in hours, days, weeks, months, or years. For example, forbid to cancel or reschedule booking a room in a hotel 2 days before. As this time might not be enough to find the new visitors.
7. Click 'Save'

Rounding Time
The app allows defining the rule to round time slots start. This is useful in case the applied restrictions resulted in a calculated start you do not like. For example, an hour-long service starting at 12:23 is hardly good. To solve the problem you can simply set up rounding for an hour.
To get a nice starting time:
1. Start creating or editing a service
2. In the 'Settings' tab find the option 'Start Round'
3. Set a rounding rule
4. Click 'Save'
The rule can be defined through the field 'Start round' for the services, which default duration is set in hours. For the daily services, the field is replaced by 'Start Time', which allows stating the time at which the service should start.
For example, if an appointment is available now after 14:12 tomorrow. Then, the rounding for:
0:05 - would round start to 14:15
0:10 - would round start to 14:20
0:30 - would round start to 14:30
1:00 - would round start to 15:00
02:00 - would round start to 16:00
24:00 - rounding for the day - would round start to 00:00
32:00 - rounding for the day and 8 hours - would round to 08:00 the next day
When you set the rounding/start time, you set the time in the server's timezone. So, when the time slot is booked the time may look different as another timezone may be applied as the default one in configuration / or might be chosen manually by a manager / a client. For example, for the hotel, we have set the start time for the daily service 'Room' as 12:00, but as we start booking a time slot all the available ones start from 13:00. As our system's timezone is GMT +2 and the manager works remotely from the city with the timezone GMT +3.
Take into account that rounding is done in working calendar timezone.
Multi Time Zones
The module supports a multi-timezone regime. You can set a default time zone for booking an appointment or choose a timezone manually while booking from both the backend and frontend (). This feature is particularly useful, for international companies and for the travel business to avoid confusion about the time of the appointment.
To choose the default timezone:
1. Open the Appointments app
2. Go to Configuration>Configuration
3. Find the section Business Appointments Options
4. Find the option 'Company Timezone' (If hidden, untick the option 'Different Time Zones')
5. Define time zone to show time slots
6. Click 'Save'
After that, the chosen timezone will be applied and shown above the timeslots while booking an appointment from both the backend and frontend.
Sometimes it might be useful to let managers/clients choose a timezone while booking. In this case, when choosing time slots, by default the timezone will be applied. However, it will still be possible to switch to another timezone with the help of the selection field above the timeslots. For example, if you have an online language school, some customers might be from various countries.
To allow choosing a timezone:
1. Open the Appointments app
2. Go to Configuration>Configuration
3. Find the section Business Appointments Options
4. Tick the option 'Different Time Zones'
5. Click 'Save'

Keep in mind that there are several timezone settings, that may affect the way the timeslots are displayed. Those are:
1. Timezone of the user
2. System timezone (set on the computer/browser)
3. Timezone, chosen in the appointment configurations as a default one
The user sees the appointments in the calendar according to the user's timezone. For example, if our teacher 'Anita Oliver' is from London, and her user's timezone is UTC/GMT +1 hours. Then, it is natural to show the appointments in her time, so she knew the right time of her lessons.
It is important to make sure that the timezone of the user matches the timezone of the system (set on the user's computer/browser). As the time in Odoo interfaces is shown in the user's timezone, while the functionality will be applied in the default (set in appointment configurations) or system's time. For example, you will choose the time slot as 9:00 in GMT -4, and in the calendar, it would be shown in the user's time GMT +2 as 16:00.
Complex Examples
Here you will find examples, of the settings that influence time slot generation:
1. Duration of service: Tooth stopping lasts for 45 minutes, Surgery for 2 hours.
2. Own calendar of the resource and time offs: We chose a particular employee (), whose working calendar will be taken into consideration while calculating available time slots (Standard 40 hours/week). Since we have assigned employees as resources for these resource types, we don't want the appointment to intercross with the planned meetings of employees, so ticked the box Calendar Events as Busy Time.
3. Extra Resources: We have added 2 extra resources to Tooth Stopping (a room and an assistant) and 1 extra resource for the surgery (a room).
4. The Extra Calendar of services: Standard 20 hours/week for Tooth stopping.
5. Slot Step: We set the slot step as 01:00 for Tooth Stopping and 02:00 for Surgery, so the generated time slots will be equal the duration of the service.
6. Time Requirements: We want our clients to book their appointments at least the day before the time of the appointment and no more than 30 days before the appointment. The client may cancel or reschedule the appointment no later than a day before the appointment.
7. Rounding Time: Rounding is set as 1:00 for both services.
8. Resource allocation: We want to allow our clients to choose the Dentist, so the Resource selection is set as: Manual. The Resource Allocation Method is set as: By Workload.
1. Duration of service: both Lesson and Consultation last for 45 minutes.
2. Own calendar of the resource and time offs: We chose a particular employee (), whose working calendar will be taken into consideration while calculating available time slots (Standard 40 hours/week). Since we have assigned the employees as the resources for these resource types, we want the appointment not to intercross with the planned meetings of employees, so ticked the box Calendar Events as Busy Time.
3. Extra Resources: We have added an extra resource (a room) to the services.
4. The Extra Calendar of the service: We didn't set Extra Calendar to any service.
5. Slot Step: We set the Slot Step as 01:00 for Lesson and 00:15 for Consultation, so the clients could book the time slots flexibly.
6. Checkout Period: We added the checkout period as 00:15 minutes to Lesson, so the teachers had a break between lessons. However, it wasn't necessary in this case, as the start round for the service is set as 01:00 and the lesson takes 00:45 min.
7. Time Requirements: We want our clients to book their appointments at least the day before the time of the appointment and no more than 30 days before the appointment. It isn't allowed to cancel or re-schedule the lessons (0).
8. Rounding Time: We don't add Extra Calendar Restriction to fully rely on the related resource's calendar.
9. Resource allocation: We don't want to allow our clients to choose a teacher, so the Resource selection is set as: Automatic. We want the lessons to be distributed equally among our teachers and as the duration of a lesson is fixed as the Resource Allocation Method we choose: By Appointments Number.
1. Duration of services: The cars are rented on a daily basis. The renting time can be chosen manually, but shouldn't tale less than a day.
2. Own calendar of the resource and time offs: We chose a working calendar as 24/7 Non-stop, as the car is rented on a daily basis, so the whole day should be available.
3. The Extra Calendar of the service: We didn't set Extra Calendar to any service.
4. Slot Step: The Slot Step is set as 1 day, so the generated time slots will be generated with the step of 1 day.
5. Checkout Period: The Checkout Period is set as 2:00 hours, so the clients should return the car not at 00:00, but at 22:00, although the car will be booked for the whole period.
6. Start&End Day Restriction: Although the weekend might be included in the booking. It isn't allowed to start/end booking during the weekend. So, we created a rule and specified the days of the week, when the reservation cannot start and end.
7. The Extra Calendar of the service: We didn't set Extra Calendar to any service.
8. Time Requirements: We want our clients to book the appointments at least the day before the time of the appointment and no more than 90 days before the appointment. The client may cancel or reschedule the appointment no later than a day before the appointment.
9. Rounding Time: Rounding is unavailable for daily service. The start time for the services is set as 00:00.
10. Resource allocation: We don't want to allow our clients to choose the exact type of car as there isn't much difference between the cars of one class, so the Resource selection is set as: Automatic. There is no difference what car is chosen, so as the Resource Allocation Method we choose: By Order. This way if the first car in the list is available, it will be assigned for the appointment. When it isn't available, then the second car in the list will be assigned and so on.
1. Duration of services: The rooms are booked on a daily basis. The booking time can be chosen manually, but shouldn't tale less than a day.
2. Own calendar of the resource and time offs: We chose a working calendar as 24/7 Non-stop, as the rooms are booked on a daily basis, so they should be available all day.
3. The Extra Calendar of the service: We didn't set Extra Calendar to any service.
4. Slot Step: The Slot Step is set as 1 day, so the generated time slots will be generated with the step of 1 day.
5. Checkout Period: The Checkout Period is set as 2:00 hours as we need the time to clean the room for the next guests. So the clients should move out at 12:00.
6. Time Requirements: We want our clients to book the appointments at least the week before the time of the appointment and no more than 90 days before the appointment. You are allowed to cancel or re-schedule the room no later than a week before the appointment.
7. Rounding Time: Rounding is unavailable for daily service. The start time for the services is set as 14:00.
8. Resource allocation: We want to allow our clients to choose a room (with or without a balcony), so the Resource selection is set as: Manual. The Resource Allocation Method is set as: By Workload.
1. Duration of the services: We have set the default duration of each service (Antalya, Dubai) as 7 days and 10 days.
2. Own calendar of the resource and time offs: We chose a working calendar as 24/7 Non-stop, as the tours are booked on a daily basis.
3. The Extra Calendar of the service: We didn't set Extra Calendar to any service.
4. Slot Step: The Slot Step is set as 1 day, as the tours start every day.
5. Checkout Period: The Checkout period is 12 hours as the last night isn't spend in the hotel. The clients must leave the hotel before the midnight and get to the flight.
6. Start&End Day Restriction: The tours don't start at the weekend.
7. Time Requirements: We want our clients to book their appointments at least 15 days before the time of the appointment and no more than 365 days before the appointment. You are allowed to cancel or re-schedule the tour no later than 15 days before it.
8. Rounding Time: Rounding is unavailable for daily service. The start time for the services is set as 12:00.
9. Resource allocation: We want to allow our clients to choose the resource, so the Resource selection is set as: Manual. The Resource Allocation Method is set as: By Workload.
Managing Appointments
Appointments can be scheduled either from the frontend (see Website Booking Process) or from the backend (see Scheduling Appointments: Backend). In the convenient single-view interface, you will see all reserved appointments, regardless of the way they were booked.
See appointments on the daily, weekly, monthly, and yearly calendar view. Search, filter, and group the appointments to find the required ones quickly. Create and manage appointments right from the calendar.
Instantly access information about an appointment. To view the short preview, just click on an appointment in the calendar. Click 'Edit' to be redirected to the appointment card. From the appointment card, change the appointment's stages and re-plan the appointment if necessary.
Specify the client's email and mobile/phone number while scheduling an appointment for efficient interaction with them. Send messages, feedback requests, and confirmation emails.
Create alarms to notify users and/or clients about upcoming appointments. Select default alarms for each resource type, so they will be automatically applied to all new appointments of this type.
Appointments Calendar
The single view interface allows filtering by appointment details and getting instant access to required information about the appointments. The interface consists of the main part with the calendar and the right part with functional elements.
In the main part of the calendar, you can see and manage reservations. It is possible to see the appointments in the daily, weekly, monthly, and yearly view. To switch to the required one, just click on it above the calendar. By default, the events are shown in the monthly calendar.
Move between the periods in the calendar with the help of the arrows above it. Click on the 'Today' button, to return to the view with the current day.
Use the filters and search bar to find the appointments you need quickly. Filter appointments to see only your appointments, planned appointments, appointments that are planned but already late, or add a custom filtering option.
To search through the appointments, start typing the keyword in the search bar and choose the related search option. The available search options are Reference, Resource, Service, Contact (the client), Type (resource type), and Sale Order ().

The right side of the single interface serves for navigation purposes. There you'll see a smaller calendar, and a list of available resource types, resources, services, and appointment states.
A small monthly calendar allows switching to a particular day quickly. Just click on any day, and it will be opened in the main part of the interface. Click once to see the day in the weekly view, and click twice the time to see it in the daily view. To move between months, use the arrows above the calendar.
Choose a resource type, resources, a service, and stages or a combination of them to see the related appointments. When you choose a resource type, the selection of the resources and services is limited to only the related ones. If the resources have different sets of services, then as you select the resource/some resources, the list of services is also limited to only the ones related to the resource/resources. Click on the reset button '' by the resources, services, or states to see the appointments for all available options.
When you search by resource in the calendar or filter the appointments in the calendar in the right navigation interface, you may see more reservations, than, when you search/filter only by the resource type. The appointments, where the resource is used as an extra resource are also shown. For example, if you select the resource type 'Dentist' you may not see any reservations, but if you select a particular dentist 'Anita Oliver', you may see the appointments, if she takes part in them as an additional resource (see Extra Resources).
Click on the 'Save as default' button at the bottom of the right navigation panel to save the resource type, resource, service, and states combination for your user and apply it automatically every time you open the appointments app. Only one combination may be applied per user. To change it, just choose a different set and click 'Save as default'. The feature is particularly useful when the responsible user manages the appointments itself or has a personal manager, this way the set of resource types, resources, and services may be fixed.
To create an appointment, simply select the day range on the monthly/yearly/weekly view or click on any time slot on the weekly/daily view and specify the details (see Scheduling Appointments: Backend).
Appointments Card
Instantly access information about an appointment. To see the short preview just click on an appointment in the calendar. There you will see the information about the appointment's reference, date and time, duration, service, resource, extra resources, resource type, and contact. Click on the service, resource type or contact to be redirected to the related card with the details.
In the single view interface, click 'Delete' on the short preview card to delete the appointment permanently. Click 'Edit' to be redirected to the appointment card.
On the appointment card, you will find all the information about the appointment. Start editing an appointment to optionally add one of the available alarms to the appointment, and change the contact, pricelist, or website. However, you cannot change the resource type, resource, service, or time manually. This should be done through re-scheduling to avoid conflict (see Re-scheduling).
To change the resource type, resource, extra resources, service or time of the appointment, use the re-scheduling wizard.
Above the appointment, you will find the 'Start working' button, which will help you to launch the time tracking (). When you want to make a pause or the appointment is over, click 'Finish working'. The total duration can be seen in the 'Time Tracking' tab. In the same tab, you can also add the working time manually. This way you will be able to charge the client for the exact time spent providing the service (see Universal Appointments: Time Tracking).
When you track the time, the responsible person is recorded automatically as the user, that launched the timer/added the working time. You can change the person in the field 'Responsible'.
If the time was recorded with a mistake, you can delete the record by clicking on the 'Delete' button.

From the appointments card, in the tab 'Extra products', you can add some complementaries. However, this action will not result in adding those products to the generated sale order. To submit the additional products and add them as sale lines, after saving the changes click on the button 'Adapt Sale' (). After that, the changes will be applied and added to the related sale order.
As soon as the sale order is confirmed, it is no longer possible to add the products. The 'Adapt Sale' button will not be visible on the appointment card.
State Changing
In the top right corner, you will find the buttons to manage the appointment states. Click on the buttons 'Mark done', 'Mark missed', and 'Cancel' to change the appointment stage. Even if you accidentally marked the appointment as done or canceled it, you can still reschedule it by clicking on the button 'Re-plan'. After that, the appointment will return to the stage 'Planned'. As you mark an appointment done or cancel it, its time slot becomes vacant and might be occupied by another reservation, and thus be unavailable for re-planning.
If you switch between the stages, then the followers might receive the notification, if the related option for notification is set (see Appointments Discussion).
Keep in mind that some status changes may lead to follow-up emails to the client. For example, if set on the related resource type's card, as soon as the appointment is moved to the stage 'Mark Done', then an email with the client satisfaction survey will be sent to the contact.
Re-scheduling
It is not possible to change the resource type, resource, service, or date of the appointment by editing it. For that, a special re-scheduling wizard is used. The re-scheduling process is similar to simple scheduling, but the details are entered by default, however, can be changed.
Keep in mind that during the rescheduling it isn't possible to change the contact. But you can do that through the simple editing of the appointment. And, you can edit the contact itself in the standard menu 'Contacts'.
There are two ways to launch the re-scheduling wizard. The first one is simply by drag&drop of the appointment in the calendar of the single view interface. In this case, the available time slots will be searched in the day range to which you dropped the appointment. Optionally, you can change the dates for rescheduling. For example, if we drag&drop the appointment for the dentist, Anita Oliver, from the 1st of July to the 8th of July, then in the initiated re-scheduling wizard the available time slots will be generated only for the 8th of July. However, the date can be changed in the line 'Search in Dates'.
The second way to re-schedule an appointment is through the button on the appointment card. For that, click on any appointment on the calendar view and then on the button 'Edit'. In the top right corner of the appointment card, find the button 'Re-schedule'. Click on it to initiate the re-scheduling wizard. There you will see the time slots for all available days, you can limit the search by specifying the dates in the field 'Search in days'. For example, we have a reservation for our dentist, Anita Oliver, on the 1st of July. If we open the appointments card and click on the button re-schedule in the top right corner, we will see that all available dates are generated and the field 'Search in dates' is empty and therefore does not limit the search. According to the resource type's time requirements, we can book an appointment no later than 4 hours before and no earlier than 30 days after the appointment, and only the related time slots are generated (see Time Requirements).
Not only you can change the day and time, when rescheduling an appointment, but also the other appointment details, such as resource type, resource, and service. Keep in mind, that during the rescheduling it isn't possible to change the contact.
The process of rescheduling isn't finished until the new time slot is chosen and the details are confirmed. Hence, the currently occupied time slot will not be available until successfully rescheduled.

Appointments Discussion
It might be useful to discuss the appointments and let some users receive notifications about discussion, changing the appointments states, and rating. For that, the module allows adding followers and configuring options, which they should be notified of. By default, the followers are notified about Discussions, New Appointments and Recovering, and Rescheduling/Resource Update.
The followers are added hierarchically. So, if a user follows a resource type, he is automatically added as a follower of the related resources and appointments. If a user follows the resource, he is automatically added as a follower of the related appointments. The auto subscription is applied only to the resources/appointments that were created after adding followers to the resource type/resource.
When you add a user as a follower, you can also edit the options, about which the notifications should be sent to that user. For that:
1. Add a user as a follower to a resource type, resource, or appointment
2. Click on the 'Pencil' button by the follower
3. Tick all the options when a user should be notified.
The chosen set of options is also inherited according to the hierarchy. For example, if our manager Mitchell Admin follows the resource type 'English' and chooses to be notified only about 'Appointments Cancellation', then, automatically he is also added as a follower to the related resources (teachers - Doris Cole, Sharlene Rogers) and related appointments (BA-2345, BA-S2345, etc.) to receive only notifications about cancellations.
To the standard list of options (Discussions, Revisions, Activities, Note), the module also adds appointment-specific options:
1. New Appointments and Recovering
If ticked, then the follower will receive emails when an appointment is created or re-planned after being marked done or canceled. For example, our dentist Anita Oliver is our human resource (). By default, she is subscribed to her own resources to be notified about 'New Appointments and Recovering' and 'Rescheduling / Resource Update'. So as soon as a new appointment, and she is chosen as a resource, she receives a notification.
2. Rescheduling/Resource Update
If ticked, then the follower will receive emails, when an appointment is rescheduled or when a resource for the appointment is changed. For example, we have 2 dentists Ernest Reed and Anita Oliver (human resources ), at first the client booked an appointment with Anita Oliver, but then changed his mind and asked to rebook the appointment for Ernest Reed. As our dentists were both following the related to them resources with the option 'Rescheduling / Resource Update' ticked, they were both warned about the change.
3. Appointments Cancellation
If ticked, then the follower will receive the emails when an appointment is canceled. For example, an appointment for a German lesson was booked (BA-2345). Then the client changed his mind and asked to cancel the appointment. After that, the follower Abigail Peterson, which is subscribed to the option 'Appointments Cancellation' of the related resource type (German) will receive the notification.
4. Appointment Rating
If ticked, then the follower will receive the emails when a client leaves feedback about an appointment. For example, our manager Mitchel Admin, from the quality control department is subscribed to all resource types' option 'Appointments Rating'. So, as soon as a client gives feedback on the appointment by choosing the related smile, Mitchell Admin is notified.
Sometimes there is a necessity to discuss the details of the appointment with the client. In this case, we highly recommend specifying the client's email as you create an appointment. Optionally, you can add the details later to the related contact's card. That will allow sending the emails through the related appointment's messages thread and sending the notifications to the client (success email, rating email, alarms).
Open any appointment card by clicking on the 'Edit' button in the single view interface. Below the appointment card, you will find the chat box with the messages thread. Here you can send messages directly to the client.
Follow an appointment, or add followers to get notifications about the appointment and related discussions. By default, the followers of the appointment are: the appointments manager, that has created it; the followers of the related resource type and resource, the responsible user, and the client. But, you can add some more followers, for that, click on the 'person' icon in the top right corner of the messages thread.
From the appointment card, you can also choose the options that a client should be notified about. For that, click on the 'Pencil' icon by the client. By default, the client is notified about Discussions, New Appointments and Recovering, and Rescheduling/Resource Update.
As a manager / a client () books an appointment, the client receives the success email. The success email is also sent when an appointment is rescheduled. The success email is the email that confirms the appointment and contains the details about it.
By default, the email includes the voucher for printing. However, you can decide whether to attach the voucher or not. In the tab 'Notifications' on resource type card, the option 'No vouchers in success emails' was introduced. If checked, then all the appointments of the related resources, upon completion of the scheduling process, will send the Success Email without printed voucher.
If the multi-scheduling is enabled, and several time slots for a single resource are chosen, the client will get one success email. For example, if a client calls and asks the manager to book 2 English lessons and 1 German lesson, but the teacher is the same for both, then the client will receive only one success email for all. If the German teacher (resource) is a different person, then the client will receive 2 success emails (1 for 2 English lessons and 1 for a German lesson).
When a client books several time slots from the website (), he will receive one success email for all of them, as it isn't possible to change the resource/resource type/service of only some of the time slots while booking.
The content of the email might be changed in the Configurations > Email Templates, by updating the email template 'Appointments: Success Email Template'. Optionally, you can create another one by clicking the button 'Create'.
To apply changes to the success email template or to apply your own, use the following dynamic attributes:
object - the main appointment among confirmed/re-scheduled ones. You can use any field of reservations, including:
{{ object.partner_id.name }} - the client name
{{ object.name }} - this reservation number
{{ object.resource_id.name }} - the resource title
{{ object.resource_id.resource_type_id.name }} -  the resource type title
{{ object.service_id.name }} - the provided service
{{ object.resource_id.location }} - the resource location
ctx - standard Odoo email template context enriched with the special parameters:
* appointments - the list (recordset) of appointments combined in the success email. It is possible to iterate over this recordset, and use the same fields that are mentioned above. For example:
<t t-set="appointments" t-value="ctx.get('appointments')"/>
<t t-foreach="appointments" t-as="appointment">
    <t t-out="appointment.name"/>
</t>
* reshedule - whether this reservation is confirmed or re-scheduled with the new time or resource. For example:
<t t-if="ctx['reshedule']">
    Appointment was re-scheduled
</t>
<t t-else="">
    Appointment was scheduled
</t>
* target_company - Odoo company under which this reservation was done. For example:
<t t-out="ctx['target_company'].phone"/>
* website_http_domain - website domain (if any) on which this reservation was done. For example:
<t t-out="ctx['website_http_domain']"/>
Assign a particular success email to a resource-type card. For that, in the tab notifications choose the related template in the field 'Success Email'. Only one template can be chosen per resource type.
It is possible to send a copy of the client success email to other partners, for example, to make sure that it was delivered. But, as the success email is a special type of email, you can't receive a copy just by following the related resource type, resource, and appointment. The users should be specified on the related resource's card in the field 'Success emails CC', then they will receive a copy of the related-to-this-resource success emails.
If you send a message through the chat box below the appointment, the client, the responsible for the appointment, and other appointment followers will receive it. The user that sends the message will not receive an email with it.
If you have an add-on Universal Appointments: Portal and Website, then you can turn on the appointments for portal users. This way, the clients will receive the messages through the portal as well (see Portal Control of Reservations).
You can also send an attachment through the message thread, so the client will receive an email with it. To do that, use the 'Pin' icon below the chat box.
Add a log note, which will be seen only by the internal users to leave some comments about the appointment.
System messages, such as the change of the appointment's status, are also seen only internally. The client, will not see be notified about the change in the status of the appointment. However, some status changes may lead to follow-up emails to the client. For example, if set on the related resource type's card, as soon as the appointment is moved to the stage 'Mark Done', the email with the client satisfaction survey will be sent to the contact. It will also appear in the related messages thread.
Appointments Alarms
Send alarms about the appointments. The app allows preparing 3 types of appointment alerts: pop-ups, emails, and SMS. You can quickly create those through the special configuration menu entry. Select default alarms for each resource type, so they will be automatically applied to all new appointments of this type. Otherwise, you may choose those for specific appointments.
The module has convenient menu entries to manage notifications and related templates. You will find the list of those under the section 'Notifications', as you open the appointments module and click 'Configuration'.
For example, in the Alarms menu (Configurations > Reminders), you will be able to see the settings in the related columns (remind before, interval, recipients, template), without opening the alarm. You can search or group the alarms by the type of alarm and the recipients' option.
To create an Alarm:
1. Click the 'Create' button in the separate menu, or the button 'Create' from the related field on the resource type's/appointment's card
There are two ways to create an alarm. You can either start typing an alarm's name in the related field on the resource type's/appointment's card, click anywhere and choose the option 'Create and Edit' or you can do that from the separate menu Configurations > Reminders by clicking 'Create'.
2. Choose the type of alarm
There are three available types of alarms: Email, SMS, and Pop-up (alarm as a window in the backend). SMS reminders are sent using the Odoo SMS server. You need to make sure that you have sufficient balance for Odoo SMS IAP. To check the current balance or recharge the account, go to Settings > Odoo IAP and click 'View my Services'. Read more through the links: IAP, SMS Pricing.
In order to send SMS reminders, you need to have sufficient balance for Odoo SMS IAP.
3. If you select the SMS/Email type of the alarm, choose the related template
For SMS and Email alarms you should also assign a template that is rendered based on appointment details. You can do that, either from the technical menu (Email templates, SMS templates) or by editing the template related to the module appointments. Alternatively, you can open the Appointments module, and go to Configuration > Email Templates/SMS Templates.
Menu Email Templates shows all available email templates related to appointments. From there you can create and manage the templates. The template related to the Email Alarm is titled 'Appointments: Default Email Reminder'.
Menu SMS Templates show all available SMS templates related to appointments. From there you can create and manage the templates. The template related to the SMS Alarm is titled 'Appointments: Default SMS Reminder'.
For example, you can make several different email templates to remind about an appointment 2 days before and an hour before the appointment, with a different body (Don't forget about the appointment.../We are writing you to remind you about the appointment, which is about to start...).
4. Define the time before which the recipients should be notified
It is possible to apply time ranges in days, hours, or minutes. For example, you can send an email alarm 2 days before the scheduled date and an SMS alarm 30 minutes before the appointment.
5. Define whom to notify
Email and SMS can be sent to both internal and external users. In particular, you can send such alarms to a responsible user, external followers (clients), internal followers, or all followers.
Responsible user - the user, which is chosen in the tab 'Responsible user' of the related resource. For example, Mitchell Admin is a responsible user of the resource Hotel 5 stars. If an employee represents a resource (), then the user of the related employee is also a responsible user. For example, our dentist Anita Oliver is both a resource and a responsible person. If the option to 'notify only responsible' is chosen, then only Anita Oliver will be notified.
External Followers - followers that don't have access to the Odoo backend. In order to add an external follower, its contact should be created (which can be done in the step of adding followers). The client, that calls to reserve the appointment/makes a reservation from the website, is automatically added as a follower to the related appointment. For example, there are 5 followers of an appointment: Mitchel Admin (the appointments manager, that has created it), Anita Oliver (the dentist&responsible), Abigail Peterson (follower of the related resource type), Ernest Reed (follower of the resource), Azure Interior (the client), Azure Interior USA (the client's representative, which was added manually as a follower). When the option 'notify only external followers' is chosen, then only Azure Interior and Azure Interior USA will be notified.
Internal Followers - users who have access to the Odoo backend and its functional apps, and who are added as a follower to an appointment. For example, there are 5 followers of an appointment: Mitchel Admin (the appointments manager, that has created it), Anita Oliver (the dentist&responsible), Abigail Peterson (follower of the related resource type), Ernest Reed (follower of the resource), Azure Interior (the client), Azure Interior USA (the client's representative, which was added manually as a follower). If the option to 'notify only internal followers' is chosen, then, only Mitchel Admin, Anita Oliver, Abigail Peterson, and Ernest Reed will be notified.
All Followers - both internal and external followers. For example, there are 5 followers of an appointment: Mitchel Admin (the appointments manager, that has created it), Anita Oliver (the dentist&responsible), Abigail Peterson (follower of the related resource type), Ernest Reed (follower of the resource), Azure Interior (the client), Azure Interior USA (the client's representative, which was added manually as a follower). Once the option to 'notify all followers' is chosen, all of them will be notified.
Pop-up alarms are only available for backend users.
For example, you can create an email alarm to notify all internal followers 1 day before, an SMS alarm to notify all external followers 1 hour before and a pop-up to notify only responsible users an hour before.
6. Click 'Save'
After creating, you will be able to choose these alarms on the appointments resource type's card, so the alarms are added automatically to all newly created appointments. Alternatively, you can add the alarms straight to a particular appointment card. For that just select any appointment, click 'Edit' and add/remove the alarms from the line 'Alarms' (see Managing Appointments).
For example, on the resource type 'English' of our language school, we have set 2 default alarms, one previously created 'Email: 1 day before' and one specially created right from the resource type's card 'Pop-up: 10 minutes before'. To make sure the teacher will not forget about an early morning lesson (11:00-11:45), we add an extra alarm to those appointment cards 'SMS: 15 hours before'.

To make sure that the settings are applied correctly and to control the alarms sending you can refer to the queue of alarms, which can be seen in the menu Configuration > Reminder Queue. There, you will find all the alarms, that were generated for appointments.
You will be able to see the alarm time, alarm details, and the appointment's reference right from the menu, without opening an alarm.
Search alarms by the appointment's and alarm's reference. Group alarms with reminder time, appointment, and alarm type. Delete the alarms you don't need one by one by clicking on the gear above the alarm and selecting the option 'Delete' or in a batch by ticking the related boxes, clicking on the gear above, and selecting the option 'Delete'.
Keep in mind that the default alarms, which you add to a particular resource type, are added only to newly created appointments and not to the ones, that were created before applying the alarms.
Appointments Analytics
The module provides a convenient menu to track and analyze the provided appointments through the appointments' report view.
To view the appointments report, click on the 'Reporting' tab in the systray and choose the 'Appointments analysis'. The appointments can be analyzed on pivot and graph views. By default, as you open a menu, the analysis is shown in a pivot view as a table.
Choose a measure for the analysis. By clicking on the 'Measures' button above the table and choosing one of the options. The available measures for appointments analysis are:
1. Duration
Analysis based on the appointment's duration. For example, the lesson's duration is 45 minutes and the duration of surgery is 2 hours. We have had 5 appointments so far (3 lessons and 2 surgeries). In the table, we will see the total duration of booked appointments (6.15). We can further extend the table to see the duration of booked appointments per each resource type, resource, service, etc.
2. Sale Total
Analysis of the total price of the appointments' sale orders in the default currency of the company. The tool takes into consideration the total price of a sale order, which may include additional products. The sales total is shown including the related tax. For example, yesterday 3 lessons (50$ - 57.5$ (incl.15%tax)) were booked with 3 students books (10$ each) and today 2 surgeries (220$ - 253$ (incl.15%tax)). The total will be shown as 708.50.
3. Tracked Duration ()
Analysis of the real-time spent on providing an appointment. The time that was tracked, and appeared in the tab Time Tracking of an appointment. For example, the surgery in the dental clinic lasts for two hours. As soon as the surgeon started it, the nurse clicked the button 'Start working above the appointment and the timer was launched. Upon finishing the button 'Stop working was clicked'. The total tracked time was not 2 hours, but 1 hour 40 minutes. As the pricing is set per planned duration (2 hours) and not for the tracked duration (1:40 hours), the price total will be the same. In the table, the tracked price will be used to show statistics.
4. Count
Analysis of the number of booked appointments. For example, yesterday 3 lessons were booked and today 2 surgeries. In the table, we will see the total number of booked appointments (5). We can further extend the table to see the number of booked appointments per resource type, resource, service, etc.
In the pivot view, vertically and horizontally, by default, you see only the option 'Total', which can be further extended with the options of your choice, by clicking on the '+' icon. The available options are State, Resource Type, Resource, Service, Responsible, Contact, Reserved Time, Website, Sale State, Invoice Status, and Company.
For example, let's extend it to the list of resource types, which you can further expand by clicking on the related plus. Click on the plus by the resource type and choose the option resource. Then you will be able to see the analytics for the resources as well. Click again on the plus by the resource and choose the option service to see the analytics by services as well. Some options may result in the line 'Undefined'. For example, if you choose to expand the analytics by 'website', while not using the website appointments.
Click on the plus by the vertical 'Total' to choose the expansion option. For example, choose the option state, to divide the analytics between the appointment states. For example, to see the analysis for done and planned appointments separately.
To cancel the expansion, click on the '-' icon by the parent option.
Above the table, you will find three icons. Click on the icon '' to flip the axis. So, the horizontal and vertical options will change place. This way you can achieve the perfect view of the table. For example, if you chose the expand option 'State' horizontally, the option 'Resource type' vertically and then clicked the flip button, then the option 'Resource type will be written horizontally, while 'State' vertically.
Click on the icon '' to expand all the other lines/columns accordingly to the one you have already expanded. For example, if you have several resource types and clicked on the expand button by the 'Dental clinic' to show the analysis by resources as well, only this resource type will be expanded. Click on the extend button and all other resource types will be also expanded by the same option (resource).
You can also download the table by clicking on the icon ''. The resulting document will be in the .xlsx format.

Not only you can construct the tables by expanding by clicking on the + by the parent option, but also by grouping the options. You can create different hierarchies of groupings by clicking on several options one by one. The available grouping options are the same that you see when you click on the '+' icon in the table. To reset the grouping, just click on the cross by it in the search bar. For example, click on the option resource type, then the option resource and service and you will see the following hierarchy in the search bar 'Resource type > Resource > Service'. On the table it will be shown as if you extended the option 'Total' by the resource type, then resource type by resource, and resource by service.
You can also limit the number of considered appointments by filtering them. For example, consider only done appointments for the analysis. The available filters are Done Appointments, Reserved Appointments, My Appointments, With Sale Order (), and No Zero Tracked Duration ().
To reset the grouping, just click on the cross by it in the search bar.
It is possible to apply several filters, by clicking them one by one. Then only appointments that match all conditions will be considered. For example, choose the measure as duration and apply the filter 'Done Appointments' and in the table, you will see only the statistics for the appointments that are marked as done.
Use the search bar to find only the analysis of particular appointments. For example, if we have multiple resource types including dentistry, write the word 'dental' and choose the searching option 'Resource type', then we will see the statistic related to two resource types: Dental clinic Chicago and Dental clinic New York.
The available search options are the same as the ones used for expanding and grouping.
Switch to the graph view by clicking on the right icon in the top right corner below the search bar. There are three various graphs to visualize the result. You can see the analysis in the bar chart, line chart, and pie chart.
In the bar chart and line chart, you can see the analysis in an ascending (from the lowest to the highest) or descending way (from the highest to the lowest).
Detalize the chart by applying various search parameters or grouping options and hierarchies the same way you did in the table. Simultaneously, if there are different options, which may be compared, you can see the bar chart stacked (when all the options are shown on one another instead of being placed in a row).
Click on any chart section to see all the appointments it considered for the analysis. They will be written as IDs. Click on any ID, to see the details of the appointment.
Appointments Rating
You can check the quality of provided services by referring to customer feedback, which you can get by sending the rating email. In order to collect the rating, you need to turn on the option 'Use Rating for Appointments' in the appointments' configuration. After that, you will be able to turn the option on/off for each resource type. This way the related to the resource type appointments will/will not get the email request for the feedback. To turn on the option:
1. Open the resource type
2. Click 'Edit'
3. In the 'Settings' tab, tick the option 'Appointments Customer Rating'
4. In the tab 'Notifications', choose the template that you want to use to get the feedback (the available one is Appointments: Rating Template)
5. Click 'Save'.
Change the content of the email in the Configurations > Email Templates, by updating the email template 'Appointments: Rating Template' or creating another template by clicking on the 'Create' button.
Clients should select among 3 simple "smiles": satisfied, not satisfied, and highly dissatisfied. The final rating is calculated for resource types, resources, and services.
Configure automatic requests for a customer review when the appointment is done. For that, assign a particular rating email template on a resource type's card in the tab 'Notifications', field 'Rating Email'. Only one template can be chosen per resource type.
You can see the reports with the customer rating in the menu Reporting > Customer Rating. Simultaneously, in the top right corner of each resource type, resource, and service you will find a button, that shows the related rating. Click on it to see the rate for each particular appointment.
The resulting value shows the total percentage of positive reviews. This way, the rating of 50% means, that there are half of the positive marks (satisfied) and half of the negative marks (not satisfied, highly dissatisfied). If you see the total rating of 0%, it means that there are no positive marks and there are only negative ones.
If there aren't any reviews for a particular resource type, resource or service yet, then the button with the feedback is hidden from the related card.

To see all customer marks, you can open a special menu. For that, click on the 'Reporting' tab in the systray and choose the Customer ratings. In the menu, you will be able to see the ratings in the kanban, pivot, graph, and list view.
In the kanban view, you will see the ratings as cards with the chosen client smile (satisfied/ok/dissatisfied), and the related details about the appointment. The reference for the appointment is shown as a link. Click on it to see the appointment card.
In the table and graph view, you can choose a measurement to be accessed as a count (the total number of ratings) and as a rating value (as a mark from 1 to 5). The appointments for which the client didn't send feedback aren't considered for the analysis.
In the list view, you will see the list of appointments and their details in the columns, in particular: submitted on, related operator, customer, parent document name, resource name, and the rating itself.
It is possible to delete one or several ratings by selecting them, clicking on the gear above, and choosing the option 'Delete'.
In all the views, you can search, filter, and group the rating. The available search options are Related Operator, Customer, Appointment, Parent Document Name, Resource, and Service. The available filtering options are My Ratings, Satisfied, Okay, Dissatisfied, Today, Last 7 days, Last 30 days, Submitted on (various periodic options), and Creation Date (various periodic options). The available grouping options are Rated Operator, Customer, Rating, Appointment, Resource type, Resource, Service, and Date.
You can combine various search, grouping, and filtering options. In this case, only the records that match all the conditions are shown. For example, in our dentistry, we can choose the search option as the customer (Azure Interior), the filtering option as last 30 days, and the grouping option as rating (satisfied). To remove the selected search, grouping, or filtering, just click on the cross by it.
Appointments Numeration
Appointment numeration works based on the standard Odoo functionality - sequence. As soon as an appointment is created, it is numbered automatically. You may change the numbering logic (suffix, prefix, step, etc.) by configuring the related Odoo sequence.
The new number is applied only to newly created appointments. This way, if you previously had some appointments, their reference numbering will not be changed. This way you will be able to keep track of the previously created appointments. For example, in our company, we used to generate appointments by adding the prefix BA-%(year)s/, where %(year)s is the legend for extracting the year with the century (for example, 2022). We have removed the prefix and added the suffix LS, which is the initials of our company. After saving, the previously generated numeration for the appointments didn't change, it is still of a format BA-2022/056. But the newly created appointment is numbered '001LS'.
In order to change the appointments numeration:
1. Go to General Settings
2. Activate the developer mode
3. In the systray, go to Technical > Sequences
4. There find the sequence related to the module Universal Appointments (business.appointment) and click on it
5. Click 'Edit', to change the way the appointments
6. Choose the implementation way as 'Standard' or 'No gaps'
While assigning a sequence number to a record, the 'no gap' sequence implementation ensures that each previous sequence number has been assigned already. While this sequence implementation will not skip any sequence numbers upon assignment, there can still be gaps in the sequence if records are deleted. The 'no gap' implementation is slower than the standard one.
7. Choose the company for which the numeration is changed (see Multicompanies & Multiwebsites)
Appointment numeration supports the multi-company regime and might be assigned for each company. Or, leave the field empty, to apply the numbering to all companies.
8. Optionally, assign prefix and/or suffix
If you add a prefix, then this value will be written before the appointment number. For example, BA066.
If you add the suffix, then this value will be written after the appointment number. For example, 066BA.
To use numeration without suffixes or prefixes, just miss the step. For example, 1, 01, 001, etc.
9. Assign the sequence size
The sequence size is the number of signs used to number the appointment. If the number has fewer signs, then Odoo will automatically add some '0' on the left of the 'Next Number' to get the required padding size. For example, if I set the number as 3, then my appointment's numbers maybe 001, 010, 055, 100, etc. If I set the number as 2, then: 01, 08, 10, 100, etc.
10. Set the step
The next number of the sequence will be incremented by this number. The step must not be equal to 0. For example, if I set the step as 2, then I may have the following appointments name: 002, 004, 006, 008, etc.
11. Set the following number
Once you create a new appointment, this number will be used. For example, if you specify the next number as '50', then the next appointment will be BA050. The further one will be BA051, etc. Simultaneously, in the settings, you will see that the next number changed from 50 to 52.
12. Optionally, tick the box 'Use subsequences per date_range'
If you want the appointment number to start from a particular number during the particular dates, then the option might be useful. After enabling it, you need to specify the dates during which the appointment sequence will start from a particular number and the number itself. The appointment will get the related number when booked during these days. But will get the new numeration, if booked in advance from the date, which doesn't fall into the dates. For example, we want our numbers to start from 20 during the summer. We have specified the dates. Today is the 29th of May, and a manager booked an appointment for the 5th of June. However, the old numeration was used as now it is not summer yet.
13. Click 'Save'
Universal Appointments: Portal and Website
Universal Appointments: Website and Portal () is an optional add-on that allows you to add the appointments scheduling wizard to the portal and on your websites. The process of booking is similar to the one in the backend.
As the client chooses a time slot and pre-reservation occurs, optionally force the public (not logged-in users) to sign in, only offer to do so, or just let them enter their account details.
Choose the set of optional and mandatory account details fields to get the necessary details from the client. By default, the required ones are name and email. Portal (already registered) users will have the previously filled-in account details auto-populated. Optionally add a checkbox to agree with the terms and conditions.
Ask clients to confirm their email or mobile number. If the confirmation option is turned on, users would be obliged to insert received codes. In case a correct code is not introduced in time (the timer is set up on the configuration page), appointments will be canceled. If you selected SMS confirmation (depends on Odoo SMS IAP) but your balance is not sufficient, a confirmation code would be forwarded by email.
As soon as all steps are done, a client receives a confirmation email and is redirected to the success page/new appointments(s) page. For not yet registered users, the app offers to enter the password for the Odoo portal.
During the whole process, a client sees the progress bar (if you have not purposefully turned it off). The progress bar lets safely return to any previous step and back. Introduce your own titles for progress steps.
The Odoo portal lets schedule new or repeat existing reservations, and cancel or re-schedule planned appointments. Portal users observe the list of planned and done appointments and may check any of those. Each appointment portal page has a chatterbox that allows direct communication with the resource manager and other followers. From the reservation page, users can also print a voucher and appointment confirmation.
Customize the website scheduling wizard. Show/hide introduction blocks, images, and short descriptions for resource types, resources, and services. Prepare your own Odoo website full details pages for resource types, resources, and services using Odoo's standard website builder. Show/hide links for those pages.
Clear website bookings
Full-service management details
Customizable website and portal pages
Portal control over reservations
Turn on/off Business Appointments for portal users to let them schedule and manage the appointments. For that, go to Configuration > Configuration, find the section Website Specific Options and tick the box 'Business Appointments in portal'.
Turn on/off Business Appointments for public users to let them schedule the appointments. For that, go to Configuration > Configuration, find the section Website Specific Options and tick the box 'Business Appointments on website'. To see and turn on the option 'Business Appointments on website', you should enable the appointments in the portal.
The settings are applied to each of the available websites separately (see Multicompanies & Multiwebsites).

Website Booking Process
If you have the module Universal Appointments: Portal and Website, make sure the option 'Appointments in Portal and Website' is turned on to allow portal and public users to book appointments from the website.
In the 'Website specific options' section in configuration, you can manage the appointment settings on a website (see Configuration Page). If you work in a multiwebsite environment, you can choose the website to apply the settings to (see Multicompanies & Multiwebsites).
To turn on the possibility to book appointments in the portal, tick the option 'Business appointments in portal'. This way, registered users will see the tab appointments in their portal and the page 'Appointments' on the website.
After enabling appointments for the portal, another option 'Business appointments on website' appears. Once checked, appointments will be shown to all visitors on the current website. So, everyone will be able to book an appointment from the frontend.
The list of steps for booking an appointment is fixed. However, the steps that have only one option (so there is no alternative to choose) are skipped. This way the number of steps might change. For example, we have separate websites for our dental clinics. On the second website, we have only one published resource type 'Dental clinic New York', so this step is skipped and the clients start the booking by choosing a resource (a dentist).
You can change the label for each step, so the steps were understandable to the customers. For example, instead of the label 'Choose a resource' you can write 'Choose a dentist' (see Steps Customization).
It isn't necessary to register in order to book an appointment from the website. However, for further bookings with the same account details (email and phone) registration is necessary.
It is not necessary to register in order to book an appointment.
While booking an appointment, above the choice area, you will find the progress bar with the stages of the booking process. You can move between stages safely, without losing progress. Choices are saved, so even if you don't complete the booking and close the site after re-opening it you will be able to proceed from the same step. As soon as a time slot is chosen, the pre-reservation timer is launched. It is necessary to complete the reservation during that time, otherwise, the pre-reservation will be canceled and the time slot will be available again for other bookings (see Pre-reservation).
Optionally, the progress bar can be hidden. Then, the clients will not be able to return to the previous step safely (Portal and Website: Customization & Settings).
The reservation process on the website is very similar to the one on the backend. Let's look closer at each step of the booking process.
1. Choosing Resource Type
When the client opens the page 'Appointments', he/she sees the first step of booking - resource type selection. The customer searches among resource types and selects the required one.
A resource type might represent a particular sphere of business (i.e., dental clinic, travel agency), or a particular address (i.e. Chicago, New York, Green rd 5) (see Managing Resource Types).
It is possible to apply various filters, sorting, and search criteria to find the required resource types quickly. By default, the available filtering options are: Standard (the same order as in the backend), from A to Z, and from Z to A. The available search options are: By name, In the description, in services. If the available options aren't enough, you can create some custom filtering and searching options (see Portal and Website: Customization & Settings).
In the step 'Choose resource type', only published resource types are shown. If the resource type doesn't have any resources and services assigned, then such a resource type is hidden, even if published. Also, if there is only one available resource type for the website, then the step will not be shown and that resource type will be applied by default. For example, we have a resource type 'Dental clinic New York', which is the only published resource type on our second website. That is why the booking on that website starts from the resource selection.
On the resource type card, a client sees the related picture, title, and description. If you turn on the option 'Show types full details pages' on the configuration page, then in the bottom right corner a client will see a button that will redirect to the resource type's full page.
On the full page, you can see not only the picture, title, and description of the resource type, but also some additional details prepared using HTML building blocks and custom fields () (see Custom Filters & Search Configuration).
2. Choosing Resource
As soon as the resource type is chosen, the client is redirected to the next step - resource selection. The customer navigates over available for this type of resource and chooses one, a few, or applies any (all).
A resource might represent a facility or a person whose time is considered for allocation to provide a service (see Managing Resources).
It is possible to apply various filters, sorting, and search criteria to find the required resources quickly. By default, the available filtering options are: Standard (the same order as in the backend), from A to Z, and from Z to A. The available search options are: By name, in the description, and in services. If the available options aren't enough, you can create some custom filtering and searching options (see Portal and Website: Customization & Settings).
In the step 'Choose resource', only published resources, related to the chosen resource type, are shown. This step is missed in case there is a single published resource or a chosen resource type that assumes automatic allocation (see Resource Allocation).
It is possible to choose one resource. In this case, the resource will be assigned and its calendar will be chosen to generate the available time slots after selecting a service.
You can also choose several resources by adding them one by one or you can click on the option 'Any' to choose all available resources.
If a client chooses several resources, then one of those resources will be assigned automatically according to the chosen allocation method of the related resource type. For example, if a client can't select one between the two dentists he likes, then he can choose both and the most suitable resource will be chosen automatically by the app (see Resource Allocation).
On the resource card, a client sees the related picture, title, and description. If you turn on the option 'Show resources full details pages' on the configuration page, then in the bottom right corner the client will see a button that will redirect to the resource's full page.
On the full page, you can see not only the picture, title, and description of the resource, but also some additional details prepared using HTML building blocks and custom fields () (see Custom Filters & Search Configuration).
3. Choosing Service
As soon as the resource is chosen, the client is redirected to the next step - service selection. The customer navigates over the available services and chooses one.
Service defines what actually should be done, for example, English Lessons, Tooth stopping, Surgery, Car Rent, etc. (see Managing Services).
It is possible to apply various filters, sorting, and search criteria to find the required service quickly. By default, the available filtering options are: Standard (the same order as in the backend), from A to Z, and from Z to A. The available search options are: by name, in the description. If the available options aren't enough, you can create some custom filtering and searching options (see Portal and Website: Customization & Settings).
On the step 'Choose service', only published services, related to previously chosen resource types and resources, are shown. Also, if there is only one available service for the website or when the service is always the same for the particular resource type, then the step will not be shown and that service will be applied by default. For example, if a client of our language school chooses the resource type 'English' and then chooses the English teacher 'Doris Cole', then only the services that she provides will be shown. Since Doris Cole provides only lessons, but not consultations, the step will be skipped and the client will be redirected to the time slot selection.
Also, in this step, if configured (), a client may see the available pricelists and switch between them. It is especially useful when the company is international and there is a possibility to pay in different currencies. This way, a client may choose the pricelist with his/her currency and see the exact price for the service.
Portal users will also be able to choose the one assigned to them pricelist and therefore can book the service with a discount if any. For example, our clients are from countries, where the currencies are dollars and euros. So, they can select between these two pricelists to see the exact price. The regular customer Azure Interior also has a pricelist '10% discount' assigned. He sees the prices with the discount, however, can switch between the pricelists and choose another one.
In order to make certain pricelists selectable on the website, go to Configuration > Pricelists, open any pricelist, go to the tab configuration, optionally in the field 'Website' choose the website to show the price list and tick the box 'Selectable'.
If there is only one pricelist available for the website, then the pricelist selection will not be shown.
On the service card, a client sees the related picture, title, price, and description. If you turn on the option 'Show services full details pages' on the configuration page, then in the bottom right corner the client will see a button that will redirect to the service's full page.
On the full page, you can see not only the picture, title, description, price of the service, and the pricelist selection button, but also some additional details prepared using HTML building blocks and custom fields () (see Custom Filters & Search Configuration).
Session Duration
The clients' choice is saved and if the reservation wasn't completed, the client can open the page again later and continue the booking process from the same step. Also, it is possible to return to any of the previous step and then move back without losing the progress.
When a client chooses a resource type, resource, or service, the pre-reservation doesn't occur, but the choice is also saved.
You may set the time when the information about chosen resource type, resource, or service on the website should be cleared. That is especially useful, in cases, when certain resource types, resources, or services are no longer available for the choice on the website. So, the client can no longer be transferred to the related step.
The session choice of the clients can be cleared automatically, after a certain time, or manually, by clicking on the button.
To set the timer to clear all the sessions automatically:
1. In the Appointments app, go to Configuration > Configuration and find the section Website Specific Options
2. Find the field 'Session duration (h)' and specify the number of hours after which the website session should be cleared
3. Click 'Save'.
This is mainly related to the choice of the resource type, resource, and service as further steps are already regulated by other timers (pre-reservation timer and portal confirmation timer) (see Pre-reservation and 6. Confirming Reservation).
The application will regularly check all sessions for obsolescence and delete them if they are updated earlier than the allowed session duration. Here, the date/time of any action is considered. If the user has chosen something or even just updated the page, the duration is reset to zero, i.e. the duration is calculated from the moment the user is inactive on any tab.
By default, the session duration is set as a week and checks take place once a day. It is not recommended to set a session too short, because it may interrupt the reservation and cause irritation and the scheduler will have to be called very often, which consumes system resources.
Keep in mind, that the session duration should be at least 5 minutes, and should exceed the reservation & confirmation period, as otherwise the session may be reset before the timer that the user sees.
It is possible to configure the frequency of session duration checks. For that, in Configuration below the field 'Session duration', find the button 'Configure update frequency'. Then, the pop-up window will appear. There, in the field 'Execute every', choose the frequency of the scheduled job and click 'Save'.
You can clear all existing unfinished website sessions manually. For that, in Configuration below the field 'Session duration', find the button 'Clear website sessions'.
4. Choosing Time
As soon as the service is chosen, the client is redirected to the next step - time slot selection. The slots are generated automatically. The customer navigates over the available time slots and chooses the required one(s).
When booking an appointment through the website by the portal user, time slots will be generated taking into account the contact's reservations. The time slots, when the user has a reservation will not be shown. For example, if our client Azure Interior has a reservation on the 4th of October at 16:00 - 16:45, he will not see the timeslots that intersect with that reservation while booking another reservation for any resource.
The available timeslots are shown based on the Resource's calendar. This way, the time when the resource is unavailable or has time-off isn't shown (Resource Calendar).
When generating slots for aliases, the calendar of the main resource and its busy time is taken into account. This way, one real object can be used in different places, but a single calendar will be generated for it (see Managing Resources).
In case of automatic resource selection, or when there are several resources selected, the algorithm decides which resource the appointment should be assigned based on the resource allocation method (see Resource Allocation).
If the chosen service has an extra calendar assigned, then the time available for booking will be further restricted. The service will be available at the intersection of the resource and service calendar (see Extra Calendar Restriction).
If some extra resources are chosen, then, when booking (both in the backend and in the portal), the system will take into account calendars not only of the main resource but also of the additional ones. In order, for the time slot to be available for booking, both the main and the additional resources should be free. While scheduling an appointment for the service, that requires the extra resources, you will see the line that warns you about the additional resources. Hover over the line to see what resources are required (see Extra Resources).
If on the related resource type's card the option 'Calendar Events as Busy Time is ticked, then for periods when a responsible user has meetings (i.e. events assumed by Odoo calendar), appointment booking will not be possible (see Meetings Calendar).
Per each resource type, you can define when an appointment might be scheduled. The appointment should be booked no earlier and no later than the set time, for example, no earlier than a month before the day of the appointment and no later than 1 day before. Only the days available for booking will be shown (see Time Requirements).
If the start round is set in the service's settings, then the time slot start will be rounded accordingly (see Rounding Time).
In this step, a client may: search for the time slots for particular dates; select the duration of the service, if configured; select the time zone, if configured. Each action results in slot recalculation (see Time Slots Generation).
In order to find the related period of time quickly, the client can set the days range to search in the field 'Search in dates'. If the set day range covers several months, then here you will see the buttons within months, click on the required one to see the time slots only for a particular month.
The time slots will be divided based on the related service's default duration. If the manual duration is allowed then the client will be able to select the required duration in the field 'Duration', then the time slots will be recalculated (see Service Duration).
Set the slot step with which time slots will be generated, to make the booking time flexible (see Slot Step).
Specify the time required for completing the reservation, without the participation of the client. Set, the checkout period, to show the client what time he/she should finish receiving the service, while the resource will be blocked for the entire selected time (the time for providing the service and the checkout period) (see Checkout Period).
Configure the Start Day&End Day Restriction to choose the set of days of the week and/or a set of specific dates on which the reservation cannot start/end (see Start &End Day Restriction).
Above the generated time slots, you will see the time zone in which the time is booked. Based on the settings it will be either default or available to choose manually. In the latter case, the time zone will be adjusted to the timezone of the system (computer) (see Multi Time Zones).
If the set day range covers several months, then here you will see the buttons with months, click on the required one to see the time slots only for a particular month.
In order to move to the next step, the client should just select the desired time slot by clicking on it. You may even allow scheduling a few appointments simultaneously. To allow multi-scheduling from the frontend, on the configuration page tick the option Multi Scheduling, and specify the maximum number of slots that can be chosen per single booking in the section 'Website Specific Options', in the field 'Maximum Appointments (Portal)' and save the changes. In the frontend, multi-time slots can only be selected for the same set of resources, resource types, and services. This way all the required dates will be booked at once. The client will receive one success email for all reservations of a single resource. One sale order will be generated for all reservations (). For example, Mitchell Admin booked two time slots for Tooth stooping. And, on the list of appointments, he will see two different records, one for each time he booked. However, he will receive only one success email. And both reservations will relate to the same sale order ().
To select several time slots, a client should click on each of them one by one and then push the 'Forward' button to move to the next step. If the maximum number of time slots is booked, then the client will be redirected to the next step automatically. In order to remove the time slot from the selection, click on the cross by it.
The selection of a time slot means that this slot is pre-reserved and cannot be used for other bookings. As soon as a time slot is selected above the progress bar appears a timer, which shows the time left to finish the booking. If not completed during that time, then the pre-reservation will be canceled and reserved time slots will be available for further bookings. You can define the maximum period for pre-reservation on the configuration page in the line 'Maximum Period for Pre-Reservation' (see Pre-reservation).
5. Filling in Contact Details
As soon as the time slot is chosen, the client will be redirected to the next step - account details. Optionally, on this step, you may force the public (not logged-in users) to sign in, only offer to sign in, or just let them add their details. The set of contact details might be configured per website.
To force or offer the users to sign in before entering the account details, go to Appointments Configurations > Website Specific Options and find the field 'Sign in for public users'. The setting defines the logic of the public user sign up/sign in.
The option 'Sign in required' means that before entering account details, unregistered website visitors must sign up/log in to the portal. It will not be possible to skip the sign-up / sign-in. Make sure, that the standard setting of free sign-up and resent password is enabled. Otherwise, the customers will not be able to sign up/sign in. You can configure it in General Settings > Permissions > 'Customer Account' & 'Password Reset').
The option 'Sign in offered' means that such users would be offered to log in if they had an account, but the step might be missed. The offer to sign in will be shown above the fields on the step 'Account Details'. In case, the option 'Sign in offered' is chosen, you can write your own text to offer the sign-in, for that the field 'Sign in text' is added. By default, the warning is 'If you already have an account, please sign in', where 'sign in' is the link, that redirects to the login page. The field supports HTML, however, you shouldn't change the link, that is added to the field by default.
The option 'Auto sign in' means that public users might finish reservations without signing in, while the portal users will be auto-created for them and the letter to finish the registration will be sent.
The offer or the obligation to log in does not apply to the portal user (that has already logged in). The logged-in users can continue filling in the account details/confirming the reservation as usual.
The available account details information (name, email, phone, or mobile) of the logged-in users will be filled in automatically on the Account Details step. This way portal users will not have to enter it each time they make a reservation.
You can also choose the account details fields to get the required information from the client. The set of fields is configured for each website.
The fields can be either mandatory or optional. The mandatory fields are the fields that are required to enter a value to confirm the scheduling. By default, the mandatory ones are 'Name' and 'Email'. It is up to you what other fields should be added and whether their filling is required.
You can add fields and ask a client to provide the following details: city, country, job position, mobile, phone, state, street, street2, title, and zip.
Add field phone and mobile to make sure appointment managers will be able to contact the client by calling. For example, if the client is late, it is more likely that he/she will be able to reply orally, than in written form.
Let the client choose their title, so the managers know how to refer to them. This way, it will be easier to address people politely. For example, if in the name it isn't clear, whether a client is a man or a woman, and in order to provide the beauty service it needs to be specified, then a title might be helpful.
If you want to know the job position of a contact, then you can also let clients specify it. It might be useful for further collaboration or to reflect the specifics of the service. For example, in the language school, we also provide lessons with native speakers to the teachers.
Add the fields country, state, city, street, street 2, and zip to get address details if some products or services require delivery. For example, in a car rental, we may get the car to the renter's address or to the airport parking lot.
To choose the set of account details fields:
1. Open the module Appointments and go to Configuration > Configuration
2. Find the section Website Specific Options
3*. Choose the website (see Multicompanies & Multiwebsites)
4. In the field Mandatory Account Details, specify the fields that must be filled
5. In the field Optional Account Details, specify the fields that can be filled optionally
6. Click 'Save'
If the existing fields aren't enough, it is possible to create some custom fields (). To view the appointment field on the account details page, simply choose the 'Input form placement', while creating a custom field. Custom Fields can also be both mandatory and optional. To make filling in this field mandatory, tick the option 'Required to enter a value'. For example, for a language school, you can create a text field 'Learning preferences', to find out what the student likes before the lesson. A field with the information that a client fills will be added to the appointment, but not to the contact's card (see Universal Appointments: Custom Fields for Website and Portal).
The module checks whether the entered email is entered correctly. If there is a mistake in an email, the client will not be allowed to complete the booking until it is fixed. For example, the email 234wfegbh, will not be accepted as there is no '@' sign.
If filling in a mobile or phone number is mandatory, then they are also checked by the module. If the number is written in the wrong way, then the error that states the reason will appear above the fields. For example, the number 763453211355 will not be accepted as there is no country code.
In this step, you can also request clients to agree to terms and conditions. For that, on the appointments configuration page, tick the field 'Agree on terms and conditions'. After that, on the step 'Account details', will appear a box, which should be ticked by the client to continue the booking process. You can add the text that should be displayed by the box in the field 'Agree on terms text'. The field supports HTML code, so you can add a link to the terms of the agreement page.
Optionally, turn off the need to agree on the terms of the agreement while booking for the portal users. For that, tick the box 'Terms for public users only'.
6. Confirming Reservation
As an existing user logs in into the system after choosing a time slot and click's the button to complete the booking process, the system checks, if he/she already has another appointments at the time of the currently chosen time slots. If there is another appointment at the same time or the one that intersects with the currently chosen time, then the system will transfer the user back to the slot selection page.
After filling in the details and agreeing to the terms of the agreement, it might be a good option to ask the clients to confirm the email/mobile or phone number. This way, you will be able to make sure that the client is serious about the appointment and that they have provided the right credentials.
For that, in the appointment configuration, find the section 'Extra Features', and choose the way of confirmation in the field Website/Portal Confirmation.
You can either set the confirmation by email or by mobile or phone number. Confirming a phone number requires sending an SMS, which is done through the Odoo SMS server. You need to make sure that you have sufficient balance for Odoo SMS IAP. To check the current balance or recharge the account, go to Settings > Odoo IAP and click 'View my Services'. Read more through the links: IAP, SMS Pricing.
After selecting the confirmation method, define:
The maximum period of confirmation - the time for which the email/mobile or phone number should be confirmed. Otherwise, the pre-reservation will be canceled and the time slot will be available for further bookings.
The maximum number of attempts to confirm - the number of attempts that a client can make to confirm the appointment. If exceeded, then the pre-reservation will be canceled and the time slot will be available for further bookings.
New Confirmation Code Minimum Period - the time after which the new code can be asked, so the customer may request a new code if he/she has not received the previous one. The number is specified in seconds.
Maximum Number of Code Refreshing - the number of new confirmation codes that a client can receive. If exceeded, then the pre-reservation will be canceled and the time slot will be available for further bookings.
You can turn off both timers: the confirmation timer and the pre-reservation timer. Then, the timers will be hidden for the clients (Portal and Website: Customization & Settings).
7. Success Page & Signing up
As soon as all the steps are done, the customer receives a confirmation email with the appointment details and is redirected to the success page.
Public and Portal users finish the reservation differently.
Upon completing the reservation, portal users are either redirected to 'My appointments' page with a list of his/her appointments (if they have several), or to the page of their current appointment (if there is only one). It is also possible to redirect the user to the related sale order (), if the add-on Universal Appointments: Sales is installed and the option 'Open order on finishing' is enabled, or even to the form of signing and payment (see below).
Upon completing the reservation, public users are redirected to the success page, where they are suggested to choose the password to finish the registration. Public users are the users, who have not logged in before starting the reservation process or at the stage of filling in contact details.
If the option of forced sign-in is enabled ('Sign in Required'), then public users will not be able to complete the reservation unless they sign up and log in. If the sign-in wasn't mandatory, then after completing the reservation process, public users are redirected to the appointment page, from which they can control their appointments right in the Odoo portal.
The Odoo portal allows you to print the appointment's confirmation, schedule new or repeat existing reservations, and cancel or reschedule planned ones. Each appointment has a chatterbox, which allows direct communication with resource managers and other followers. If an appointment has a linked sale order (draft, sent, or confirmed) (), it would also be available through the standard Odoo portal entries 'Quotations' and 'Sale Orders' (see Portal Control of Reservations).
If a public user doesn't finish the registration, then he/she will not be able to create a new appointment with the same account details. In this case, he/she should contact the administrator, to get the sign-in credentials.
In case a single sale order is generated upon confirming a reservation, it is possible to redirect the user straight to the sales order (). For that, in the section, of configuration, enable the option 'Open order on finishing'. Take into account that the order/payment form will be opened automatically and only if it is in the 'Sent' or 'Confirmed' state. The state of the generated order is based on the configuration option 'Auto Sale Order' (see Linking Appointments and Sale Orders).
Portal Control of Reservations
If you turn on the option 'Business appointments in portal', then portal users will have an opportunity to schedule and manage their appointments right from the portal.
In the user's portal, a new tab 'My Appointments' is added. When a portal user clicks on it, he/she sees the list of his/her appointments. Users can observe the list of planned and done appointments and may check any of them. In the list, the user sees the reference, scheduled time, resource, and service of each appointment.
It is possible to apply various filters, sorting, and search criteria to find the required appointments quickly. By default, the available sorting options are: Date, Resource type, Resource, and Service. The available filtering options are: All, Planned. The available search options are: By reference, resource type, resource, and service. If the available options aren't enough, you can create some custom filtering and searching options (see Portal and Website: Customization & Settings).
The Odoo portal allows you to schedule new or repeat existing reservations, and cancel or reschedule planned ones. Below the search bar, there is a button 'Schedule New Appointment', which redirects straight to the appointments scheduling page. If some stages were filled in previously, and the pre-reservation wasn't launched or didn't finish yet, then the user is redirected to the stage, where he/she stopped (see Pre-reservation).
Click on any appointment reference to open the appointment page. There you will find the appointment card with the information about the date and time, service, and resource.
If you have previously added some custom fields () and chose their portal page placement, then those fields will also be displayed on the appointment card with the client's answers (see Universal Appointments: Custom Fields for Website and Portal).
If an appointment has a linked sale order (sent, confirmed, or done) (), it would also be available through the standard Odoo portal entries 'Quotations' and 'Sale Orders' (see Linking Appointments and Sale Orders).
Above the appointment card, you will find the breadcrumbs to return to the previous step and the side arrows to move between the appointments.
On the left side of the interface, there are functional buttons:
1. Print Confirmation
Click 'Print Confirmation' to generate a file with the details of the appointment. The module uses the standard layout for the appointment, which can be configured in General Settings > Companies > Document Layout.
The generated file will be opened in the same window. It will include the reference of the appointment, the scheduled time with the time zone, the resource, the service, and their addresses if any.
In case, you have set the Checkout period for the service, only the time with the customer participation will be shown in the printed form, whereas the full time (customer participation time + checkout period) will be shown and booked in the backend, For example, for the daily service, if the service starts at 14:00 and the Checkout Period is set as 2 hours, then in the printed file the booking time will be 14:00 - 12:00, while in backend 14:00-14:00 (see Checkout Period).
The address can be filled in, in both, resource and service, however, only one of those will be shown in the document. The service address is prioritized over the resource address. If the address isn't mentioned on the service card, then the address of the related resource, if written, will be shown.
2. Repeat
Click 'Repeat' to create a new appointment with the same resource type, resource, and service. You will be redirected straight to the step of choosing the date and time. Proceed with the scheduling process in an ordinary way. After that, a new appointment will be created. For example, the language school customer may want to book the lessons regularly. With the help of the button 'Repeat', he/she will be able to skip the steps, that should be the same (resource type, resource, service) and will be moved straight to the step of choosing the time slot.
3. Complementaries
You can also add some of the complementary products right from a reservation form, if the related option is enabled. For that, just click on the button 'Complementaries', choose the products by changing their quantity, and click 'Add'. Both service, quantity, and complementary products will be re-calculated. The extra products will be added to the appointment, but in order to add them to the sale order as well, the sale should be adapted from the backend (the button 'Adapt Sale' () on the appointment's card. For example, the service Tooth Stopping offers two complementary products 'Tooth paste' and 'Teeth Cleaning'. So, they are offered to the client, when the time slot is chosen. The client Azure Interior didn't choose the complementaries while booking, but then changed his/her mind and added them through the button 'Complementaries'. The manager, clicked 'Adapt Sale' on the related appointment card, and the items were added to the sale order
On the appointment card, you will see the field 'Extra products', with chosen complementaries and their quantities listed.
In case, there are no complementaries available, the button will be hidden.
4. Re-schedule
Click 'Re-Schedule' to change the details of your current appointment. You will be redirected to the step of choosing the time slot for your current appointment. However, with the help of the progress bar, you can also move to one of the previous stages to change the resource type, resource, or service. Above the progress bar will appear a note, which states the reference number of the current appointment, its date and time, and offers to schedule a new appointment instead. To complete the rescheduling, just follow the standard scheduling process. After that, the details of the current appointment will be changed.
For example, Azure Interior wanted to change the time of the appointment, so clicked on the button 'Re-schedule' and on the step 'Choose Time Slot', choose another time.
5. Cancel
Click 'Cancel' to repeal the appointment. Then a pop-up window will appear that ask to confirm the decision. After that, the reserved time slot will be available for further bookings.
For example, a dental consultation was booked, but then, the client changed plans and canceled it. So, the time slot became available for new clients.
You can set a time after which the client will not be allowed to cancel or reschedule an appointment. The time can be set in hours, days, weeks, months, or years. For example, forbid to cancel or reschedule booking a room in a hotel 2 days before. As this time might not be enough to find new visitors (see Time Requirements).
6. Schedule New
Click 'Schedule New' to schedule a new appointment. You will be redirected to the appointments page. If some stages were filled in previously, and the pre-reservation wasn't launched or didn't finish yet, then the user is redirected to the stage, where he/she stopped (see Pre-reservation).
For example, a client while booking, saw another service, that he wanted to try, so, decided to schedule another appointment, clicked 'Scheduled New', and was redirected to the scheduling wizard.
7. Sign&Pay/Accept & Sign/Accept & Pay/Pay Now ()
On the appointment portal form, the client may see a button for signing/paying for a related order. It is shown only if there is a linked order with the 'Sent' status and your Odoo is configured for that.
The button itself may imply different actions depending on the settings (for example, if the signature is required/not required) and the order status (already signed, time to pay): 'Sign & Pay', 'Accept & Sign', 'Accept & Pay', 'Pay Now'. The Odoo behavior, in this case, is the same as for Odoo portal sale orders.
As a user clicks on the button, he/she is redirected to the order page with the required signing/payment form opened automatically (see Linking Appointments and Sale Orders).
Below the buttons, you will find a contact of the user, responsible for the appointment. Click 'Send a message' below the contact's name and you will be redirected to the chat box at the end of the page.
Each appointment has a separate chatterbox which allows direct communication with the resource manager and other followers of the appointment.
A client can also send an attachment through the message thread to ask for/provide some details related to the appointment. To do that, the 'Pin' icon below the chat box should be used.
Portal and Website: Customization & Settings
The module provides wide opportunities for customization. You can change the stage titles; show/hide some functional elements (the set of elements is different for each page); add and edit the resource type, resource, and service full pages; and add custom filters and search options.
The set of steps to book an appointment is fixed. However, the steps that have only one option (so there is no alternative to choose) are skipped. This way the number of steps might change. For example, we have separate websites for our dental clinics. On the second website, we have only one published resource type 'Dental clinic New York', so this step is skipped and the clients start the booking by choosing a resource (a dentist).
The default labels for the steps may not be fully understandable in many use cases. For example, the step 'Choose resource type' may not be clear for the clients of a dental clinic. So, it might be a good idea to change the step labels according to your business needs. This way, the steps will be understandable to the customers. For example, instead of the label 'Choose a resource' you can write 'Choose a dentist'.
To change the labels of the steps:
1. Go to the appointments configuration page
2. Find the section 'Website Specific Options'
3*. If you work in a multiwebsite environment, choose the website to apply the settings to (see Multicompanies & Multiwebsites)
4. Write a new label in the corresponding step line 'Label for step...'
5. Click 'Save'.
Let's look at possible ways to customize the website appointments wizard. Open the page 'Appointments' on the website and click on the option 'Customize' in the systray. There you will find two categories: Appointment layout and Appointments. The first category combines the customization settings that are applied for the whole booking process. The second category includes step-specific customization options (which should be configured for each step separately). The set of options may differ for different steps (see Steps Customization).
From the section Appointments layout, you can turn on/off the progress bar and expiration timers.
While booking an appointment, above the choice area, you will find the progress bar with the stages of the booking process. You can move between stages safely, without losing progress. Choices are saved, so even if you don't complete the booking and close the site after re-opening it you will be able to proceed from the same step.
Optionally, from the systray option 'Customize', you can turn off the progress bar by clicking on the slider button with the line 'Progress Bar'. This doesn't mean that the client's scheduling progress will not be saved while advancing through stages. The progress bar will just be invisible to clients. In the mobile version, the progress bar is also shown, but without the step, names to avoid overloading the interface.
As soon as a time slot is chosen, the pre-reservation timer is launched. It is necessary to complete the reservation during that time, otherwise, the pre-reservation will be canceled and the time slot will be available again for other bookings (see Pre-reservation).
The pre-reservation timer is shown above the progress bar. The warning explains that there is a limited time to complete the registration and shows the time, during which the client should confirm the appointment.
It might be a good option to ask clients to confirm their email/phone after entering the account details. In this case, another timer appears as soon as the appointment is confirmed - the confirmation timer. The warning explains that there is limited time to prove that, the phone/email stated previously belongs to the client and shows the time, during which the client should confirm that.
Optionally, from the systray option 'Customize', you can turn off both timers: the confirmation timer and the pre-reservation timer by clicking on the slider button by the line 'Show Expiration Timers'. Then, they will be hidden from clients. However, the time to complete the scheduling process and to confirm mobile/email will still be limited to the time specified in configurations.
Steps Customization
Each step of the scheduling process can be customized. Turn on/off customization options per stage, change stage labels, show or hide prices, choose fields to ask for the account details, and request to agree with the terms of the agreement. If you work in a multi-company environment and have several websites, the settings are applied to all of the websites separately (see Multicompanies & Multiwebsites).
Let's look at the step-specific options. They are applied to each step separately. For example, if you turn on an introduction block on the resource type step, then the block will be added only to the step from which it was applied - Choose Resource type. A set of such options may differ for various steps.
The following options are available for the steps Choose Resource type, Choose Resource, Choose Service:
1. Introduction
You can turn on/off the introduction above the scheduling wizard. To do that, go to one of the steps (Choose Resource type, Choose Resource, Choose Service), click 'Customize' in the systray, and then, on the slider button by the option 'Introduction'.
Once the introduction is turned on, click on the 'Edit' button, and above the scheduling wizard, there will be an area where you can add some building blocks. The available building blocks are the same that you use while editing website pages. This way, you can create a catching introduction, or write some instructions.
You need to turn on/off the introduction for each step, where you need/don't need it. The building blocks/text that you add to the introduction are added only to the currently edited step.
For example, we have turned on the introduction for the steps: Choose Resource Type and Choose Service. For the step Choose Resource Type, we have added a text building block with the introduction and instructions for the booking process. For the steps Choose Service, we have added the building block 'Quotes' with some reviews from our clients.
2. Search bar
You can turn on/off the search bar in the scheduling wizard. To do that, go to one of the steps (Choose Resource type, Choose Resource, Choose Service), click 'Customize' in the systray, and then, on the slider button by the option 'Searchbar'.
Once the search bar is turned on, you will see the dropdown fields with the sorting, filtering, and search options. The available sorting, filtering, and search criteria may differ in different steps. You can also add some extra filtering and search options (see Custom Filters & Search Criteria).
You need to turn on/off the search bar for each step, where you need/don't need it.
For example, we have turned on the search bar only for the step: Choose Service. Since we only have 2 resource types and 4 resources, the search bar for those steps isn't necessary.
3. Show descriptions
You can turn on/off descriptions of resource types/resources/services. To do that, go to one of the steps (Choose Resource type, Choose Resource, Choose Service), click 'Customize' in the systray and then, on the slider button by the option 'Show Description'.
Once the description is turned on and added, you will see it below the resource type/resource/services titles. You can add the description to a particular resource type, resource, or service from the tab description on the related card in the backend or by clicking on the related space on the resource type, resource, or service in the editing mode in the frontend.
You need to turn on/off the description for each step, where you need/don't need it.
For example, we turned on the description for the steps: Choose Resource and Choose Service. This way we can tell the clients about the education and certifications of our employees (resources of human kind) and the details about the provided services.
4. Show images
You can turn on/off images of resource types/resources/services. To do that, go to one of the steps (Choose Resource type, Choose Resource, Choose Service), click 'Customize' in the systray, and then, on the slider button by the option 'Show Images'.
Once the image is turned on and added, you will see it on the resource type/resource/services card. You can add the image to a particular resource type, resource, or service by clicking on the pencil icon on the related card in the backend or by clicking on the related space twice on the resource type, resource, or service in the editing mode in the frontend.
You need to turn on/off the images for each step, where you need/don't need it.
For example, we have turned on the images for the step: Choose Resource. So, the clients could see and choose the employees (resources of human kind).
In the step - Choose Service, it might also be a good idea to show the price for the services (). It might be particularly useful when the price for the service is fixed and final. This way the client will get the idea about the company's prices and if they are attractive, then it would be easier to make a decision.
If your company is international, or you want to hold some promotions, then you can turn on the pricelists (). Clients will be able to switch between them on the step - Choose Service. This way, a client may choose the pricelist with his/her currency and see the exact price for the service.
Portal users will also be able to choose the one assigned to them pricelist and therefore can book the service with a discount if any. For example, our clients are from countries, where the currencies are dollars and euros. So, they can select between these two pricelists to see the exact price. The regular customer Azure Interior also has a pricelist '10% discount' assigned. He sees the prices with the discount, however, can switch between the pricelists and choose another one.
To turn on pricelists and prices:
1. Go to the appointments configuration page and find the section 'Website Specific Options'
2*. If you work in a multicompany environment, choose the website to display the prices on (see Multicompanies & Multiwebsites)
3. Tick the option 'Pricelists and Prices'
4. Click 'Save'.
Once the price is turned on, you will see it on the service cards below the title. To change the price of the service you need to change it on the related product.
Once the pricelist is turned on, above the service cards, you will see the pricelist selector. To apply a certain pricelist, just choose it from the selection. If there is only one pricelist available for the website, then the pricelist selection will not be shown.
In order to make certain pricelists selectable on the website:
1. Open the appointments app and go to Configuration > Pricelists
2. Open any pricelist and click 'Edit'
3. Go to the tab configuration, optionally in the field 'Website' choose the website to show the price list and tick the box 'Selectable'.
For the steps Choose time, Account Details, Confirmation, it's possible to add only the Introduction block. You can turn on/off the introduction above the scheduling wizard. To do that, go to one of the steps (Choose time, Account Details, Confirmation), click 'Customize' in the systray, and then, on the slider button with the option 'Introduction'.
Once the introduction is turned on, click on the 'Edit' button, and above the scheduling wizard, there will be an area where you can add some building blocks. The available building blocks are the same that you use while editing website pages. This way, you can tell customers what to do on those steps, or explain how the timers work.
You need to turn on/off the introduction for each step, where you need/don't need it. The building blocks/text that you add to the introduction are added only to the currently edited step.
For example, we have turned on the introduction for the steps: Choose time and Confirmation. There we have explained the way the timers work.
In the step 'Account Details', you can choose the fields to get the required information from the client. A set of fields is configured for each website. The fields can be either mandatory or optional. By default, the mandatory ones are 'Name' and 'Email'. It is up to you what other fields should be added and whether their filling is required. You can add fields and ask a client to provide the following details: city, country, job position, mobile, phone, state, street, street2, title, and zip (see Website Booking Process).
If the existing fields aren't enough, it is possible to create some custom fields (). For example, for a language school, you can create a text field 'Learning preferences', to find out what the student likes before the lesson. A field with the information that a client fills will be added to the appointment, but not to the contact's card (see Universal Appointments: Custom Fields for Website and Portal).
In this step, you can also request clients to agree to terms and conditions. On the appointment configuration page, tick the field 'Agree on terms and conditions' and introduce the request text. The field supports HTML code, so you can add a link to the terms of the agreement page. Optionally, turn off the need to agree on the terms of the agreement while booking for the portal users (see Website Booking Process).
Full Details Page
If you want to describe resource types, resources, or services in detail to make them stand out or to inform customers about related details, you can prepare own full details pages using Odoo standard website builder.
Own full details pages are turned on/off for resource types/resources/services separately. This way you can, for example, turn on the full pages for services and turn them off completely for resource types and resources.
If you have enabled the full details page for resource types/ resources/ services, it is still possible to turn off the page for one or several resource types/resources and services. For example, you can show the full page the resource type 'English' to describe the learning approach and not show it for the resource type 'Dentist New York'.
Even if the page for a particular resource type/ resource/ service is turned off, you can still open and edit it, by the link from the tab 'Website' on the related card in the backend. However, this page will be available only for internal users. So, if you try to send a link to an external partner, it will result in page '404 not found'.
To turn on own full details pages for resource types, go to the appointments configuration page and in the section 'Website Specific Options' tick the box 'Show types full details pages'.
On the full page, you can see not only the picture, title, and description of the resource type but also some additional information of your choice. The page supports building blocks, so you can edit it the way you like. You can also add custom fields and make them visible on the own page of a resource type ().
To start editing the full page, either open it from the website and click 'Edit' in the top right corner or open the resource type's card in the backend and in the tab 'Website' click on the button 'edit full website description' and, in the new tab, you will be redirected straight to the editing wizard.
The link to the full page can be hidden for separate resource types. For that, open the resource type and in the tab 'Website' tick the option 'Do not show website full description'. When a client opens the full page of a resource type, he/she can see the 'Schedule' button in the top right corner. Click on it to select this resource type and move straight to the next step.
To turn on own full details pages for resources, go to the appointments configuration page and in the section 'Website Specific Options' tick the box 'Show resources full details pages'.
On the full page, you can see not only the picture, title, and description of the resource but also some additional information of your choice. The page supports building blocks, so you can edit it the way you like. You can also add custom fields and make them visible on the own page of a resource ().
To start editing the full page, either open it from the website and click 'Edit' in the top right corner or open the resource's card in the backend, and in the tab 'Website' click on the button 'edit full website description' and, in the new tab, you will be redirected straight to the editing wizard.
The link to the full page can be hidden for separate resources. For that, open the resource and in the tab 'Website' tick the option 'Do not show website full description'. When a client opens the full page of a resource, he/she can see the 'Schedule' button in the top right corner. Click on it to select this resource and move straight to the next step.
To turn on own full details pages for services, go to the appointments configuration page, and in the section 'Website Specific Options' tick the box 'Show services full details pages'.
On the full page, you can see not only the picture, title, description, price of the service, and the pricelist selection button, but also some additional information of your choice. The page supports building blocks, so you can edit it the way you like. You can also add custom fields and make them visible on the own page of a service ().
To start editing the full page, either open it from the website and click 'Edit' in the top right corner or open the service's card in the backend, and in the tab 'Website' click on the button 'edit full website description' and, in the new tab, you will be redirected straight to the editing wizard.
The link to the full page can be hidden for separate services. For that, open the service and in the tab 'Website' tick the option 'Do not show website full description'.
Custom Filters & Search Criteria
In order for the clients to be able to apply sorting, filtering, and search criteria, it is necessary to turn on the option 'Searchbar' for the related steps (Choose Resource type, Choose Resource, Choose Service) in the systray section 'Customize'. If the existing filters or search criteria aren't enough, it is possible to create some custom ones. Custom filter and search options are added separately to appointments/ resource types/ resources/ services.
The appointment filter and search criteria are the ones applied in the customer's portal on the page 'My Appointments'. This way the client may filter and search among his/her appointments. It is possible to filter appointments by various criteria. By default, there are two filtering options: all, and planned. To add custom portal appointment filters:
1. In the Appointments app, go to Configuration > Configuration
2. Scroll to the section 'Website Specific Options'
3. Find 'Custom Portal Appointments Filters:'
4. Click 'Add a line'
5. Click 'Create'
6. Add a filter name
7. Add the filtering rule in the field 'Domain'
8. Click 'Save&Close' and then 'Save'.
For example, create a filter 'Longer than 1 hour', to filter appointments that take more than an hour according to default duration. For that, add the following rule: Service > Appointment Default Duration >1.00.
Custom fields can also be chosen for the filtering options. For example, add the filter 'Preferred car color' to the dropdown field with available car colors, and set the rule related to the color 'Preferred car color = red' to filter the appointments, where the client chose the red car ().
It is possible to search for appointments by various criteria. By default, there are 4 search criteria: by reference, by resource type, by resource, and by service. To add custom portal search criteria:
1. In the Appointments app, go to Configuration > Configuration
2. Scroll to the section 'Webrsite Specific Options'
3. Find 'Custom Portal Appointments Search'
4. Click 'Add a line'
5. Click 'Create'
6. Choose the field that will be checked for matches while searching (the selection fields are also supported)
7. The field 'Label' (the search title, which will be shown in the search options) will be generated automatically, but you can change it
8. Click 'Save&Close' and then 'Save'
For example, add a search option 'Sale State' to search for matches in the states of the related sale order.
Custom fields can also be chosen for the search criteria. For example, if you have a beauty salon and added the text field 'Preferred haircut', add the search criteria 'Preferred haircut' to search for matches in the field ().
In case, the searching or filtering result has no matches, you will see a warning: 'There are currently no appointments found according to your criteria. Active search: "yoursearch". Active filters: "Planned". Schedule a new appointment or clear search'. The phrase contains a link that redirects to the Appointments scheduling page on the website. The phrase 'Clear search' contains a link that reloads the 'My appointments' page and clears the search parameters.
The resource type filter and search criteria are the ones applied in the first step of scheduling the appointment on the website. This way the client may filter and search among the available resource types to find the ones he/she needs quickly. It is possible to filter resource types by various criteria. By default, there is only one filtering option available - all. To add custom portal resource type filters:
1. In the Appointments app, go to Configuration > Configuration
2. Scroll to the section 'Website Specific Options'
3. Find 'Custom Portal Resource type Filters'
4. Click 'Add a line'
5. Click 'Create'
6. Add a filter name
7. Add the filtering rule in the field 'Domain'
8. Click 'Save&Close' and then 'Save'.
For example, create a filter 'Best', to filter resource types that contain the word 'Best' in the description. For that, add the following rule: Description contains Best.
Custom fields that are added to the own page of a resource type can also be chosen for the filtering options. For example, add the filter 'Works on Sunday' to filter the resource types, where the value of the custom field 'Schedule' includes Sunday. This way the clients of our dental clinic will be able to find the dentist, that works on Sunday before moving to the step 'Choose time' ().
It is possible to search resource types based on various criteria. By default, there are 3 search criteria: by name, in the description, and in services. To add custom portal resource type search criteria:
1. In the Appointments app, go to Configuration > Configuration
2. Scroll to the section 'Website Specific Options'
3. Find 'Custom Portal Resource type Search'
4. Click 'Add a line'
5. Click 'Create'
6. Choose the field that will be checked for matches while searching (the selection fields are also supported)
7. The field 'Label' (the search title, which will be shown in the search options) will be generated automatically, but you can change it
8. Click 'Save&Close' and then 'Save'
For example, add a search option 'Website Description' to search for matches on the full page of the resource type.
Custom fields can also be chosen for the search criteria. For example, add the search criteria 'Working day' to search for matches in the custom field 'Schedule'. This way the clients of our dental clinic will be able to find out what dentists work in the day they need without proceeding to the step 'Choose time' ().
In case, the searching or filtering result has no matches, you will see a warning: 'There are no records found with your criteria. Push clean search to clear search filters'. The phrase 'Clean search' contains a link that clears the filter/search parameters.
The resource filter and search criteria are the ones applied in the second step of scheduling the appointment on the website. This way the client may filter and search among the available resources to find the ones he/she needs quickly. It is possible to filter resources by various criteria. By default, there is only one filtering option available - all. To add custom portal resource filters:
1. In the Appointments app, go to Configuration > Configuration
2. Scroll to the section 'Website Specific Options'
3. Find 'Custom Portal Resource Filters'
4. Click 'Add a line'
5. Click 'Create'
6. Add a filter name
7. Add the filtering rule in the field 'Domain'
8. Click 'Save&Close' and then 'Save'.
For example, create a filter 'Top Service', to filter resources with an average rating of more than 50%. For that, add the following rule: Average Rating > 50.
Custom fields that are added to the own page of a resource can also be chosen for the filtering options. For example, add the filter 'IELTS' to filter the resources, where the value of the custom field 'Certificates' includes IELTS. This way the clients of our language school will be able to find the teachers (human resources) with the IELTS certificate quickly ().
It is possible to search resources based on various criteria. By default, there are 3 search criteria: by name, in the description, and in services. To add custom portal resource search criteria:
1. In the Appointments app, go to Configuration > Configuration
2. Scroll to the section 'Webrsite Specific Options'
3. Find 'Custom Portal Resource Search'
4. Click 'Add a line'
5. Click 'Create'
6. Choose the field that will be checked for matches while searching (the selection fields are also supported)
7. The field 'Label' (the search title, which will be shown in the search options) will be generated automatically, but you can change it
8. Click 'Save&Close' and then 'Save'
For example, add a search option 'Website Description' to search for matches on the full page of the resource.
Custom fields can also be chosen for the search criteria. For example, add the search criteria 'Certificates' to search for matches in the custom field 'Certificates'. This way the clients of our language school will be able to find the teacher with the certificate they need ().
In case, the searching or filtering result has no matches, you will see a warning: 'There are no records found with your criteria. Push clean search to clear search filters'. The phrase 'Clean search' contains a link that clears the filter/search parameters.

The service filter and search criteria are the ones applied in the third step of scheduling the appointment on the website. This way the client may filter and search among the available services to find the ones he/she needs quickly. It is possible to filter services by various criteria. By default, there is only one filtering option available - all. To add custom portal service filters:
1. In the Appointments app, go to Configuration > Configuration
2. Scroll to the section 'Website Specific Options'
3. Find 'Custom Portal Service Filters'
4. Click 'Add a line'
5. Click 'Create'
6. Add a filter name
7. Add the filtering rule in the field 'Domain'
8. Click 'Save&Close' and then 'Save'.
For example, create a filter 'Newest Services', to filter services, that were added last few months. For that, add the following rule: Created on >= 01/05/2022.
Custom fields that are added to the own page of service can also be chosen for the filtering options. For example, add the filter 'Don't eat before' to filter the services, where the value of the custom field 'Recommendations' includes that requirement. This way the clients of our dental clinic will know what services (for example, surgery) require to avoid eating before it ().
It is possible to search for services based on various criteria. By default, there are 2 search criteria: by name, in the description. To add custom portal service search criteria:
1. In the Appointments app, go to Configuration > Configuration
2. Scroll to the section 'Webrsite Specific Options'
3. Find 'Custom Portal Service Search'
4. Click 'Add a line'
5. Click 'Create'
6. Choose the field that will be checked for matches while searching (the selection fields are also supported)
7. The field 'Label' (the search title, which will be shown in the search options) will be generated automatically, but you can change it
8. Click 'Save&Close' and then 'Save'
For example, add a search option 'Website Description' to search for matches on the full page of the service.
Custom fields can also be chosen for the search criteria. For example, add the search criteria 'Recommendations' to search for matches in the custom field 'Recommendations'. This way the clients of our dental clinic will be able to find out about the recommendations and requirements before the procedures ().
In case, the searching or filtering result has no matches, you will see a warning: 'There are no records found with your criteria. Push clean search to clear search filters'. The phrase 'Clean search' contains a link that clears the filter/search parameters.
Universal Appointments: Sales
Universal Appointments: Sales () - is an add-on, that allows linking appointments and sale orders. As soon as a new appointment is scheduled, it is possible to automatically generate the related sale order. The resulting sale order can be either a draft (can be changed), automatically confirmed (cannot be changed), or sent quotation (ready to accept and pay).
The sales team/salesperson of the generated sale order is taken according to the settings of the resource or resource type (if not set in the resource). Otherwise, the sales team of the responsible person is taken.
Turn on the appointments reference in sale orders, to see the details of the appointment right in the sales line.
In case multi-scheduling is enabled and several time slots are scheduled, a single sale order is generated. When some of the appointments in the sale order are canceled, the related sale lines are deleted, while the sale order is canceled only if all lines were deleted.
Choose the pricing method, while creating or editing a resource type card. Charge the client either for the planned duration, tracked duration (), or units.
Choose a pricelist while scheduling an appointment to change the currency of the order or to apply the discount. When choosing a client from the contacts list, a pricelist, if assigned, is taken from the contact.
Add service-specific complementary products to the appointment sale order. Add some additional complementaries later to the appointment, if the sale order is not yet confirmed.
Generate a Sale Order
Show Appointments Reference in a Sale Line
Choose a Pricing Method
Add Complementaries to Sale Order
With the help of the add-on, you will be able to link appointments with the sale orders. The app relies upon standard Odoo sales workflow and payment mechanics. The idea is that each appointment might be linked to a sale order: manually or automatically (set up on the configuration page). The automatic approach assumes that each appointment after confirmation would create a draft or confirmed sale order. After that, the default Odoo checkout process with default payment acquirers is assumed to take place.
To turn on the features of the module, in Configuration > Extra Features, make sure that the option 'Link Appointments to Sale Orders' is enabled. After that, in the field 'Auto Sale Order', you will be able to choose the default state of the automatically generated sale orders. The sale orders will be created as soon as an appointment is scheduled. There are 4 options available:
1. Sent sale orders
If chosen, a sent quotation would be prepared based on the reservation. A sent quotation might be edited, so it is possible to add/remove some complementary products, change the price for the appointment, etc. The order in the status 'Sent Quotation' is ready to be paid.
For example, in our language school the price for the services is fixed, but, later a client may want to add the student's books to the order. In this case, we may change the order before the payment.
On the appointment portal () form the client will see a button for signing/paying for a related order. As a user clicks on the button, he/she is redirected to the order page with the required signing/payment form opened automatically.
When a user schedules appointments from the website, as soon as he/she confirms their contact details, it is possible to redirect him/her straight to the sales order (). For that, in the section, of configuration, enable the option 'Open order on finishing'. Take into account that the order would be opened automatically and ready for signing/paying only if it is in the 'Sent' state (see Universal Appointments: Website Sales).
2. Confirmed sale orders
If chosen, an Odoo sale order would be created as soon as a reservation is scheduled. The method is suitable if your service is standard, while final sale positions and details would hardly be modified after the appointment.
For example, in our car rental, the price for the services is fixed and, thus, we can charge the client as soon as an appointment is scheduled.
3. Draft quotations
If chosen, only a quotation in the state 'Draft' would be prepared. This kind of order is not yet ready to sign and pay and might be further changed before sending to the client for payment. In this way, you have more flexibility in updating an order during service provision or beforehand, for instance, if you wanted to add extra complementaries or provide individual discounts.
For example, in our dental clinic, the price for the service may be different as it is also based on the materials required to provide the service for a certain client. So, some of the materials are added to the order, while providing the service or before, after checking out all the details.
The sales order in the 'Draft' state isn't shown to the portal user. In order for the sale of the order to be visible in the portal, the state of it should be changed to the 'Sent' status.
4. Manual orders
If chosen, managers have to create quotations while providing service. The method might be applicable when actual sale lines become clear only during the visit itself.
For example, a mobile phone repair business assumes initial diagnostics, and only after that, the price is offered.
Until an appointment sale order is confirmed, you can update it from a reservation form. Both service, quantity, and complementary products are re-calculated in this case. If changed from the appointments card, it is also required to click the button 'Adapt Sale', to introduce the changes in the related Sale Order as well.
In the generated sale order the responsible salesperson/team is taken according to the hierarchy. At first, it is checked if the resource sales team/seller is defined. If not, then the sales team/seller of the resource type is considered. In case, it also wasn't defined, then the responsible person of the resource and his/her sales team are set as responsible for the sale order.
For example, in our dental clinic, we have a human resource () Ernest Reed (used by default as the responsible person as well). The default sales team of the resource is set as America, and the default sales team of the related resource type is set as Europe. The sales team in the sale order will be 'America' and the salesperson Ernest Reed.
Turn on the option "Appointment reference in sales" in the module settings. The field can be found if the 'Link Appointments to Sale Orders' option is enabled. After that, when creating/adapting a sales order, the lines associated with the current reservation will include the reservation number and the date with the time zone in square brackets.
For example, the reference for the service Tooth Stopping in our dental clinic will be [BA-2022/1507 10/05/2022 11:00-12:00 (Europe/Moscow)], where we can find the appointments number, date, and time with the specified timezone.
If multi-scheduling is enabled and several time slots are booked (both from the site () and from the backend), a single sales order will be created.
In case a different salesperson / sales team was assigned to the resource types/resources of the reservations, for the sale order, the salesperson/team will be taken from the first appointment. Such a situation is possible, only while booking from the backend, while the appointments managers might change the resource/resource type to schedule a time slot during the single booking session.
In case, you click 'Adapt Sale' on the appointments card, when there are different reservations in the sale order, the seller, origin, price list, and partner will be taken from the appointment, which is changing.
When one of the reservations in the sale order is canceled, only the associated-with-it order lines will be deleted, and the sale order will be canceled only if all order lines are deleted.
For example, we have booked several time slots during a single session from the backend and booked one time slot for the service 'Tooth Stopping' and two German lessons. A single Sale Order was generated with the salesperson and sales team of the resource related to the service 'Tooth Stopping' as its time slot was booked the first.

The module also adds the possibility to choose the way the clients are charged for the services. For that, in the field 'Calculate price for' on the resource type card, choose the pricing method. The price can be calculated per:
1. Planned duration
In this case, the clients are charged for the fixed time of the service, which is known beforehand. Odoo quotations are created based on initial reservation plans.
For example, in our car rental, the client manually chooses the number of days of the rent, pays exactly for that time, and should return the car at the end of the period.
2. Units
In this case, the clients pay for the particular item (f.e. mobile phone), or for the particular service as a unit. Sale orders consider appointments for the same price disregarding their duration.
For example, standard haircutting or tire mounting is invoiced the same disregarding how much time they actually take.
3. Tracked (real) duration (the extension Universal Appointments: Time Tracking () is required)
In this case, the actual time spent is invoiced. To track the time, open the appointment card and click on the button 'Start working', when the service is provided click on the button 'Finish working'. The time will be recorded and added to the tab 'Time Tracking'. The time can be recorded multiple times and will be displayed and counted in the related tab. Click 'Adapt Sale' to change the details of the generated Sale Order according to the tracked time.
For example, the approach is suitable for consultation or legal services, where the client pays for the exact time of the service, which is not yet clear while booking.
Appointments prices are price list dependent. This means that a manager might select individual conditions during scheduling. To turn on the feature, in configuration, tick the box 'Multiple Services Prices'. In such a way, it will be possible to apply various currencies, discounts, and promos.
The pricelist can be chosen on the first step of booking as the appointment manager chooses the resource type/resource/service and at the step of adding contact's details. In case, the client already has a contact with the pricelist assigned, it will be applied as you choose that contact. However, you can still change the pricelist, if needed. You can also change the pricelist as you edit the appointment card. Don't forget to push the button 'Adapt Sale' to apply the changes to the sale order as well.
The pricelist set to the appointment will be assigned to the whole resulting sale order. The pricelist is applied to the whole order, including complementary or other products. For example, give a discount for booking appointments during a particular period (for example, a 10% discount for booking a lesson during the summer holidays). Then add the extra product students book (10$). In the generated sale order the discount will be applied to the total price (lesson + students' book).
Universal Appointments: Website Sales
Universal Appointments: Website Sales - is an add-on, that allows showing service prices on the Odoo website. This way, the client will see the prices on the step of choosing a service.
The module allows publishing certain pricelists, so the clients could switch between them, to see the price in the desired currency or to apply a discount.
Create a sale order as soon as the reservation is created () and allow portal users to sign and pay orders right from the linked reservations.
Configure the app to redirect users to a generated sales order at the end of the website booking process.
Automatically add chosen while reservation by website visitors/portal customers complementaries to the generated quotations/sales orders (if any).
Show prices on a website
Publish pricelists
Use Odoo payment options to pay for the appointments
Add complementaries from the website to the Sale Order
While scheduling an appointment on the website, as the client opens the step of choosing a service, it is possible to show prices on the service cards. To show the prices and pricelists on the website:
1. Go to Configuration > Configuration and find the section 'Website Specific Options'
2. Optionally, choose the website to apply the settings to (see Multicompanies & Multiwebsites)
3. Tick the option 'Pricelists and Prices'
4. Click 'Save'.
The price for the service is defined on the card of the related product. To establish a connection between a service and a product:
1. Start creating or editing a service card
2. In the field 'Related Product' choose the product
3. Click 'Save'
After that, the service cards would contain the price information according to the related-to-service products and customer pricelist.
To change the price of the service, you need to change the price of the related product.
Keep in mind that if the tax is not included in the price of the product, the price will be shown without tax.
Also, on the step of choosing a service, the client may choose a pricelist and the prices will be recalculated. This way, clients, may see the price in other available currencies, or apply a discount, if any.
To make a pricelist available for the selection on the website:
1. Go to Configuration > Pricelists
2. Open a pricelist
3. Choose the website to show the pricelist, or leave the field empty to show i on all available websites (see Multicompanies & Multiwebsites)
4. Tick the box 'Selectable'
5. Click 'Save'.
After that, the pricelist will be available for selection on the website. For example, we have made 2 prices selectable: the default one (Public Pricelist) and the pricelist in euros (Eur).
If the contact has an assigned pricelist, it will be applied on the step of choosing a service and the price will be shown according to it. For instance, it might be a good idea to assign a pricelist with 'Wholesale' prices to the partners of the company.
For example, we have made 2 prices selectable: the default one (Public Pricelist) and the pricelist in euros (Eur). Also, the client has an assigned pricelist (Wholesale Pricelist), which provides a 10% discount. So, the client's pricelist will be applied by default, but he/she will still see the available-for-the-selection pricelists if any.
If there is only one pricelist available, then the dropdown field with pricelist selection will be hidden and the default pricelist or contact's pricelist, if any, will be assigned.
If a client chooses, some complementary products while scheduling, then they are automatically added to the resulting sale order, if any. In case, they are added later through the button on the appointment card, it would be also necessary to click the button 'Adapt Sale' on the related appointment card in backend. Then, they will be also added to the existing sale order.
As soon as the sale order is confirmed, it is no longer possible to add the products. The 'Adapt Sale' button will not be visible on the appointment card.
After confirming the account details, portal users are either redirected to 'My appointments' page with a list of his/her appointments (if they have several), or to the page of their current appointment (if there is only one) (see 7. Success Page & Signing up).
It is also possible to redirect the user straight to the sales order. For that, in the section 'Website Specific Options', of configuration, enable the option 'Open order on finishing'. Take into account that the order/payment form would be opened automatically only if it is in the 'Sent' or 'Confirmed' state. The state of the generated order is based on the configuration option 'Sent Quotation' of the setting 'Auto Sale Order' (see Universal Appointments: Sales).
On the appointment portal form, the client will see a button for signing/paying for a related order. The button itself may imply different actions depending on the settings (for example, signature required/not required) and the order status (already signed, the time to pay (before/after)): "Sign & Pay", "Accept & Sign", "Accept & Pay", "Pay Now". As a user clicks on the button, he/she is redirected to the order page with the required signing/payment form opened automatically.
Here, the app relies upon standard Odoo sales workflow and payment mechanics. The default Odoo checkout process with default payment acquirers is assumed to take place.
Universal Appointments: Custom Fields
Universal Appointments: Custom Fields () - is an add-on, which allows adding custom details for appointments, resource types, resources, and services. The add-on doesn't work without the core module: Custom Fields: Core. You can place your custom fields in the backend on the appointments/resource types/resources and services cards, or make custom properties of resource types, resources, and services visible on the website if you have: Universal Appointments: Portal and Website (), and Universal Appointments: Custom Fields for Website and Portal () (see. Universal Appointments: Custom Fields for Website and Portal).
Adding Extra Fields
Various Form Placement
Require to Enter a Value
Various Types of Fields
In order to show a new property for appointments, go to Configuration > Appointments Custom Fields, click 'Create' to add a new field, and enter details. The appointments custom fields can be resource type dependent. Just choose one or several resource types, while creating an appointment custom field, and the custom field will be added only to the appointments of those resource types.
In order to show a new property for resource types, go to Configuration > Resource Type Custom fields, click 'Create' to add a new field, and enter details.
In order to show a new property for resources, go to Configuration > Resource Custom fields, click 'Create' to add a new field, and enter details.
In order to show a new property for services, go to Configuration > Service Custom fields, click 'Create' to add a new field, and enter details.
It is possible to add custom fields of the following types:
1. Single-line text (char)
2. Simple text without formatting (text)
3. Rich text (HTML-formatted text)
4. Integer or float numbers
5. Drop-down choice with your own options (selection)
6. Checkbox (boolean)
7. Date or date and time
8. Binary (a file to upload)
9. Reference to another Odoo document (e.g. for sale order, contact; many2one)
As you add a field of the dropdown type, it is possible to add the options one by one by clicking on the button 'Add a line'. Or all options at once by adding the list of options. For that, click on the button 'Add selection values based on a string'.
As you click on the button a pop-up wizard will appear. The options should be divided by a comma. When you are ready click 'Prepare Selection Values' and they will be automatically added to the list of available selection options.
If some of the options were previously added to the list, they will not be removed by the new ones.
When you create a custom field for resources, you also can choose to add the field only to the resources that relate to certain resource types. For that, just choose the resource types in the field 'Types'.
The tool lets you comfortably select an interface position of a custom field from a closed list of options. In the backend form of view, you can place your custom fields in the: left column, right column, custom tab, or after description. Custom fields for resource types and services can be also placed in the settings tab.
Mark a custom field required to force users to enter values. In this case, a user will not be able to save a resource type/resource/service/appointment if the field is left empty. For that, tick the box 'Required to enter a value' as you create or edit a custom field.
Custom Fields for appointments can be also used for analysis. For that, tick the box 'Used for Analysis' as you create or edit a custom field (Appointments Analytics).
The rights to create custom fields belong only to 'Appointments: Administrator' (see Access Rights).
Universal Appointments: Custom Fields for Website and Portal
Universal Appointments: Custom Fields for Website and Portal () - is an add-on, which allows showing custom fields on the Odoo website. The add-on also requires the core modules: Universal Appointments: Website and Portal (), Universal Appointments: Custom Fields (), and Custom Fields: Core.
Extra Fields
Account Details Placement
Required to Enter the Value
Full Details Page Placement
The available field types for appointments/resource types/resources/services are the same as in the backend (see Universal Appointments: Custom Fields).
The appointment custom fields on the website can be shown on the appointment card on the Odoo website/portal. For that, as you create or edit an appointment custom field, choose its portal placement in the field 'Portal Page Placement'. The available placements are: at the end, left column, and right column.
Appointments custom fields can be resource type dependent. If configured, the appointments custom fields will be shown only on the related to the resource type/types appointments cards.
Custom fields for resource types/resources/services are added to the full details page. To show the custom fields on the website, you need to turn on the full page for resource types/resources/services and choose the custom field's placement in the field 'Full Details Page Placement'. The available placements are: at the end, left column, and right column. You can also leave the field empty if you want to have a custom field only in the backend.
The full page can be turned off for all or separate resource types/resources/services (see Full Details Page).

Also, you can add custom appointment fields to the 5th step ('Account Details') of booking an appointment on the website. This way, you can get some extra information from the client. To add the custom field to the account details step, choose its 'Input Form Placement' as you create or edit an appointment custom field. The available placement is at the end of the page. A field with the information that a client fills in will be added to the appointment, but not to the contact's card. For example, we have a car rental business and the cars are available in three colors: red, white, and black. So, we have added a dropdown custom field 'Preferred color' and chose its input form placement on the account details page. As the client fills in the details and confirms the appointment, the managers see the details in the backend, according to the chosen backend form placement. The client can also see his/her reply on the appointment card in the portal.
If the appointment custom fields relates to a certain resource type/types and the input form placement was set, then the field will be shown on the step of filling in the account details only of the related resource type/types.
Force clients to fill in the custom field to confirm the reservation, so you will be able to get the required information to provide the service. To make filling in the field mandatory, tick the option 'Required to enter a value'. For example, for a language school, you can create a text field 'Learning preferences', to find out what the student likes before the lesson.
Universal Appointments: HR Bridge
Universal Appointments: HR Bridge - is an add-on, that allows applying employees as appointment resources. This way the calendar of the employee, his/her meetings, and own leaves will be used to generate the available time slots.
Set employees as resources
Consider employee's working calendar and busyness
To turn on the features of the module, make sure, that the option 'Employees as Resources' is enabled in Configurations of the module, section 'Extra Features'.
As you enable the module functions and start creating a resource, one more field 'Resource Kind' will appear. There you will be able to choose between two kinds: 'Material' and 'Human'. Choose the option 'Human' and choose the employee in the field 'Employee'. For example, you can create a resource for the dentist 'Anita Oliver'.
We can't create two stand-alone human resources () for a single employee, as then the already booked time slots of one will not be taken into consideration while booking slots for another one. In this case, we may create a resource of a Human kind and its alias. This way you will be able to use the calendar of the prime resource. For example, Doris Cole (a human resource) is both a hairdresser and a teacher (see Managing Resources).
The responsible person of the resource will be set by default and that will be the same employee (cannot be changed). For example, if we create a resource for our dentist and choose the employee Anita Oliver, she will be the responsible user as well.
Optionally, enable the feature 'Calendar Events as Busy Time' on the related resource type card to consider the meetings of the of the employee's user unavailable for bookings. For example, the dentist Anita Oliver (both resource and responsible) has a meeting on Thursday at 4 pm on her calendar, that's why this time is not available for booking.
As you create a resource of Human kind. The working calendar of the chosen employee is considered to generate the available time slots. For example, the calendar of our dentist Anita Oliver is Standard 40 hours/week. So the related resources 'tooth stooping' and 'surgery' are available only during this time.
Not only the calendar affects generated time slots, but also the Time-offs. Time-offs can be either global (the time, when the company doesn't work) or own Leaves (when an employee takes a vacation). It is impossible to schedule appointments for non-working hours.
You can see and manage global time offs right from the working hours card. To do that, just click on the 'Public Time off' button.
You can view and manage all employees' own Leaves right from the working hours card. For that, just click on the button 'Time Off'.
Universal Appointments: Time Tracking
Universal Appointments: Time Tracking - is an add-on, which allows tracking of spent time on service provision. The module allows tracking the real-time spent on providing service and control statistics by resource types, resources, and services.
Track the real-time spent
Control Statistics
To turn on the features of the module, make sure, that the option 'Time Tracking' is enabled in Configurations of the module, section 'Extra Features'.
To track the time spent on the appointment and register done jobs, click on an appointment in the calendar, then click 'Edit' to be redirected to the appointment card. Above the appointment, you will find the 'Start working' button, which will help you to launch the time tracking. When you want to make a pause or the appointment is over, click 'Finish working'. The timer can be launched and finished multiple times. The total duration will be recorded and calculated in the 'Time Tracking' tab. In the same tab, you can also add the working time manually. This way you will be able to charge the client for the exact time spent providing the service.
Charge the clients () for the actual time spent. For that, in the field 'Calculate price for' on the resource type card, choose the pricing method as 'Tracked (real) duration' (see Configuring Pricing Methods).
As you track the time of multiple appointments, you can control the statistics by resource types, resources, and services. To analyze the real time spent on the appointments, go to Appointments Analysis and choose the measure as 'Tracked Duration'. For example, the surgery in the dental clinic lasts for two hours. As soon as the surgeon started it, the nurse clicked the button 'Start working above the appointment and the timer was launched. Upon finishing the button 'Stop working was clicked'. The total tracked time was not 2 hours, but 1 hour 40 minutes (see Appointments Analysis).
The price for the appointment is calculated based on the configuration 'Calculate price for' on the resource type card. If you configure it to calculate the price for 'Tracked duration', then the duration of the appointment will be considered to calculate the final price. To calculate the price for the tracked time, don't forget to click the button 'Adapt Sale', then the price in the sale order will be adapted accordingly.

Universal Appointments: Gantt
Universal Appointments: Gantt - is an optional add-on () that introduces the Gantt view for appointments (reservations). The add-on requires the Enterprise license of Odoo. The add-on allows seeing the appointments in the Gant view in the read-only mode. With the help of the add-on, you will be able to control the workload of business units, analyze shifts, allocate resources, and provide service in the familiar well-known interface.
Control workload
Analyze the data
To turn on the features of the module, make sure, that the option 'Gantt view' is enabled in Configurations of the module, section 'Extra Features'.
As you open the appointments module, in the top right corner above the calendar, you will find the buttons to switch between the appointments views. Click on the third button () to switch to the Gantt view. As in the single view interface, here you will be able to see all reserved appointments, regardless of the way they were booked, switch between the daily, weekly, monthly, and yearly calendar view, search, filter, and group the appointments to find the required ones quickly.
From the Gantt view, by default, you see the resources on the vertical scale and the dates/days/time on the horizontal scale. You can select various searching and filtering criteria to limit the number of shown appointments. For example, show only today's appointments.
Apply various grouping options to change to create different hierarchies of groupings by clicking on several options one by one. To reset the grouping, just click on the cross by it in the search bar. For example, click on the option resource type, then the option resource and service and you will see the following hierarchy in the search bar 'Resource type > By Prime Resources > Service'.
Instantly access information about any appointment by hovering over it. To view the appointment card, just click on an appointment in the calendar. There you will be able to see the information about the appointment, change its state, track the real-time of the appointment (), etc. To find out more about the appointment card and the related actions, see the article 'Appointments Card'.
From the Gantt view, it isn't possible to schedule and re-schedule the appointments. The table is available in read-only view.
Access Rights
Access to appointments is managed in a different way for different types of users. There are 3 types of users:
1. Odoo user or internal user
2. Portal user or registered user ()
3. Public user ()
Rights to administrate the appointments belong to 2 user roles: 'Appointments: Only Own' and 'Appointments: Administrator'. If you want a user to be able to see and schedule appointments in the backend, he or she should belong to one of those groups. If the internal user doesn't have one of the appointment roles assigned, the related menu will be hidden for such a user.
On the website (), if configured, portal users will be able to schedule appointments and see the list of the appointments related to them, their company, and colleagues. They can also manage the appointments with the help of some functional buttons on the appointment page.
Public users, if configured, will be able to schedule an appointment and will receive a sign-up invitation to make further bookings and be able to see and manage related appointments.
For portal and public users, only published resource types, resources and services will be available for booking.
Internal User Rights
The tool introduces its own user rights system to make sure business data is secured. For the backend users, there are 2 groups that are allowed to work with appointments. Those are: 'Appointments: Only Own' and 'Appointments: Administrator'.
Users with the 'Appointments: Administrator' group assigned are allowed to manage all settings and update any appointment-related objects of their company(s).
Users with the 'Appointments: Only Own' group assigned are allowed to:
1. See the resource types and services in the read-only view
2. Observe the resources, in which they are followers, responsible or extra managers, or which do not have such managers at all
3. Observe an appointment, if they are followers of the appointment/the related resource, if they are the responsible or extra managers of the related resource, or if the resource doesn't have such managers at all
4. Create, update and delete appointments related to the resources, in which they are a responsible or an extra manager, or which do not have such managers at all.
So, the followers of a resource type/resource/appointment can access them in the read-only view. In order to create, manage and delete an appointment, the user should be a responsible or extra manager of the resource, or there shouldn't be such a manager assigned.
The followers are added hierarchically. So, if a user follows a resource type, he is automatically added as a follower of the related resources and appointments. If a user follows the resource, he is automatically added as a follower of the related appointments (see Appointments Discussion).
The module supports a multicompany regime, so the stated rights are also limited by the company set in the related resource type. This way, in order to have the access to a certain resource type/resource/appointment, the user should also have the access to the related company (Multicompanies & Multiwebsites).
To access the appointments menu (calendar) a user should belong to one of these groups. The menu will be hidden for other internal users.
To assign an appointments role to an internal user:
1. Go to Settings > Manage Users
2. Choose a particular user
3. Click 'Edit'
4. Scroll to the section 'Other'
5. In the field 'Business Appointments' choose one of the roles
6. Click 'Save'
There is an additional access role, which was introduced to let users of the group 'Appointments: Only Own' manage the working calendars, that is Manager Resource Calendars and All Leaves. It allows to:
1. See the Configuration > Working Calendars menu (even if the user doesn't belong to the group 'Appointments: Administrator')
2. Edit any working calendar and shifts in it
3. Create, delete, edit (including approval) any Leaves: both global and for each employee
To assign the role Manager Resource Calendars and All Leaves to a user:
1. Go to Settings > Manage Users
2. Choose a particular user
3. Click 'Edit'
4. Scroll to the section 'Other'
5. Find the option Manager Resource Calendars and All Leaves and enable it
6. Click 'Save'
Portal&Public User Rights
Public users () - website visitors - may access the Appointments page only if you explicitly allowed that. Thus, you can switch off the option 'Business appointments on website' () to fully disable the scheduling appointments for such users. The option cannot be turned on, if the appointments for the portal users aren't enabled.
Public users () would see only those resource types, resources, and services, which are published and available for the website they are visiting.
To (un)publish () a resource type/resource/service, open a resource type/resource/ service card and click the button 'Publish' in the top right corner.
To (un)publish () resource types/resources/services in a batch, open the related list menu, select the resource types/resources/services, click on the button 'Action' above and choose the option 'Website (un)publish'.
The steps, that have only one available (published) option (so there is no alternative to choose) are skipped. Make sure, that at least one published resource and service are available for the published resource type to make it visible on the website. For example, we have a published resource type 'Dentist' and published service 'Tooth stopping', but we don't have any published 'Resource' related to these resource types and services. So, none of them are visible on the website.
Any website visitor might schedule an appointment and access resources/services without registration unless you make the sign-up mandatory to confirm the reservation by choosing the option 'Sign in required' in the field 'Sign in for public users' of the related website (see Filling in Contact Details).
Upon completing the reservation, public users are redirected to the success page, where they are suggested to choose the password to finish the registration. If a public user doesn't finish the registration, then he/she will not be able to create a new appointment with the same account details. In this case, he/she should contact the administrator, to get the sign-in credentials (see Success Page & Signing up).
Portal users () - registered and logged-in users - have the same access rights as public users (), but they also can see and manage the reservations available to them, their company (if set and has separate reservations), and their colleagues (if any). For example, Brandon Freeman sees in his portal the reservations that he made from his account, the reservations that were made from the account of his company Azure Interior, and the reservations of his colleague Abigail Peterson.
Turn on the option 'Business appointments in portal', to let portal users schedule and manage their appointments right from the portal.
In the user's portal, a new tab 'My Appointments' is added. When a portal user clicks on it, he/she sees the list of his/her appointments. Users can observe the list of planned and done appointments and may check any of them. In the list, the user sees the reference, scheduled time, resource, and service of each appointment (see Portal Control of Reservations).
Upon completing the reservation, portal users are either redirected to 'My appointments' page with a list of his/her appointments (if they have several), or to the page of their current appointment (if there is only one). It is also possible to redirect the user to the related sale order () if the add-on Universal Appointments: Sales is installed and the option 'Open order on finishing' is enabled, or even to the form of signing and payment (see Success Page & Signing up).
Multicompanies & Multiwebsites
The module supports the multiwebsite and multi-company environment. This way you can reflect the workflow of several businesses in a single Odoo environment and configure the structure of the appointment accordingly. So, the users of one company scheduled appointments only based on the objects related to their own company or the global ones.
A company can be assigned to:
1. Resource type
If you open the resource types menu, you will find the list of the resource types. If you work in a multicompany environment, then, here you will see only the resource types related to your company or to the companies selected in the systray, if you have the access to several ones.
This way, only internal users of a certain company will see, create and manage the related resource types. For example, only the internal users of the company 'Dental clinic' see the resource types 'Dental clinic New York' and 'Dental clinic Chicago'.
If a company isn't specified, then such a resource type is considered global and is visible by all internal users with the access to resource type menu.
2. Resource
The company of a resource is assigned automatically and is taken from the related resource type. So, to assign a company to the resource, you should set it on the related resource type card.
If a company of the related resource type isn't specified, then such a resource is considered global and is visible by all internal users with the access to resource menu.
3. Service
If you open the services menu, you will find the list of the services. If you work in a multicompany environment, then, here you will see only the services related to your company or to the companies selected in the systray, if you have the access to several ones.
This way, only internal users of a certain company will see, create and manage the related services. For example, only the internal users of the company 'Dental clinic' see the services 'Tooth Stopping' and 'Surgery'.
If a company isn't specified, then such a service is considered global and is visible by all internal users with the access to resource type menu.
4. Appointments
The company of an appointment is assigned automatically and is taken from the related resource. As the company of the resource is inherited from the related resource type, then, to change the company of the appointment, you need to change the company of the related resource type.
If a company of the related resource type isn't specified, then such an appointment is considered global and is visible by all internal users with access to the appointments calendar.
5. Numeration
Appointment numeration also supports the multi-company regime and might be assigned for each company separately. This way each company may have a separate appointments numeration. For example, numeration with the prefix DC for dental clinic (DC001) and with suffix CR for car rent (001CR).
Leave the field empty, to apply the same numbering to all companies.
6. Pricelists
You can create company-specific pricelists. That is especially useful when only a certain company has a promotion/sale or for companies that provide services in countries with different currencies.
If the company isn't specified, then such a pricelist is considered global and can be chosen while scheduling an appointment by all internal users.
In case, the add-on Universal Appointments: Portal and Website is installed, you will be able to reflect different business structures on the available websites. For example, you can create several websites: Dental clinic, Language school, Hotel, Car rent, and Travel agency, and adapt the appointment structure, so only related resource types/resources and services were available for each of the websites.
It is possible to choose the related website in:
1. Resource type
Choose the website, on which the resource type will be shown. Leave the field empty, to make the resource type global and available on all websites.
In order to make it visible to the public and portal users, the resource type should be published (see Portal&Public User Rights).
2. Resource
Choose the website, on which the resource will be shown. Leave the field empty, to make the resource global and available on all websites.
In order to make it visible to the public and portal users, the resource should be published (see Portal&Public User Rights).
3. Service
Choose the website, on which the service will be shown. Leave the field empty, to make the service global and available on all websites.
In order to make it visible to the public and portal users, the service should be published (see Portal&Public User Rights).
4. Pricelists
Choose the website, on which the pricelist will be shown. Leave the field empty, to make the pricelist global and available on all websites. It is especially useful, when some of the companies are international, or when the companies work in countries with different currencies and there is a possibility to pay in different currencies.
In configurations, it is required to apply the settings for each of the websites separately. To switch between sites settings, select the website to configure in 'Website for appointments'. Here you also have a website link button (), that forwards you to the chosen website to see the result, but make sure you clicked 'Save' in the left corner at the top of the page to save the configurations.
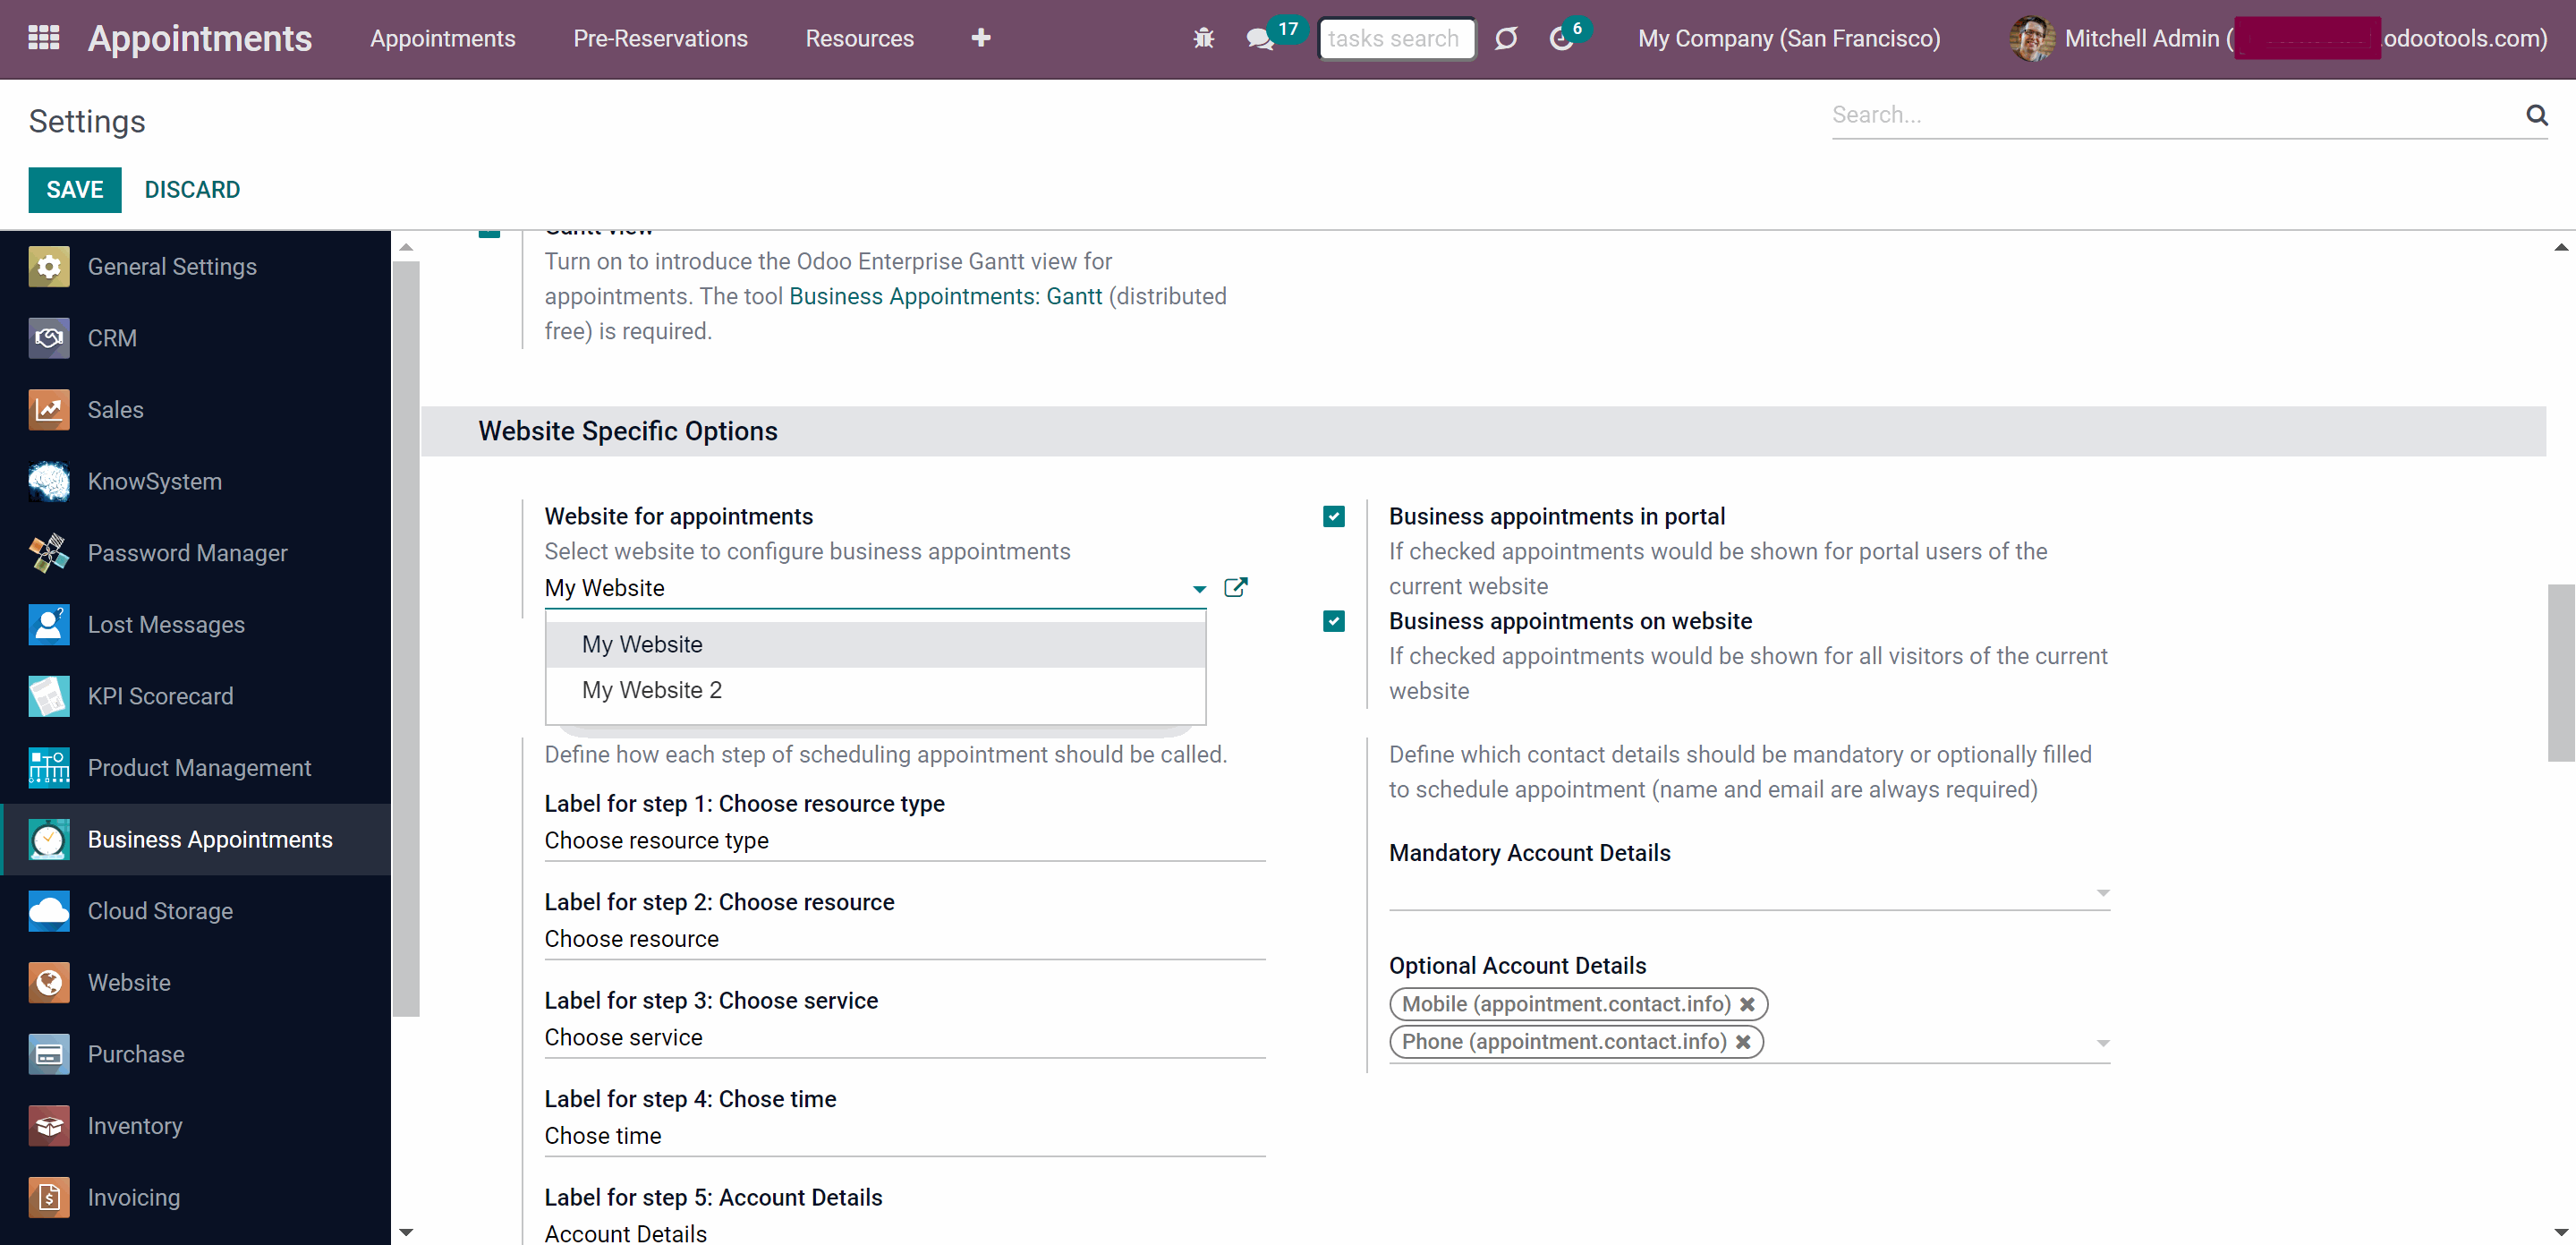
Configuration Page
Universal Appointments and Time Reservations has a configuration page, where you can turn on and off some add-on features and make necessary changes to make your work convenient.
Maximum Period for Pre-Reservation: allows setting the time to finish the pre-reservation. After that time, if not completed, the slot is unblocked and available for the new reservation (see Pre-reservation).
Multi Scheduling: allows booking several time slots at once. Is available both in the backend and frontend. In the backend, you can select slots for different resources, resource types, and services in one wizard (see Scheduling Appointments: Backend, Website Booking Process).
Maximum Appointments (Backend): specify the maximum number of time slots, that can be chosen at once in the backend. A separate appointment for each time slot will be generated. Visible only if the multi scheduling option is enabled (see Scheduling Appointments: Backend).
Complementary Products Offer: turn on offering managers complementary products while scheduling a time slot. Such products would be shown if any are associated with reserved service (see Offering Complementary Products).
Different Time Zones: make time zone available for selection while scheduling an appointment. Otherwise, all time slots will be shown always at the same timezone taken from a current company (see Multi Time Zones).
Company Timezone: define the default time zone to show time slots. In case the option 'Different Time Zones' is turned off, it will be the timezone in which all clients and appointment managers schedule appointments (see Multi Time Zones).
Multiple Service Prices: if checked, it would be possible to create a pricelist and assign different prices per product.
Use Rating for Appointments: turn on to send rating requests when appointments are done. This option might be turned on or off per each resource type (see Appointments Rating).
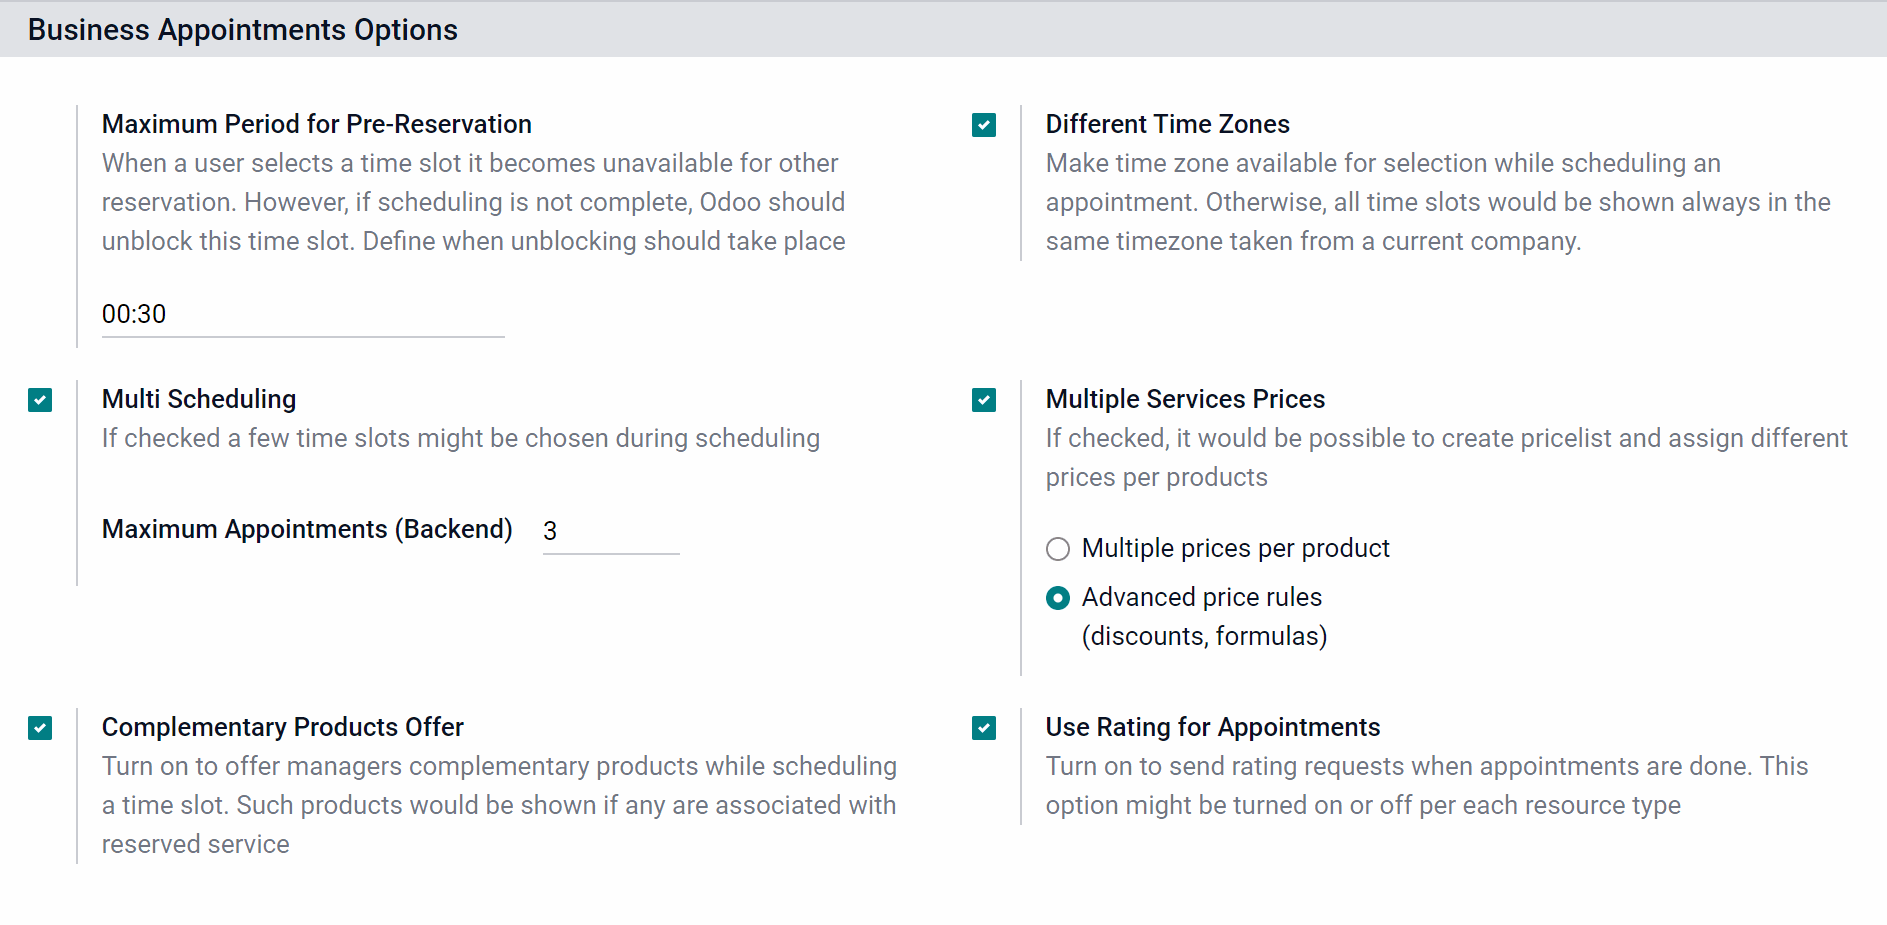
In the Extra Options section, you can see all the available add-ons and their pages. From here you can turn them on and off.
Some of the add-ons have additional settings when enabled.
Website / Portal Confirmation (): define whether website / portal visitor should confirm appointment. You can either set the confirmation by email or by mobile or phone number (see 6. Confirming Reservation).
Auto Sale Order (): choose the default state of the automatically generated sale orders. The sale orders will be created as soon as an appointment is scheduled (see Linking Appointments and Sale Orders).
Appointment reference in sales (): if enabled, when creating/adapting a sales order, the lines associated with the current reservation will include the reservation number and the date with the time zone in square brackets (see Linking Appointments and Sale Orders).
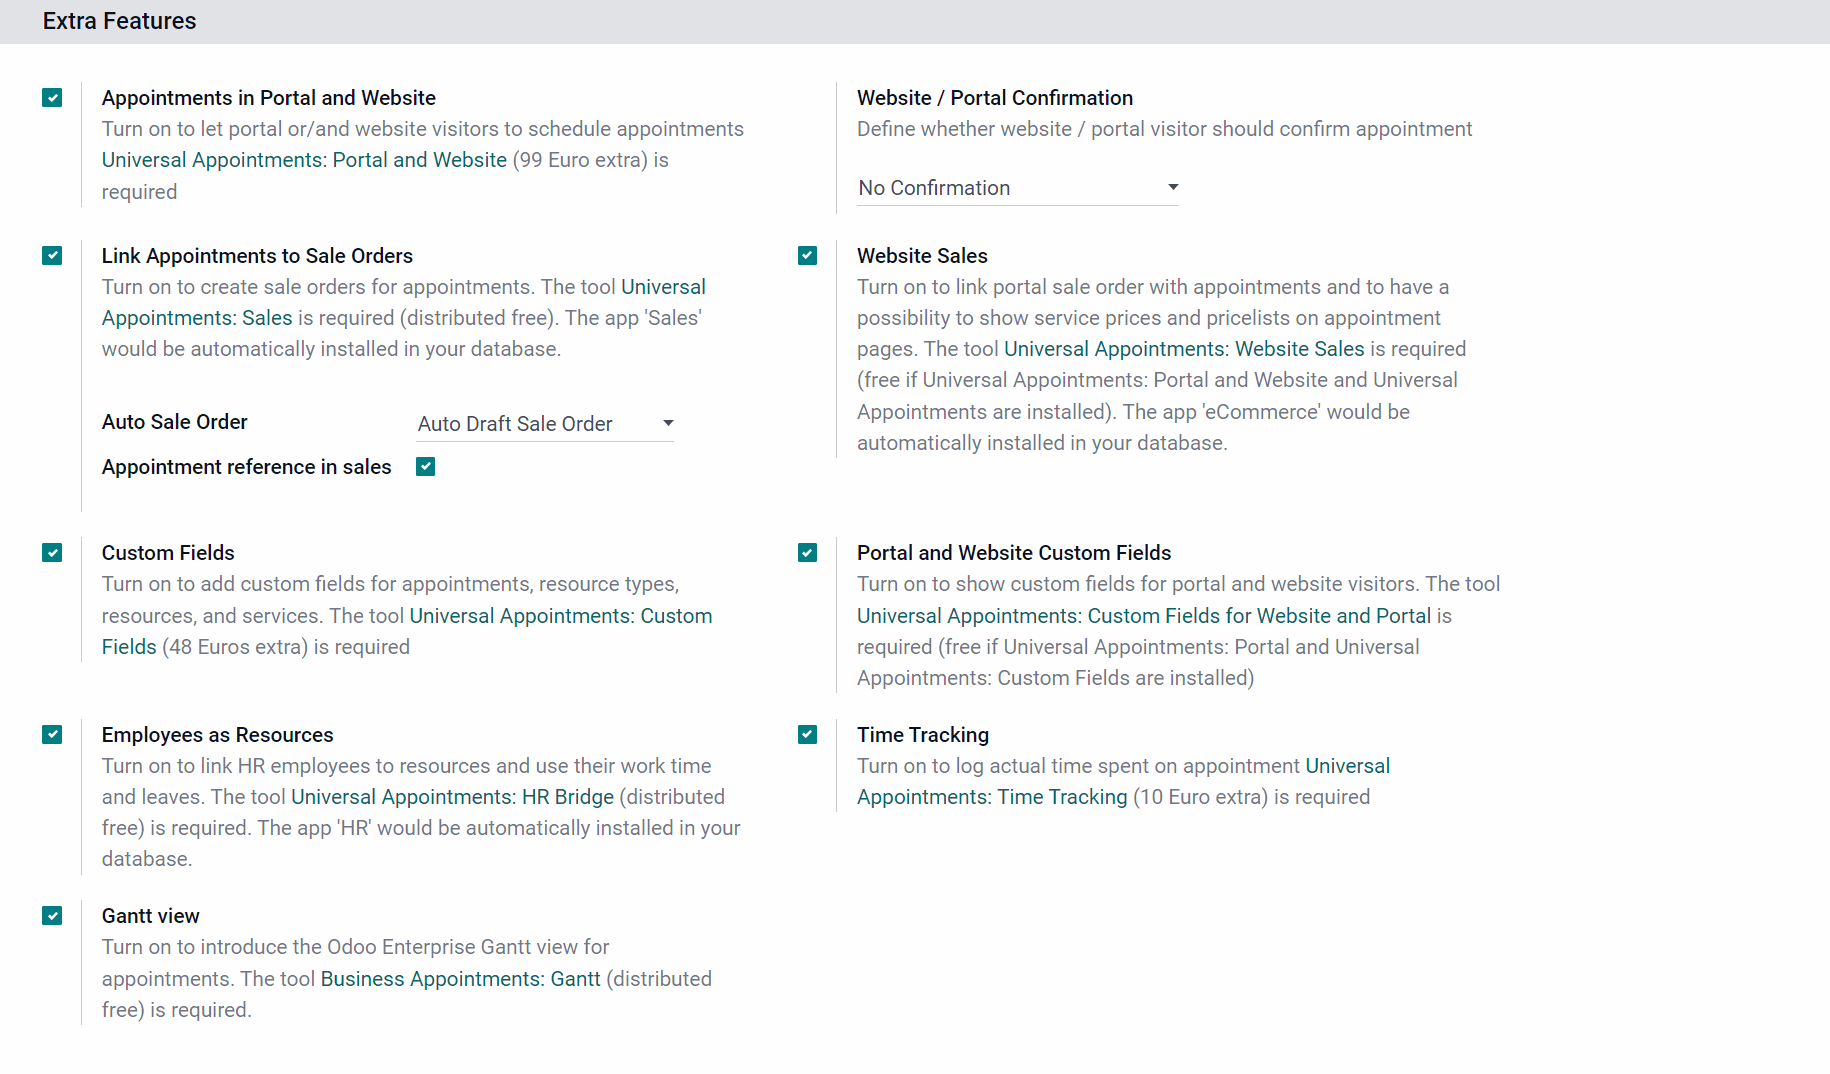
The add-on Universal Appointments: Portal and Website () has its own configuration section. The extension supports multi-website, and it is required to apply the settings for each site separately. To switch between sites' settings, select the website to configure in 'Website for appointments'. Here you also have a website link button (), that forwards you to the chosen website to see the result, but make sure you clicked 'Save' in the left corner at the top of the page.
From here, you can define how each step of scheduling an appointment should be called. It isn't possible to remove the stages, but according to the resource type settings some of the stages may be skipped, in case there is nothing to choose from. For example, if you have only one resource and service related to a particular resource type, then the second and third steps will be skipped (see Portal and Website: Customization & Settings).
Business appointments in portal: if checked appointments would be shown for portal users of the current website (see Universal Appointments: Portal and Website).
Business appointments on website: if checked appointments would be shown for all visitors of the current website (see Universal Appointments: Portal and Website).
Mandatory Account Details: define which contact details should be mandatorily filled in to schedule an appointment (name and email are always required) (see 5. Filling in Contact Details).
Optional Account Details: define which contact details should be optionally filled in to schedule an appointment (name and email are always required) (see 5. Filling in Contact Details).
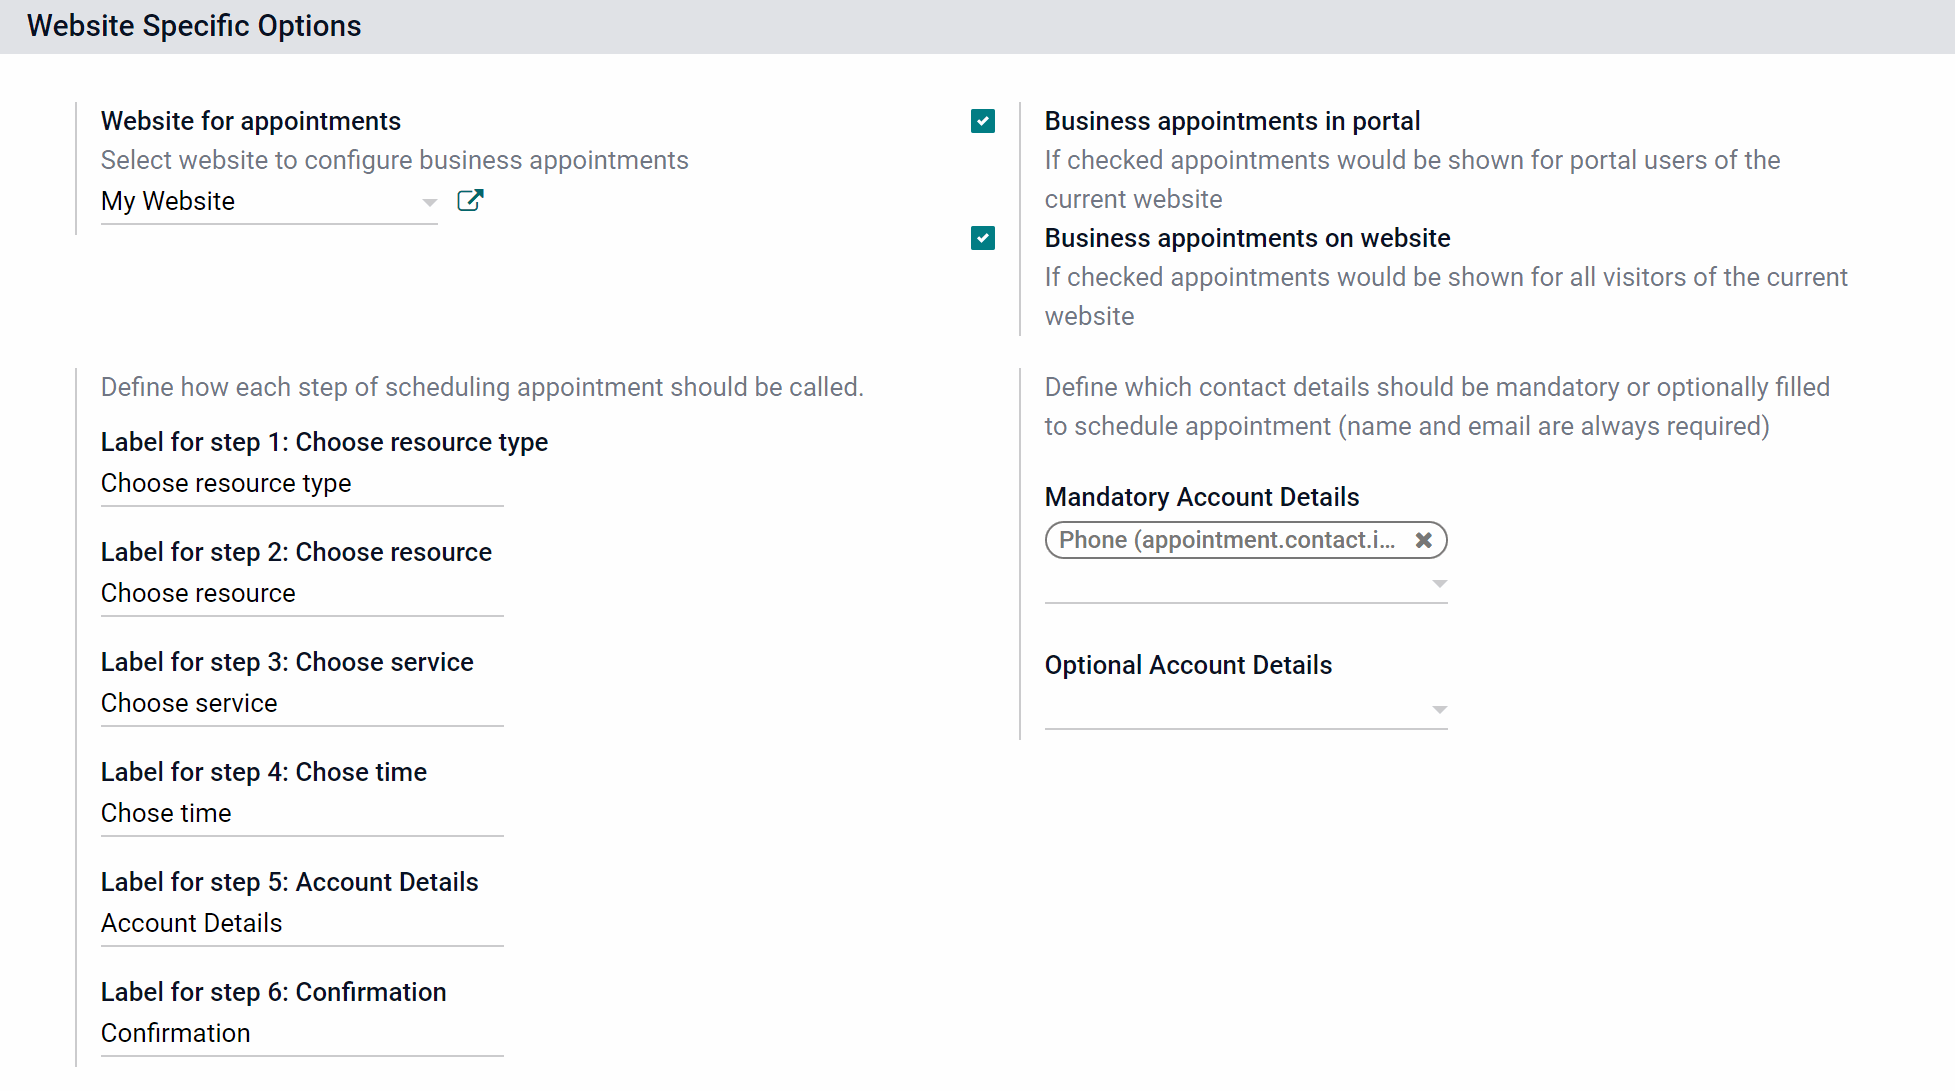
Sign in for public users: define the sign-in policy for public users. 'Sign in required' means that before entering account details, unregistered website visitors must log in to the portal. 'Sign in offered' means that such users would be offered to log in if they had an account, but the step might be missed. 'Auto sign in' means that public users might finish reservations without signing in, while the portal users would be auto-created for them (see 5. Filling in Contact Details).
Sign in text: write your own text to offer the sign-in. The field supports HTML, however, you shouldn't change the link, that is added to the field by default (see 5. Filling in Contact Details).
Maximum Appointments (Portal): define how many time slots might be selected during scheduling on the website. Visible only if the multi scheduling option is enabled (see 4. Choosing Time).
Agree on terms and conditions: define whether the contact details page should include an obligatory agreement to terms and conditions (see 5. Filling in Contact Details).
Terms for public users only: turn on if terms should be agreed only by public visitors (not by portal users) (see 5. Filling in Contact Details).
Custom Portal Appointments Filters: allows adding custom portal appointment filters. This way the client may filter his/her appointments in the portal (Custom Filters & Search Criteria).
Custom Portal Appointments Search: allows adding custom portal appointment search options. This way the client may search among his/her appointments in the portal (Custom Filters & Search Criteria).
Show types full detail pages: if turned on, each found resource type would have a link for full details which you may update on the website. The full description might be turned off for a specific type (see Full Details Page).
Show resources full details pages: if turned on, each found resource would have a link for full details which you may update on the website. The full description might be turned off for a specific resource (see Full Details Page).
Show services full details pages: if turned on, each found service would have a link for full details which you may update on the website. The full description might be turned off for a specific service (see Full Details Page).
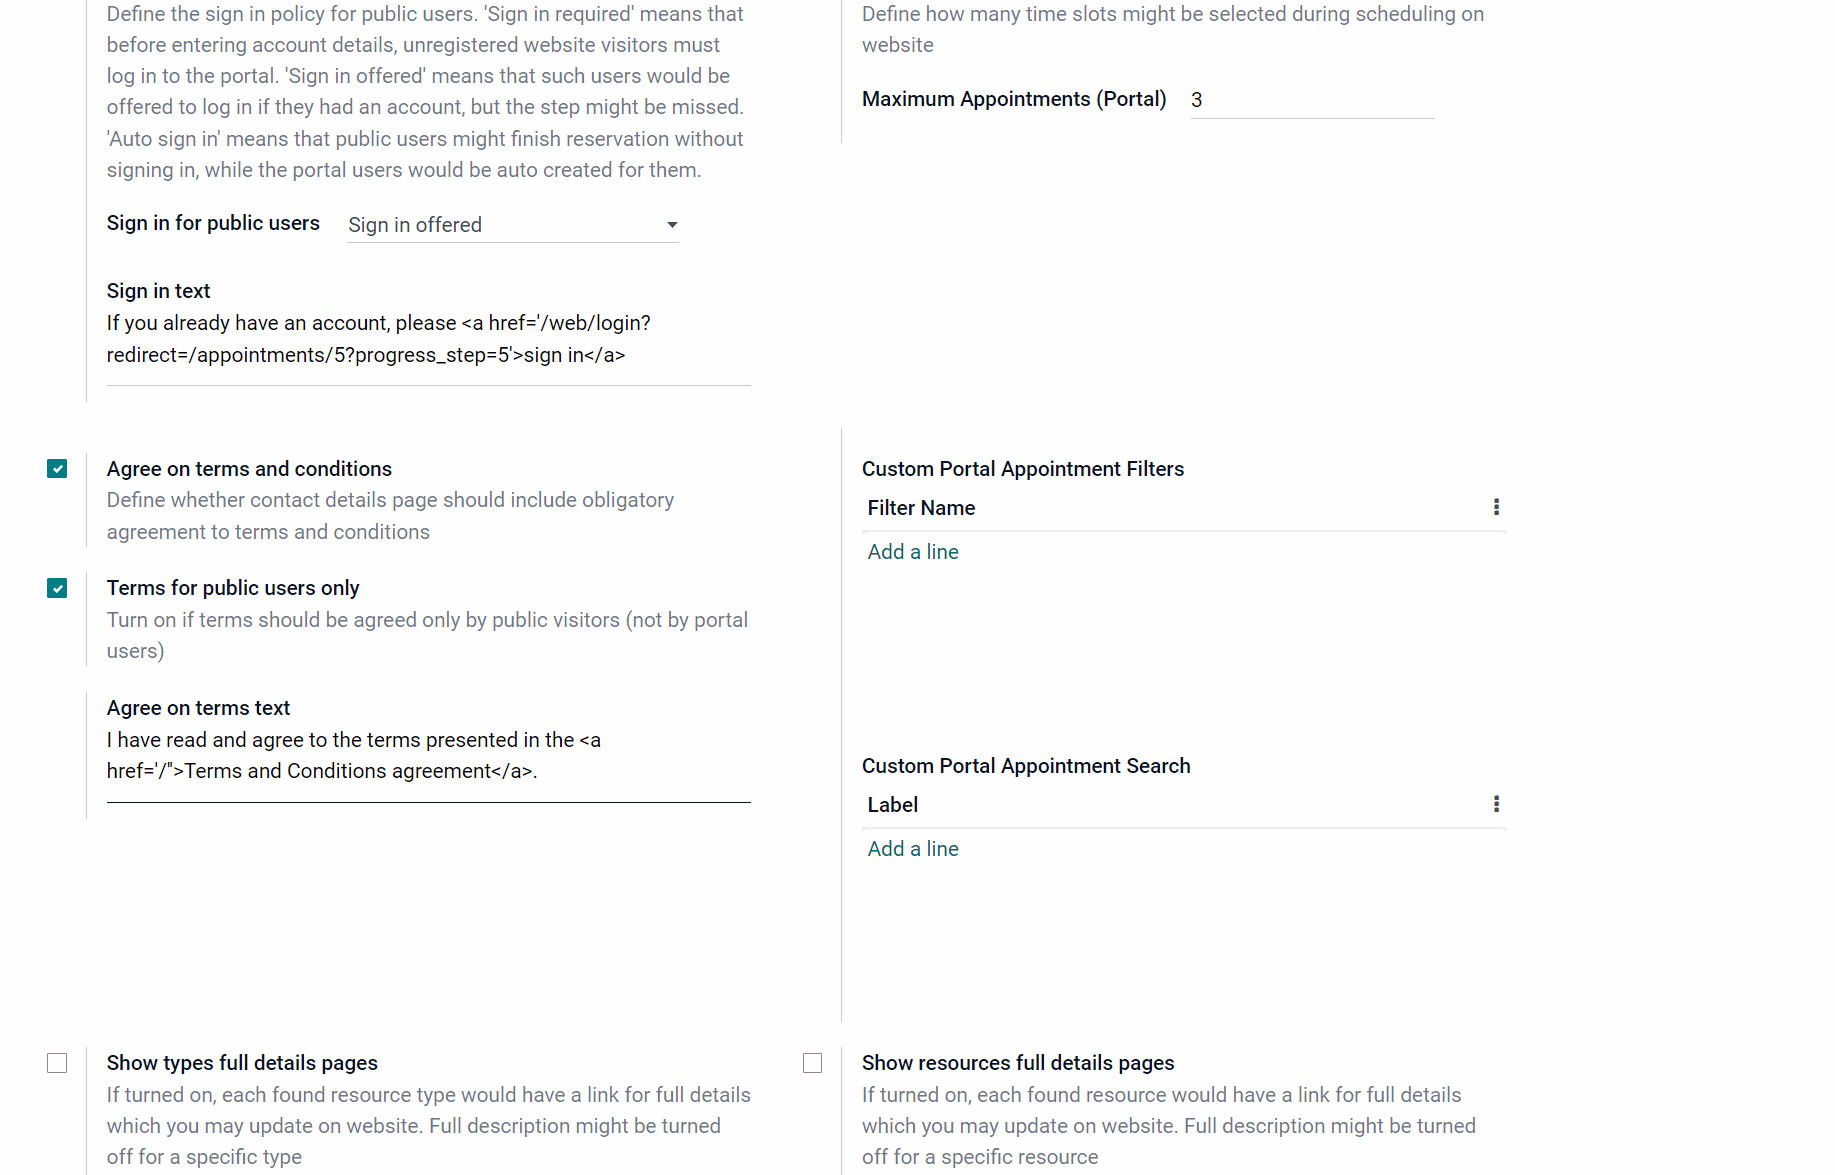
Custom Portal Resource type Filters: allows adding custom filtering options to let a client filter the available resource types to find the ones he/she needs quickly. Can be applied on the first step of the scheduling process on the website (Custom Filters & Search Criteria).
Custom Portal Resource type Search: allows adding custom search options to let a client search among the available resource types to find the ones he/she needs quickly. Can be applied on the first step of the scheduling process on the website (Custom Filters & Search Criteria).
Custom Portal Resource Filters: allows adding custom filtering options to let a client filter the available resources to find the ones he/she needs quickly. Can be applied on the second step of the scheduling process on the website (Custom Filters & Search Criteria).
Custom Portal Resource Search: allows adding custom search options to let a client search among the available resources to find the ones he/she needs quickly. Can be applied on the second step of the scheduling process on the website (Custom Filters & Search Criteria).
Custom Portal Service Filters: allows adding custom filtering options to let a client filter the available services to find the ones he/she needs quickly. Can be applied on the third step of the scheduling process on the website (Custom Filters & Search Criteria).
Custom Portal Service Search: allows adding custom search options to let a client search among the available services to find the ones he/she needs quickly. Can be applied on the third step of the scheduling process on the website (Custom Filters & Search Criteria).
Complementary Products for Reservation: if turned on, the suggested products would be shown for customers after selecting a time slot for reservation (see Offering Complementaries).
Open Order on finishing (): if turned on, Odoo would redirect portal users, if possible, to a linked sale order for payment after finishing the reservation and signing up instead of appointment(s) (see Linking Appointments and Sale Orders).
Pricelists and Prices ( ) : if turned on, service cards would contain price information according to the customer price list (see Prices & Pricelists).

About Universal Appointments and Time Reservations
This is an Odoo full-featured app to administrate, control, and improve service management workflow. The tool lets you organize flawless time reservations, control fulfillment, evaluate customer satisfaction, sale and upsell goods in almost any industry. With all options installed the tool represents a structured e-shop for your services.
A flexible module setup allows reflecting specifics of your business or even multiple businesses. There are 3 core objects that together help to reflect the company's workflows. These are Resource Types, Resources, and Services. Each object introduces certain settings for the flexible reservation process. Set up the structure of resources and services to reflect your company's workflows. Assign specialists and equipment manually or automatically. Flexibly manage appointment duration rules.
The module has a convenient backend menu, from which the appointment managers can create a new reservation in just a few clicks. The module's convenient single-view interface allows both: booking appointments right from the calendar and navigating through the appointments
The appointment scheduler allows making a new reservation in a few clicks. It is quick and simple but with full control over potential intersections.
The algorithm of the module allows making sure that only vacant time slots will be available for booking. The vacant slots for appointments are automatically generated based on working calendars, service peculiarities, and specifics of managed businesses.
Apply popup alarms, add success emails, and prepare SMS reminders to make sure the clients will not forget or miss an appointment.
Automatically request client reviews upon completion of the reservation and see. Collect the rating and check the quality of provided services.
The module provides a convenient menu to track and analyze the provided appointments through the appointments' report view. Choose a measure for the analysis.
It is possible to let portal partners and website visitors schedule an appointment through the configurable multi-step process of checkout and confirmation ().
Customize the way the appointments wizard is seen on the website. Turn on/off optional layout elements on the website. Introduce your own titles and welcome texts. Exclude booking steps ().
Generate a sale order automatically as soon as an appointment is scheduled. The resulting sale order can be either a draft (can be changed), automatically confirmed (cannot be changed), or sent quotation (ready to accept and pay) ().
Boost revenues by upselling accessories. If configured, Odoo will show the popup with suggested products for backend managers ()/website clients () immediately after reserving a time slot.
Appointment resources might be linked with employees. This way the calendar of the employee, his/her meetings, and own leaves will be used to generate the available time slots ().
Introduce custom fields for reservations, resource types, resources, and services (). You can place your custom fields in the backend on the appointments/resource types/resources and services cards, or make custom properties of resource types, resources, and services visible on the website ()
The app is configurable for multi companies and for multi-website environments.
Comfortable scheduling without conflicts
Innovative appointments calendar
Customer satisfaction and reports
Custom details and reminders
Concepts and Terms
Appointment/Reservation – a core object, that represents an arrangement to get a particular service at a particular time and place. The main elements of a reservation are: resource, client, time, and service.
Pre-reservation – an arrangement, that isn't yet confirmed. Usually, used to block a particular time slot of a particular resource. Appears after choosing a time slot and is valid until all details are confirmed or the time for the pre-reservation is out (see Pre-reservation).
Resource type – a core object that sets the specifics of the business and stores the related to the business settings. It also keeps information about related services and resources. This way, you can distinguish one group of services and resources from the other. For example, resource types might be particular businesses you manage ('Beauty Salon', 'Dental clinic', 'Hairdressers') or you can assign different addresses of the business as resource types (see Managing Resource types).
Resource – a core object that represents a facility or a person (), whose time is considered for allocation to provide a service. For example, in a language school, a classroom or a teacher may serve as a resource (see Managing Resources).
Service – a core object that defines what actually should be done. For instance, it can be a 'consultation', 'tooth surgery', 'classic hair cutting', 'car class C rent', etc (see Managing Services).
Time Requirements – time restrictions, when an appointment might be scheduled. This way you can specify the maximum and the minimum number of days before the appointment, and the time when an appointment can no longer be canceled or rescheduled. The time slots will be generated according to the time requirements (see Time Requirements).
Rounding Time – the rule to round time slots start to avoid calculating a start you do not like (see Rounding Time).
(Resource) Alias – a special type of resource that serves as an avatar for another resource. Usually, used to apply the same facility or employee for different kinds of work (resource type). Does not have its own calendar settings and responsible, and refers to the calendar and details of the prime resource instead (see Managing Resources).
Prime resource – a resource, that has one or several aliases, that use its calendar settings (see Managing Resources).
Responsible user – the user who manages and controls appointments of a particular resource; is chosen in the field 'Responsible user' of the related resource. For example, Mitchell Admin is a responsible user of the resource Hotel 5 stars. If an employee represents a resource (), then the user of the related employee is also a responsible user. For example, our dentist Anita Oliver is both the resource and the responsible person (see Managing Resources).
Working Calendars – a working time pattern, which is assigned to employees. If an employee represents a resource (), then his/her working time is used to generate available time slots (see Resource Calendars).
Alias Working Hours/Extra Alias Calendar – an additional working calendar, which is assigned to an alias to limit the time, when an alias is available for booking. The intersections between the main resource calendar and alias calendar will be used to generate the available time slots for an alias (see Extra Alias Calendar).
Odoo Calendar – a standard Odoo calendar, which is used for scheduling events or meetings with the delegates or among other employees in the organization (see Meetings Calendar).
Odoo Events – a meeting, registered through the Odoo standard events calendar, which, if configured, makes certain times unavailable for generating time slots (see Meetings Calendar).
Global Time offs – the time when the company doesn't work (see Resource Calendars).
Personal Time offs – the time when an employee takes a vacation/leave/day off (see Resource Calendars).
Resource allocation – the appointment distribution among the resources based on the chosen resource allocation method (see Resource Allocation).
Resource allocation method – the way/algorithm to distribute the appointments among resources. The distribution method is applied in cases where automatic resource selection is chosen. Or, when the client can't choose between the resources and selects several ones or all. You can configure and distribute resources by workload, appointment number, and order (see Resource Allocation).
Extra Resources – the additional resources to provide the service. When booking (both in the backend and in the portal), the system takes into account calendars not only of the main resource but also of the additional ones. In order, for the time slot to be available for booking, both the main and the additional resources should be free (see Extra Resources).
Extra Service Calendar – a calendar, that states the days and the time, when a service is available. The service will be available for booking at the intersection of the resource and service calendar (see Extra Calendar Restriction).
Service Duration – the time required for providing a particular service. Can be defined in hours and days (see Service Duration).
Manual Duration – the time for providing the service, which is chosen manually, during the scheduling process both in the backend and frontend (see Service Duration).
Slot Step – the step with which the timeslots are generated, allows booking the time flexibly (see Slot Step).
Checkout Period – the time required for completing the reservation, without the participation of the client. This setting allows showing the client what time he/she should finish receiving the service. At the same time, the resource will be blocked for the entire selected time (see Checkout Period).
Start&End Day Restriction – the set of days of the week and/or a set of specific dates on which the reservation cannot start/end. This way you can restrict the days when an appointment is allowed to start or end (see Start&End Day Restriction).
Rounding Time – the rule to round time slots start to avoid calculating a start you do not like (see Rounding Time).
Single View Interface - the functional interface for internal users to see and navigate through appointments and schedule new ones conveniently (see Appointments Calendar).
Scheduling wizard – a pop-up window, with functional elements, that allow selecting the details of the appointment and specifying the account details of the client (see Scheduling Appointments: Backend, Portal Control of Reservations).
Re-scheduling – is the process of changing the details of the existing appointment. It is possible to choose a different resource type, resource, service and time slot (see Scheduling Appointments: Backend).
Appointments Numeration – the numbering logic (suffix, prefix, step, etc.) of appointments (see Appointments Numeration).
Internal user – a user who has access to the Odoo backend and its functional apps. In order to access the appointments, the user should also have one of the related roles assigned (see Access Rights).
Portal user () – a registered user who has access to the Odoo portal, but cannot access the Odoo backend. Can access website appointments booking page, if configured. Sees only published resource types, resources, and services (see Access Rights).
Public user () – any website visitor, who hasn't logged into Odoo. Can access website appointments booking page, if configured. Sees only published resource types, resources, and services (see Access Rights).
Backend interface – the interface introduced for internal users with one of the appointment roles assigned to see and manage the appointments and configure the elements of the scheduling process (see Scheduling Appointments: Backend, Managing Appointments).
Website interface – website page introduced for portal and public users to schedule appointments conveniently (see Website Booking Process).
Portal interface – the interface introduced for portal users to navigate through scheduled appointments conveniently. The portal users can see and manage scheduled appointments and contact the company representatives (see Portal Control of Reservations).
Appointments Alarms – the pop-ups, emails, and SMS notifications, that remind the chosen groups of users about the upcoming appointment (see Appointments Alarms).
Success Email – the email that confirms the appointment and contains the details about it. It is sent when a manager / a client () books an appointment and when an appointment is re-scheduled (see Appointments Discussion).
Rating Email – an email, to request feedback from the customer. It is sent automatically as soon as the appointment is marked as completed (see Appointments Rating).
Followers – users, that want to keep updated and receive particular kinds of notifications about a certain appointment or all appointments of a certain object (see Appointments Discussion).
External Followers – followers that don't have access to the Odoo backend. For example, our clients (see Appointments Alarms).
Internal Followers – users who have access to the Odoo backend and its functional apps, and who are added as a follower to an appointment. For example, Abigail Peterson, our appointments manager (see Appointments Alarms).
All Followers – both internal and external followers (see Appointments Alarms).
Website booking – the scheduling process through the wizard on the appointments website page. The scheduling process is similar to the one in the backend (see Website Booking Process).
Website step – a certain level of the scheduling process, which requires making a certain choice or specifying details (see Website Booking Process).
Progress bar – a graphical control element used to visualize the progression of the scheduling process on the website (see Portal and Website: Customization & Settings).
Session duration – the time after which the client's choice on the website is cleared. Mainly relates to the first three steps of the website booking process (see 3. Choosing Service).
Pre-reservation timer – a timer that appears as soon as the time slot is chosen. It allows creating a pre-reservation on a certain time slot, so no one else can reserve it until the time is off, or the client confirms the reservation (see 4. Choosing Time).
Confirmation timer – a timer that may be configured to appear as soon as the reservation is confirmed. It allows making sure that the client uses real email/phone to book a reservation (see 6. Confirming Reservation).
Sale Order – is a document generated by the seller specifying the details about the appointment and optionally some complementary products ordered by the customer (see Universal Appointments: Sales).
Pricing method – are the way in which the price of appointments can be calculated. It is specified per each resource type. The possible options are: for the planned duration, tracked duration, and per unit (see Configuring Pricing Methods).
Pricelist – is an object that contains rules, according to which the company prices are adapted. It may contain a discount or a rule to show the price in another currency. Pricelists may be assigned to portal users (see Prices & Pricelists).
Complementary Products – are products related to a certain service, that may also interest the customer.
Add-ons Icons
Universal Appointments: Portal and Website
The optional module that introduces the website booking process and lets external users schedule appointments and control reservations in the portal.
Universal Appointments: Sales
The optional free module introduces service pricing information and links appointments with sales.
Appointments: Website Sales
The optional free module includes service price lists and prices in the reservation checkout process. (+)
Universal Appointments: Custom Fields
The optional module that lets you add and show custom fields for appointments and related objects.
Universal Appointments: Custom Fields for Website and Portal
The optional free module that shows custom fields on the website and portal pages (frontend). (+)
Universal Appointments: Time Tracking
The optional module that allows tracking time spent on each appointment.
Universal Appointments: HR Bridge
The optional free module that allows considering employees as appointment resources.
Universal Appointments: Gantt
The optional free extension that introduces the Odoo Enterprise Gantt view for appointments.
Appointments Management Structure
There are 3 core objects that together help to reflect the company's workflows. These are Resource Types, Resources, and Services. The layers have the following hierarchy: Resource Types > Resources > Services.
Each object introduces certain settings for the flexible reservation process.
The decision on what to consider as resource types, resources, and services is completely up to you. Such an approach lets you reflect on almost any service business.
The tool does not force you to have multiple instances for each layer. In simple cases, there might be just a single representative for each step. For example, Lawyers (Resource Type) – Attorney Chris Black (Resource) – Consultation (Service).
If there is a single option, the app will reflect that by simplifying appointment scheduling. Therefore, steps without actual choice are auto missed. For example, Layers (Resource Type) – Consultation (Service).
Managing Resource types
Resource type – is a core object that sets the specifics of the business and stores the related to the business settings. It also keeps information about related services and resources. This way, you can distinguish one group of services and resources from the other. For example, resource types might be particular businesses you manage ('Beauty Salon', 'Dental clinic', 'Hairdressers') or you can assign different addresses of the business as resource types.
Another approach is to consider a resource type as a group of particular resources. For example, if you have a car rental business, the cars may be divided into classes 'class B cars' and 'class C cars'.
Resource types contain main settings of how to organize service provision: how to allocate resources, how to calculate appointment total price, what are time restrictions, which services are possible, etc.
To create a resource type:
1. Open the module Appointments
2. Go to the tab Resources > Resource Types
3. Click 'Create'
4. Add a reference and optionally add the picture (It might also be visible on the website )
5. Choose a service method
Assign a particular service to be chosen automatically to skip the step services ('Service is always the same for all resources and appointments') or let users choose a service from the variety of them ('Service should be selected for resources and for appointment'). For example, if you provide the cars for rent, then there may be no choice of the service and it is always a 'Car Rent'. Or you can use different types of cars as services and in this case, let the clients choose the one they want, for example, 'Premium car rent', 'Electrocar rent', etc.
6. Choose the available services
Choose the services that will be associated with the resource type. One service may relate to several resource types. For example, in a Language school, the available services may be: Lesson, Consultation.
7. Choose a resource selection (see Resource Allocation)
Let users choose the resource ('Manual'), or automatically assign the resource ('Automatic'). For example, if you have a language school you may let clients choose the teacher or assign a teacher automatically.
8. Choose the resource allocation method (see Resource Allocation)
If you have chosen to automatically assign the resource, then choose the way the distribution will be decided. To spread the appointments equally, keeping in mind the resource duration, choose to distribute resources by the option 'Resource workload'. For example, it is useful if you have a dental clinic and want all dentists to have equal actual working time.
To spread the resources equally, based on the number of appointments, choose the option 'By appointments number'. For example, it is useful when you have a language school, where the lessons have a fixed time and you want the teachers to have an equal number of lessons.
To distribute resources on a queue basis, choose the option 'By order'. For example, it is useful if you have a car rental, and it doesn't matter which car is chosen for the appointment.
9. Choose how the total price will be calculated () (see Configuring Pricing Methods)
Choose the option 'Planned duration', when the appointment's time and the price is fixed. For example, a lesson in a language school.
Choose the option 'Tracked Duration' () if the time of the appointment may change and therefore only the price for the actual duration should be charged. For example, booking a room in a hotel with the possibility to extend the time of stay.
Choose the option 'Units', when the total price for the appointment equals the product's price. For example, a tour in a travel agency.
10. Set Time Requirements (see Time Requirements)
Set the time, at which it is possible to book an appointment. A user will not be able to book an appointment if before the appointment is left less time than is set in the line 'Reservation should be done in'. For example, allow booking a hotel room no later than 7 days before the appointment.
A user will not be able to book an appointment if the time before the appointment exceeds the time set in the line 'Reservation should not be done after'. For example, allow booking a lesson no earlier than a month before the appointment.
Set time, for which a user can cancel an appointment in the line 'Portal: Cancellation/Re-Schedule might be done in'. Set the time as 0, to forbid cancellation. For example, forbid canceling or re-scheduling a tour 15 days before the booked time.
11. Optionally, in the tab settings tick the box Calendar Events as Busy Time (see Meetings Calendar)
If the option is checked, then for periods when a responsible user has meetings (i.e., events assumed by the Odoo calendar), appointment booking will not be possible. For example, if we have a resource 'Room 5' with the teacher as a responsible user Anita Oliver, then the time, when the user has meetings will not be available for booking.
If the resource is set as Human (), then the working calendar of the employee is used to generate available time slots. And, if the option 'Calendar Events as Busy Time' is turned on, then the meetings of the employee are also considered. For example, the teacher Anita Oliver (both resource and responsible) has a meeting on Thursday at 4 pm on her calendar, that's why this time is not available for the lesson.
12. Optionally, in the tab settings, tick the box Appointments Customer Rating (see Appointments Rating)
If the option is turned on, then the rating request will be sent when an appointment is marked done.
13. If you work in a multicompany environment, in the line 'Company', choose the related one (see Multicompanies & Multiwebsites)
14. Optionally, in the tab 'Notifications', select 'Success Email' and 'Rating Email' templates.
A 'Success Email' will be sent to the client as confirmation of the appointment (see Appointments Discussion).
A 'Rating Email' will be sent to the client to get feedback after the appointment (see Appointments Rating).
15. Optionally, in the tab 'Notifications', set the default alarms (see Notifications)
Define who to notify: a responsible manager, external followers (clients), internal followers, or all followers. Keep in mind that pop-up alarms are only available for back-end users.
16. In the 'Description' tab, add the description to the Resource type
If the option 'Show types full details pages' () is turned on, then the description is shown on the full resource type page (the page might be edited on the website (see Portal and Website: Customization & Settings)) and in the selection of the website booking wizard (if not hidden by ticking the option 'Do not show website full description' in the tab Website on the resource type's card).
17*. Select the website, on which the resource type will be visible and optionally tick the box 'Do not show website full description' to make the description invisible on the website () (see Multicompanies & Multiwebsites).
18. Click 'Save'.
If you open the resource types' menu, you will find the list of the resource types. If you work in multicompany environment, then, here you will see only the resource types related to your company or to the companies selected in the systray, if you have the access to several companies (see Multicompanies & Multiwebsites).
On the resource type's card, you will see the list of its services, the total number of booked appointments, the number of resources, and rating.
Click on the three dots in the top right corner and choose 'Edit' to be redirected straight to the editing wizard. Click 'Delete' to delete the resource type. Here you can also choose the color to mark the resource type.
With the help of the search bar, you can find the resource type by the matches in the name or description and by the related resource and service.
Filter or group the resource types by way of resource distribution or by the service method to find the related ones quickly. When you group the resource types in the kanban view, you can also change the resource types settings by drag&drop.
Select multiple resource types in the list view to export, (un)archive, delete, and (un)publish () them.
If you open a Resource type, in the top right corner you can find functional buttons.
The first button is 'Appointments'. After making some appointments related to the resource type, on this button, you will see the total number of such appointments. Click on it and you will be redirected to the appointments calendar with the appointments filtered by this resource type.
The second button is 'Resources'. After creating some resources related to the resource type, on this button, you will see the number of such resources. Click on it and you will be redirected to the resource menu with the resources searched by this resource type.
If you tick the option 'Appointments Customer Rating' and receive feedback from clients, then the next button you see is the rating button, which shows the satisfaction in percentage. Click on it and you will be redirected to the menu 'Resource Types Rating', where you will see the chosen emoji and the information about it, including the client and the appointment of each rate.
If you have the module Universal Appointments: Portal and Website () installed, then on the resource type card, you also see the button 'Publish/Unpublished' to make the resource type available/unavailable for booking from the website.
Below is the created resource type, you will find a message thread, where you can discuss the resource type with colleagues, leave log notes, schedule activities, and add attachments. Follow the resource type and add the resource type followers to get the information about it, its resources, and new/rescheduled/canceled appointments timely (if you have set the 'Default Alarms' in the 'Notifications' tab for 'Internal followers' or 'All followers') (see Notifications).
Here you will find the list of resource type examples related to different business types:
We have 2 dental clinics in different towns and want to manage the appointments to both from one website. We can use different addresses as resource types. So, let's create two resource types for dental clinics in New York and Chicago.
Services and Resources: As we have a variety of services for a client to choose the service method is chosen as: Service should be selected for resources and for appointment.
We want to allow our clients to choose the Dentist, so the Resource selection is set as: Manual. In this case, the option chosen as the Resource Allocation Method will be applied only if several or all resources are chosen.
As the related services always take the same time to complete and the price should be taken for the fixed time, the field Calculate price for is set as: Planned Duration.
Time requirements: We want our clients to book appointments at least the day before the time of the appointment and no more than 30 days before the appointment. The client may cancel or reschedule the appointment no later than a day before the appointment.
Settings: Since we have assigned the employees as resources for these resource types, we don't want the appointment to intercross with the planned meetings of employees, so ticked the box Calendar Events as Busy Time ().
We also want to get feedback from our clients, so we turned on the Appointments Customer Rating and choose the required template in the tab Notifications.
We have a language school, where several foreign languages are taught. We can use the languages as resource types. So, let's create two resource types for English and German.
Services and Resources: As we have two different services and the client can choose one of them, the service method is chosen as: Service should be selected for resources and for appointment.
We don't want to allow our clients to choose the teacher, so the Resource selection is set as: Automatic. We want the lessons to be distributed equally among our teachers and as the duration of a lesson is fixed as the Resource Allocation Method we choose: By Appointments Number.
As the related services always take the same time to complete and the price should be taken for the fixed time, the field Calculate price for is set as: Planned Duration.
Time requirements: We want our clients to book appointments at least the day before the time of the appointment and no more than 30 days before the appointment. It isn't allowed to cancel or re-schedule the lessons (0).
Settings: Since we have assigned the employees as resources for these resource types, we don't want the appointment to intercross with the planned meetings of employees, so ticked the box Calendar Events as Busy Time ().
Also, we want to get feedback from our clients, so we turned on the Appointments Customer Rating and chose the required template in the tab Notifications.
We have a Car Rent Business, where different classes of cars are presented (A,B,C). We can use those classes as resource types. So, let's create three resource types for Car Rent: Class A, Car Rent: Class B and Car Rent: Class C.
Services and Resources: As we have only one service (Car class) and the client can't choose, the service method is chosen as: Service is always the same for all resources and appointments.
We don't want to allow our clients to choose the exact type of the car as there isn't much difference between the cars of one class, so the Resource selection is set as: Automatic. There is no difference between what car is chosen, so as the Resource Allocation Method we choose: By Order. This way, if the first car on the list is available, it will be assigned for the appointment. If it isn't available, then the second car on the list will be assigned and so on.
Although the time of rent may be different, the client should specify the exact time before booking and rent the car for particular hours, so the field Calculate price for is set as: Planned Duration.
Time requirements: We want our clients to book the appointments at least the day before the time of the appointment and no more than 90 days before the appointment. The client may cancel or reschedule the appointment no later than a day before the appointment.
Settings: As we have assigned Material as the resource for these resource types, we didn't tick the box Calendar Events as Busy Time, as Material may not have any meetings ().
Also, we want to get feedback from our clients, so we turned on the Appointments Customer Rating and chose the required template in the tab Notifications.
We have a small hostel, where there are two types of rooms: Single room and Double room. We can use room types as resource types. So, let's create two resource types for Single room and Double room.
Services and Resources: As we have only one service and the client can't choose, the service method is chosen as: Service is always the same for all resources and appointments.
We want to allow our clients to choose the room (with or without balcony), so the Resource selection is set as: Manual. In this case, the option chosen as the Resource Allocation Method will be applied only if several or all resources are chosen.
As the client may extend the duration of the stay, and the price should be taken for the exact time which may not be final at the moment of booking, the field Calculate price for is set as: Tracked Duration.
Time requirements: We want our clients to book the appointments at least the week before the time of the appointment and no more than 90 days before the appointment. It is allowed to cancel or re-schedule the room no later than a week before the appointment.
Settings: As we have assigned the Material as the resource for these resource types, we didn't tick the box Calendar Events as Busy Time, as Material may not have any meetings ().
We also want to get feedback from our clients, so we turned on the Appointments Customer Rating and choose the required template in the tab Notifications.
We have a travel agency, where the tours to various destinations can be booked. We can use the destinations as Resource types. So, let's create some resource types, for example Turkey and UAE.
Services and Resources: As we have various tours as services and the client can choose one of them, the service method is chosen as: Service should be selected for resources and for appointment.
We want to allow our clients to choose the resource, so the Resource selection is set as: Manual. In this case, the option chosen as the Resource Allocation Method will be applied only if several or all resources are chosen.
As the related services always take the same time to complete and the price should be taken for the fixed time, the field Calculate price for is set as: Planned Duration.
Time requirements: We want our clients to book appointments at least 15 days before the time of the appointment and no more than 365 days before the appointment. It is allowed to cancel or re-schedule the tour no later than 15 days before.
Settings: As we have assigned Material as the resource for these resource types, we didn't tick the box Calendar Events as Busy Time, as Material may not have any meetings ().
Also, we don't want to get feedback from our clients through email as we have our own form on the website for that, so we turned off the Appointments Customer Rating.
Managing Resources
Resource – is a core object that represents a facility or a person, whose time is considered for allocation to provide a service.
In some business models, the resource may be represented by a certain specialist: for example, 'Dentist John Brown', 'Hairdresser Anna Green'. In other companies it might be a piece of particular equipment or facility: for example, 'Mercedes A1231' for the Car Rent Business, 'Room 12' for a Hotel.
In resource settings, you can define available days, timetables and time off, responsible users, etc.
To create a resource:
1. Open the module Appointments
2. Go to the tab Resources > Resources (or click on the 'Resources' tab from the Resource Type's card and click 'Create')
3. Click 'Create'
4. Add a reference and optionally add a picture (it will also be visible on the website )
5*. Choose the resource kind
Resource kind can be either human () or material. The setting influences the way the working hours are applied. When choosing 'Human', then the working hours of a particular employee are taken into consideration. In the case of material, you can set a particular calendar with set working hours.
6. Choose the type
The field allows linking the resource with a particular resource type. The field is filled automatically when a resource is created from the resource type's card.
7. Choose or create working hours for the resource (see Resource Calendars)
Slots are generated according to configured resource business calendars. Each resource has its own calendar and time offs: it is impossible to schedule appointments for non-working hours. For example, when we choose a Human as a resource, the calendar of the employee is taken into consideration to calculate the available time slots (). The calendar of our dentist Anita Oliver is Standard 40 hours/week. In order to make the resource available the whole day (for example, a hotel room) you will need a 24/7 Non-Stop Calendar (see Resource Calendars).
8. Optionally, select the responsible person
It is extremely important to set the user, responsible for the resource, as it affects many aspects. In particular:
Set Default Alarms to notify about related appointments responsible for the appointments user (see Notifications).
The user with the access rights 'Only Own' will only be able to observe resources in which he/she is a responsible manager or which do not have such managers at all (see Access Rights).
When you choose the Employee as a resource, the field 'Responsible person' is filled automatically (). In this case, the employee's calendar will be considered for generating available time slots (see Universal Appointments: HR Bridge).
If on the related Resource Type you tick the option 'Calendar Events as Busy Time', then the time with the events related to the responsible user will not be available for booking.
For example, if the English teacher Doris Cole is set as a responsible person for the resource Room 5, then, we can set the notifications, so only Doris would receive them. Also, as we have ticked the option 'Calendar Events as Busy Time', her meetings are taken into consideration to generate the available time slots for English lessons with the teacher.
9. Optionally, write the location of the resource
It will be shown in the confirmation voucher. If the location of the service isn't stated, then the location of the resource will be written.
10. Optionally, choose the person who will receive a copy of the client success email (see Appointments Discussion)
If assigned, the success email would be also sent to those partners as a copy of the client success email.
11. In the 'Description' tab, add the description of the module.
If the option 'Show resources full details pages' () is turned on, then the description is shown on the full resource page (the page might be edited on the website (see Portal and Website: Customization & Settings)) and in the selection of the website booking wizard (if not hidden by ticking the option 'Do not show website full description' in the tab Website on the resource's card).
12*. Select the website, on which the resource will be visible and optionally tick the box 'Do not show website full description' to make the description invisible on the website () (see Multicompanies & Multiwebsites).
13. Click 'Save'.
Optionally make the resource an alias for another one. This way you will be able to use the calendar of the prime resource. It is particularly useful when one of your resources provides services from different areas. Any alias resource ceases to be independent in terms of calendar settings and responsible, i.e. it only displays the prime resource. Aliases cannot have an associated employee, but they can be of the Human type (if the add-on Universal Appointments: HR Bridge is installed). We can't create two stand-alone human resources () for a single employee, as then the already booked slots of one will not be taken into consideration while booking slots for another one. For example, Doris Cole (a human resource) is both a hairdresser and a teacher.
When generating slots for aliases, the working calendar of the main resource and its employment are taken into account. This way, one real object can be used in different places, but a single calendar will be generated for it. For example, we have two resource types 'Swimming lane for one' and 'Swimming lane for a team', which require the same resource 'Lane 1'. We can't use the same resource with 2 different resource types and can't create 2 resources as we only have 1 lane. So, we create an alias 'Lane for swimming', which refers to the working calendar ('Standard 40 hours/week') and employment of the resource 'Lane 1'. This way, when the resource 'Lane 1' is occupied, the resource 'Lane for swimming' is also unavailable and vice versa.
While creating a resource, as soon as you choose the prime resource, the fields 'Working hours' and 'Responsible' are removed to avoid confusion. At the same time, the field 'Alias working hours' is added.
Optionally, you can add the extra working calendar to the alias in the field 'Alias working hours'. Then, this calendar will be used to generate the time slots, when an alias is booked. In order, for a time slot to be shown, the related time should be available in both: the calendar of the main resource and the calendar of the alias. For example, we have a hairdresser Doris Cole with the working calendar 40 hours/week, who can also work part-time as a teacher on Monday and Friday. So, we have added the working calendar with the time Monday and Friday to her alias 'Teacher Doris Cole'. Then, when her lessons are booked, managers and clients see the available timeslots only on Monday and Friday (see Extra Alias Calendar).
Please, take into account that an alias cannot be available during the time when the main resource is unavailable, even if this time is specified in the alias calendar. Only, the time intersections are used to generate the available time slots for an alias. For example, the main resource 'Hairdresser Doris Cole' should have in her working hours Monday and Friday with the related time specified, so managers and clients could book the lessons from her alias 'Teacher Doris Cole' on these days (see Extra Alias Calendar).
The prime resource (employee (), equipment) can have several aliases with different settings. Alias requires configuring its own resource type, services, descriptions, and other settings (for example, sales settings). The prime resource 'Doris Cole' is used for the resource type 'Beauty salon' and provides only the services related to hair cutting/dying. The alias 'Doris Cole' is used for the resource type 'Language school' and provides only the services related to teaching.
To turn the resource into an alias, just start creating or editing a resource and in the field 'This resource in only alias for', below the title, choose the prime resource.
You can archive/publish an alias without doing the same with the prime resource and vice versa. If the prime resource is archived/has ceased to be public, its aliases will still be available in the backend and on the website (). The aliases will continue using the calendar and will consider the busyness of the main resource. However, it is recommended to avoid archiving the prime resource and unpublish it instead to prevent any inconsistent behavior.
If you choose the alias as an extra resource, then, during the calculation of the time slots, it will be replaced by the prime resource (see Extra Resources). For example, 'Room 303' is an alias for the resource 'Room'. When choosing the service 'Rent', in the scheduling wizard, we see the note that an extra resource 'Room' is required. After scheduling, in the field 'Extra resource', the resource 'Room' is shown.
Aliases allow you to use the same resource to provide different services in completely different areas, while taking into account the working hours and employment (meetings, time-offs, etc.) of the prime resource.
Once you open the resource menu, you will find the list of the resources. On the resource's card, you will see the related resource type, the list of its services, the working hours, the total number of booked appointments, the rating, and a photo of the responsible user.
Click on the three dots in the top right corner and choose 'Edit' to be redirected straight to the editing wizard. Click 'Delete' to delete the resource. Here you can also choose the color to mark the resource.
With the help of the search bar, you can find the resource by the matches in name, description, type, responsible user, working hours, and related employee and service.
Filter resources to see only alias or prime ones, by their kind or group the resources by resource type, responsible user, employee, resource kind, and working calendar. When you group the resources in the kanban view, you can change the resources settings simply by drag&drop.
When you search by resource in the calendar or filter the appointments in the calendar in the right navigation interface, you may see more reservations, than, when you search/filter only by the resource type. The appointments of the resource aliases are also shown. For example, if you select the resource type 'Dentist' you may not see any reservations, but if you select a particular dentist 'Anita Oliver', you may see the appointments of the resource alias 'Assistant' (Resource type 'Hospital').
When you filter the appointments by the resource alias, you will see only the appointments of the alias and not of its prime resource.
Select multiple resources in the list view to export, (un)archive, delete, (un)publish () them.
If you open a Resource, in the top right corner you can find functional buttons.
The first button shows the number of appointments created, that relate to this resource. The number also includes the reservations where this resource is an additional one (see Extra Resources). Click on it, and you will be redirected to the appointments calendar with the appointments filtered by the resource and related resource type.
If the resource is of the type 'Material', then the second button is 'Own Leaves'. If you click on the button, you can create the resource time off, so the resource will not be available for a certain time.
If you tick the option 'Appointments Customer Rating' on the related resource type card and received feedback from the clients, then on the resource's card you also see the button with the rating related to this resource. Click on it to see the detailed information about the rating.
If you have the module Universal Appointments: Portal and Website () installed, then on the resource card you will also see the button 'Publish/Unpublished'. To make the resource available/unavailable for booking from the website.
Here you will find the list of resource examples related to different business types:
For a dental clinic, we want to have dentists as resources. So, we have chosen the resource kind as Human ().
Then we have selected the related resource type and services.
We chose a particular employee whose working calendar will be taken into consideration while calculating available time slots (Standard 40 hours/week).
The field 'Responsible' was filled automatically with the same user, as it is the Employee responsible for providing related services.
Then, optionally we could add the address, but it was already stated as a Resource type.
We didn't assign any users to receive a copy of the client's confirmation email.
For language school, we want to have teachers as resources. So, we have chosen the resource kind as Human ().
Then we have selected the related resource type and services.
We chose a particular employee whose working calendar will be taken into consideration while calculating available time slots (Standard 40 hours/week).
The field 'Responsible' was filled automatically with the same user, as it is the Employee responsible for providing related services.
We didn't assign any users to receive a copy of the client's confirmation email.
For car rent, we want to have cars as resources. So, we have chosen the resource kind as Material.
Then we have selected the related resource type. As on the resource type's card we stated that the service is always the same, here we can't choose it.
We chose a working calendar as 24/7 Non-stop, as the car is rented on a daily basis, so all day should be available.
We have stated the responsible employee for providing related services.
We didn't assign any user to receive a copy of the client's confirmation email.
For hotel, we want to have the options with/without balcony as resources. So, we have chosen the resource kind as Material.
Then we have selected the related resource type. As on the resource type's card we stated that the service is always the same, here we can't choose it.
We chose a working calendar as 24/7 Non-stop, as the rooms are booked on a daily basis, so they should be available all day.
We have stated the responsible employee for providing related services.
We didn't assign any user to receive a copy of the client's confirmation email.
For a travel agency, we want to have placement options as resources. So, we have chosen the resource kind as Material.
Then we have selected the related resource type and services.
We chose a working calendar as 24/7 Non-stop as the tours are booked on a daily basis.
We don't state the responsible employee for providing related services.
We assigned a user to receive a copy of the client's confirmation email.
Managing Services
Service – is a core object that defines what actually should be done. For instance, it can be a 'consultation', 'tooth surgery', 'classic hair cutting', 'car class C rent', etc.
Services are not equal to Odoo products, but they are linked to each other to manage pricing details. Each service should have a related product assigned.
Services regulate the time settings of appointments (how long should it take and when it can be started) and they also may further restrict the time available for booking.
On the service card, you can also state the goods, which might be suggested as complementaries as the time slot is selected.
To create a service:
1. Open the module Appointments
2. Go to the tab Resources > Services (or start writing a service name in the field 'Available Services' on the Resource type's or Resource's card and click 'Create')
3. Click 'Create'
4. Add the reference and optionally add a picture (it will be also visible on the website )
5. Set the appointments default duration (It can be set in hours or days) (see Service Duration)
The slot generation algorithm takes into account the service duration. Available time slots have a duration depending on a chosen service. For example, if the default duration is an hour, then the available slots will be 8:00, 9:00, 10:00, etc.
6. Optionally, write the location of the service
It will be shown in the confirmation voucher. If the location of the service isn't stated, then the location of the resource will be written.
7. Choose a related product
The field allows the creation of a link between a product and a service. It allows you to use standard Odoo, for example, to manage the pricing details. For example, for the service 'Lesson' you can create a product with the same title and set the pricing information.
If you don't need to calculate the price of the service, then it is possible to use the same product for all the services.
8. Choose complementary products
After reserving a time slot by the manager from the backend (or when a client finishes scheduling an appointment ) a pop-up with the complimentary products will be shown. The pop-up allows both adding one / a few complementaries or missing the step if suggested products are not required. For example, for a hotel room, you can choose 'Breakfast' and 'Excursions' as suggested products.
9. Optionally, in the field 'Slot Step', choose the step for the time slots (see Slot Step)
The Slots Step field, allows generating time slots flexibly, including allowing overlapping ones. This way, you can set the step with which time slots will be created. You can choose the slot step for both services in days and hours. For example, if we reserve service with a duration of an hour and the step of the service is set as 0:30 min, then the generated slots will look the following way: 09:00-10:00; 09:30-10:30; 10:00-11:00, 10:30-11:30. After booking the time slot 9:30-10:30, the time slots 09:00-10:00 and 10:00-11:00 will be unavailable for further booking. It might be useful in a beauty salon with an unloaded schedule.
10. Optionally, in the field 'Start round', define how the appointment start time should be rounded (see Rounding Time)
Define how the appointment start time should be rounded. To avoid the calculation of unlikable start time. For example, an hour-long lesson starting at 12:23 is hardly good. To solve the problem, you can simply set up rounding for an hour (other available options are 5, 10, 30 minutes; 2 hours; midnight or midday tomorrow).
11. Optionally, specify the Checkout period (see Checkout Period)
Specify the time required for completing the reservation, without the participation of the client. This setting allows showing the client what time he/she should finish receiving the service. At the same time, the resource will be blocked for the entire selected time (the time for providing the service and the checkout period). For example, the room is reserved from 14:00 01.08 to 12:00 10.08 (10 days), where the start round is set as 14:00, and the checkout period is set as - 02:00 hours (14-2=12; that is, 12:00 - checkout time). At the same time, in the backend, the resource 'Room' is reserved for the service 'Rent' from 14:00 01.08 to 14:00 10.08 (i.e. full time).
12. Optionally, for the services with daily duration, set the Start/End day Restriction (see Start&End Day Restriction)
As you switch to the daily default duration of service, two extra fields are shown: Start Day restriction & End Day restriction. Each of the fields represents a rule, that keeps the information about the set of days of the week and/or a set of specific dates on which the reservation cannot start/end. For example, you can specify some special weekends or holidays.
13. Optionally, tick the box 'Allow manual duration', so the duration of the service can be chosen manually (see Service Duration)
Choose the duration of an appointment, while booking, and only after that, the available time slots will be generated for the chosen time. For example, a car might be rented for a different period of time, so it should be possible to choose the duration manually.
14. If you work in a multicompany environment, then you can choose the related service company (see Multicompanies & Multiwebsites).
15. Optionally, in the 'Extra Calendar Restriction' field, set an additional calendar of the service. (see Extra Calendar Restriction)
If selected, then the intersection of the resource and service calendar will be taken into account when calculating the available slots. For example: if the English lesson is available: Monday 10 am - 2 pm; and the teacher (resource) is available: Monday 8 am - 12 pm; then the available time for booking the lesson will be Monday 10 am - 12 pm.
16. Optionally, choose the additional resources to provide the service (see Extra Resources)
On the service card, it is possible to specify the additional resources to provide the service. Then, when booking (both in the backend and in the portal), the system will take into account calendars not only of the main resource but also of the additional ones. In order, for the time slot to be available for booking, both the main and the additional resources should be free. For example, in our language school, we have human resources (teachers). For the service 'Lesson', also another resource is required – 'Room'. When the room and/or teacher is busy, it isn't possible to book a lesson.
17. In the tab 'Description' add the description of the service.
If the option 'Show services full details pages' () is turned on, then the description is shown on the full-service page (the page might be edited on the website (see Portal and Website: Customization & Settings) and in the selection of the website booking wizard (if not hidden by ticking the option 'Do not show website full description' in the tab Website on the service's card).
18*. Select the website on which the service will be visible and optionally tick the box 'Do not show website full description' to make the description invisible on the website ()
19. Click 'Save'.
Once you open the services menu, you will find the list of the services. On the service card, you will see the linked-to-the-service product and rating.
Click on the three dots in the top right corner and choose 'Edit' to be redirected straight to the editing wizard. Click 'Delete' to delete the service. Here you can also choose the color to mark the resource.
With the help of the search bar, you can find the services by the matches in name, description, and by related product.
Add custom filters and groupings to find related services quickly. Group the services (for example, by resource) in the kanban view, and change the settings simply by drag&drop.
Select multiple services in the list view to export, (un)archive, delete, (un)publish () them.
If you tick the option 'Appointments Customer Rating' on the related resource type card and received feedback from the clients, then on the service's card you also see the button with the rating related to this service. Click on it to see the detailed information about the rating.
If you have the module Universal Appointments: Portal and Website () installed, then on the service card you also see the button 'Publish/Unpublished'. To make the service available/unavailable for booking from the website.
Here you will find the list of service examples related to different business types:
For dental clinic, we have created several services and specified their details.
We set the default duration of each service as: 1 hour for Tooth Stopping and 2 hours for Surgery.
Then, we chose the related product to each service to manage pricing details.
We have added products Teeth cleaning and Professional Tooth Paste as complementary products to the Tooth Stopping, that could be offered to the clients while booking.
We also set the Start Round as: 00:30 for Tooth Stopping and 01:00 for Surgery, to make sure that the time of start looks good. For example, instead of 14:12 to have 14:30 (Tooth Stopping) and 15:00 (Surgery).
We set the slot step as 01:00 for Tooth Stopping and 02:00 for Surgery, so the generated time slots will be equal the duration of the service.
We have added the Extra Calendar Restriction (Standard 20 hours/week) for the service Tooth Stopping as the clinic provides this service only in the morning.
We have added 2 extra resources to Tooth Stopping (a room and an assistant) and 1 extra resource for the surgery (a room).
And, we didn’t turn on the option Allow Manual Duration, as the time spent on the resource is fixed.
For language school, we have created several services and specified their details.
We have set the default duration for each service as: 00:45 minutes (option 'hours').
Then, we chose the related product to each service to manage pricing details.
We didn't add complementary products, that could be offered to the clients while booking.
Also, we set the Start Round as: 01:00 for Lesson and 00:15 for Consultation, to make sure that the time of start looks good. For example, instead of 14:40 to have 15:00 (Lesson) and 14:45 (Consultation).
We set the Slot Step as 01:00 for Lesson and 00:15 for Consultation, so the clients could book the time slots flexibly.
We didn't add Extra Calendar Restriction to fully rely on the related resource's calendar.
We have added an extra resource (a room) to the services.
We added the checkout period as 00:15 minutes to Lesson, so the teachers had a break between lessons. However, it wasn't necessary in this case, as the start round for the service is set as 01:00 and the lesson takes 00:45 min.
And, we didn’t turn on the option Allow Manual Duration, as the time spent on the resource is fixed.
For car rent, we have created several services and specified their details.
We set the default duration of each service as: 1 day.
Then, we chose the related product to each service to manage pricing details.
We didn't add complementary products, that could be offered to the clients while booking.
The Slot Step is set as 1 day, so the generated time slots will be generated with the step of 1 day.
As the Start Time of the daily service, we have set 00:00, which means that we count days starting from 00:00 of the day of rent.
The Checkout Period is set as 2:00 hours, so the clients should return the car not at 00:00, but at 22:00, although the car will be booked for the whole period.
We didn't add Extra Calendar Restriction to fully rely on the related resource's calendar.
Although the weekend might be included in the booking. It isn't allowed to start/end booking during the weekend. So, we created a rule and specified the days of the week, when the reservation cannot start and end.
We also turned on the option Allow Manual Duration, as a client can rent the car for various number of days. A client can rent a car for a period from 1 to 5 days. The multiple for days is 1, so it is possible to rent the car for 1,2,3,4,5 days.
For hotel, we have created a single service and specified its details.
We set the default duration of each service as: 1 day.
Then, we chose the related product to the service to manage pricing details.
We have added products Breakfast and Excursions as complementary products, that could be offered to the clients while booking.
The Slot Step is set as 1 day, so the generated time slots will be generated with the step of 1 day.
As the Start Time of the daily service, we have set 14:00, which means that we count days starting from 14:00 of the day of booking.
The Checkout Period is set as 2:00 hours as we need the time to clean the room for the next guests. So the clients should move out at 12:00.
We didn't add Extra Calendar Restriction to fully rely on the related resource's calendar.
We also turned on the option Allow Manual Duration, as a client can book the room for various number of days. A client can book a room for a period from 1 to 365 days. The multiple for days is 1, so it is possible to book the room for any number of days within the limit.
For travel agency, we have created a several services and specified their details.
We set the default duration of each service as: 7 days and 10 days.
Then, we chose the related product to the service to manage pricing details.
We have added products Extra meal, Animators and Excursions as complementary products, that could be offered to the clients while booking.
The Slot Step is set as 1 day, as the tours start every day.
As the Start Time of the daily service, we have set 12:00, which means that we count days starting from 12:00 of the day of booking. At 12:00 the tour starts and finishes at 12:00 on the last day of the tour.
The Checkout period is 12 hours as the last night isn't spend in the hotel. The clients must leave the hotel before the midnight and get to the flight.
We didn't add Extra Calendar Restriction to fully rely on the related resource's calendar.
The tours don't start at the weekend.
And, we didn’t turn on the option Allow Manual Duration, as the tours time is fixed.
Examples of Business Structures
The module can be used in various types of business. Here you will find examples of some business structures, that can be created with the help of our module.
Dental clinics network:
Resource Type: Dental Clinic New York, Dental Clinic Chicago.
Resources: Anita Oliver (New York), Ernest Reed (Chicago) ().
Services: Tooth Stopping, Surgery.
Language school:
Resource Type: English, German.
Resources: Doris Cole (English), Sharlene Rhodes (English), Paul Williams (German) ().
Services: Lesson, Consultation.
Car rent:
Resource Type: Class A, Class B, Class C.
Resources: various cars.
Services: Class A (car rent class A), Class B (car rent class B), Class C (car rent class C) (a single service specific for each class).
Hotel:
Resource Type: Single room, Double room.
Resources: Single room with balcony (Single room), Single room without balcony (Single room), Double room with balcony (Double room), Double room without balcony (Double room).
Services: Room (a service can be single if the price for the rooms is the same or you don't need to calculate the price while booking ()).
Travel agency:
Resource Type: UAE, Turkey.
Resources: various placement options (the price should be managed on the service level ).
Services: various Tours.
Keep in mind, that a single time slot can be booked only once. So, in this case after the user books a day, the related resource will not be available for other users on this day. So, the example above might be used to sell the group tours only.
Otherwise, if you need to make one timeslot available for multiple bookings, you need to create as many resources as there are places in each tour (see the example Car Rent).
Scheduling Appointments: Backend
Reservation is the process of assigning a particular time slot to the person (client) in order to provide a certain service. Usually, a reservation means that the service is no longer available for booking at the time of appointment.
Reservations can be made either from the backend by appointment managers or from the frontend by the client(). In order to be able to book an appointment from the frontend, a special add-on Universal Appointments: Portal and Website is required (see Website Booking Process).
In this article, we will see how to book an appointment from the backend.
The module has a convenient backend menu, from which the appointment managers can create a new reservation in just a few clicks. The module's convenient single-view interface allows both: booking appointments right from the calendar and navigating through the appointments with the help of filters, a mini calendar, a search bar, and specific appointment details (see Managing Appointments).
To create an appointment, in any calendar view (daily, weekly, monthly, yearly), just select the day or day range (by moving the mouse while holding the right click) and the appointments wizard will be automatically initiated.
If previously you have specified the resource type, resource, and service in the right functional panel of the single view interface, then those will be automatically specified in the initiated appointments wizard. For example, in the right functional panel, we have chosen the resource type as 'Dentist', the resource as 'Anita Oliver', and service as 'Surgery', then click on the day (15th of June), when we want to book the appointment and in the wizard, the fields resource type, resource, and service were filled automatically. Also, the available time slots are shown on the day 15th of June.
Even if you select a particular day/day range to launch the appointments wizard, you will be able to change the period of time for which the time slots will be generated. For example, a client calls the appointments manager and asks if it is possible to book the Tooth Stooping for Monday or Tuesday. The manager selects these two days by clicking the right side of the mouse and holding it while moving from Monday to Tuesday and the wizard is launched. Then the manager specifies the resource type, resource, and service and it turns out that there are no available time slots. The client then asks to check if there is any time on Wednesday and the manager changes the days to search in, in the field 'Search in dates'.
Available time slots cannot be limited by hours. So, even if you choose a particular time period on the calendar, this time will not be selected by default in the launched wizard. For example, if you open the single view interface in the daily view (25th of June) and click on the timeline at 11:00, then the appointments wizard will be launched. After specifying the resource type, resource and service the available time slots will be generated for the chosen day (25th of June), however, you still need to choose the time 11:00 among the available time slots.
To sum up, in order for an appointment manager to make an appointment, it is possible to set the filters on the right side of the interface. Otherwise, the manager should choose them right in the wizard and select the days' range in the calendar to initiate the appointments wizard.
After launching the appointments wizard, you need to:
1. Select the resource type
Resource type – is a key core object that sets the specifics of the business and stores the related to the business settings. It also keeps information about related services and resources (see Managing Resource Types).
Based on the selected resource type, the choice of resources and services will be limited to only the related ones. The resource type, if selected in the right panel of the single view interface, is set automatically, but you can switch to another one (see Managing Resource Types).
For example, we have several resource types including 'Dentist'. This resource type is selected on the right side of the single view interface, so we can see the related appointments in the calendar. When we click on the day the appointments wizard appears. In the appointments wizard, by default, applied the resource type 'Dentist'. When we click on the resource type's selection field, we see all the other available for us resource types that we can switch to.
2. Select the resource
Resource – is a core object that represents a facility or a person, whose time is considered for allocation to provide a service (see Managing Resources).
After choosing the resource type, the choice of resources becomes limited to only the related-to-the-resource-type ones. If you have previously selected one or several resources in the right panel of the single view interface, they will be set automatically. But you can change your choice.
It is possible to choose one resource. In this case, the resource will be assigned and its calendar will be chosen to generate the available time slots after selecting a service.
You can also choose several resources by adding them one by one. You can also click on the option 'Any' to choose all available resources. Then, you can remove the resources you don't need from the selection.
If a client chooses several resources, then one of those resources will be assigned automatically according to the chosen allocation method of the related resource type. For example, if a client can't select one between the two dentists he likes, then he can choose both and the most suitable resource will be chosen automatically by the app (see Resource Allocation).
For example, we have several resource types including 'Dentist', which is selected on the right side of the single view interface. We have 3 resources that represent the dentists. Two out of three are selected on the right side of the single view interface (Anita Oliver, Abigail Peterson), so we can see the related appointments in the calendar. As we select the day's range the appointments wizard appears. The appointments wizard, by default, applies the resource type 'Dentist' and selected 2 of our dentists: Anita Oliver and Abigail Peterson. We can still change the choice if needed, but, we proceed with the booking. This way, the appointment will be assigned automatically to one of the selected resources, Anita Oliver or Abigail Peterson, according to the selected allocation rule in the resource type's settings. In our case, the appointment was assigned to Anita as she had fewer appointments than Abigail and our allocation method is 'By appointments number' (see Resource Allocation).
The step is missed in case there is a single active resource or a chosen resource type that assumes automatic allocation.
3. Select the service
Service – is a core object that defines what, actually, should be done. For instance, it can be a 'consultation', 'tooth surgery', 'classic hair cutting', 'car class C rent', etc (see Managing Services).
In the wizard, you also need to select which service should be scheduled. The tool automatically checks and restricts viable options according to the previously chosen resource types and resources.
If you have previously selected the service in the right panel of the single view interface, it will be set automatically. But you can change your choice.
For example, we have several resource types including 'Dentist' and several resources including the dentist Anita Oliver, which are selected on the right side of the single view interface. There, we have also selected the related service 'Surgery', so we can see only the related appointments in the calendar. As we click on the time slot, the selected information from the right side of the single view interface is filled automatically and the time slots are generated. But we still can change the parameters and the time slots will be regenerated. As we don't want to change anything, we just proceed to the next step of booking an appointment.
4*. Optionally select the pricelist ()
Appointment prices are price list dependent. This means that a manager might select individual conditions during scheduling. To turn on the feature, in configuration, tick the box 'Multiple Services Prices'. In such a way, it will be possible to apply various currencies, discounts, and promos.
Set the pricelist to the appointment, and it will be assigned to the resulting sale order. The pricelist is applied to the wholesale order, including complementary or other products. For example, give a discount for booking appointments during a particular period (for example, a 10% discount for booking a lesson during the summer holidays). Then add the extra product students book (10$). In the generated sale order the discount will be applied to the total price (lesson + students' book).
5. Choose a time slot
As soon as the wizard details are filled out, the tool will generate and show available time slots (see Time Slots Generation).
The available timeslots are shown based on the Resource's calendar. This way, the time when the resource is unavailable or has time-off isn't shown (Resource Calendar).
When generating slots for aliases, the calendar of the main resource and its busy time is taken into account. This way, one real object can be used in different places, but a single calendar will be generated for it (see Managing Resources).
In case of automatic resource selection, or when there are several resources selected, the algorithm decides which resource the appointment should be assigned to, based on the resource allocation method (see Resource Allocation).
If the chosen service has an extra calendar assigned, then the time available for booking will be further restricted. The service will be available at the intersection of the resource and service calendar (see Extra Calendar Restriction).
If some extra resources are chosen, then, when booking (both in the backend and in the portal), the system will take into account calendars not only of the main resource but also of the additional ones. In order, for the time slot to be available for booking, both the main and the additional resources should be free. While scheduling an appointment for the service, that requires the extra resources, you will see the line that warns you about the additional resources. Hover over the line to see what resources are required (see Extra Resources).
The time slots will be divided based on the related service's default duration (see Service Duration).
Set the slot step with which time slots will be generated, to make the booking time flexible (see Slot Step).
Specify the time required for completing the reservation, without the participation of the client. Set, the checkout period, to show the client what time he/she should finish receiving the service, while the resource will be blocked for the entire selected time (the time for providing the service and the checkout period) (see Checkout Period).
Configure the Start Day&End Day Restriction to choose the set of days of the week and/or a set of specific dates on which the reservation cannot start/end (see Start &End Day Restriction).
A manager should merely select a desired one. Selection means that this slot is pre-reserved and cannot be used for other bookings (see Pre-reservation).
If on the related resource type's card the option 'Calendar Events as Busy Time is ticked, then for periods when a responsible user has meetings (i.e. events assumed by the Odoo calendar), appointment booking will not be possible (see Meetings Calendar).
Per each resource type, you can define when an appointment might be scheduled. The appointment should be booked no earlier and no later than the set time, for example, no earlier than a month before the day of the appointment and no later than 1 day before. Only the days available for booking will be shown (see Time Requirements).
If the start round is set in the service's settings, then the time slot start will be rounded accordingly (see Rounding Time).
Above the generated time slots, you will see the time zone in which the time is booked. Based on the settings it will be either default or available to choose manually. In the latter case, the time zone will be adjusted to the timezone of the system (computer) (see Multi Time Zones).
You may even allow scheduling a few appointments simultaneously. To allow multi-scheduling from the backend, on the configuration page tick the option Multi Scheduling, specify the maximum number of slots, that can be chosen per single booking, and save the changes. In the backend, you can select slots for different resources, resource types, and services in one wizard. For example, when a client wants to book several lessons, but of different languages and thus of different teachers, you will be able to choose the time slots, change the settings and then choose some more timeslots. This way all the required dates will be booked at once. The client will receive one success email for all reservations of a single resource. One sale order will be generated for all reservations ().
6. Optionally add complementary products
If there are complementaries defined for a booked service and the option 'Complementary Products for Reservation' is turned on, Odoo will show a pop-up with suggested products for backend managers immediately after reserving a time slot.
The pop-up allows both adding one / a few complementaries or merely missing the step if suggested products are not required. You can turn on/off the feature on the configuration page.
For example, a dental clinic may suggest toothpaste or a toothbrush as complementary products. To find out how to configure suggestions for complementary products, see Managing Services.
7. Select or create a contact
Choose the contact among the existing ones and all the required details will be taken from the contact's card. No further filling will be required and the other fields will be hidden. If the contact has a parent company, it will be written before the contact, for example, Azure Interior, Brandon Freeman.
If the client is not from the contacts list, you can create a contact right from the wizard. For that, just fill in the contact's name and once you submit the appointment, the contact will be created. This way you can create not only the contact itself but also a contact's company if it isn't yet in the list of contacts.
In order to submit a booking and create a contact, only one field is mandatory. That is the field 'Name'. However, it is strongly recommended to select email/mobile or phone to be in contact and send confirmations. Optionally, you can add other details and they will also be reflected on the contact's card.
The created contact/parent company can be found in the 'Contacts' menu. Simultaneously, the contact's card can be also accessed right from the appointments menu. For that, just click on the appointment in the calendar view and then click on the contact and you will be redirected.
The other available contact fields from the account details page in the appointments wizard are: the contact's title, email, phone, mobile, job position, address, and company name.
If you know the contact's title (Mr, Mrs, Doctor...), and want to make sure that the client is addressed politely, you can select it right after the contact's name.
Fill in the field email for effective communication with the client and to make it possible for the client to receive the notifications/rating email/success email about the appointment.
Fill in the fields phone and mobile to make sure the appointment managers will be able to contact the client by calling. For example, if the client is late, it is more likely that he/she will be able to reply orally, than in written form.
Fill in the address details, if some products or services require delivery. For example, in a car rental, we may get the car to the renter's address or to the airport parking lot.
If you know the job position of a contact, then you can also specify it here. It might be useful for further collaboration or to reflect the specifics of the service. For example, in the language school, we also provide lessons with native speakers to the teachers.
If you know the company name of a client, but the company isn't yet on your contacts list, then you can fill in the field 'Company name'. It will result in creating a company with the chosen name and the contact of the client will be linked to the company automatically.
Also in this step, if the option is turned on, you can still see the chosen pricelist and change it if necessary. If you choose a particular contact, then the contact's pricelist is applied instead of the previously chosen one, but you can switch to another one and it will not result in changing the contact's pricelist on the contact's card. For example, as we were creating the appointment, we chose the pricelist 'Christmas 5%', but then as we moved further and chose the contact 'Abigail Peterson', the pricelist changed to 'Extra 10%', as she is our regular client. So, in order to make the client happy, we decided to combine the discounts by creating and assigning a new pricelist 'Extra 15%' for this particular order. As we applied it on the account details step, after confirming the appointment it applied to the resulting sale order. It didn't change the contact's details, Abigail still has the price list 'Extra 10%' assigned (see Universal Appointments: Sales).
If the existing fields aren't enough and you want to add an extra field to the appointments, it is possible to create some custom fields (). To view the appointments field on the account details page, just choose the 'Input form placement' option, while creating a custom field, and, if you want to make filling in this field mandatory, tick the option 'Required to enter a value'. For example, for a language school, you can create a text field 'Learning preferences', to find out what the student likes before the lesson. This field will be added to the appointment, but not to the contact's card (Universal Appointments: Custom Fields).
After creating a contact through the appointments wizard, you will be able to edit it and add some more details to the standard app Contacts.
You will also be able to edit the contact right from the appointments calendar, for that, just click on any appointment and then on the external link icon by the contact's name.
Optionally, add some notes about the appointment.
8*. On this step, it is also checked if there are any other reservations that block the current by resource or additional resources, or by related contact. If there is another reservation or there are intersections with other contact reservations, then the warning will appear. The same contact cannot have 2 reservations by different resources at the same time. For example, if our portal user Azure Interior has a reservation for Tooth Stopping on the 4th of October at 16:00 (duration is 45 min) and then we try to book another reservation for Haircut at 16:30, then the second time slot will not be booked and the warning will appear as the contact already has a reservation at that time.
If several tabs are opened at the same time for the same user, and the same time slot for different reservations is chosen, the second one will not be booked: the pop-up warning will appear.
9. Click 'Confirm'.
After that, the appointment will appear in the appointments menu as a line at a particular time in the calendar. You can find it by applying the related filters or by opening the day for which the appointment was booked (it will be placed on the booked time). You will be able to see and manage its details by clicking on the appointment and then the button 'Edit'. Delete the appointment by clicking on the button 'Delete'. Easily re-schedule an appointment by launching the re-scheduling wizard through drag&dropping an event. From the wizard, you will be able not only to choose another available time slot but also to change the details of the appointment, such as resource type, resource, service, and pricelist of the appointment (see Managing Appointments).
Once configured, the sale order will be created (). The resulting sale order can be either a draft (can be changed), automatically confirmed (cannot be changed), or sent quotation (ready to accept and pay) (see Universal Appointments: Sales).
Time Slots Generation
The algorithm of the module allows making sure that only vacant time slots will be available for booking. The vacant slots for appointments are automatically generated based on working calendars, service peculiarities, and specifics of managed businesses. Here are all the factors that influence the time slots generation:
1. Resource calendars and time offs (see Resource Calendars)
The algorithm takes into account the working calendar of the resource. Each resource has its own calendar and time offs: global ones – when the company doesn't work; and own leaves - when an employee takes a vacation. It is impossible to schedule an appointment for non-working time. For example, our dentist Anita Oliver works according to the working calendar 'Standard 40 hours/week', but on Monday she had to go to a doctor, so took leave and the time slots on Monday were unavailable for booking.
When generating slots for aliases, the calendar of the main resource and its busy time are taken into account. This way, one real object can be used in different places, but a single calendar will be generated for it. For example, our teacher Doris Cole is also an interpreter. But, we can't create a second resource for her as the busy/scheduled time will not be shared. So, we create an alias 'Doris Cole', that refers to the working calendar ('Standard 40 hours/week') and employment of the resource 'Teacher Doris Cole'. This way, when one of the resources is occupied, the other is also unavailable (see Managing Resources).
2. Resource allocation (see Resource Allocation)
When there are several resources that relate to the same service, the time slot for the service will be available until each related resource's time is occupied. For example, there are 3 cars in the car rental. Two cars were booked on Monday, but the time slot 'Monday 24.06' is still available as there is one more car for booking.
3. Extra Alias Calendar (see Extra Alias Calendar)
Aliases of both human and material type may have their own working calendar assigned. This time will be used to generate the available time slots for the aliases. At the same time, an alias cannot be available during the time when the main resource is unavailable, even if this time is specified in the alias calendar. Therefore, the time intersections of the main resource's calendar and the extra calendar of the alias will be used to generate the available time slots for the alias. For example, we have a hairdresser Doris Cole with the working calendar 40 hours/week, who can also work part-time as a teacher on Monday and Friday. So, we have added the working calendar with the time Monday and Friday to her alias 'Teacher Doris Cole'. Then, when her lessons are booked, managers and clients see the available timeslots only on Monday and Friday.
4. The Extra Calendar of services (see Extra Calendar Restriction)
If defined on the service card, then this service would be available only in intervals that simultaneously suit this calendar and appointment resource calendar. For example, the tooth stopping is available Monday 10 am - 2 pm and the dentist Anita Oliver works Monday 8 am - 12 pm. Then, the available time to book the service will be Monday 10 am - 12 pm.
5. Extra Resources of service (see Extra Resources)
If defined, then, when booking (both in the backend and in the portal), the system will take into account calendars not only of the main resource but also of the additional ones. In order, for the time slot to be available for booking, both the main and the additional resources should be free. For example, in our language school, we have human resources (teachers). For the service 'Lesson', also another resource is required – 'Room'. When the room and/or teacher is busy, it isn't possible to book a lesson.
6. Service Duration (see Service Duration)
The algorithm takes into account service duration. Available time slots have a duration depending on the chosen service or one entered manually. For example, if a lesson in a language school lasts for 45 minutes, then the available timeslots will be 8:00, 8:45, 9:30, 10:15, etc.
7. Slot Step (see Slot Step)
With the help of the field 'Slot Step', you can set the step with which time slots will be created. You can choose the slot step for both services in days and hours. For example, if we reserve service with a duration of an hour and the step of the service is set as 0:30 min, then the generated slots will look the following way: 09:00-10:00; 09:30-10:30; 10:00-11:00, 10:30-11:30. After booking the time slot 9:30-10:30, the time slots 09:00-10:00 and 10:00-11:00 will be unavailable for further booking. It might be useful in a beauty salon with an unloaded schedule.
8. Checkout Period (see Checkout Period)
Specify the time required for completing the reservation, without the participation of the client. For example, the room is reserved from 14:00 01.08 to 12:00 10.08 (10 days), where the start round is set as 14:00, and the checkout period is set as - 02:00 hours (14-2=12; that is, 12:00 - checkout time). At the same time, in the backend, the resource 'Room' is reserved for the service 'Rent' from 14:00 01.08 to 14:00 10.08 (i.e. full time).
9. Start&End Day Restriction (see Start&End Day Restriction)
Set the Start Day&End Day Restriction to choose the set of days of the week and/or a set of specific dates on which the reservation cannot start/end. For example, the resource 'Boat rent' is available 24/7, but the beginning and end of its service 'Boat m21' cannot fall on weekends (Sat, Sun). If the service lasts 3 days, in accordance with the restrictions of the current date, the nearest start of the service may be 28.07 at 13:53. But according to the rounding of the service 00:00, the closest available time is on Friday, 29.07 00:00.
10. Pre-reservations (see Pre-reservations)
Reserved and pre-reserved time slots are not available for booking and will not be available for selection. Pre-reservation WILL be canceled if not done within a specified period (you may change this limit on the configuration page). For example, a client started booking a car for Monday, so pre-reservation appeared and the time slot became unavailable for booking. According to our settings, the pre-reservation was canceled as it wasn't finished for 30 minutes and the time slot became available again.
On the website, when a time slot is booked by a logged in user (portal user), time slots where he/she has reservations by any resource will not be shown.
If the user logged in after choosing a time slot, then at the end of the reservation, the system will transfer him/her to the slot selection page.
11. Meetings Calendar (see Meetings Calendar)
Once configured, the app will also consider simple meetings of resources' responsible users as busy for generating time slots. For example, if our dentist Anita Oliver has a meeting on her Odoo calendar, this time will not be available for booking.
12. Time Requirements (see Time Requirements)
Per each resource type, you can define when an appointment might be scheduled. For example, in a hotel, we can set the generating time slots so, our clients will be able to book the appointments at least the week before the time of the appointment and no more than 90 days before the appointment.
13. Rounding Time (see Rounding Time)
The algorithm takes into account service rounding time if set. So, you can avoid the cases, when the start time doesn't look good, for example, 15:12 or 08:17. Also, it might be useful to make sure that there is a break between appointments. For example, if a lesson in a language school lasts for 45 minutes and the rounding is set as 01:00, then the available timeslots will be 8:00, 9:00, 10:00, 11:00, etc.
14. Multi Time Zones (see Multi Time Zones)
Available time slots are generated for a specific time zone. You can either choose it on the configuration page or let choose a timezone while booking, so the time slots will be recalculated accordingly. For example, a hotel room might be booked by foreigners, that live at a different timezone, so we let them choose it on the website.
Resource Calendars
The module uses standard Odoo working calendars, based on which, when added to the resource, slots are generated. Each resource has its own calendar and time offs: it is impossible to schedule appointments for non-working hours. For example, when we assign the calendar 'Standard 40/hours week' to the resource 'Room 5', then the services related to the resource will be available for booking only during this time.
The working time may be seen and managed in the menu 'Workings Calendars'.
To create a working calendar:
1. Go to Configuration > Working Calendars
2. Click 'Create' or choose a calendar to edit
3. Write the title
4*. If you work in the multicompany environment, then choose a company
5. Optionally switch to 2 weeks calendar by clicking the related button
Useful, in case, the working pattern is similar not for each week, but for every 2 weeks.
6. Click 'Add a line' to add a day, write its title and specify the working day and time
7. Click 'Save'.
The module adds a unique calendar 24/7, that is particularly useful for daily bookings, as it allows you to make resources available throughout the day. For example, when a person books a room or rents a car, it might not be convenient to track the duration in hours. The standard Odoo calendar doesn't allow adding the full day as working hours, which would result in the impossibility to calculate the time slots for the daily services.
If you choose the 'Resource kind' as 'Human' (), then the working calendar of the employee is used to generate the available time slots. For example, the calendar of our dentist Anita Oliver is Standard 40 hours/week. So the related resources 'tooth stooping' and 'surgery' are available only during this time.
Not only the calendar affects generated time slots, but also the Time-offs. Time-offs can be either global (the time, when the company doesn't work) or own Leaves (when an employee takes a vacation).
You can see and manage global time offs right from the working hours card. To do that, just click on the 'Public Time off' button.
You can view and manage all employees' own Leaves right from the working hours card. For that, just click on the button 'Time Off'.
Not only the resources of the Human kind can have the time off. It is also possible to create time off for the resources of the Material kind. For example, for the maintenance period. You can create the time off right from the working hours card. To do that, just click on the button 'Time Off' and then 'Create'.
In order to use the working calendar to generate the available services. It should be applied to the related resource. For that:
1. Go to Resources > Resources
2. Start creating or editing a resource
3. Choose the calendar in the field 'Working Hours' or create a new one by writing the title and clicking 'Create'/'Create and Edit'
4. Click 'Save'.
If you want to use one resource with its working hours and employment for different resource types/ services, then you can create some alias resources for the prime one. Any alias resource ceases to be independent in terms of calendar settings and responsible, i.e. it only displays the prime resource.
Aliases cannot have an associated employee, but they can be of the Human type (if the add-on Universal Appointments: HR Bridge is installed). We can't create two stand-alone human resources () for a single employee, as then the already booked slots of one will not be taken into consideration while booking slots for another one. For example, Doris Cole (a human resource) is both a hairdresser and a teacher.
When generating slots for aliases, the calendar of the main resource and its employment are taken into account. If you schedule an appointment for the prime resource, then this time will become unavailable for the alias as well and vice versa. During the time-offs and busy times of the prime resource, the alias is also unavailable for booking. This way a single calendar is generated for both the prime resource and its aliases. For example, we have two resource types 'Swimming lane for one' and 'Swimming lane for the team', which require the same resource 'Lane 1'. We can't use the same resource with 2 different resource types and can't create 2 resources as we only have 1 lane. So, we create an alias 'Lane for swimming', which refers to the working calendar ('Standard 40 hours/week') and employment of the resource 'Lane 1'. This way, when the resource 'Lane 1' is occupied, the resource 'Lane for swimming is also unavailable and vice versa.
To turn the resource into an alias, just start creating or editing a resource and in the field 'This resource in only alias for', below the title, choose the prime resource (see Managing Resources).
Resource Allocation
If there are several resources related to the same service, then there might be a necessity to specify the way the appointments should be distributed among them. There are 2 general approaches introduced by the app: manual resource selection and automatic one. You can set the way the resources are distributed on the related resource type's card. For that:
1. Open the module Appointments
2. Go to the tab Resources > Resource Types
3. Start creating or editing a resource type
4. In the field resource selection, choose either manual or automatic
Manual resource selection may be applied in case each resource is unique, and you prefer to give clients a right to select among those. For example, a customer would like to be consulted by a certain doctor or to be serviced by a definite hairdresser.
Automatic allocation is configured per each resource type depending on your business specifics.
5. Choose the way the resource will be assigned in the field 'Resource Allocation Method'
The distribution method is applied in cases where automatic resource selection is chosen. Or, when the client can't choose between the resources and selects several ones or all.
You can configure and distribute resources by workload, appointment number, and order.
Automatic distribution by resource workload lets assigning appointments according to the total planned duration of all open appointments. For example, it might be fair in beauty salons to equally spread tasks.
Automatic allocation by appointment number does not take into account real duration, but only absolute quantity. For example, it might be suitable for tire mounting where the price is set up not per duration but per unit.
Automatic distribution by order means that each resource has its own priority, and allocation is done on a queue basis. Thus, the resource with the highest priority would always be chosen until it has available slots for the target moment. After that, the second-important resource is under consideration until it is also occupied, and so on. For example, such an approach might work for facilities booking or car rental.
6. Click 'Save'.
When an automatic allocation is chosen, the step 'Choose resource' is skipped. Automatic allocation - applied when all resources are considered equally good for clients. For example, customers would hardly compare Opel Astra 1234 vs. Opel Astra 1235.
Even if you chose the manual resource allocation, it is still not necessary for the managers/clients to choose a particular one. If they aren't sure which resource to choose, then they can select several resources (so the algorithm assigns one of them based on the resource allocation method).
If one resource is chosen for several services, then, when the time is booked by one service, it will not be available for further booking by another service as well.
Extra Alias Calendar
For each resource alias, of both material and human kind, you can set the "Extra Alias Calendar". The calendar will be used to generate the available time slots for aliases. The alias will be available for booking at the intersection of the main resource and extra alias calendar. For example:
- The main resource is available: Monday - Friday 10 am - 6 pm;
- The alias is available: Monday 8 am - 12 pm; Friday 10 am - 4 pm
- So the available time to schedule the appointment for the alias will be Monday 10 am - 12 pm and Friday 10 am -4 pm.
If the extra alias calendar is not set, then the reservation of the alias will be done in the usual way, based on the available time of the main resource.
To set Extra Alias Calendar:
1. Go to Universal Appointments > Resources > Resources
2. Start creating or editing an alias
3. In the field 'Alias Working hours' choose a working calendar among the available ones or create a new one.
This way, the same resource may relate to different resource types and be available either at the same time, or at different times, depending on your choice.
Extra Calendar Restriction
For each service, you can set the "Extra Calendar Restriction", which If selected, further limits the time available for booking. The service will be available for booking at the intersection of the resource and service calendar. For example:
The service is available: Monday 10 am - 2 pm; Tuesday 4 pm - 6 pm
The resource is available: Monday 8 am - 12 pm; Tuesday 10 am - 4 pm
So the available time to book the service will be Monday 10 am - 12 pm.
If the extra calendar restriction is not set, then the reservation will be done in the usual way, based on the available time of the resource.
To set Extra Calendar Restriction:
1. Go to Universal Appointments > Resources > Services
2. Start creating or editing a Service
3. In the 'Settings' tab find the line 'Extra Calendar Restriction'.
4. Choose a working calendar among the available ones or create a new one
5. Click 'Save'
Extra Resources
On the service card, it is possible to specify the additional resources to provide the service. Then, when booking (both in the backend and in the portal), the system will take into account calendars not only of the main resource but also of the additional ones. In order, for the time slot to be available for booking, both the main and the additional resources should be free. For example, in our language school, we have human resources (teachers). For the service 'Lesson', also another resource is required – 'Room'. When the room and/or teacher is busy, it isn't possible to book a lesson.
A single resource can serve both as the main one and as an additional resource for another one. If the main resource is already booked for a particular time, then it cannot serve as an additional one at this time and vice versa. For example, the resource 'Room' is the main resource for the resource type 'Rent'. If it is booked, then that time becomes unavailable for booking the lesson as well.
To assign extra resources to provide a service:
1. Start creating or editing a service
2. In the tab 'Settings', find the section 'Extra Resources Required'
3. Click 'Add a line'
4. Optionally, write the reference, to explain what the line stands for
5. Optionally, choose the resource type/types alternatively
6. Optionally, choose the resource/resources alternatively
7. Optionally, choose one more required resource by adding another line (rule)
8. Click 'Save'
When there are several resources to choose from, but you need only one of them to provide a service add them in one line. When you choose a resource type in the table, then one of its resources will be used as an additional one, upon booking the service. If several resource types are selected in a single line, then one of the related resources will be used as an additional one, upon booking the service. For example, for the service Tooth Stooping, we also need a room. Add extra resources 'Room 1' and 'Room 2'. Then, upon scheduling an appointment, one of them will be also booked.
When several resources must be available add them in different lines. The time of all the required resources will be checked to generate the available time slots. For example, for the service Tooth Stooping, we need both a room and an assistant. Then, upon scheduling an appointment, both a room and an assistant will be booked.
Change the order of the lines/ options inside the line, to change the priority of the resources. For example, if we have chosen two rooms in one line in the order (Room 1, Room 2), then the availability of the resource 'Room 1' will be prioritized and checked first. If there is a second line with the assistant, in the order (John, Eva), then, John will be prioritized over Eva and the additional resource 'Room' will be prioritized over 'Assistant'. The order of checking will be (Room 1, John), (Room 2, John), (Room 1, Eva), (Room 2, Eva).
It is necessary that at least one combination is possible. Otherwise, there will be no available time slots. Keep in mind, that one and the same resource cannot serve as both primary and additional resources for the same service. So John can't be a dentist and his assistant at the same time. Such combinations are excluded from time slots.
While scheduling an appointment for the service, that requires the extra resources, you will see the line that warns you about the additional resources. Hover over the line to see what resources are required. The most suitable combination is assigned automatically according to the chosen allocation method of the resource type related to the extra resources.
In case, it isn't possible to book any of the required resource types/ resources from a single line, then the app will show a warning. Such a situation may appear when the required resource types/resources are archived. In order to show the available time slots, at least one combination of extra resources should be available.
If you didn't finish the appointment, but the pre-reservation was created, then on the pre-reservation card you will also see the resources that will be booked additionally upon completing the scheduling.
As you finish scheduling an appointment, on the appointment's card, you will see the field 'Extra resources' with the additionally booked resources.
When you search by resource in the calendar or filter the appointments in the calendar in the right navigation interface, you may see more reservations, than, when you search/filter only by the resource type. The appointments, where the resource is used as an extra resource are also shown. For example, if you select the resource type 'Dentist' you may not see any reservations but is you select a particular dentist 'Anita Oliver', you may see the appointments if she takes part in them as an additional resource.
On the resource card, you can see the number of reservations related to this resource. The number also includes the reservations where this resource is an additional one.
Service Duration
The duration of the service is the time required for providing a particular service. Duration is applied per each service individually according to the set of rules. Duration is defined either in hours (for example, it might be suitable for consultations, and lessons) or in days (for example, applicable for room, car, or equipment rental).
The duration of the service can be either fixed or applied manually according to the preset rules.
The fixed/rigid duration for service is the one used by default when generating time slots. This cannot be changed in the process of booking. For example, it may be useful in a language school, where the lesson always lasts 45 minutes, or in a dental clinic, where the standard tooth stopping takes an hour.
It is also possible to let clients/managers select the duration of service manually while booking. It is particularly useful for hotels and car rental business types. For example, a hotel room might be booked for a various number of days.
For the manual duration, it is possible to apply restrictions: what is the maximum/minimum order, and what should be the multiplier. For instance, you can simply apply the rule: a service should last not less than an hour, not more than 8 hours, but the duration should be always multiplied by 30 minutes (1:20 is not possible, while 01:00 and 01:30 are fine).
To set the duration of the service:
1. Go to Universal Appointments > Resources > Services
2. Start creating or editing a Service
3. Find the field 'Appointment Default Duration', and define whether appointments should be scheduled for hours or for days, and set the time
This time will be applied by default when generating the available time slots, even if the manual duration is allowed. For example, if I try to book a room and the default duration will be 2 days, then after getting to the step with the time slots, the available slots will be calculated for 2 days (06/23/2022 - 06/25/2022; 06/25/2022 - 06/27/2022).
4. Optionally, allow manual duration by ticking the box 'Allow Manual Duration' in the 'Settings' tab
After that, you will see the fields to set the rules for the manual duration.
In the field 'Min Duration in Hours/Days', set the shortest period of time which should be available for booking. For example, if you set it as 2 days for a hotel room, then it will not be possible to book the room for a day.
In the field 'Max Duration in Hours/Days', set the longest period of time which should be available for booking. For example, if you set it as 14 days for a hotel room, then it will not be possible to book the room for more than 2 weeks.
In the field 'Multiple for Hours/Days', define how manual duration should be rounded. For example, if you set it as 2 days for a hotel room, then it will not be possible to book the room for 1, 3, 5, 7, etc... days. Instead, the room will be available for 2, 4, 6, 8... days.
5. Click 'Save'
Slot Step
The Slots Step field, allows generating time slots flexibly, including allowing overlapping ones. This way, you can set the step with which time slots will be created. For example, if we reserve service with a duration of an hour and the step of the service is set as 0:30 min, then the generated slots will look the following way: 09:00-10:00; 09:30-10:30; 10:00-11:00, 10:30-11:30. After booking the time slot 9:30-10:30, the time slots 09:00-10:00 and 10:00-11:00 will be unavailable for further booking. It might be useful in a beauty salon with an unloaded schedule.
If the step is equal to the service default duration, then it will not be overlapped (in case the manual duration is disabled). For example, if we reserve service with the duration of an hour with the step 01:00 hour, then the generated slots will look the following way: 09-10; 10-11; 11-12. It might be useful if there is no need to have breaks between the appointments, for example, in the rental business.
If the step is bigger than the service duration, that will result in the breaks between the available for booking a time slot. For example, if we reserve service with the duration of an hour with the step 02:00 hour, then the generated slots will look the following way: 09-10; 11-12. It might be useful to manage a hospital when after certain procedures, it is required to prepare the room and tools for the next client.
It is possible to set the slot step for both services with the duration in days and hours. For example, if we have a service '7 days tour', and choose the slot step as 1 day, then the available time slots will be 01.08 - 08.08, 02.08 - 09.08, etc. In order to avoid intersections, make the slot step equal to the service duration. For example, if we have a service '7 days tour', and choose the slot step as 7 days, then the available time slots will be 01.08 - 08.08, 09.08 - 17.08, etc.
The slot step can be assigned on the service card, the tab 'Settings', field 'Slots Step'.
Checkout Period
Specify the time required for completing the reservation, without the participation of the client. This setting allows showing the client what time he/she should finish receiving the service. At the same time, the resource will be blocked for the entire selected time (the time for providing the service and the checkout period). The selected while booking time slots will show the time for the client, and the time on the appointments card in the backend will show the real booking time.
It is particularly useful, in a hotel business, when some additional time is required for the room cleaning, before making it possible for further renting. For example, the room is reserved from 14:00 01.08 to 12:00 10.08 (10 days), where the start round is set as 14:00, and the checkout period is set as - 02:00 hours (14-2=12; that is, 12:00 - checkout time). At the same time, in the backend, the resource 'Room' is reserved for the service 'Rent' from 14:00 01.08 to 14:00 10.08 (i.e. full time).
It is possible to set the checkout period for both daily and hourly services. You can set the checkout period on the service card, in the tab 'Settings', field 'Checkout Period'.
Start&End Day Restriction
As you switch to the daily default duration of service, two extra fields are shown: Start Day restriction & End Day restriction. Each of the fields represents a rule, that keeps the information about the set of days of the week and/or a set of specific dates on which the reservation cannot start/end. For example, you can specify some special weekends or holidays. When creating a new reservation, these rules are taken into account, and the application doesn't show the slots, where the beginning or end is prohibited.
To create a rule, on the service card, in the tab 'Settings', just start writing the reference in one of the fields Start Day restriction/End Day restriction, and choose the option 'Create&Edit'. You can add several rules in one field. The rules can be further reused for other services.
For example, the resource 'Boat rent' is available 24/7, but the beginning and end of its service 'Boat m21' cannot fall on weekends (Sat, Sun). If the service lasts 3 days, and the current date (20.08 Sat), the nearest start of the service may be 22.08 (Mon). The service cannot start on Thursday and Friday, as in this case, the end will fall on the weekend.
It is also important to keep in mind the time requirements of the related resource type. For example, if according to the requirements we cannot make the reservation later than a day before the appointment, then if the current date is 21.08(Sun) and the time is 15:00, then the closest available for the booking date will be 23.08 (Tue), as the start time of the service is 12:00 and it would be less than a day before it.
In case the 24/7 service starts at 00:00, the module would remove a second, to make it possible to book the day before the End Restricted Days. For example, we have a daily service 'Boat m21', and restricted starting it during the weekend. In order to book the whole day, we need 24 hours available. At 00:00 already starts another day. That would make it impossible to book on Friday, but the module removes one second (00:00 - 23:59), so the only booked day is Friday.
Pre-reservation
When a manager/client starts reserving service and chooses a time slot, pre-reservation occurs. The pre-reservation is an appointment that wasn't confirmed. When the time slots are generated, pre-reserved slots, as well as reserved ones, aren't shown or available for selection.
Pre-reservation is canceled automatically. By default, the time for pre-reservation is set as 30 minutes, and after that time, if not completed, the slot is unblocked. It is possible to set a different time for the reservation. For that:
1. Open the Appointments app
2. Go to Configuration>Configuration
3. Find the section Business Appointments Options
4. In the 'Maximum Period for Pre-Reservation' set the time
When a client chooses a timeslot (), above the form appears the timer (with the time you have set). During this time, the client should complete the appointment process by filling in the details and confirming the appointment. Once the time is over and the booking process isn't completed, then the slot becomes unblocked and available for further bookings.
If a manager chooses a time slot in the backend, that also results in a pre-reservation. It is particularly useful, in case, there are several managers to avoid booking the same time slot. As soon as one of them reserves the time slot, it will no longer be available for selection.
Even if, the managers will generate the same slots simultaneously, as soon as one of them chooses a particular time slot, the second one will not be able to select the same one.
If the manager returns to the previous steps by clicking the 'Cancel' button, or by clicking the cross in the top right corner - the pre-reservation will be canceled.
If the manager is unable to complete the reservation, for example, if the page is refreshed or closed, then the time slot will remain pre-reserved. After the set time, it will be canceled.
You can see all pre-reservations valid at the moment by clicking on the tab 'Pre-reservations' in the systray. It is a technical menu, which is shown for informational purposes only. The history of pre-reservations is not kept, so, if there aren't any active pre-reservations, then the menu is empty.
Meetings Calendar
Also, the resource type card has the option 'Calendar Events as Busy Time. If the option is ticked, then for periods when a responsible user has meetings (i.e. events assumed by the Odoo calendar), appointment booking will not be possible. For example, when we have resource 'Room 5' with the teacher as a responsible user Anita Oliver, then the time, when the user has meetings will not be available for booking.
If the resource is set as Human (), then the working calendar of the employee is used to generate available time slots. And if the option 'Calendar Events as Busy Time' is turned on, then the meetings of the employee are also considered. For example, our dentist Anita Oliver has two meetings on her calendar. The first meeting is on the 13th of July, she organizes the meeting and it lasts the whole day. So, the date is unavailable for booking. The second meeting is on the 20th of July 10:00 - 11:00, and she is an attendee. This hour will be unavailable for booking an appointment. Anita has another meeting on the 2nd of July, but it will not be taken into consideration for booking time slots as it is on Saturday and it isn't a working day for Anita.
Time Requirements
Per each resource type, define when an appointment might be scheduled. This way the time slots will only be generated for these days. For that:
1. Go to Universal Appointments > Resources > Resource Types
2. Start creating or editing a Resource type
3. Find the section 'Time Requirements'
4. Set a time after which the slot will not be available for booking in the field 'Reservation should be done in'
You can set a time, after which a time slot will no longer be available for booking. The time can be set in minutes, hours, days, weeks, months, or years. For example, when there are only a few minutes left before the lesson's time, a teacher will hardly be ready for it.
5. Set the time available for booking in advance in the field 'Reservation should not be done after'
You can set a time in which the time slot can be booked. The time can be set in hours, days, weeks, months, or years. For example, it is hardly a good idea to book a dentist appointment a year in advance as during this time many things may change.
6. Set the time available for cancellation and rescheduling in the field 'Portal: Cancellation/Re-Schedule might be done in'
You can set a time after which it will not be allowed to cancel or reschedule an appointment. The time can be set in hours, days, weeks, months, or years. For example, forbid to cancel or reschedule booking a room in a hotel 2 days before. As this time might not be enough to find the new visitors.
7. Click 'Save'
Rounding Time
The app allows defining the rule to round time slots start. This is useful in case the applied restrictions resulted in a calculated start you do not like. For example, an hour-long service starting at 12:23 is hardly good. To solve the problem you can simply set up rounding for an hour.
To get a nice starting time:
1. Start creating or editing a service
2. In the 'Settings' tab find the option 'Start Round'
3. Set a rounding rule
4. Click 'Save'
The rule can be defined through the field 'Start round' for the services, which default duration is set in hours. For the daily services, the field is replaced by 'Start Time', which allows stating the time at which the service should start.
For example, if an appointment is available now after 14:12 tomorrow. Then, the rounding for:
0:05 - would round start to 14:15
0:10 - would round start to 14:20
0:30 - would round start to 14:30
1:00 - would round start to 15:00
02:00 - would round start to 16:00
24:00 - rounding for the day - would round start to 00:00
32:00 - rounding for the day and 8 hours - would round to 08:00 the next day
When you set the rounding/start time, you set the time in the server's timezone. So, when the time slot is booked the time may look different as another timezone may be applied as the default one in configuration / or might be chosen manually by a manager / a client. For example, for the hotel, we have set the start time for the daily service 'Room' as 12:00, but as we start booking a time slot all the available ones start from 13:00. As our system's timezone is GMT +2 and the manager works remotely from the city with the timezone GMT +3.
Take into account that rounding is done in working calendar timezone.
Multi Time Zones
The module supports a multi-timezone regime. You can set a default time zone for booking an appointment or choose a timezone manually while booking from both the backend and frontend (). This feature is particularly useful, for international companies and for the travel business to avoid confusion about the time of the appointment.
To choose the default timezone:
1. Open the Appointments app
2. Go to Configuration>Configuration
3. Find the section Business Appointments Options
4. Find the option 'Company Timezone' (If hidden, untick the option 'Different Time Zones')
5. Define time zone to show time slots
6. Click 'Save'
After that, the chosen timezone will be applied and shown above the timeslots while booking an appointment from both the backend and frontend.
Sometimes it might be useful to let managers/clients choose a timezone while booking. In this case, when choosing time slots, by default the timezone will be applied. However, it will still be possible to switch to another timezone with the help of the selection field above the timeslots. For example, if you have an online language school, some customers might be from various countries.
To allow choosing a timezone:
1. Open the Appointments app
2. Go to Configuration>Configuration
3. Find the section Business Appointments Options
4. Tick the option 'Different Time Zones'
5. Click 'Save'
Keep in mind that there are several timezone settings, that may affect the way the timeslots are displayed. Those are:
1. Timezone of the user
2. System timezone (set on the computer/browser)
3. Timezone, chosen in the appointment configurations as a default one
The user sees the appointments in the calendar according to the user's timezone. For example, if our teacher 'Anita Oliver' is from London, and her user's timezone is UTC/GMT +1 hours. Then, it is natural to show the appointments in her time, so she knew the right time of her lessons.
It is important to make sure that the timezone of the user matches the timezone of the system (set on the user's computer/browser). As the time in Odoo interfaces is shown in the user's timezone, while the functionality will be applied in the default (set in appointment configurations) or system's time. For example, you will choose the time slot as 9:00 in GMT -4, and in the calendar, it would be shown in the user's time GMT +2 as 16:00.
Complex Examples
Here you will find examples, of the settings that influence time slot generation:
1. Duration of service: Tooth stopping lasts for 45 minutes, Surgery for 2 hours.
2. Own calendar of the resource and time offs: We chose a particular employee (), whose working calendar will be taken into consideration while calculating available time slots (Standard 40 hours/week). Since we have assigned employees as resources for these resource types, we don't want the appointment to intercross with the planned meetings of employees, so ticked the box Calendar Events as Busy Time.
3. Extra Resources: We have added 2 extra resources to Tooth Stopping (a room and an assistant) and 1 extra resource for the surgery (a room).
4. The Extra Calendar of services: Standard 20 hours/week for Tooth stopping.
5. Slot Step: We set the slot step as 01:00 for Tooth Stopping and 02:00 for Surgery, so the generated time slots will be equal the duration of the service.
6. Time Requirements: We want our clients to book their appointments at least the day before the time of the appointment and no more than 30 days before the appointment. The client may cancel or reschedule the appointment no later than a day before the appointment.
7. Rounding Time: Rounding is set as 1:00 for both services.
8. Resource allocation: We want to allow our clients to choose the Dentist, so the Resource selection is set as: Manual. The Resource Allocation Method is set as: By Workload.
1. Duration of service: both Lesson and Consultation last for 45 minutes.
2. Own calendar of the resource and time offs: We chose a particular employee (), whose working calendar will be taken into consideration while calculating available time slots (Standard 40 hours/week). Since we have assigned the employees as the resources for these resource types, we want the appointment not to intercross with the planned meetings of employees, so ticked the box Calendar Events as Busy Time.
3. Extra Resources: We have added an extra resource (a room) to the services.
4. The Extra Calendar of the service: We didn't set Extra Calendar to any service.
5. Slot Step: We set the Slot Step as 01:00 for Lesson and 00:15 for Consultation, so the clients could book the time slots flexibly.
6. Checkout Period: We added the checkout period as 00:15 minutes to Lesson, so the teachers had a break between lessons. However, it wasn't necessary in this case, as the start round for the service is set as 01:00 and the lesson takes 00:45 min.
7. Time Requirements: We want our clients to book their appointments at least the day before the time of the appointment and no more than 30 days before the appointment. It isn't allowed to cancel or re-schedule the lessons (0).
8. Rounding Time: We don't add Extra Calendar Restriction to fully rely on the related resource's calendar.
9. Resource allocation: We don't want to allow our clients to choose a teacher, so the Resource selection is set as: Automatic. We want the lessons to be distributed equally among our teachers and as the duration of a lesson is fixed as the Resource Allocation Method we choose: By Appointments Number.
1. Duration of services: The cars are rented on a daily basis. The renting time can be chosen manually, but shouldn't tale less than a day.
2. Own calendar of the resource and time offs: We chose a working calendar as 24/7 Non-stop, as the car is rented on a daily basis, so the whole day should be available.
3. The Extra Calendar of the service: We didn't set Extra Calendar to any service.
4. Slot Step: The Slot Step is set as 1 day, so the generated time slots will be generated with the step of 1 day.
5. Checkout Period: The Checkout Period is set as 2:00 hours, so the clients should return the car not at 00:00, but at 22:00, although the car will be booked for the whole period.
6. Start&End Day Restriction: Although the weekend might be included in the booking. It isn't allowed to start/end booking during the weekend. So, we created a rule and specified the days of the week, when the reservation cannot start and end.
7. The Extra Calendar of the service: We didn't set Extra Calendar to any service.
8. Time Requirements: We want our clients to book the appointments at least the day before the time of the appointment and no more than 90 days before the appointment. The client may cancel or reschedule the appointment no later than a day before the appointment.
9. Rounding Time: Rounding is unavailable for daily service. The start time for the services is set as 00:00.
10. Resource allocation: We don't want to allow our clients to choose the exact type of car as there isn't much difference between the cars of one class, so the Resource selection is set as: Automatic. There is no difference what car is chosen, so as the Resource Allocation Method we choose: By Order. This way if the first car in the list is available, it will be assigned for the appointment. When it isn't available, then the second car in the list will be assigned and so on.
1. Duration of services: The rooms are booked on a daily basis. The booking time can be chosen manually, but shouldn't tale less than a day.
2. Own calendar of the resource and time offs: We chose a working calendar as 24/7 Non-stop, as the rooms are booked on a daily basis, so they should be available all day.
3. The Extra Calendar of the service: We didn't set Extra Calendar to any service.
4. Slot Step: The Slot Step is set as 1 day, so the generated time slots will be generated with the step of 1 day.
5. Checkout Period: The Checkout Period is set as 2:00 hours as we need the time to clean the room for the next guests. So the clients should move out at 12:00.
6. Time Requirements: We want our clients to book the appointments at least the week before the time of the appointment and no more than 90 days before the appointment. You are allowed to cancel or re-schedule the room no later than a week before the appointment.
7. Rounding Time: Rounding is unavailable for daily service. The start time for the services is set as 14:00.
8. Resource allocation: We want to allow our clients to choose a room (with or without a balcony), so the Resource selection is set as: Manual. The Resource Allocation Method is set as: By Workload.
1. Duration of the services: We have set the default duration of each service (Antalya, Dubai) as 7 days and 10 days.
2. Own calendar of the resource and time offs: We chose a working calendar as 24/7 Non-stop, as the tours are booked on a daily basis.
3. The Extra Calendar of the service: We didn't set Extra Calendar to any service.
4. Slot Step: The Slot Step is set as 1 day, as the tours start every day.
5. Checkout Period: The Checkout period is 12 hours as the last night isn't spend in the hotel. The clients must leave the hotel before the midnight and get to the flight.
6. Start&End Day Restriction: The tours don't start at the weekend.
7. Time Requirements: We want our clients to book their appointments at least 15 days before the time of the appointment and no more than 365 days before the appointment. You are allowed to cancel or re-schedule the tour no later than 15 days before it.
8. Rounding Time: Rounding is unavailable for daily service. The start time for the services is set as 12:00.
9. Resource allocation: We want to allow our clients to choose the resource, so the Resource selection is set as: Manual. The Resource Allocation Method is set as: By Workload.
Managing Appointments
Appointments can be scheduled either from the frontend (see Website Booking Process) or from the backend (see Scheduling Appointments: Backend). In the convenient single-view interface, you will see all reserved appointments, regardless of the way they were booked.
See appointments on the daily, weekly, monthly, and yearly calendar view. Search, filter, and group the appointments to find the required ones quickly. Create and manage appointments right from the calendar.
Instantly access information about an appointment. To view the short preview, just click on an appointment in the calendar. Click 'Edit' to be redirected to the appointment card. From the appointment card, change the appointment's stages and re-plan the appointment if necessary.
Specify the client's email and mobile/phone number while scheduling an appointment for efficient interaction with them. Send messages, feedback requests, and confirmation emails.
Create alarms to notify users and/or clients about upcoming appointments. Select default alarms for each resource type, so they will be automatically applied to all new appointments of this type.
Appointments Calendar
The single view interface allows filtering by appointment details and getting instant access to required information about the appointments. The interface consists of the main part with the calendar and the right part with functional elements.
In the main part of the calendar, you can see and manage reservations. It is possible to see the appointments in the daily, weekly, monthly, and yearly view. To switch to the required one, just click on it above the calendar. By default, the events are shown in the monthly calendar.
Move between the periods in the calendar with the help of the arrows above it. Click on the 'Today' button, to return to the view with the current day.
Use the filters and search bar to find the appointments you need quickly. Filter appointments to see only your appointments, planned appointments, appointments that are planned but already late, or add a custom filtering option.
To search through the appointments, start typing the keyword in the search bar and choose the related search option. The available search options are Reference, Resource, Service, Contact (the client), Type (resource type), and Sale Order ().
The right side of the single interface serves for navigation purposes. There you'll see a smaller calendar, and a list of available resource types, resources, services, and appointment states.
A small monthly calendar allows switching to a particular day quickly. Just click on any day, and it will be opened in the main part of the interface. Click once to see the day in the weekly view, and click twice the time to see it in the daily view. To move between months, use the arrows above the calendar.
Choose a resource type, resources, a service, and stages or a combination of them to see the related appointments. When you choose a resource type, the selection of the resources and services is limited to only the related ones. If the resources have different sets of services, then as you select the resource/some resources, the list of services is also limited to only the ones related to the resource/resources. Click on the reset button '' by the resources, services, or states to see the appointments for all available options.
When you search by resource in the calendar or filter the appointments in the calendar in the right navigation interface, you may see more reservations, than, when you search/filter only by the resource type. The appointments, where the resource is used as an extra resource are also shown. For example, if you select the resource type 'Dentist' you may not see any reservations, but if you select a particular dentist 'Anita Oliver', you may see the appointments, if she takes part in them as an additional resource (see Extra Resources).
Click on the 'Save as default' button at the bottom of the right navigation panel to save the resource type, resource, service, and states combination for your user and apply it automatically every time you open the appointments app. Only one combination may be applied per user. To change it, just choose a different set and click 'Save as default'. The feature is particularly useful when the responsible user manages the appointments itself or has a personal manager, this way the set of resource types, resources, and services may be fixed.
To create an appointment, simply select the day range on the monthly/yearly/weekly view or click on any time slot on the weekly/daily view and specify the details (see Scheduling Appointments: Backend).
Appointments Card
Instantly access information about an appointment. To see the short preview just click on an appointment in the calendar. There you will see the information about the appointment's reference, date and time, duration, service, resource, extra resources, resource type, and contact. Click on the service, resource type or contact to be redirected to the related card with the details.
In the single view interface, click 'Delete' on the short preview card to delete the appointment permanently. Click 'Edit' to be redirected to the appointment card.
On the appointment card, you will find all the information about the appointment. Start editing an appointment to optionally add one of the available alarms to the appointment, and change the contact, pricelist, or website. However, you cannot change the resource type, resource, service, or time manually. This should be done through re-scheduling to avoid conflict (see Re-scheduling).
To change the resource type, resource, extra resources, service or time of the appointment, use the re-scheduling wizard.
Above the appointment, you will find the 'Start working' button, which will help you to launch the time tracking (). When you want to make a pause or the appointment is over, click 'Finish working'. The total duration can be seen in the 'Time Tracking' tab. In the same tab, you can also add the working time manually. This way you will be able to charge the client for the exact time spent providing the service (see Universal Appointments: Time Tracking).
When you track the time, the responsible person is recorded automatically as the user, that launched the timer/added the working time. You can change the person in the field 'Responsible'.
If the time was recorded with a mistake, you can delete the record by clicking on the 'Delete' button.
From the appointments card, in the tab 'Extra products', you can add some complementaries. However, this action will not result in adding those products to the generated sale order. To submit the additional products and add them as sale lines, after saving the changes click on the button 'Adapt Sale' (). After that, the changes will be applied and added to the related sale order.
As soon as the sale order is confirmed, it is no longer possible to add the products. The 'Adapt Sale' button will not be visible on the appointment card.
State Changing
In the top right corner, you will find the buttons to manage the appointment states. Click on the buttons 'Mark done', 'Mark missed', and 'Cancel' to change the appointment stage. Even if you accidentally marked the appointment as done or canceled it, you can still reschedule it by clicking on the button 'Re-plan'. After that, the appointment will return to the stage 'Planned'. As you mark an appointment done or cancel it, its time slot becomes vacant and might be occupied by another reservation, and thus be unavailable for re-planning.
If you switch between the stages, then the followers might receive the notification, if the related option for notification is set (see Appointments Discussion).
Keep in mind that some status changes may lead to follow-up emails to the client. For example, if set on the related resource type's card, as soon as the appointment is moved to the stage 'Mark Done', then an email with the client satisfaction survey will be sent to the contact.
Re-scheduling
It is not possible to change the resource type, resource, service, or date of the appointment by editing it. For that, a special re-scheduling wizard is used. The re-scheduling process is similar to simple scheduling, but the details are entered by default, however, can be changed.
Keep in mind that during the rescheduling it isn't possible to change the contact. But you can do that through the simple editing of the appointment. And, you can edit the contact itself in the standard menu 'Contacts'.
There are two ways to launch the re-scheduling wizard. The first one is simply by drag&drop of the appointment in the calendar of the single view interface. In this case, the available time slots will be searched in the day range to which you dropped the appointment. Optionally, you can change the dates for rescheduling. For example, if we drag&drop the appointment for the dentist, Anita Oliver, from the 1st of July to the 8th of July, then in the initiated re-scheduling wizard the available time slots will be generated only for the 8th of July. However, the date can be changed in the line 'Search in Dates'.
The second way to re-schedule an appointment is through the button on the appointment card. For that, click on any appointment on the calendar view and then on the button 'Edit'. In the top right corner of the appointment card, find the button 'Re-schedule'. Click on it to initiate the re-scheduling wizard. There you will see the time slots for all available days, you can limit the search by specifying the dates in the field 'Search in days'. For example, we have a reservation for our dentist, Anita Oliver, on the 1st of July. If we open the appointments card and click on the button re-schedule in the top right corner, we will see that all available dates are generated and the field 'Search in dates' is empty and therefore does not limit the search. According to the resource type's time requirements, we can book an appointment no later than 4 hours before and no earlier than 30 days after the appointment, and only the related time slots are generated (see Time Requirements).
Not only you can change the day and time, when rescheduling an appointment, but also the other appointment details, such as resource type, resource, and service. Keep in mind, that during the rescheduling it isn't possible to change the contact.
The process of rescheduling isn't finished until the new time slot is chosen and the details are confirmed. Hence, the currently occupied time slot will not be available until successfully rescheduled.
Appointments Discussion
It might be useful to discuss the appointments and let some users receive notifications about discussion, changing the appointments states, and rating. For that, the module allows adding followers and configuring options, which they should be notified of. By default, the followers are notified about Discussions, New Appointments and Recovering, and Rescheduling/Resource Update.
The followers are added hierarchically. So, if a user follows a resource type, he is automatically added as a follower of the related resources and appointments. If a user follows the resource, he is automatically added as a follower of the related appointments. The auto subscription is applied only to the resources/appointments that were created after adding followers to the resource type/resource.
When you add a user as a follower, you can also edit the options, about which the notifications should be sent to that user. For that:
1. Add a user as a follower to a resource type, resource, or appointment
2. Click on the 'Pencil' button by the follower
3. Tick all the options when a user should be notified.
The chosen set of options is also inherited according to the hierarchy. For example, if our manager Mitchell Admin follows the resource type 'English' and chooses to be notified only about 'Appointments Cancellation', then, automatically he is also added as a follower to the related resources (teachers - Doris Cole, Sharlene Rogers) and related appointments (BA-2345, BA-S2345, etc.) to receive only notifications about cancellations.
To the standard list of options (Discussions, Revisions, Activities, Note), the module also adds appointment-specific options:
1. New Appointments and Recovering
If ticked, then the follower will receive emails when an appointment is created or re-planned after being marked done or canceled. For example, our dentist Anita Oliver is our human resource (). By default, she is subscribed to her own resources to be notified about 'New Appointments and Recovering' and 'Rescheduling / Resource Update'. So as soon as a new appointment, and she is chosen as a resource, she receives a notification.
2. Rescheduling/Resource Update
If ticked, then the follower will receive emails, when an appointment is rescheduled or when a resource for the appointment is changed. For example, we have 2 dentists Ernest Reed and Anita Oliver (human resources ), at first the client booked an appointment with Anita Oliver, but then changed his mind and asked to rebook the appointment for Ernest Reed. As our dentists were both following the related to them resources with the option 'Rescheduling / Resource Update' ticked, they were both warned about the change.
3. Appointments Cancellation
If ticked, then the follower will receive the emails when an appointment is canceled. For example, an appointment for a German lesson was booked (BA-2345). Then the client changed his mind and asked to cancel the appointment. After that, the follower Abigail Peterson, which is subscribed to the option 'Appointments Cancellation' of the related resource type (German) will receive the notification.
4. Appointment Rating
If ticked, then the follower will receive the emails when a client leaves feedback about an appointment. For example, our manager Mitchel Admin, from the quality control department is subscribed to all resource types' option 'Appointments Rating'. So, as soon as a client gives feedback on the appointment by choosing the related smile, Mitchell Admin is notified.
Sometimes there is a necessity to discuss the details of the appointment with the client. In this case, we highly recommend specifying the client's email as you create an appointment. Optionally, you can add the details later to the related contact's card. That will allow sending the emails through the related appointment's messages thread and sending the notifications to the client (success email, rating email, alarms).
Open any appointment card by clicking on the 'Edit' button in the single view interface. Below the appointment card, you will find the chat box with the messages thread. Here you can send messages directly to the client.
Follow an appointment, or add followers to get notifications about the appointment and related discussions. By default, the followers of the appointment are: the appointments manager, that has created it; the followers of the related resource type and resource, the responsible user, and the client. But, you can add some more followers, for that, click on the 'person' icon in the top right corner of the messages thread.
From the appointment card, you can also choose the options that a client should be notified about. For that, click on the 'Pencil' icon by the client. By default, the client is notified about Discussions, New Appointments and Recovering, and Rescheduling/Resource Update.
As a manager / a client () books an appointment, the client receives the success email. The success email is also sent when an appointment is rescheduled. The success email is the email that confirms the appointment and contains the details about it.
By default, the email includes the voucher for printing. However, you can decide whether to attach the voucher or not. In the tab 'Notifications' on resource type card, the option 'No vouchers in success emails' was introduced. If checked, then all the appointments of the related resources, upon completion of the scheduling process, will send the Success Email without printed voucher.
If the multi-scheduling is enabled, and several time slots for a single resource are chosen, the client will get one success email. For example, if a client calls and asks the manager to book 2 English lessons and 1 German lesson, but the teacher is the same for both, then the client will receive only one success email for all. If the German teacher (resource) is a different person, then the client will receive 2 success emails (1 for 2 English lessons and 1 for a German lesson).
When a client books several time slots from the website (), he will receive one success email for all of them, as it isn't possible to change the resource/resource type/service of only some of the time slots while booking.
The content of the email might be changed in the Configurations > Email Templates, by updating the email template 'Appointments: Success Email Template'. Optionally, you can create another one by clicking the button 'Create'.
To apply changes to the success email template or to apply your own, use the following dynamic attributes:
object - the main appointment among confirmed/re-scheduled ones. You can use any field of reservations, including:
{{ object.partner_id.name }} - the client name
{{ object.name }} - this reservation number
{{ object.resource_id.name }} - the resource title
{{ object.resource_id.resource_type_id.name }} -  the resource type title
{{ object.service_id.name }} - the provided service
{{ object.resource_id.location }} - the resource location
ctx - standard Odoo email template context enriched with the special parameters:
* appointments - the list (recordset) of appointments combined in the success email. It is possible to iterate over this recordset, and use the same fields that are mentioned above. For example:
<t t-set="appointments" t-value="ctx.get('appointments')"/>
<t t-foreach="appointments" t-as="appointment">
    <t t-out="appointment.name"/>
</t>
* reshedule - whether this reservation is confirmed or re-scheduled with the new time or resource. For example:
<t t-if="ctx['reshedule']">
    Appointment was re-scheduled
</t>
<t t-else="">
    Appointment was scheduled
</t>
* target_company - Odoo company under which this reservation was done. For example:
<t t-out="ctx['target_company'].phone"/>
* website_http_domain - website domain (if any) on which this reservation was done. For example:
<t t-out="ctx['website_http_domain']"/>
Assign a particular success email to a resource-type card. For that, in the tab notifications choose the related template in the field 'Success Email'. Only one template can be chosen per resource type.
It is possible to send a copy of the client success email to other partners, for example, to make sure that it was delivered. But, as the success email is a special type of email, you can't receive a copy just by following the related resource type, resource, and appointment. The users should be specified on the related resource's card in the field 'Success emails CC', then they will receive a copy of the related-to-this-resource success emails.
If you send a message through the chat box below the appointment, the client, the responsible for the appointment, and other appointment followers will receive it. The user that sends the message will not receive an email with it.
If you have an add-on Universal Appointments: Portal and Website, then you can turn on the appointments for portal users. This way, the clients will receive the messages through the portal as well (see Portal Control of Reservations).
You can also send an attachment through the message thread, so the client will receive an email with it. To do that, use the 'Pin' icon below the chat box.
Add a log note, which will be seen only by the internal users to leave some comments about the appointment.
System messages, such as the change of the appointment's status, are also seen only internally. The client, will not see be notified about the change in the status of the appointment. However, some status changes may lead to follow-up emails to the client. For example, if set on the related resource type's card, as soon as the appointment is moved to the stage 'Mark Done', the email with the client satisfaction survey will be sent to the contact. It will also appear in the related messages thread.
Appointments Alarms
Send alarms about the appointments. The app allows preparing 3 types of appointment alerts: pop-ups, emails, and SMS. You can quickly create those through the special configuration menu entry. Select default alarms for each resource type, so they will be automatically applied to all new appointments of this type. Otherwise, you may choose those for specific appointments.
The module has convenient menu entries to manage notifications and related templates. You will find the list of those under the section 'Notifications', as you open the appointments module and click 'Configuration'.
For example, in the Alarms menu (Configurations > Reminders), you will be able to see the settings in the related columns (remind before, interval, recipients, template), without opening the alarm. You can search or group the alarms by the type of alarm and the recipients' option.
To create an Alarm:
1. Click the 'Create' button in the separate menu, or the button 'Create' from the related field on the resource type's/appointment's card
There are two ways to create an alarm. You can either start typing an alarm's name in the related field on the resource type's/appointment's card, click anywhere and choose the option 'Create and Edit' or you can do that from the separate menu Configurations > Reminders by clicking 'Create'.
2. Choose the type of alarm
There are three available types of alarms: Email, SMS, and Pop-up (alarm as a window in the backend). SMS reminders are sent using the Odoo SMS server. You need to make sure that you have sufficient balance for Odoo SMS IAP. To check the current balance or recharge the account, go to Settings > Odoo IAP and click 'View my Services'. Read more through the links: IAP, SMS Pricing.
In order to send SMS reminders, you need to have sufficient balance for Odoo SMS IAP.
3. If you select the SMS/Email type of the alarm, choose the related template
For SMS and Email alarms you should also assign a template that is rendered based on appointment details. You can do that, either from the technical menu (Email templates, SMS templates) or by editing the template related to the module appointments. Alternatively, you can open the Appointments module, and go to Configuration > Email Templates/SMS Templates.
Menu Email Templates shows all available email templates related to appointments. From there you can create and manage the templates. The template related to the Email Alarm is titled 'Appointments: Default Email Reminder'.
Menu SMS Templates show all available SMS templates related to appointments. From there you can create and manage the templates. The template related to the SMS Alarm is titled 'Appointments: Default SMS Reminder'.
For example, you can make several different email templates to remind about an appointment 2 days before and an hour before the appointment, with a different body (Don't forget about the appointment.../We are writing you to remind you about the appointment, which is about to start...).
4. Define the time before which the recipients should be notified
It is possible to apply time ranges in days, hours, or minutes. For example, you can send an email alarm 2 days before the scheduled date and an SMS alarm 30 minutes before the appointment.
5. Define whom to notify
Email and SMS can be sent to both internal and external users. In particular, you can send such alarms to a responsible user, external followers (clients), internal followers, or all followers.
Responsible user - the user, which is chosen in the tab 'Responsible user' of the related resource. For example, Mitchell Admin is a responsible user of the resource Hotel 5 stars. If an employee represents a resource (), then the user of the related employee is also a responsible user. For example, our dentist Anita Oliver is both a resource and a responsible person. If the option to 'notify only responsible' is chosen, then only Anita Oliver will be notified.
External Followers - followers that don't have access to the Odoo backend. In order to add an external follower, its contact should be created (which can be done in the step of adding followers). The client, that calls to reserve the appointment/makes a reservation from the website, is automatically added as a follower to the related appointment. For example, there are 5 followers of an appointment: Mitchel Admin (the appointments manager, that has created it), Anita Oliver (the dentist&responsible), Abigail Peterson (follower of the related resource type), Ernest Reed (follower of the resource), Azure Interior (the client), Azure Interior USA (the client's representative, which was added manually as a follower). When the option 'notify only external followers' is chosen, then only Azure Interior and Azure Interior USA will be notified.
Internal Followers - users who have access to the Odoo backend and its functional apps, and who are added as a follower to an appointment. For example, there are 5 followers of an appointment: Mitchel Admin (the appointments manager, that has created it), Anita Oliver (the dentist&responsible), Abigail Peterson (follower of the related resource type), Ernest Reed (follower of the resource), Azure Interior (the client), Azure Interior USA (the client's representative, which was added manually as a follower). If the option to 'notify only internal followers' is chosen, then, only Mitchel Admin, Anita Oliver, Abigail Peterson, and Ernest Reed will be notified.
All Followers - both internal and external followers. For example, there are 5 followers of an appointment: Mitchel Admin (the appointments manager, that has created it), Anita Oliver (the dentist&responsible), Abigail Peterson (follower of the related resource type), Ernest Reed (follower of the resource), Azure Interior (the client), Azure Interior USA (the client's representative, which was added manually as a follower). Once the option to 'notify all followers' is chosen, all of them will be notified.
Pop-up alarms are only available for backend users.
For example, you can create an email alarm to notify all internal followers 1 day before, an SMS alarm to notify all external followers 1 hour before and a pop-up to notify only responsible users an hour before.
6. Click 'Save'
After creating, you will be able to choose these alarms on the appointments resource type's card, so the alarms are added automatically to all newly created appointments. Alternatively, you can add the alarms straight to a particular appointment card. For that just select any appointment, click 'Edit' and add/remove the alarms from the line 'Alarms' (see Managing Appointments).
For example, on the resource type 'English' of our language school, we have set 2 default alarms, one previously created 'Email: 1 day before' and one specially created right from the resource type's card 'Pop-up: 10 minutes before'. To make sure the teacher will not forget about an early morning lesson (11:00-11:45), we add an extra alarm to those appointment cards 'SMS: 15 hours before'.
To make sure that the settings are applied correctly and to control the alarms sending you can refer to the queue of alarms, which can be seen in the menu Configuration > Reminder Queue. There, you will find all the alarms, that were generated for appointments.
You will be able to see the alarm time, alarm details, and the appointment's reference right from the menu, without opening an alarm.
Search alarms by the appointment's and alarm's reference. Group alarms with reminder time, appointment, and alarm type. Delete the alarms you don't need one by one by clicking on the gear above the alarm and selecting the option 'Delete' or in a batch by ticking the related boxes, clicking on the gear above, and selecting the option 'Delete'.
Keep in mind that the default alarms, which you add to a particular resource type, are added only to newly created appointments and not to the ones, that were created before applying the alarms.
Appointments Analytics
The module provides a convenient menu to track and analyze the provided appointments through the appointments' report view.
To view the appointments report, click on the 'Reporting' tab in the systray and choose the 'Appointments analysis'. The appointments can be analyzed on pivot and graph views. By default, as you open a menu, the analysis is shown in a pivot view as a table.
Choose a measure for the analysis. By clicking on the 'Measures' button above the table and choosing one of the options. The available measures for appointments analysis are:
1. Duration
Analysis based on the appointment's duration. For example, the lesson's duration is 45 minutes and the duration of surgery is 2 hours. We have had 5 appointments so far (3 lessons and 2 surgeries). In the table, we will see the total duration of booked appointments (6.15). We can further extend the table to see the duration of booked appointments per each resource type, resource, service, etc.
2. Sale Total
Analysis of the total price of the appointments' sale orders in the default currency of the company. The tool takes into consideration the total price of a sale order, which may include additional products. The sales total is shown including the related tax. For example, yesterday 3 lessons (50$ - 57.5$ (incl.15%tax)) were booked with 3 students books (10$ each) and today 2 surgeries (220$ - 253$ (incl.15%tax)). The total will be shown as 708.50.
3. Tracked Duration ()
Analysis of the real-time spent on providing an appointment. The time that was tracked, and appeared in the tab Time Tracking of an appointment. For example, the surgery in the dental clinic lasts for two hours. As soon as the surgeon started it, the nurse clicked the button 'Start working above the appointment and the timer was launched. Upon finishing the button 'Stop working was clicked'. The total tracked time was not 2 hours, but 1 hour 40 minutes. As the pricing is set per planned duration (2 hours) and not for the tracked duration (1:40 hours), the price total will be the same. In the table, the tracked price will be used to show statistics.
4. Count
Analysis of the number of booked appointments. For example, yesterday 3 lessons were booked and today 2 surgeries. In the table, we will see the total number of booked appointments (5). We can further extend the table to see the number of booked appointments per resource type, resource, service, etc.
In the pivot view, vertically and horizontally, by default, you see only the option 'Total', which can be further extended with the options of your choice, by clicking on the '+' icon. The available options are State, Resource Type, Resource, Service, Responsible, Contact, Reserved Time, Website, Sale State, Invoice Status, and Company.
For example, let's extend it to the list of resource types, which you can further expand by clicking on the related plus. Click on the plus by the resource type and choose the option resource. Then you will be able to see the analytics for the resources as well. Click again on the plus by the resource and choose the option service to see the analytics by services as well. Some options may result in the line 'Undefined'. For example, if you choose to expand the analytics by 'website', while not using the website appointments.
Click on the plus by the vertical 'Total' to choose the expansion option. For example, choose the option state, to divide the analytics between the appointment states. For example, to see the analysis for done and planned appointments separately.
To cancel the expansion, click on the '-' icon by the parent option.
Above the table, you will find three icons. Click on the icon '' to flip the axis. So, the horizontal and vertical options will change place. This way you can achieve the perfect view of the table. For example, if you chose the expand option 'State' horizontally, the option 'Resource type' vertically and then clicked the flip button, then the option 'Resource type will be written horizontally, while 'State' vertically.
Click on the icon '' to expand all the other lines/columns accordingly to the one you have already expanded. For example, if you have several resource types and clicked on the expand button by the 'Dental clinic' to show the analysis by resources as well, only this resource type will be expanded. Click on the extend button and all other resource types will be also expanded by the same option (resource).
You can also download the table by clicking on the icon ''. The resulting document will be in the .xlsx format.
Not only you can construct the tables by expanding by clicking on the + by the parent option, but also by grouping the options. You can create different hierarchies of groupings by clicking on several options one by one. The available grouping options are the same that you see when you click on the '+' icon in the table. To reset the grouping, just click on the cross by it in the search bar. For example, click on the option resource type, then the option resource and service and you will see the following hierarchy in the search bar 'Resource type > Resource > Service'. On the table it will be shown as if you extended the option 'Total' by the resource type, then resource type by resource, and resource by service.
You can also limit the number of considered appointments by filtering them. For example, consider only done appointments for the analysis. The available filters are Done Appointments, Reserved Appointments, My Appointments, With Sale Order (), and No Zero Tracked Duration ().
To reset the grouping, just click on the cross by it in the search bar.
It is possible to apply several filters, by clicking them one by one. Then only appointments that match all conditions will be considered. For example, choose the measure as duration and apply the filter 'Done Appointments' and in the table, you will see only the statistics for the appointments that are marked as done.
Use the search bar to find only the analysis of particular appointments. For example, if we have multiple resource types including dentistry, write the word 'dental' and choose the searching option 'Resource type', then we will see the statistic related to two resource types: Dental clinic Chicago and Dental clinic New York.
The available search options are the same as the ones used for expanding and grouping.
Switch to the graph view by clicking on the right icon in the top right corner below the search bar. There are three various graphs to visualize the result. You can see the analysis in the bar chart, line chart, and pie chart.
In the bar chart and line chart, you can see the analysis in an ascending (from the lowest to the highest) or descending way (from the highest to the lowest).
Detalize the chart by applying various search parameters or grouping options and hierarchies the same way you did in the table. Simultaneously, if there are different options, which may be compared, you can see the bar chart stacked (when all the options are shown on one another instead of being placed in a row).
Click on any chart section to see all the appointments it considered for the analysis. They will be written as IDs. Click on any ID, to see the details of the appointment.
Appointments Rating
You can check the quality of provided services by referring to customer feedback, which you can get by sending the rating email. In order to collect the rating, you need to turn on the option 'Use Rating for Appointments' in the appointments' configuration. After that, you will be able to turn the option on/off for each resource type. This way the related to the resource type appointments will/will not get the email request for the feedback. To turn on the option:
1. Open the resource type
2. Click 'Edit'
3. In the 'Settings' tab, tick the option 'Appointments Customer Rating'
4. In the tab 'Notifications', choose the template that you want to use to get the feedback (the available one is Appointments: Rating Template)
5. Click 'Save'.
Change the content of the email in the Configurations > Email Templates, by updating the email template 'Appointments: Rating Template' or creating another template by clicking on the 'Create' button.
Clients should select among 3 simple "smiles": satisfied, not satisfied, and highly dissatisfied. The final rating is calculated for resource types, resources, and services.
Configure automatic requests for a customer review when the appointment is done. For that, assign a particular rating email template on a resource type's card in the tab 'Notifications', field 'Rating Email'. Only one template can be chosen per resource type.
You can see the reports with the customer rating in the menu Reporting > Customer Rating. Simultaneously, in the top right corner of each resource type, resource, and service you will find a button, that shows the related rating. Click on it to see the rate for each particular appointment.
The resulting value shows the total percentage of positive reviews. This way, the rating of 50% means, that there are half of the positive marks (satisfied) and half of the negative marks (not satisfied, highly dissatisfied). If you see the total rating of 0%, it means that there are no positive marks and there are only negative ones.
If there aren't any reviews for a particular resource type, resource or service yet, then the button with the feedback is hidden from the related card.
To see all customer marks, you can open a special menu. For that, click on the 'Reporting' tab in the systray and choose the Customer ratings. In the menu, you will be able to see the ratings in the kanban, pivot, graph, and list view.
In the kanban view, you will see the ratings as cards with the chosen client smile (satisfied/ok/dissatisfied), and the related details about the appointment. The reference for the appointment is shown as a link. Click on it to see the appointment card.
In the table and graph view, you can choose a measurement to be accessed as a count (the total number of ratings) and as a rating value (as a mark from 1 to 5). The appointments for which the client didn't send feedback aren't considered for the analysis.
In the list view, you will see the list of appointments and their details in the columns, in particular: submitted on, related operator, customer, parent document name, resource name, and the rating itself.
It is possible to delete one or several ratings by selecting them, clicking on the gear above, and choosing the option 'Delete'.
In all the views, you can search, filter, and group the rating. The available search options are Related Operator, Customer, Appointment, Parent Document Name, Resource, and Service. The available filtering options are My Ratings, Satisfied, Okay, Dissatisfied, Today, Last 7 days, Last 30 days, Submitted on (various periodic options), and Creation Date (various periodic options). The available grouping options are Rated Operator, Customer, Rating, Appointment, Resource type, Resource, Service, and Date.
You can combine various search, grouping, and filtering options. In this case, only the records that match all the conditions are shown. For example, in our dentistry, we can choose the search option as the customer (Azure Interior), the filtering option as last 30 days, and the grouping option as rating (satisfied). To remove the selected search, grouping, or filtering, just click on the cross by it.
Appointments Numeration
Appointment numeration works based on the standard Odoo functionality - sequence. As soon as an appointment is created, it is numbered automatically. You may change the numbering logic (suffix, prefix, step, etc.) by configuring the related Odoo sequence.
The new number is applied only to newly created appointments. This way, if you previously had some appointments, their reference numbering will not be changed. This way you will be able to keep track of the previously created appointments. For example, in our company, we used to generate appointments by adding the prefix BA-%(year)s/, where %(year)s is the legend for extracting the year with the century (for example, 2022). We have removed the prefix and added the suffix LS, which is the initials of our company. After saving, the previously generated numeration for the appointments didn't change, it is still of a format BA-2022/056. But the newly created appointment is numbered '001LS'.
In order to change the appointments numeration:
1. Go to General Settings
2. Activate the developer mode
3. In the systray, go to Technical > Sequences
4. There find the sequence related to the module Universal Appointments (business.appointment) and click on it
5. Click 'Edit', to change the way the appointments
6. Choose the implementation way as 'Standard' or 'No gaps'
While assigning a sequence number to a record, the 'no gap' sequence implementation ensures that each previous sequence number has been assigned already. While this sequence implementation will not skip any sequence numbers upon assignment, there can still be gaps in the sequence if records are deleted. The 'no gap' implementation is slower than the standard one.
7. Choose the company for which the numeration is changed (see Multicompanies & Multiwebsites)
Appointment numeration supports the multi-company regime and might be assigned for each company. Or, leave the field empty, to apply the numbering to all companies.
8. Optionally, assign prefix and/or suffix
If you add a prefix, then this value will be written before the appointment number. For example, BA066.
If you add the suffix, then this value will be written after the appointment number. For example, 066BA.
To use numeration without suffixes or prefixes, just miss the step. For example, 1, 01, 001, etc.
9. Assign the sequence size
The sequence size is the number of signs used to number the appointment. If the number has fewer signs, then Odoo will automatically add some '0' on the left of the 'Next Number' to get the required padding size. For example, if I set the number as 3, then my appointment's numbers maybe 001, 010, 055, 100, etc. If I set the number as 2, then: 01, 08, 10, 100, etc.
10. Set the step
The next number of the sequence will be incremented by this number. The step must not be equal to 0. For example, if I set the step as 2, then I may have the following appointments name: 002, 004, 006, 008, etc.
11. Set the following number
Once you create a new appointment, this number will be used. For example, if you specify the next number as '50', then the next appointment will be BA050. The further one will be BA051, etc. Simultaneously, in the settings, you will see that the next number changed from 50 to 52.
12. Optionally, tick the box 'Use subsequences per date_range'
If you want the appointment number to start from a particular number during the particular dates, then the option might be useful. After enabling it, you need to specify the dates during which the appointment sequence will start from a particular number and the number itself. The appointment will get the related number when booked during these days. But will get the new numeration, if booked in advance from the date, which doesn't fall into the dates. For example, we want our numbers to start from 20 during the summer. We have specified the dates. Today is the 29th of May, and a manager booked an appointment for the 5th of June. However, the old numeration was used as now it is not summer yet.
13. Click 'Save'
Universal Appointments: Portal and Website
Universal Appointments: Website and Portal () is an optional add-on that allows you to add the appointments scheduling wizard to the portal and on your websites. The process of booking is similar to the one in the backend.
As the client chooses a time slot and pre-reservation occurs, optionally force the public (not logged-in users) to sign in, only offer to do so, or just let them enter their account details.
Choose the set of optional and mandatory account details fields to get the necessary details from the client. By default, the required ones are name and email. Portal (already registered) users will have the previously filled-in account details auto-populated. Optionally add a checkbox to agree with the terms and conditions.
Ask clients to confirm their email or mobile number. If the confirmation option is turned on, users would be obliged to insert received codes. In case a correct code is not introduced in time (the timer is set up on the configuration page), appointments will be canceled. If you selected SMS confirmation (depends on Odoo SMS IAP) but your balance is not sufficient, a confirmation code would be forwarded by email.
As soon as all steps are done, a client receives a confirmation email and is redirected to the success page/new appointments(s) page. For not yet registered users, the app offers to enter the password for the Odoo portal.
During the whole process, a client sees the progress bar (if you have not purposefully turned it off). The progress bar lets safely return to any previous step and back. Introduce your own titles for progress steps.
The Odoo portal lets schedule new or repeat existing reservations, and cancel or re-schedule planned appointments. Portal users observe the list of planned and done appointments and may check any of those. Each appointment portal page has a chatterbox that allows direct communication with the resource manager and other followers. From the reservation page, users can also print a voucher and appointment confirmation.
Customize the website scheduling wizard. Show/hide introduction blocks, images, and short descriptions for resource types, resources, and services. Prepare your own Odoo website full details pages for resource types, resources, and services using Odoo's standard website builder. Show/hide links for those pages.
Clear website bookings
Full-service management details
Customizable website and portal pages
Portal control over reservations
Turn on/off Business Appointments for portal users to let them schedule and manage the appointments. For that, go to Configuration > Configuration, find the section Website Specific Options and tick the box 'Business Appointments in portal'.
Turn on/off Business Appointments for public users to let them schedule the appointments. For that, go to Configuration > Configuration, find the section Website Specific Options and tick the box 'Business Appointments on website'. To see and turn on the option 'Business Appointments on website', you should enable the appointments in the portal.
The settings are applied to each of the available websites separately (see Multicompanies & Multiwebsites).
Website Booking Process
If you have the module Universal Appointments: Portal and Website, make sure the option 'Appointments in Portal and Website' is turned on to allow portal and public users to book appointments from the website.
In the 'Website specific options' section in configuration, you can manage the appointment settings on a website (see Configuration Page). If you work in a multiwebsite environment, you can choose the website to apply the settings to (see Multicompanies & Multiwebsites).
To turn on the possibility to book appointments in the portal, tick the option 'Business appointments in portal'. This way, registered users will see the tab appointments in their portal and the page 'Appointments' on the website.
After enabling appointments for the portal, another option 'Business appointments on website' appears. Once checked, appointments will be shown to all visitors on the current website. So, everyone will be able to book an appointment from the frontend.
The list of steps for booking an appointment is fixed. However, the steps that have only one option (so there is no alternative to choose) are skipped. This way the number of steps might change. For example, we have separate websites for our dental clinics. On the second website, we have only one published resource type 'Dental clinic New York', so this step is skipped and the clients start the booking by choosing a resource (a dentist).
You can change the label for each step, so the steps were understandable to the customers. For example, instead of the label 'Choose a resource' you can write 'Choose a dentist' (see Steps Customization).
It isn't necessary to register in order to book an appointment from the website. However, for further bookings with the same account details (email and phone) registration is necessary.
It is not necessary to register in order to book an appointment.
While booking an appointment, above the choice area, you will find the progress bar with the stages of the booking process. You can move between stages safely, without losing progress. Choices are saved, so even if you don't complete the booking and close the site after re-opening it you will be able to proceed from the same step. As soon as a time slot is chosen, the pre-reservation timer is launched. It is necessary to complete the reservation during that time, otherwise, the pre-reservation will be canceled and the time slot will be available again for other bookings (see Pre-reservation).
Optionally, the progress bar can be hidden. Then, the clients will not be able to return to the previous step safely (Portal and Website: Customization & Settings).
The reservation process on the website is very similar to the one on the backend. Let's look closer at each step of the booking process.
1. Choosing Resource Type
When the client opens the page 'Appointments', he/she sees the first step of booking - resource type selection. The customer searches among resource types and selects the required one.
A resource type might represent a particular sphere of business (i.e., dental clinic, travel agency), or a particular address (i.e. Chicago, New York, Green rd 5) (see Managing Resource Types).
It is possible to apply various filters, sorting, and search criteria to find the required resource types quickly. By default, the available filtering options are: Standard (the same order as in the backend), from A to Z, and from Z to A. The available search options are: By name, In the description, in services. If the available options aren't enough, you can create some custom filtering and searching options (see Portal and Website: Customization & Settings).
In the step 'Choose resource type', only published resource types are shown. If the resource type doesn't have any resources and services assigned, then such a resource type is hidden, even if published. Also, if there is only one available resource type for the website, then the step will not be shown and that resource type will be applied by default. For example, we have a resource type 'Dental clinic New York', which is the only published resource type on our second website. That is why the booking on that website starts from the resource selection.
On the resource type card, a client sees the related picture, title, and description. If you turn on the option 'Show types full details pages' on the configuration page, then in the bottom right corner a client will see a button that will redirect to the resource type's full page.
On the full page, you can see not only the picture, title, and description of the resource type, but also some additional details prepared using HTML building blocks and custom fields () (see Custom Filters & Search Configuration).
2. Choosing Resource
As soon as the resource type is chosen, the client is redirected to the next step - resource selection. The customer navigates over available for this type of resource and chooses one, a few, or applies any (all).
A resource might represent a facility or a person whose time is considered for allocation to provide a service (see Managing Resources).
It is possible to apply various filters, sorting, and search criteria to find the required resources quickly. By default, the available filtering options are: Standard (the same order as in the backend), from A to Z, and from Z to A. The available search options are: By name, in the description, and in services. If the available options aren't enough, you can create some custom filtering and searching options (see Portal and Website: Customization & Settings).
In the step 'Choose resource', only published resources, related to the chosen resource type, are shown. This step is missed in case there is a single published resource or a chosen resource type that assumes automatic allocation (see Resource Allocation).
It is possible to choose one resource. In this case, the resource will be assigned and its calendar will be chosen to generate the available time slots after selecting a service.
You can also choose several resources by adding them one by one or you can click on the option 'Any' to choose all available resources.
If a client chooses several resources, then one of those resources will be assigned automatically according to the chosen allocation method of the related resource type. For example, if a client can't select one between the two dentists he likes, then he can choose both and the most suitable resource will be chosen automatically by the app (see Resource Allocation).
On the resource card, a client sees the related picture, title, and description. If you turn on the option 'Show resources full details pages' on the configuration page, then in the bottom right corner the client will see a button that will redirect to the resource's full page.
On the full page, you can see not only the picture, title, and description of the resource, but also some additional details prepared using HTML building blocks and custom fields () (see Custom Filters & Search Configuration).
3. Choosing Service
As soon as the resource is chosen, the client is redirected to the next step - service selection. The customer navigates over the available services and chooses one.
Service defines what actually should be done, for example, English Lessons, Tooth stopping, Surgery, Car Rent, etc. (see Managing Services).
It is possible to apply various filters, sorting, and search criteria to find the required service quickly. By default, the available filtering options are: Standard (the same order as in the backend), from A to Z, and from Z to A. The available search options are: by name, in the description. If the available options aren't enough, you can create some custom filtering and searching options (see Portal and Website: Customization & Settings).
On the step 'Choose service', only published services, related to previously chosen resource types and resources, are shown. Also, if there is only one available service for the website or when the service is always the same for the particular resource type, then the step will not be shown and that service will be applied by default. For example, if a client of our language school chooses the resource type 'English' and then chooses the English teacher 'Doris Cole', then only the services that she provides will be shown. Since Doris Cole provides only lessons, but not consultations, the step will be skipped and the client will be redirected to the time slot selection.
Also, in this step, if configured (), a client may see the available pricelists and switch between them. It is especially useful when the company is international and there is a possibility to pay in different currencies. This way, a client may choose the pricelist with his/her currency and see the exact price for the service.
Portal users will also be able to choose the one assigned to them pricelist and therefore can book the service with a discount if any. For example, our clients are from countries, where the currencies are dollars and euros. So, they can select between these two pricelists to see the exact price. The regular customer Azure Interior also has a pricelist '10% discount' assigned. He sees the prices with the discount, however, can switch between the pricelists and choose another one.
In order to make certain pricelists selectable on the website, go to Configuration > Pricelists, open any pricelist, go to the tab configuration, optionally in the field 'Website' choose the website to show the price list and tick the box 'Selectable'.
If there is only one pricelist available for the website, then the pricelist selection will not be shown.
On the service card, a client sees the related picture, title, price, and description. If you turn on the option 'Show services full details pages' on the configuration page, then in the bottom right corner the client will see a button that will redirect to the service's full page.
On the full page, you can see not only the picture, title, description, price of the service, and the pricelist selection button, but also some additional details prepared using HTML building blocks and custom fields () (see Custom Filters & Search Configuration).
Session Duration
The clients' choice is saved and if the reservation wasn't completed, the client can open the page again later and continue the booking process from the same step. Also, it is possible to return to any of the previous step and then move back without losing the progress.
When a client chooses a resource type, resource, or service, the pre-reservation doesn't occur, but the choice is also saved.
You may set the time when the information about chosen resource type, resource, or service on the website should be cleared. That is especially useful, in cases, when certain resource types, resources, or services are no longer available for the choice on the website. So, the client can no longer be transferred to the related step.
The session choice of the clients can be cleared automatically, after a certain time, or manually, by clicking on the button.
To set the timer to clear all the sessions automatically:
1. In the Appointments app, go to Configuration > Configuration and find the section Website Specific Options
2. Find the field 'Session duration (h)' and specify the number of hours after which the website session should be cleared
3. Click 'Save'.
This is mainly related to the choice of the resource type, resource, and service as further steps are already regulated by other timers (pre-reservation timer and portal confirmation timer) (see Pre-reservation and 6. Confirming Reservation).
The application will regularly check all sessions for obsolescence and delete them if they are updated earlier than the allowed session duration. Here, the date/time of any action is considered. If the user has chosen something or even just updated the page, the duration is reset to zero, i.e. the duration is calculated from the moment the user is inactive on any tab.
By default, the session duration is set as a week and checks take place once a day. It is not recommended to set a session too short, because it may interrupt the reservation and cause irritation and the scheduler will have to be called very often, which consumes system resources.
Keep in mind, that the session duration should be at least 5 minutes, and should exceed the reservation & confirmation period, as otherwise the session may be reset before the timer that the user sees.
It is possible to configure the frequency of session duration checks. For that, in Configuration below the field 'Session duration', find the button 'Configure update frequency'. Then, the pop-up window will appear. There, in the field 'Execute every', choose the frequency of the scheduled job and click 'Save'.
You can clear all existing unfinished website sessions manually. For that, in Configuration below the field 'Session duration', find the button 'Clear website sessions'.
4. Choosing Time
As soon as the service is chosen, the client is redirected to the next step - time slot selection. The slots are generated automatically. The customer navigates over the available time slots and chooses the required one(s).
When booking an appointment through the website by the portal user, time slots will be generated taking into account the contact's reservations. The time slots, when the user has a reservation will not be shown. For example, if our client Azure Interior has a reservation on the 4th of October at 16:00 - 16:45, he will not see the timeslots that intersect with that reservation while booking another reservation for any resource.
The available timeslots are shown based on the Resource's calendar. This way, the time when the resource is unavailable or has time-off isn't shown (Resource Calendar).
When generating slots for aliases, the calendar of the main resource and its busy time is taken into account. This way, one real object can be used in different places, but a single calendar will be generated for it (see Managing Resources).
In case of automatic resource selection, or when there are several resources selected, the algorithm decides which resource the appointment should be assigned based on the resource allocation method (see Resource Allocation).
If the chosen service has an extra calendar assigned, then the time available for booking will be further restricted. The service will be available at the intersection of the resource and service calendar (see Extra Calendar Restriction).
If some extra resources are chosen, then, when booking (both in the backend and in the portal), the system will take into account calendars not only of the main resource but also of the additional ones. In order, for the time slot to be available for booking, both the main and the additional resources should be free. While scheduling an appointment for the service, that requires the extra resources, you will see the line that warns you about the additional resources. Hover over the line to see what resources are required (see Extra Resources).
If on the related resource type's card the option 'Calendar Events as Busy Time is ticked, then for periods when a responsible user has meetings (i.e. events assumed by Odoo calendar), appointment booking will not be possible (see Meetings Calendar).
Per each resource type, you can define when an appointment might be scheduled. The appointment should be booked no earlier and no later than the set time, for example, no earlier than a month before the day of the appointment and no later than 1 day before. Only the days available for booking will be shown (see Time Requirements).
If the start round is set in the service's settings, then the time slot start will be rounded accordingly (see Rounding Time).
In this step, a client may: search for the time slots for particular dates; select the duration of the service, if configured; select the time zone, if configured. Each action results in slot recalculation (see Time Slots Generation).
In order to find the related period of time quickly, the client can set the days range to search in the field 'Search in dates'. If the set day range covers several months, then here you will see the buttons within months, click on the required one to see the time slots only for a particular month.
The time slots will be divided based on the related service's default duration. If the manual duration is allowed then the client will be able to select the required duration in the field 'Duration', then the time slots will be recalculated (see Service Duration).
Set the slot step with which time slots will be generated, to make the booking time flexible (see Slot Step).
Specify the time required for completing the reservation, without the participation of the client. Set, the checkout period, to show the client what time he/she should finish receiving the service, while the resource will be blocked for the entire selected time (the time for providing the service and the checkout period) (see Checkout Period).
Configure the Start Day&End Day Restriction to choose the set of days of the week and/or a set of specific dates on which the reservation cannot start/end (see Start &End Day Restriction).
Above the generated time slots, you will see the time zone in which the time is booked. Based on the settings it will be either default or available to choose manually. In the latter case, the time zone will be adjusted to the timezone of the system (computer) (see Multi Time Zones).
If the set day range covers several months, then here you will see the buttons with months, click on the required one to see the time slots only for a particular month.
In order to move to the next step, the client should just select the desired time slot by clicking on it. You may even allow scheduling a few appointments simultaneously. To allow multi-scheduling from the frontend, on the configuration page tick the option Multi Scheduling, and specify the maximum number of slots that can be chosen per single booking in the section 'Website Specific Options', in the field 'Maximum Appointments (Portal)' and save the changes. In the frontend, multi-time slots can only be selected for the same set of resources, resource types, and services. This way all the required dates will be booked at once. The client will receive one success email for all reservations of a single resource. One sale order will be generated for all reservations (). For example, Mitchell Admin booked two time slots for Tooth stooping. And, on the list of appointments, he will see two different records, one for each time he booked. However, he will receive only one success email. And both reservations will relate to the same sale order ().
To select several time slots, a client should click on each of them one by one and then push the 'Forward' button to move to the next step. If the maximum number of time slots is booked, then the client will be redirected to the next step automatically. In order to remove the time slot from the selection, click on the cross by it.
The selection of a time slot means that this slot is pre-reserved and cannot be used for other bookings. As soon as a time slot is selected above the progress bar appears a timer, which shows the time left to finish the booking. If not completed during that time, then the pre-reservation will be canceled and reserved time slots will be available for further bookings. You can define the maximum period for pre-reservation on the configuration page in the line 'Maximum Period for Pre-Reservation' (see Pre-reservation).
5. Filling in Contact Details
As soon as the time slot is chosen, the client will be redirected to the next step - account details. Optionally, on this step, you may force the public (not logged-in users) to sign in, only offer to sign in, or just let them add their details. The set of contact details might be configured per website.
To force or offer the users to sign in before entering the account details, go to Appointments Configurations > Website Specific Options and find the field 'Sign in for public users'. The setting defines the logic of the public user sign up/sign in.
The option 'Sign in required' means that before entering account details, unregistered website visitors must sign up/log in to the portal. It will not be possible to skip the sign-up / sign-in. Make sure, that the standard setting of free sign-up and resent password is enabled. Otherwise, the customers will not be able to sign up/sign in. You can configure it in General Settings > Permissions > 'Customer Account' & 'Password Reset').
The option 'Sign in offered' means that such users would be offered to log in if they had an account, but the step might be missed. The offer to sign in will be shown above the fields on the step 'Account Details'. In case, the option 'Sign in offered' is chosen, you can write your own text to offer the sign-in, for that the field 'Sign in text' is added. By default, the warning is 'If you already have an account, please sign in', where 'sign in' is the link, that redirects to the login page. The field supports HTML, however, you shouldn't change the link, that is added to the field by default.
The option 'Auto sign in' means that public users might finish reservations without signing in, while the portal users will be auto-created for them and the letter to finish the registration will be sent.
The offer or the obligation to log in does not apply to the portal user (that has already logged in). The logged-in users can continue filling in the account details/confirming the reservation as usual.
The available account details information (name, email, phone, or mobile) of the logged-in users will be filled in automatically on the Account Details step. This way portal users will not have to enter it each time they make a reservation.
You can also choose the account details fields to get the required information from the client. The set of fields is configured for each website.
The fields can be either mandatory or optional. The mandatory fields are the fields that are required to enter a value to confirm the scheduling. By default, the mandatory ones are 'Name' and 'Email'. It is up to you what other fields should be added and whether their filling is required.
You can add fields and ask a client to provide the following details: city, country, job position, mobile, phone, state, street, street2, title, and zip.
Add field phone and mobile to make sure appointment managers will be able to contact the client by calling. For example, if the client is late, it is more likely that he/she will be able to reply orally, than in written form.
Let the client choose their title, so the managers know how to refer to them. This way, it will be easier to address people politely. For example, if in the name it isn't clear, whether a client is a man or a woman, and in order to provide the beauty service it needs to be specified, then a title might be helpful.
If you want to know the job position of a contact, then you can also let clients specify it. It might be useful for further collaboration or to reflect the specifics of the service. For example, in the language school, we also provide lessons with native speakers to the teachers.
Add the fields country, state, city, street, street 2, and zip to get address details if some products or services require delivery. For example, in a car rental, we may get the car to the renter's address or to the airport parking lot.
To choose the set of account details fields:
1. Open the module Appointments and go to Configuration > Configuration
2. Find the section Website Specific Options
3*. Choose the website (see Multicompanies & Multiwebsites)
4. In the field Mandatory Account Details, specify the fields that must be filled
5. In the field Optional Account Details, specify the fields that can be filled optionally
6. Click 'Save'
If the existing fields aren't enough, it is possible to create some custom fields (). To view the appointment field on the account details page, simply choose the 'Input form placement', while creating a custom field. Custom Fields can also be both mandatory and optional. To make filling in this field mandatory, tick the option 'Required to enter a value'. For example, for a language school, you can create a text field 'Learning preferences', to find out what the student likes before the lesson. A field with the information that a client fills will be added to the appointment, but not to the contact's card (see Universal Appointments: Custom Fields for Website and Portal).
The module checks whether the entered email is entered correctly. If there is a mistake in an email, the client will not be allowed to complete the booking until it is fixed. For example, the email 234wfegbh, will not be accepted as there is no '@' sign.
If filling in a mobile or phone number is mandatory, then they are also checked by the module. If the number is written in the wrong way, then the error that states the reason will appear above the fields. For example, the number 763453211355 will not be accepted as there is no country code.
In this step, you can also request clients to agree to terms and conditions. For that, on the appointments configuration page, tick the field 'Agree on terms and conditions'. After that, on the step 'Account details', will appear a box, which should be ticked by the client to continue the booking process. You can add the text that should be displayed by the box in the field 'Agree on terms text'. The field supports HTML code, so you can add a link to the terms of the agreement page.
Optionally, turn off the need to agree on the terms of the agreement while booking for the portal users. For that, tick the box 'Terms for public users only'.
6. Confirming Reservation
As an existing user logs in into the system after choosing a time slot and click's the button to complete the booking process, the system checks, if he/she already has another appointments at the time of the currently chosen time slots. If there is another appointment at the same time or the one that intersects with the currently chosen time, then the system will transfer the user back to the slot selection page.
After filling in the details and agreeing to the terms of the agreement, it might be a good option to ask the clients to confirm the email/mobile or phone number. This way, you will be able to make sure that the client is serious about the appointment and that they have provided the right credentials.
For that, in the appointment configuration, find the section 'Extra Features', and choose the way of confirmation in the field Website/Portal Confirmation.
You can either set the confirmation by email or by mobile or phone number. Confirming a phone number requires sending an SMS, which is done through the Odoo SMS server. You need to make sure that you have sufficient balance for Odoo SMS IAP. To check the current balance or recharge the account, go to Settings > Odoo IAP and click 'View my Services'. Read more through the links: IAP, SMS Pricing.
After selecting the confirmation method, define:
The maximum period of confirmation - the time for which the email/mobile or phone number should be confirmed. Otherwise, the pre-reservation will be canceled and the time slot will be available for further bookings.
The maximum number of attempts to confirm - the number of attempts that a client can make to confirm the appointment. If exceeded, then the pre-reservation will be canceled and the time slot will be available for further bookings.
New Confirmation Code Minimum Period - the time after which the new code can be asked, so the customer may request a new code if he/she has not received the previous one. The number is specified in seconds.
Maximum Number of Code Refreshing - the number of new confirmation codes that a client can receive. If exceeded, then the pre-reservation will be canceled and the time slot will be available for further bookings.
You can turn off both timers: the confirmation timer and the pre-reservation timer. Then, the timers will be hidden for the clients (Portal and Website: Customization & Settings).
7. Success Page & Signing up
As soon as all the steps are done, the customer receives a confirmation email with the appointment details and is redirected to the success page.
Public and Portal users finish the reservation differently.
Upon completing the reservation, portal users are either redirected to 'My appointments' page with a list of his/her appointments (if they have several), or to the page of their current appointment (if there is only one). It is also possible to redirect the user to the related sale order (), if the add-on Universal Appointments: Sales is installed and the option 'Open order on finishing' is enabled, or even to the form of signing and payment (see below).
Upon completing the reservation, public users are redirected to the success page, where they are suggested to choose the password to finish the registration. Public users are the users, who have not logged in before starting the reservation process or at the stage of filling in contact details.
If the option of forced sign-in is enabled ('Sign in Required'), then public users will not be able to complete the reservation unless they sign up and log in. If the sign-in wasn't mandatory, then after completing the reservation process, public users are redirected to the appointment page, from which they can control their appointments right in the Odoo portal.
The Odoo portal allows you to print the appointment's confirmation, schedule new or repeat existing reservations, and cancel or reschedule planned ones. Each appointment has a chatterbox, which allows direct communication with resource managers and other followers. If an appointment has a linked sale order (draft, sent, or confirmed) (), it would also be available through the standard Odoo portal entries 'Quotations' and 'Sale Orders' (see Portal Control of Reservations).
If a public user doesn't finish the registration, then he/she will not be able to create a new appointment with the same account details. In this case, he/she should contact the administrator, to get the sign-in credentials.
In case a single sale order is generated upon confirming a reservation, it is possible to redirect the user straight to the sales order (). For that, in the section, of configuration, enable the option 'Open order on finishing'. Take into account that the order/payment form will be opened automatically and only if it is in the 'Sent' or 'Confirmed' state. The state of the generated order is based on the configuration option 'Auto Sale Order' (see Linking Appointments and Sale Orders).
Portal Control of Reservations
If you turn on the option 'Business appointments in portal', then portal users will have an opportunity to schedule and manage their appointments right from the portal.
In the user's portal, a new tab 'My Appointments' is added. When a portal user clicks on it, he/she sees the list of his/her appointments. Users can observe the list of planned and done appointments and may check any of them. In the list, the user sees the reference, scheduled time, resource, and service of each appointment.
It is possible to apply various filters, sorting, and search criteria to find the required appointments quickly. By default, the available sorting options are: Date, Resource type, Resource, and Service. The available filtering options are: All, Planned. The available search options are: By reference, resource type, resource, and service. If the available options aren't enough, you can create some custom filtering and searching options (see Portal and Website: Customization & Settings).
The Odoo portal allows you to schedule new or repeat existing reservations, and cancel or reschedule planned ones. Below the search bar, there is a button 'Schedule New Appointment', which redirects straight to the appointments scheduling page. If some stages were filled in previously, and the pre-reservation wasn't launched or didn't finish yet, then the user is redirected to the stage, where he/she stopped (see Pre-reservation).
Click on any appointment reference to open the appointment page. There you will find the appointment card with the information about the date and time, service, and resource.
If you have previously added some custom fields () and chose their portal page placement, then those fields will also be displayed on the appointment card with the client's answers (see Universal Appointments: Custom Fields for Website and Portal).
If an appointment has a linked sale order (sent, confirmed, or done) (), it would also be available through the standard Odoo portal entries 'Quotations' and 'Sale Orders' (see Linking Appointments and Sale Orders).
Above the appointment card, you will find the breadcrumbs to return to the previous step and the side arrows to move between the appointments.
On the left side of the interface, there are functional buttons:
1. Print Confirmation
Click 'Print Confirmation' to generate a file with the details of the appointment. The module uses the standard layout for the appointment, which can be configured in General Settings > Companies > Document Layout.
The generated file will be opened in the same window. It will include the reference of the appointment, the scheduled time with the time zone, the resource, the service, and their addresses if any.
In case, you have set the Checkout period for the service, only the time with the customer participation will be shown in the printed form, whereas the full time (customer participation time + checkout period) will be shown and booked in the backend, For example, for the daily service, if the service starts at 14:00 and the Checkout Period is set as 2 hours, then in the printed file the booking time will be 14:00 - 12:00, while in backend 14:00-14:00 (see Checkout Period).
The address can be filled in, in both, resource and service, however, only one of those will be shown in the document. The service address is prioritized over the resource address. If the address isn't mentioned on the service card, then the address of the related resource, if written, will be shown.
2. Repeat
Click 'Repeat' to create a new appointment with the same resource type, resource, and service. You will be redirected straight to the step of choosing the date and time. Proceed with the scheduling process in an ordinary way. After that, a new appointment will be created. For example, the language school customer may want to book the lessons regularly. With the help of the button 'Repeat', he/she will be able to skip the steps, that should be the same (resource type, resource, service) and will be moved straight to the step of choosing the time slot.
3. Complementaries
You can also add some of the complementary products right from a reservation form, if the related option is enabled. For that, just click on the button 'Complementaries', choose the products by changing their quantity, and click 'Add'. Both service, quantity, and complementary products will be re-calculated. The extra products will be added to the appointment, but in order to add them to the sale order as well, the sale should be adapted from the backend (the button 'Adapt Sale' () on the appointment's card. For example, the service Tooth Stopping offers two complementary products 'Tooth paste' and 'Teeth Cleaning'. So, they are offered to the client, when the time slot is chosen. The client Azure Interior didn't choose the complementaries while booking, but then changed his/her mind and added them through the button 'Complementaries'. The manager, clicked 'Adapt Sale' on the related appointment card, and the items were added to the sale order
On the appointment card, you will see the field 'Extra products', with chosen complementaries and their quantities listed.
In case, there are no complementaries available, the button will be hidden.
4. Re-schedule
Click 'Re-Schedule' to change the details of your current appointment. You will be redirected to the step of choosing the time slot for your current appointment. However, with the help of the progress bar, you can also move to one of the previous stages to change the resource type, resource, or service. Above the progress bar will appear a note, which states the reference number of the current appointment, its date and time, and offers to schedule a new appointment instead. To complete the rescheduling, just follow the standard scheduling process. After that, the details of the current appointment will be changed.
For example, Azure Interior wanted to change the time of the appointment, so clicked on the button 'Re-schedule' and on the step 'Choose Time Slot', choose another time.
5. Cancel
Click 'Cancel' to repeal the appointment. Then a pop-up window will appear that ask to confirm the decision. After that, the reserved time slot will be available for further bookings.
For example, a dental consultation was booked, but then, the client changed plans and canceled it. So, the time slot became available for new clients.
You can set a time after which the client will not be allowed to cancel or reschedule an appointment. The time can be set in hours, days, weeks, months, or years. For example, forbid to cancel or reschedule booking a room in a hotel 2 days before. As this time might not be enough to find new visitors (see Time Requirements).
6. Schedule New
Click 'Schedule New' to schedule a new appointment. You will be redirected to the appointments page. If some stages were filled in previously, and the pre-reservation wasn't launched or didn't finish yet, then the user is redirected to the stage, where he/she stopped (see Pre-reservation).
For example, a client while booking, saw another service, that he wanted to try, so, decided to schedule another appointment, clicked 'Scheduled New', and was redirected to the scheduling wizard.
7. Sign&Pay/Accept & Sign/Accept & Pay/Pay Now ()
On the appointment portal form, the client may see a button for signing/paying for a related order. It is shown only if there is a linked order with the 'Sent' status and your Odoo is configured for that.
The button itself may imply different actions depending on the settings (for example, if the signature is required/not required) and the order status (already signed, time to pay): 'Sign & Pay', 'Accept & Sign', 'Accept & Pay', 'Pay Now'. The Odoo behavior, in this case, is the same as for Odoo portal sale orders.
As a user clicks on the button, he/she is redirected to the order page with the required signing/payment form opened automatically (see Linking Appointments and Sale Orders).
Below the buttons, you will find a contact of the user, responsible for the appointment. Click 'Send a message' below the contact's name and you will be redirected to the chat box at the end of the page.
Each appointment has a separate chatterbox which allows direct communication with the resource manager and other followers of the appointment.
A client can also send an attachment through the message thread to ask for/provide some details related to the appointment. To do that, the 'Pin' icon below the chat box should be used.
Portal and Website: Customization & Settings
The module provides wide opportunities for customization. You can change the stage titles; show/hide some functional elements (the set of elements is different for each page); add and edit the resource type, resource, and service full pages; and add custom filters and search options.
The set of steps to book an appointment is fixed. However, the steps that have only one option (so there is no alternative to choose) are skipped. This way the number of steps might change. For example, we have separate websites for our dental clinics. On the second website, we have only one published resource type 'Dental clinic New York', so this step is skipped and the clients start the booking by choosing a resource (a dentist).
The default labels for the steps may not be fully understandable in many use cases. For example, the step 'Choose resource type' may not be clear for the clients of a dental clinic. So, it might be a good idea to change the step labels according to your business needs. This way, the steps will be understandable to the customers. For example, instead of the label 'Choose a resource' you can write 'Choose a dentist'.
To change the labels of the steps:
1. Go to the appointments configuration page
2. Find the section 'Website Specific Options'
3*. If you work in a multiwebsite environment, choose the website to apply the settings to (see Multicompanies & Multiwebsites)
4. Write a new label in the corresponding step line 'Label for step...'
5. Click 'Save'.
Let's look at possible ways to customize the website appointments wizard. Open the page 'Appointments' on the website and click on the option 'Customize' in the systray. There you will find two categories: Appointment layout and Appointments. The first category combines the customization settings that are applied for the whole booking process. The second category includes step-specific customization options (which should be configured for each step separately). The set of options may differ for different steps (see Steps Customization).
From the section Appointments layout, you can turn on/off the progress bar and expiration timers.
While booking an appointment, above the choice area, you will find the progress bar with the stages of the booking process. You can move between stages safely, without losing progress. Choices are saved, so even if you don't complete the booking and close the site after re-opening it you will be able to proceed from the same step.
Optionally, from the systray option 'Customize', you can turn off the progress bar by clicking on the slider button with the line 'Progress Bar'. This doesn't mean that the client's scheduling progress will not be saved while advancing through stages. The progress bar will just be invisible to clients. In the mobile version, the progress bar is also shown, but without the step, names to avoid overloading the interface.
As soon as a time slot is chosen, the pre-reservation timer is launched. It is necessary to complete the reservation during that time, otherwise, the pre-reservation will be canceled and the time slot will be available again for other bookings (see Pre-reservation).
The pre-reservation timer is shown above the progress bar. The warning explains that there is a limited time to complete the registration and shows the time, during which the client should confirm the appointment.
It might be a good option to ask clients to confirm their email/phone after entering the account details. In this case, another timer appears as soon as the appointment is confirmed - the confirmation timer. The warning explains that there is limited time to prove that, the phone/email stated previously belongs to the client and shows the time, during which the client should confirm that.
Optionally, from the systray option 'Customize', you can turn off both timers: the confirmation timer and the pre-reservation timer by clicking on the slider button by the line 'Show Expiration Timers'. Then, they will be hidden from clients. However, the time to complete the scheduling process and to confirm mobile/email will still be limited to the time specified in configurations.
Steps Customization
Each step of the scheduling process can be customized. Turn on/off customization options per stage, change stage labels, show or hide prices, choose fields to ask for the account details, and request to agree with the terms of the agreement. If you work in a multi-company environment and have several websites, the settings are applied to all of the websites separately (see Multicompanies & Multiwebsites).
Let's look at the step-specific options. They are applied to each step separately. For example, if you turn on an introduction block on the resource type step, then the block will be added only to the step from which it was applied - Choose Resource type. A set of such options may differ for various steps.
The following options are available for the steps Choose Resource type, Choose Resource, Choose Service:
1. Introduction
You can turn on/off the introduction above the scheduling wizard. To do that, go to one of the steps (Choose Resource type, Choose Resource, Choose Service), click 'Customize' in the systray, and then, on the slider button by the option 'Introduction'.
Once the introduction is turned on, click on the 'Edit' button, and above the scheduling wizard, there will be an area where you can add some building blocks. The available building blocks are the same that you use while editing website pages. This way, you can create a catching introduction, or write some instructions.
You need to turn on/off the introduction for each step, where you need/don't need it. The building blocks/text that you add to the introduction are added only to the currently edited step.
For example, we have turned on the introduction for the steps: Choose Resource Type and Choose Service. For the step Choose Resource Type, we have added a text building block with the introduction and instructions for the booking process. For the steps Choose Service, we have added the building block 'Quotes' with some reviews from our clients.
2. Search bar
You can turn on/off the search bar in the scheduling wizard. To do that, go to one of the steps (Choose Resource type, Choose Resource, Choose Service), click 'Customize' in the systray, and then, on the slider button by the option 'Searchbar'.
Once the search bar is turned on, you will see the dropdown fields with the sorting, filtering, and search options. The available sorting, filtering, and search criteria may differ in different steps. You can also add some extra filtering and search options (see Custom Filters & Search Criteria).
You need to turn on/off the search bar for each step, where you need/don't need it.
For example, we have turned on the search bar only for the step: Choose Service. Since we only have 2 resource types and 4 resources, the search bar for those steps isn't necessary.
3. Show descriptions
You can turn on/off descriptions of resource types/resources/services. To do that, go to one of the steps (Choose Resource type, Choose Resource, Choose Service), click 'Customize' in the systray and then, on the slider button by the option 'Show Description'.
Once the description is turned on and added, you will see it below the resource type/resource/services titles. You can add the description to a particular resource type, resource, or service from the tab description on the related card in the backend or by clicking on the related space on the resource type, resource, or service in the editing mode in the frontend.
You need to turn on/off the description for each step, where you need/don't need it.
For example, we turned on the description for the steps: Choose Resource and Choose Service. This way we can tell the clients about the education and certifications of our employees (resources of human kind) and the details about the provided services.
4. Show images
You can turn on/off images of resource types/resources/services. To do that, go to one of the steps (Choose Resource type, Choose Resource, Choose Service), click 'Customize' in the systray, and then, on the slider button by the option 'Show Images'.
Once the image is turned on and added, you will see it on the resource type/resource/services card. You can add the image to a particular resource type, resource, or service by clicking on the pencil icon on the related card in the backend or by clicking on the related space twice on the resource type, resource, or service in the editing mode in the frontend.
You need to turn on/off the images for each step, where you need/don't need it.
For example, we have turned on the images for the step: Choose Resource. So, the clients could see and choose the employees (resources of human kind).
In the step - Choose Service, it might also be a good idea to show the price for the services (). It might be particularly useful when the price for the service is fixed and final. This way the client will get the idea about the company's prices and if they are attractive, then it would be easier to make a decision.
If your company is international, or you want to hold some promotions, then you can turn on the pricelists (). Clients will be able to switch between them on the step - Choose Service. This way, a client may choose the pricelist with his/her currency and see the exact price for the service.
Portal users will also be able to choose the one assigned to them pricelist and therefore can book the service with a discount if any. For example, our clients are from countries, where the currencies are dollars and euros. So, they can select between these two pricelists to see the exact price. The regular customer Azure Interior also has a pricelist '10% discount' assigned. He sees the prices with the discount, however, can switch between the pricelists and choose another one.
To turn on pricelists and prices:
1. Go to the appointments configuration page and find the section 'Website Specific Options'
2*. If you work in a multicompany environment, choose the website to display the prices on (see Multicompanies & Multiwebsites)
3. Tick the option 'Pricelists and Prices'
4. Click 'Save'.
Once the price is turned on, you will see it on the service cards below the title. To change the price of the service you need to change it on the related product.
Once the pricelist is turned on, above the service cards, you will see the pricelist selector. To apply a certain pricelist, just choose it from the selection. If there is only one pricelist available for the website, then the pricelist selection will not be shown.
In order to make certain pricelists selectable on the website:
1. Open the appointments app and go to Configuration > Pricelists
2. Open any pricelist and click 'Edit'
3. Go to the tab configuration, optionally in the field 'Website' choose the website to show the price list and tick the box 'Selectable'.
For the steps Choose time, Account Details, Confirmation, it's possible to add only the Introduction block. You can turn on/off the introduction above the scheduling wizard. To do that, go to one of the steps (Choose time, Account Details, Confirmation), click 'Customize' in the systray, and then, on the slider button with the option 'Introduction'.
Once the introduction is turned on, click on the 'Edit' button, and above the scheduling wizard, there will be an area where you can add some building blocks. The available building blocks are the same that you use while editing website pages. This way, you can tell customers what to do on those steps, or explain how the timers work.
You need to turn on/off the introduction for each step, where you need/don't need it. The building blocks/text that you add to the introduction are added only to the currently edited step.
For example, we have turned on the introduction for the steps: Choose time and Confirmation. There we have explained the way the timers work.
In the step 'Account Details', you can choose the fields to get the required information from the client. A set of fields is configured for each website. The fields can be either mandatory or optional. By default, the mandatory ones are 'Name' and 'Email'. It is up to you what other fields should be added and whether their filling is required. You can add fields and ask a client to provide the following details: city, country, job position, mobile, phone, state, street, street2, title, and zip (see Website Booking Process).
If the existing fields aren't enough, it is possible to create some custom fields (). For example, for a language school, you can create a text field 'Learning preferences', to find out what the student likes before the lesson. A field with the information that a client fills will be added to the appointment, but not to the contact's card (see Universal Appointments: Custom Fields for Website and Portal).
In this step, you can also request clients to agree to terms and conditions. On the appointment configuration page, tick the field 'Agree on terms and conditions' and introduce the request text. The field supports HTML code, so you can add a link to the terms of the agreement page. Optionally, turn off the need to agree on the terms of the agreement while booking for the portal users (see Website Booking Process).
Full Details Page
If you want to describe resource types, resources, or services in detail to make them stand out or to inform customers about related details, you can prepare own full details pages using Odoo standard website builder.
Own full details pages are turned on/off for resource types/resources/services separately. This way you can, for example, turn on the full pages for services and turn them off completely for resource types and resources.
If you have enabled the full details page for resource types/ resources/ services, it is still possible to turn off the page for one or several resource types/resources and services. For example, you can show the full page the resource type 'English' to describe the learning approach and not show it for the resource type 'Dentist New York'.
Even if the page for a particular resource type/ resource/ service is turned off, you can still open and edit it, by the link from the tab 'Website' on the related card in the backend. However, this page will be available only for internal users. So, if you try to send a link to an external partner, it will result in page '404 not found'.
To turn on own full details pages for resource types, go to the appointments configuration page and in the section 'Website Specific Options' tick the box 'Show types full details pages'.
On the full page, you can see not only the picture, title, and description of the resource type but also some additional information of your choice. The page supports building blocks, so you can edit it the way you like. You can also add custom fields and make them visible on the own page of a resource type ().
To start editing the full page, either open it from the website and click 'Edit' in the top right corner or open the resource type's card in the backend and in the tab 'Website' click on the button 'edit full website description' and, in the new tab, you will be redirected straight to the editing wizard.
The link to the full page can be hidden for separate resource types. For that, open the resource type and in the tab 'Website' tick the option 'Do not show website full description'. When a client opens the full page of a resource type, he/she can see the 'Schedule' button in the top right corner. Click on it to select this resource type and move straight to the next step.
To turn on own full details pages for resources, go to the appointments configuration page and in the section 'Website Specific Options' tick the box 'Show resources full details pages'.
On the full page, you can see not only the picture, title, and description of the resource but also some additional information of your choice. The page supports building blocks, so you can edit it the way you like. You can also add custom fields and make them visible on the own page of a resource ().
To start editing the full page, either open it from the website and click 'Edit' in the top right corner or open the resource's card in the backend, and in the tab 'Website' click on the button 'edit full website description' and, in the new tab, you will be redirected straight to the editing wizard.
The link to the full page can be hidden for separate resources. For that, open the resource and in the tab 'Website' tick the option 'Do not show website full description'. When a client opens the full page of a resource, he/she can see the 'Schedule' button in the top right corner. Click on it to select this resource and move straight to the next step.
To turn on own full details pages for services, go to the appointments configuration page, and in the section 'Website Specific Options' tick the box 'Show services full details pages'.
On the full page, you can see not only the picture, title, description, price of the service, and the pricelist selection button, but also some additional information of your choice. The page supports building blocks, so you can edit it the way you like. You can also add custom fields and make them visible on the own page of a service ().
To start editing the full page, either open it from the website and click 'Edit' in the top right corner or open the service's card in the backend, and in the tab 'Website' click on the button 'edit full website description' and, in the new tab, you will be redirected straight to the editing wizard.
The link to the full page can be hidden for separate services. For that, open the service and in the tab 'Website' tick the option 'Do not show website full description'.
Custom Filters & Search Criteria
In order for the clients to be able to apply sorting, filtering, and search criteria, it is necessary to turn on the option 'Searchbar' for the related steps (Choose Resource type, Choose Resource, Choose Service) in the systray section 'Customize'. If the existing filters or search criteria aren't enough, it is possible to create some custom ones. Custom filter and search options are added separately to appointments/ resource types/ resources/ services.
The appointment filter and search criteria are the ones applied in the customer's portal on the page 'My Appointments'. This way the client may filter and search among his/her appointments. It is possible to filter appointments by various criteria. By default, there are two filtering options: all, and planned. To add custom portal appointment filters:
1. In the Appointments app, go to Configuration > Configuration
2. Scroll to the section 'Website Specific Options'
3. Find 'Custom Portal Appointments Filters:'
4. Click 'Add a line'
5. Click 'Create'
6. Add a filter name
7. Add the filtering rule in the field 'Domain'
8. Click 'Save&Close' and then 'Save'.
For example, create a filter 'Longer than 1 hour', to filter appointments that take more than an hour according to default duration. For that, add the following rule: Service > Appointment Default Duration >1.00.
Custom fields can also be chosen for the filtering options. For example, add the filter 'Preferred car color' to the dropdown field with available car colors, and set the rule related to the color 'Preferred car color = red' to filter the appointments, where the client chose the red car ().
It is possible to search for appointments by various criteria. By default, there are 4 search criteria: by reference, by resource type, by resource, and by service. To add custom portal search criteria:
1. In the Appointments app, go to Configuration > Configuration
2. Scroll to the section 'Webrsite Specific Options'
3. Find 'Custom Portal Appointments Search'
4. Click 'Add a line'
5. Click 'Create'
6. Choose the field that will be checked for matches while searching (the selection fields are also supported)
7. The field 'Label' (the search title, which will be shown in the search options) will be generated automatically, but you can change it
8. Click 'Save&Close' and then 'Save'
For example, add a search option 'Sale State' to search for matches in the states of the related sale order.
Custom fields can also be chosen for the search criteria. For example, if you have a beauty salon and added the text field 'Preferred haircut', add the search criteria 'Preferred haircut' to search for matches in the field ().
In case, the searching or filtering result has no matches, you will see a warning: 'There are currently no appointments found according to your criteria. Active search: "yoursearch". Active filters: "Planned". Schedule a new appointment or clear search'. The phrase contains a link that redirects to the Appointments scheduling page on the website. The phrase 'Clear search' contains a link that reloads the 'My appointments' page and clears the search parameters.
The resource type filter and search criteria are the ones applied in the first step of scheduling the appointment on the website. This way the client may filter and search among the available resource types to find the ones he/she needs quickly. It is possible to filter resource types by various criteria. By default, there is only one filtering option available - all. To add custom portal resource type filters:
1. In the Appointments app, go to Configuration > Configuration
2. Scroll to the section 'Website Specific Options'
3. Find 'Custom Portal Resource type Filters'
4. Click 'Add a line'
5. Click 'Create'
6. Add a filter name
7. Add the filtering rule in the field 'Domain'
8. Click 'Save&Close' and then 'Save'.
For example, create a filter 'Best', to filter resource types that contain the word 'Best' in the description. For that, add the following rule: Description contains Best.
Custom fields that are added to the own page of a resource type can also be chosen for the filtering options. For example, add the filter 'Works on Sunday' to filter the resource types, where the value of the custom field 'Schedule' includes Sunday. This way the clients of our dental clinic will be able to find the dentist, that works on Sunday before moving to the step 'Choose time' ().
It is possible to search resource types based on various criteria. By default, there are 3 search criteria: by name, in the description, and in services. To add custom portal resource type search criteria:
1. In the Appointments app, go to Configuration > Configuration
2. Scroll to the section 'Website Specific Options'
3. Find 'Custom Portal Resource type Search'
4. Click 'Add a line'
5. Click 'Create'
6. Choose the field that will be checked for matches while searching (the selection fields are also supported)
7. The field 'Label' (the search title, which will be shown in the search options) will be generated automatically, but you can change it
8. Click 'Save&Close' and then 'Save'
For example, add a search option 'Website Description' to search for matches on the full page of the resource type.
Custom fields can also be chosen for the search criteria. For example, add the search criteria 'Working day' to search for matches in the custom field 'Schedule'. This way the clients of our dental clinic will be able to find out what dentists work in the day they need without proceeding to the step 'Choose time' ().
In case, the searching or filtering result has no matches, you will see a warning: 'There are no records found with your criteria. Push clean search to clear search filters'. The phrase 'Clean search' contains a link that clears the filter/search parameters.
The resource filter and search criteria are the ones applied in the second step of scheduling the appointment on the website. This way the client may filter and search among the available resources to find the ones he/she needs quickly. It is possible to filter resources by various criteria. By default, there is only one filtering option available - all. To add custom portal resource filters:
1. In the Appointments app, go to Configuration > Configuration
2. Scroll to the section 'Website Specific Options'
3. Find 'Custom Portal Resource Filters'
4. Click 'Add a line'
5. Click 'Create'
6. Add a filter name
7. Add the filtering rule in the field 'Domain'
8. Click 'Save&Close' and then 'Save'.
For example, create a filter 'Top Service', to filter resources with an average rating of more than 50%. For that, add the following rule: Average Rating > 50.
Custom fields that are added to the own page of a resource can also be chosen for the filtering options. For example, add the filter 'IELTS' to filter the resources, where the value of the custom field 'Certificates' includes IELTS. This way the clients of our language school will be able to find the teachers (human resources) with the IELTS certificate quickly ().
It is possible to search resources based on various criteria. By default, there are 3 search criteria: by name, in the description, and in services. To add custom portal resource search criteria:
1. In the Appointments app, go to Configuration > Configuration
2. Scroll to the section 'Webrsite Specific Options'
3. Find 'Custom Portal Resource Search'
4. Click 'Add a line'
5. Click 'Create'
6. Choose the field that will be checked for matches while searching (the selection fields are also supported)
7. The field 'Label' (the search title, which will be shown in the search options) will be generated automatically, but you can change it
8. Click 'Save&Close' and then 'Save'
For example, add a search option 'Website Description' to search for matches on the full page of the resource.
Custom fields can also be chosen for the search criteria. For example, add the search criteria 'Certificates' to search for matches in the custom field 'Certificates'. This way the clients of our language school will be able to find the teacher with the certificate they need ().
In case, the searching or filtering result has no matches, you will see a warning: 'There are no records found with your criteria. Push clean search to clear search filters'. The phrase 'Clean search' contains a link that clears the filter/search parameters.
The service filter and search criteria are the ones applied in the third step of scheduling the appointment on the website. This way the client may filter and search among the available services to find the ones he/she needs quickly. It is possible to filter services by various criteria. By default, there is only one filtering option available - all. To add custom portal service filters:
1. In the Appointments app, go to Configuration > Configuration
2. Scroll to the section 'Website Specific Options'
3. Find 'Custom Portal Service Filters'
4. Click 'Add a line'
5. Click 'Create'
6. Add a filter name
7. Add the filtering rule in the field 'Domain'
8. Click 'Save&Close' and then 'Save'.
For example, create a filter 'Newest Services', to filter services, that were added last few months. For that, add the following rule: Created on >= 01/05/2022.
Custom fields that are added to the own page of service can also be chosen for the filtering options. For example, add the filter 'Don't eat before' to filter the services, where the value of the custom field 'Recommendations' includes that requirement. This way the clients of our dental clinic will know what services (for example, surgery) require to avoid eating before it ().
It is possible to search for services based on various criteria. By default, there are 2 search criteria: by name, in the description. To add custom portal service search criteria:
1. In the Appointments app, go to Configuration > Configuration
2. Scroll to the section 'Webrsite Specific Options'
3. Find 'Custom Portal Service Search'
4. Click 'Add a line'
5. Click 'Create'
6. Choose the field that will be checked for matches while searching (the selection fields are also supported)
7. The field 'Label' (the search title, which will be shown in the search options) will be generated automatically, but you can change it
8. Click 'Save&Close' and then 'Save'
For example, add a search option 'Website Description' to search for matches on the full page of the service.
Custom fields can also be chosen for the search criteria. For example, add the search criteria 'Recommendations' to search for matches in the custom field 'Recommendations'. This way the clients of our dental clinic will be able to find out about the recommendations and requirements before the procedures ().
In case, the searching or filtering result has no matches, you will see a warning: 'There are no records found with your criteria. Push clean search to clear search filters'. The phrase 'Clean search' contains a link that clears the filter/search parameters.
Universal Appointments: Sales
Universal Appointments: Sales () - is an add-on, that allows linking appointments and sale orders. As soon as a new appointment is scheduled, it is possible to automatically generate the related sale order. The resulting sale order can be either a draft (can be changed), automatically confirmed (cannot be changed), or sent quotation (ready to accept and pay).
The sales team/salesperson of the generated sale order is taken according to the settings of the resource or resource type (if not set in the resource). Otherwise, the sales team of the responsible person is taken.
Turn on the appointments reference in sale orders, to see the details of the appointment right in the sales line.
In case multi-scheduling is enabled and several time slots are scheduled, a single sale order is generated. When some of the appointments in the sale order are canceled, the related sale lines are deleted, while the sale order is canceled only if all lines were deleted.
Choose the pricing method, while creating or editing a resource type card. Charge the client either for the planned duration, tracked duration (), or units.
Choose a pricelist while scheduling an appointment to change the currency of the order or to apply the discount. When choosing a client from the contacts list, a pricelist, if assigned, is taken from the contact.
Add service-specific complementary products to the appointment sale order. Add some additional complementaries later to the appointment, if the sale order is not yet confirmed.
Generate a Sale Order
Show Appointments Reference in a Sale Line
Choose a Pricing Method
Add Complementaries to Sale Order
With the help of the add-on, you will be able to link appointments with the sale orders. The app relies upon standard Odoo sales workflow and payment mechanics. The idea is that each appointment might be linked to a sale order: manually or automatically (set up on the configuration page). The automatic approach assumes that each appointment after confirmation would create a draft or confirmed sale order. After that, the default Odoo checkout process with default payment acquirers is assumed to take place.
To turn on the features of the module, in Configuration > Extra Features, make sure that the option 'Link Appointments to Sale Orders' is enabled. After that, in the field 'Auto Sale Order', you will be able to choose the default state of the automatically generated sale orders. The sale orders will be created as soon as an appointment is scheduled. There are 4 options available:
1. Sent sale orders
If chosen, a sent quotation would be prepared based on the reservation. A sent quotation might be edited, so it is possible to add/remove some complementary products, change the price for the appointment, etc. The order in the status 'Sent Quotation' is ready to be paid.
For example, in our language school the price for the services is fixed, but, later a client may want to add the student's books to the order. In this case, we may change the order before the payment.
On the appointment portal () form the client will see a button for signing/paying for a related order. As a user clicks on the button, he/she is redirected to the order page with the required signing/payment form opened automatically.
When a user schedules appointments from the website, as soon as he/she confirms their contact details, it is possible to redirect him/her straight to the sales order (). For that, in the section, of configuration, enable the option 'Open order on finishing'. Take into account that the order would be opened automatically and ready for signing/paying only if it is in the 'Sent' state (see Universal Appointments: Website Sales).
2. Confirmed sale orders
If chosen, an Odoo sale order would be created as soon as a reservation is scheduled. The method is suitable if your service is standard, while final sale positions and details would hardly be modified after the appointment.
For example, in our car rental, the price for the services is fixed and, thus, we can charge the client as soon as an appointment is scheduled.
3. Draft quotations
If chosen, only a quotation in the state 'Draft' would be prepared. This kind of order is not yet ready to sign and pay and might be further changed before sending to the client for payment. In this way, you have more flexibility in updating an order during service provision or beforehand, for instance, if you wanted to add extra complementaries or provide individual discounts.
For example, in our dental clinic, the price for the service may be different as it is also based on the materials required to provide the service for a certain client. So, some of the materials are added to the order, while providing the service or before, after checking out all the details.
The sales order in the 'Draft' state isn't shown to the portal user. In order for the sale of the order to be visible in the portal, the state of it should be changed to the 'Sent' status.
4. Manual orders
If chosen, managers have to create quotations while providing service. The method might be applicable when actual sale lines become clear only during the visit itself.
For example, a mobile phone repair business assumes initial diagnostics, and only after that, the price is offered.
Until an appointment sale order is confirmed, you can update it from a reservation form. Both service, quantity, and complementary products are re-calculated in this case. If changed from the appointments card, it is also required to click the button 'Adapt Sale', to introduce the changes in the related Sale Order as well.
In the generated sale order the responsible salesperson/team is taken according to the hierarchy. At first, it is checked if the resource sales team/seller is defined. If not, then the sales team/seller of the resource type is considered. In case, it also wasn't defined, then the responsible person of the resource and his/her sales team are set as responsible for the sale order.
For example, in our dental clinic, we have a human resource () Ernest Reed (used by default as the responsible person as well). The default sales team of the resource is set as America, and the default sales team of the related resource type is set as Europe. The sales team in the sale order will be 'America' and the salesperson Ernest Reed.
Turn on the option "Appointment reference in sales" in the module settings. The field can be found if the 'Link Appointments to Sale Orders' option is enabled. After that, when creating/adapting a sales order, the lines associated with the current reservation will include the reservation number and the date with the time zone in square brackets.
For example, the reference for the service Tooth Stopping in our dental clinic will be [BA-2022/1507 10/05/2022 11:00-12:00 (Europe/Moscow)], where we can find the appointments number, date, and time with the specified timezone.
If multi-scheduling is enabled and several time slots are booked (both from the site () and from the backend), a single sales order will be created.
In case a different salesperson / sales team was assigned to the resource types/resources of the reservations, for the sale order, the salesperson/team will be taken from the first appointment. Such a situation is possible, only while booking from the backend, while the appointments managers might change the resource/resource type to schedule a time slot during the single booking session.
In case, you click 'Adapt Sale' on the appointments card, when there are different reservations in the sale order, the seller, origin, price list, and partner will be taken from the appointment, which is changing.
When one of the reservations in the sale order is canceled, only the associated-with-it order lines will be deleted, and the sale order will be canceled only if all order lines are deleted.
For example, we have booked several time slots during a single session from the backend and booked one time slot for the service 'Tooth Stopping' and two German lessons. A single Sale Order was generated with the salesperson and sales team of the resource related to the service 'Tooth Stopping' as its time slot was booked the first.
The module also adds the possibility to choose the way the clients are charged for the services. For that, in the field 'Calculate price for' on the resource type card, choose the pricing method. The price can be calculated per:
1. Planned duration
In this case, the clients are charged for the fixed time of the service, which is known beforehand. Odoo quotations are created based on initial reservation plans.
For example, in our car rental, the client manually chooses the number of days of the rent, pays exactly for that time, and should return the car at the end of the period.
2. Units
In this case, the clients pay for the particular item (f.e. mobile phone), or for the particular service as a unit. Sale orders consider appointments for the same price disregarding their duration.
For example, standard haircutting or tire mounting is invoiced the same disregarding how much time they actually take.
3. Tracked (real) duration (the extension Universal Appointments: Time Tracking () is required)
In this case, the actual time spent is invoiced. To track the time, open the appointment card and click on the button 'Start working', when the service is provided click on the button 'Finish working'. The time will be recorded and added to the tab 'Time Tracking'. The time can be recorded multiple times and will be displayed and counted in the related tab. Click 'Adapt Sale' to change the details of the generated Sale Order according to the tracked time.
For example, the approach is suitable for consultation or legal services, where the client pays for the exact time of the service, which is not yet clear while booking.
Appointments prices are price list dependent. This means that a manager might select individual conditions during scheduling. To turn on the feature, in configuration, tick the box 'Multiple Services Prices'. In such a way, it will be possible to apply various currencies, discounts, and promos.
The pricelist can be chosen on the first step of booking as the appointment manager chooses the resource type/resource/service and at the step of adding contact's details. In case, the client already has a contact with the pricelist assigned, it will be applied as you choose that contact. However, you can still change the pricelist, if needed. You can also change the pricelist as you edit the appointment card. Don't forget to push the button 'Adapt Sale' to apply the changes to the sale order as well.
The pricelist set to the appointment will be assigned to the whole resulting sale order. The pricelist is applied to the whole order, including complementary or other products. For example, give a discount for booking appointments during a particular period (for example, a 10% discount for booking a lesson during the summer holidays). Then add the extra product students book (10$). In the generated sale order the discount will be applied to the total price (lesson + students' book).
Universal Appointments: Website Sales
Universal Appointments: Website Sales - is an add-on, that allows showing service prices on the Odoo website. This way, the client will see the prices on the step of choosing a service.
The module allows publishing certain pricelists, so the clients could switch between them, to see the price in the desired currency or to apply a discount.
Create a sale order as soon as the reservation is created () and allow portal users to sign and pay orders right from the linked reservations.
Configure the app to redirect users to a generated sales order at the end of the website booking process.
Automatically add chosen while reservation by website visitors/portal customers complementaries to the generated quotations/sales orders (if any).
Show prices on a website
Publish pricelists
Use Odoo payment options to pay for the appointments
Add complementaries from the website to the Sale Order
While scheduling an appointment on the website, as the client opens the step of choosing a service, it is possible to show prices on the service cards. To show the prices and pricelists on the website:
1. Go to Configuration > Configuration and find the section 'Website Specific Options'
2. Optionally, choose the website to apply the settings to (see Multicompanies & Multiwebsites)
3. Tick the option 'Pricelists and Prices'
4. Click 'Save'.
The price for the service is defined on the card of the related product. To establish a connection between a service and a product:
1. Start creating or editing a service card
2. In the field 'Related Product' choose the product
3. Click 'Save'
After that, the service cards would contain the price information according to the related-to-service products and customer pricelist.
To change the price of the service, you need to change the price of the related product.
Keep in mind that if the tax is not included in the price of the product, the price will be shown without tax.
Also, on the step of choosing a service, the client may choose a pricelist and the prices will be recalculated. This way, clients, may see the price in other available currencies, or apply a discount, if any.
To make a pricelist available for the selection on the website:
1. Go to Configuration > Pricelists
2. Open a pricelist
3. Choose the website to show the pricelist, or leave the field empty to show i on all available websites (see Multicompanies & Multiwebsites)
4. Tick the box 'Selectable'
5. Click 'Save'.
After that, the pricelist will be available for selection on the website. For example, we have made 2 prices selectable: the default one (Public Pricelist) and the pricelist in euros (Eur).
If the contact has an assigned pricelist, it will be applied on the step of choosing a service and the price will be shown according to it. For instance, it might be a good idea to assign a pricelist with 'Wholesale' prices to the partners of the company.
For example, we have made 2 prices selectable: the default one (Public Pricelist) and the pricelist in euros (Eur). Also, the client has an assigned pricelist (Wholesale Pricelist), which provides a 10% discount. So, the client's pricelist will be applied by default, but he/she will still see the available-for-the-selection pricelists if any.
If there is only one pricelist available, then the dropdown field with pricelist selection will be hidden and the default pricelist or contact's pricelist, if any, will be assigned.
If a client chooses, some complementary products while scheduling, then they are automatically added to the resulting sale order, if any. In case, they are added later through the button on the appointment card, it would be also necessary to click the button 'Adapt Sale' on the related appointment card in backend. Then, they will be also added to the existing sale order.
As soon as the sale order is confirmed, it is no longer possible to add the products. The 'Adapt Sale' button will not be visible on the appointment card.
After confirming the account details, portal users are either redirected to 'My appointments' page with a list of his/her appointments (if they have several), or to the page of their current appointment (if there is only one) (see 7. Success Page & Signing up).
It is also possible to redirect the user straight to the sales order. For that, in the section 'Website Specific Options', of configuration, enable the option 'Open order on finishing'. Take into account that the order/payment form would be opened automatically only if it is in the 'Sent' or 'Confirmed' state. The state of the generated order is based on the configuration option 'Sent Quotation' of the setting 'Auto Sale Order' (see Universal Appointments: Sales).
On the appointment portal form, the client will see a button for signing/paying for a related order. The button itself may imply different actions depending on the settings (for example, signature required/not required) and the order status (already signed, the time to pay (before/after)): "Sign & Pay", "Accept & Sign", "Accept & Pay", "Pay Now". As a user clicks on the button, he/she is redirected to the order page with the required signing/payment form opened automatically.
Here, the app relies upon standard Odoo sales workflow and payment mechanics. The default Odoo checkout process with default payment acquirers is assumed to take place.
Universal Appointments: Custom Fields
Universal Appointments: Custom Fields () - is an add-on, which allows adding custom details for appointments, resource types, resources, and services. The add-on doesn't work without the core module: Custom Fields: Core. You can place your custom fields in the backend on the appointments/resource types/resources and services cards, or make custom properties of resource types, resources, and services visible on the website if you have: Universal Appointments: Portal and Website (), and Universal Appointments: Custom Fields for Website and Portal () (see. Universal Appointments: Custom Fields for Website and Portal).
Adding Extra Fields
Various Form Placement
Require to Enter a Value
Various Types of Fields
In order to show a new property for appointments, go to Configuration > Appointments Custom Fields, click 'Create' to add a new field, and enter details. The appointments custom fields can be resource type dependent. Just choose one or several resource types, while creating an appointment custom field, and the custom field will be added only to the appointments of those resource types.
In order to show a new property for resource types, go to Configuration > Resource Type Custom fields, click 'Create' to add a new field, and enter details.
In order to show a new property for resources, go to Configuration > Resource Custom fields, click 'Create' to add a new field, and enter details.
In order to show a new property for services, go to Configuration > Service Custom fields, click 'Create' to add a new field, and enter details.
It is possible to add custom fields of the following types:
1. Single-line text (char)
2. Simple text without formatting (text)
3. Rich text (HTML-formatted text)
4. Integer or float numbers
5. Drop-down choice with your own options (selection)
6. Checkbox (boolean)
7. Date or date and time
8. Binary (a file to upload)
9. Reference to another Odoo document (e.g. for sale order, contact; many2one)
As you add a field of the dropdown type, it is possible to add the options one by one by clicking on the button 'Add a line'. Or all options at once by adding the list of options. For that, click on the button 'Add selection values based on a string'.
As you click on the button a pop-up wizard will appear. The options should be divided by a comma. When you are ready click 'Prepare Selection Values' and they will be automatically added to the list of available selection options.
If some of the options were previously added to the list, they will not be removed by the new ones.
When you create a custom field for resources, you also can choose to add the field only to the resources that relate to certain resource types. For that, just choose the resource types in the field 'Types'.
The tool lets you comfortably select an interface position of a custom field from a closed list of options. In the backend form of view, you can place your custom fields in the: left column, right column, custom tab, or after description. Custom fields for resource types and services can be also placed in the settings tab.
Mark a custom field required to force users to enter values. In this case, a user will not be able to save a resource type/resource/service/appointment if the field is left empty. For that, tick the box 'Required to enter a value' as you create or edit a custom field.
Custom Fields for appointments can be also used for analysis. For that, tick the box 'Used for Analysis' as you create or edit a custom field (Appointments Analytics).
The rights to create custom fields belong only to 'Appointments: Administrator' (see Access Rights).
Universal Appointments: Custom Fields for Website and Portal
Universal Appointments: Custom Fields for Website and Portal () - is an add-on, which allows showing custom fields on the Odoo website. The add-on also requires the core modules: Universal Appointments: Website and Portal (), Universal Appointments: Custom Fields (), and Custom Fields: Core.
Extra Fields
Account Details Placement
Required to Enter the Value
Full Details Page Placement
The available field types for appointments/resource types/resources/services are the same as in the backend (see Universal Appointments: Custom Fields).
The appointment custom fields on the website can be shown on the appointment card on the Odoo website/portal. For that, as you create or edit an appointment custom field, choose its portal placement in the field 'Portal Page Placement'. The available placements are: at the end, left column, and right column.
Appointments custom fields can be resource type dependent. If configured, the appointments custom fields will be shown only on the related to the resource type/types appointments cards.
Custom fields for resource types/resources/services are added to the full details page. To show the custom fields on the website, you need to turn on the full page for resource types/resources/services and choose the custom field's placement in the field 'Full Details Page Placement'. The available placements are: at the end, left column, and right column. You can also leave the field empty if you want to have a custom field only in the backend.
The full page can be turned off for all or separate resource types/resources/services (see Full Details Page).
Also, you can add custom appointment fields to the 5th step ('Account Details') of booking an appointment on the website. This way, you can get some extra information from the client. To add the custom field to the account details step, choose its 'Input Form Placement' as you create or edit an appointment custom field. The available placement is at the end of the page. A field with the information that a client fills in will be added to the appointment, but not to the contact's card. For example, we have a car rental business and the cars are available in three colors: red, white, and black. So, we have added a dropdown custom field 'Preferred color' and chose its input form placement on the account details page. As the client fills in the details and confirms the appointment, the managers see the details in the backend, according to the chosen backend form placement. The client can also see his/her reply on the appointment card in the portal.
If the appointment custom fields relates to a certain resource type/types and the input form placement was set, then the field will be shown on the step of filling in the account details only of the related resource type/types.
Force clients to fill in the custom field to confirm the reservation, so you will be able to get the required information to provide the service. To make filling in the field mandatory, tick the option 'Required to enter a value'. For example, for a language school, you can create a text field 'Learning preferences', to find out what the student likes before the lesson.
Universal Appointments: HR Bridge
Universal Appointments: HR Bridge - is an add-on, that allows applying employees as appointment resources. This way the calendar of the employee, his/her meetings, and own leaves will be used to generate the available time slots.
Set employees as resources
Consider employee's working calendar and busyness
To turn on the features of the module, make sure, that the option 'Employees as Resources' is enabled in Configurations of the module, section 'Extra Features'.
As you enable the module functions and start creating a resource, one more field 'Resource Kind' will appear. There you will be able to choose between two kinds: 'Material' and 'Human'. Choose the option 'Human' and choose the employee in the field 'Employee'. For example, you can create a resource for the dentist 'Anita Oliver'.
We can't create two stand-alone human resources () for a single employee, as then the already booked time slots of one will not be taken into consideration while booking slots for another one. In this case, we may create a resource of a Human kind and its alias. This way you will be able to use the calendar of the prime resource. For example, Doris Cole (a human resource) is both a hairdresser and a teacher (see Managing Resources).
The responsible person of the resource will be set by default and that will be the same employee (cannot be changed). For example, if we create a resource for our dentist and choose the employee Anita Oliver, she will be the responsible user as well.
Optionally, enable the feature 'Calendar Events as Busy Time' on the related resource type card to consider the meetings of the of the employee's user unavailable for bookings. For example, the dentist Anita Oliver (both resource and responsible) has a meeting on Thursday at 4 pm on her calendar, that's why this time is not available for booking.
As you create a resource of Human kind. The working calendar of the chosen employee is considered to generate the available time slots. For example, the calendar of our dentist Anita Oliver is Standard 40 hours/week. So the related resources 'tooth stooping' and 'surgery' are available only during this time.
Not only the calendar affects generated time slots, but also the Time-offs. Time-offs can be either global (the time, when the company doesn't work) or own Leaves (when an employee takes a vacation). It is impossible to schedule appointments for non-working hours.
You can see and manage global time offs right from the working hours card. To do that, just click on the 'Public Time off' button.
You can view and manage all employees' own Leaves right from the working hours card. For that, just click on the button 'Time Off'.
Universal Appointments: Time Tracking
Universal Appointments: Time Tracking - is an add-on, which allows tracking of spent time on service provision. The module allows tracking the real-time spent on providing service and control statistics by resource types, resources, and services.
Track the real-time spent
Control Statistics
To turn on the features of the module, make sure, that the option 'Time Tracking' is enabled in Configurations of the module, section 'Extra Features'.
To track the time spent on the appointment and register done jobs, click on an appointment in the calendar, then click 'Edit' to be redirected to the appointment card. Above the appointment, you will find the 'Start working' button, which will help you to launch the time tracking. When you want to make a pause or the appointment is over, click 'Finish working'. The timer can be launched and finished multiple times. The total duration will be recorded and calculated in the 'Time Tracking' tab. In the same tab, you can also add the working time manually. This way you will be able to charge the client for the exact time spent providing the service.
Charge the clients () for the actual time spent. For that, in the field 'Calculate price for' on the resource type card, choose the pricing method as 'Tracked (real) duration' (see Configuring Pricing Methods).
As you track the time of multiple appointments, you can control the statistics by resource types, resources, and services. To analyze the real time spent on the appointments, go to Appointments Analysis and choose the measure as 'Tracked Duration'. For example, the surgery in the dental clinic lasts for two hours. As soon as the surgeon started it, the nurse clicked the button 'Start working above the appointment and the timer was launched. Upon finishing the button 'Stop working was clicked'. The total tracked time was not 2 hours, but 1 hour 40 minutes (see Appointments Analysis).
The price for the appointment is calculated based on the configuration 'Calculate price for' on the resource type card. If you configure it to calculate the price for 'Tracked duration', then the duration of the appointment will be considered to calculate the final price. To calculate the price for the tracked time, don't forget to click the button 'Adapt Sale', then the price in the sale order will be adapted accordingly.
Universal Appointments: Gantt
Universal Appointments: Gantt - is an optional add-on () that introduces the Gantt view for appointments (reservations). The add-on requires the Enterprise license of Odoo. The add-on allows seeing the appointments in the Gant view in the read-only mode. With the help of the add-on, you will be able to control the workload of business units, analyze shifts, allocate resources, and provide service in the familiar well-known interface.
Control workload
Analyze the data
To turn on the features of the module, make sure, that the option 'Gantt view' is enabled in Configurations of the module, section 'Extra Features'.
As you open the appointments module, in the top right corner above the calendar, you will find the buttons to switch between the appointments views. Click on the third button () to switch to the Gantt view. As in the single view interface, here you will be able to see all reserved appointments, regardless of the way they were booked, switch between the daily, weekly, monthly, and yearly calendar view, search, filter, and group the appointments to find the required ones quickly.
From the Gantt view, by default, you see the resources on the vertical scale and the dates/days/time on the horizontal scale. You can select various searching and filtering criteria to limit the number of shown appointments. For example, show only today's appointments.
Apply various grouping options to change to create different hierarchies of groupings by clicking on several options one by one. To reset the grouping, just click on the cross by it in the search bar. For example, click on the option resource type, then the option resource and service and you will see the following hierarchy in the search bar 'Resource type > By Prime Resources > Service'.
Instantly access information about any appointment by hovering over it. To view the appointment card, just click on an appointment in the calendar. There you will be able to see the information about the appointment, change its state, track the real-time of the appointment (), etc. To find out more about the appointment card and the related actions, see the article 'Appointments Card'.
From the Gantt view, it isn't possible to schedule and re-schedule the appointments. The table is available in read-only view.
Access Rights
Access to appointments is managed in a different way for different types of users. There are 3 types of users:
1. Odoo user or internal user
2. Portal user or registered user ()
3. Public user ()
Rights to administrate the appointments belong to 2 user roles: 'Appointments: Only Own' and 'Appointments: Administrator'. If you want a user to be able to see and schedule appointments in the backend, he or she should belong to one of those groups. If the internal user doesn't have one of the appointment roles assigned, the related menu will be hidden for such a user.
On the website (), if configured, portal users will be able to schedule appointments and see the list of the appointments related to them, their company, and colleagues. They can also manage the appointments with the help of some functional buttons on the appointment page.
Public users, if configured, will be able to schedule an appointment and will receive a sign-up invitation to make further bookings and be able to see and manage related appointments.
For portal and public users, only published resource types, resources and services will be available for booking.
Internal User Rights
The tool introduces its own user rights system to make sure business data is secured. For the backend users, there are 2 groups that are allowed to work with appointments. Those are: 'Appointments: Only Own' and 'Appointments: Administrator'.
Users with the 'Appointments: Administrator' group assigned are allowed to manage all settings and update any appointment-related objects of their company(s).
Users with the 'Appointments: Only Own' group assigned are allowed to:
1. See the resource types and services in the read-only view
2. Observe the resources, in which they are followers, responsible or extra managers, or which do not have such managers at all
3. Observe an appointment, if they are followers of the appointment/the related resource, if they are the responsible or extra managers of the related resource, or if the resource doesn't have such managers at all
4. Create, update and delete appointments related to the resources, in which they are a responsible or an extra manager, or which do not have such managers at all.
So, the followers of a resource type/resource/appointment can access them in the read-only view. In order to create, manage and delete an appointment, the user should be a responsible or extra manager of the resource, or there shouldn't be such a manager assigned.
The followers are added hierarchically. So, if a user follows a resource type, he is automatically added as a follower of the related resources and appointments. If a user follows the resource, he is automatically added as a follower of the related appointments (see Appointments Discussion).
The module supports a multicompany regime, so the stated rights are also limited by the company set in the related resource type. This way, in order to have the access to a certain resource type/resource/appointment, the user should also have the access to the related company (Multicompanies & Multiwebsites).
To access the appointments menu (calendar) a user should belong to one of these groups. The menu will be hidden for other internal users.
To assign an appointments role to an internal user:
1. Go to Settings > Manage Users
2. Choose a particular user
3. Click 'Edit'
4. Scroll to the section 'Other'
5. In the field 'Business Appointments' choose one of the roles
6. Click 'Save'
There is an additional access role, which was introduced to let users of the group 'Appointments: Only Own' manage the working calendars, that is Manager Resource Calendars and All Leaves. It allows to:
1. See the Configuration > Working Calendars menu (even if the user doesn't belong to the group 'Appointments: Administrator')
2. Edit any working calendar and shifts in it
3. Create, delete, edit (including approval) any Leaves: both global and for each employee
To assign the role Manager Resource Calendars and All Leaves to a user:
1. Go to Settings > Manage Users
2. Choose a particular user
3. Click 'Edit'
4. Scroll to the section 'Other'
5. Find the option Manager Resource Calendars and All Leaves and enable it
6. Click 'Save'
Portal&Public User Rights
Public users () - website visitors - may access the Appointments page only if you explicitly allowed that. Thus, you can switch off the option 'Business appointments on website' () to fully disable the scheduling appointments for such users. The option cannot be turned on, if the appointments for the portal users aren't enabled.
Public users () would see only those resource types, resources, and services, which are published and available for the website they are visiting.
To (un)publish () a resource type/resource/service, open a resource type/resource/ service card and click the button 'Publish' in the top right corner.
To (un)publish () resource types/resources/services in a batch, open the related list menu, select the resource types/resources/services, click on the button 'Action' above and choose the option 'Website (un)publish'.
The steps, that have only one available (published) option (so there is no alternative to choose) are skipped. Make sure, that at least one published resource and service are available for the published resource type to make it visible on the website. For example, we have a published resource type 'Dentist' and published service 'Tooth stopping', but we don't have any published 'Resource' related to these resource types and services. So, none of them are visible on the website.
Any website visitor might schedule an appointment and access resources/services without registration unless you make the sign-up mandatory to confirm the reservation by choosing the option 'Sign in required' in the field 'Sign in for public users' of the related website (see Filling in Contact Details).
Upon completing the reservation, public users are redirected to the success page, where they are suggested to choose the password to finish the registration. If a public user doesn't finish the registration, then he/she will not be able to create a new appointment with the same account details. In this case, he/she should contact the administrator, to get the sign-in credentials (see Success Page & Signing up).
Portal users () - registered and logged-in users - have the same access rights as public users (), but they also can see and manage the reservations available to them, their company (if set and has separate reservations), and their colleagues (if any). For example, Brandon Freeman sees in his portal the reservations that he made from his account, the reservations that were made from the account of his company Azure Interior, and the reservations of his colleague Abigail Peterson.
Turn on the option 'Business appointments in portal', to let portal users schedule and manage their appointments right from the portal.
In the user's portal, a new tab 'My Appointments' is added. When a portal user clicks on it, he/she sees the list of his/her appointments. Users can observe the list of planned and done appointments and may check any of them. In the list, the user sees the reference, scheduled time, resource, and service of each appointment (see Portal Control of Reservations).
Upon completing the reservation, portal users are either redirected to 'My appointments' page with a list of his/her appointments (if they have several), or to the page of their current appointment (if there is only one). It is also possible to redirect the user to the related sale order () if the add-on Universal Appointments: Sales is installed and the option 'Open order on finishing' is enabled, or even to the form of signing and payment (see Success Page & Signing up).
Multicompanies & Multiwebsites
The module supports the multiwebsite and multi-company environment. This way you can reflect the workflow of several businesses in a single Odoo environment and configure the structure of the appointment accordingly. So, the users of one company scheduled appointments only based on the objects related to their own company or the global ones.
A company can be assigned to:
1. Resource type
If you open the resource types menu, you will find the list of the resource types. If you work in a multicompany environment, then, here you will see only the resource types related to your company or to the companies selected in the systray, if you have the access to several ones.
This way, only internal users of a certain company will see, create and manage the related resource types. For example, only the internal users of the company 'Dental clinic' see the resource types 'Dental clinic New York' and 'Dental clinic Chicago'.
If a company isn't specified, then such a resource type is considered global and is visible by all internal users with the access to resource type menu.
2. Resource
The company of a resource is assigned automatically and is taken from the related resource type. So, to assign a company to the resource, you should set it on the related resource type card.
If a company of the related resource type isn't specified, then such a resource is considered global and is visible by all internal users with the access to resource menu.
3. Service
If you open the services menu, you will find the list of the services. If you work in a multicompany environment, then, here you will see only the services related to your company or to the companies selected in the systray, if you have the access to several ones.
This way, only internal users of a certain company will see, create and manage the related services. For example, only the internal users of the company 'Dental clinic' see the services 'Tooth Stopping' and 'Surgery'.
If a company isn't specified, then such a service is considered global and is visible by all internal users with the access to resource type menu.
4. Appointments
The company of an appointment is assigned automatically and is taken from the related resource. As the company of the resource is inherited from the related resource type, then, to change the company of the appointment, you need to change the company of the related resource type.
If a company of the related resource type isn't specified, then such an appointment is considered global and is visible by all internal users with access to the appointments calendar.
5. Numeration
Appointment numeration also supports the multi-company regime and might be assigned for each company separately. This way each company may have a separate appointments numeration. For example, numeration with the prefix DC for dental clinic (DC001) and with suffix CR for car rent (001CR).
Leave the field empty, to apply the same numbering to all companies.
6. Pricelists
You can create company-specific pricelists. That is especially useful when only a certain company has a promotion/sale or for companies that provide services in countries with different currencies.
If the company isn't specified, then such a pricelist is considered global and can be chosen while scheduling an appointment by all internal users.
In case, the add-on Universal Appointments: Portal and Website is installed, you will be able to reflect different business structures on the available websites. For example, you can create several websites: Dental clinic, Language school, Hotel, Car rent, and Travel agency, and adapt the appointment structure, so only related resource types/resources and services were available for each of the websites.
It is possible to choose the related website in:
1. Resource type
Choose the website, on which the resource type will be shown. Leave the field empty, to make the resource type global and available on all websites.
In order to make it visible to the public and portal users, the resource type should be published (see Portal&Public User Rights).
2. Resource
Choose the website, on which the resource will be shown. Leave the field empty, to make the resource global and available on all websites.
In order to make it visible to the public and portal users, the resource should be published (see Portal&Public User Rights).
3. Service
Choose the website, on which the service will be shown. Leave the field empty, to make the service global and available on all websites.
In order to make it visible to the public and portal users, the service should be published (see Portal&Public User Rights).
4. Pricelists
Choose the website, on which the pricelist will be shown. Leave the field empty, to make the pricelist global and available on all websites. It is especially useful, when some of the companies are international, or when the companies work in countries with different currencies and there is a possibility to pay in different currencies.
In configurations, it is required to apply the settings for each of the websites separately. To switch between sites settings, select the website to configure in 'Website for appointments'. Here you also have a website link button (), that forwards you to the chosen website to see the result, but make sure you clicked 'Save' in the left corner at the top of the page to save the configurations.
Configuration Page
Universal Appointments and Time Reservations has a configuration page, where you can turn on and off some add-on features and make necessary changes to make your work convenient.
Maximum Period for Pre-Reservation: allows setting the time to finish the pre-reservation. After that time, if not completed, the slot is unblocked and available for the new reservation (see Pre-reservation).
Multi Scheduling: allows booking several time slots at once. Is available both in the backend and frontend. In the backend, you can select slots for different resources, resource types, and services in one wizard (see Scheduling Appointments: Backend, Website Booking Process).
Maximum Appointments (Backend): specify the maximum number of time slots, that can be chosen at once in the backend. A separate appointment for each time slot will be generated. Visible only if the multi scheduling option is enabled (see Scheduling Appointments: Backend).
Complementary Products Offer: turn on offering managers complementary products while scheduling a time slot. Such products would be shown if any are associated with reserved service (see Offering Complementary Products).
Different Time Zones: make time zone available for selection while scheduling an appointment. Otherwise, all time slots will be shown always at the same timezone taken from a current company (see Multi Time Zones).
Company Timezone: define the default time zone to show time slots. In case the option 'Different Time Zones' is turned off, it will be the timezone in which all clients and appointment managers schedule appointments (see Multi Time Zones).
Multiple Service Prices: if checked, it would be possible to create a pricelist and assign different prices per product.
Use Rating for Appointments: turn on to send rating requests when appointments are done. This option might be turned on or off per each resource type (see Appointments Rating).
In the Extra Options section, you can see all the available add-ons and their pages. From here you can turn them on and off.
Some of the add-ons have additional settings when enabled.
Website / Portal Confirmation (): define whether website / portal visitor should confirm appointment. You can either set the confirmation by email or by mobile or phone number (see 6. Confirming Reservation).
Auto Sale Order (): choose the default state of the automatically generated sale orders. The sale orders will be created as soon as an appointment is scheduled (see Linking Appointments and Sale Orders).
Appointment reference in sales (): if enabled, when creating/adapting a sales order, the lines associated with the current reservation will include the reservation number and the date with the time zone in square brackets (see Linking Appointments and Sale Orders).
The add-on Universal Appointments: Portal and Website () has its own configuration section. The extension supports multi-website, and it is required to apply the settings for each site separately. To switch between sites' settings, select the website to configure in 'Website for appointments'. Here you also have a website link button (), that forwards you to the chosen website to see the result, but make sure you clicked 'Save' in the left corner at the top of the page.
From here, you can define how each step of scheduling an appointment should be called. It isn't possible to remove the stages, but according to the resource type settings some of the stages may be skipped, in case there is nothing to choose from. For example, if you have only one resource and service related to a particular resource type, then the second and third steps will be skipped (see Portal and Website: Customization & Settings).
Business appointments in portal: if checked appointments would be shown for portal users of the current website (see Universal Appointments: Portal and Website).
Business appointments on website: if checked appointments would be shown for all visitors of the current website (see Universal Appointments: Portal and Website).
Mandatory Account Details: define which contact details should be mandatorily filled in to schedule an appointment (name and email are always required) (see 5. Filling in Contact Details).
Optional Account Details: define which contact details should be optionally filled in to schedule an appointment (name and email are always required) (see 5. Filling in Contact Details).
Sign in for public users: define the sign-in policy for public users. 'Sign in required' means that before entering account details, unregistered website visitors must log in to the portal. 'Sign in offered' means that such users would be offered to log in if they had an account, but the step might be missed. 'Auto sign in' means that public users might finish reservations without signing in, while the portal users would be auto-created for them (see 5. Filling in Contact Details).
Sign in text: write your own text to offer the sign-in. The field supports HTML, however, you shouldn't change the link, that is added to the field by default (see 5. Filling in Contact Details).
Maximum Appointments (Portal): define how many time slots might be selected during scheduling on the website. Visible only if the multi scheduling option is enabled (see 4. Choosing Time).
Agree on terms and conditions: define whether the contact details page should include an obligatory agreement to terms and conditions (see 5. Filling in Contact Details).
Terms for public users only: turn on if terms should be agreed only by public visitors (not by portal users) (see 5. Filling in Contact Details).
Custom Portal Appointments Filters: allows adding custom portal appointment filters. This way the client may filter his/her appointments in the portal (Custom Filters & Search Criteria).
Custom Portal Appointments Search: allows adding custom portal appointment search options. This way the client may search among his/her appointments in the portal (Custom Filters & Search Criteria).
Show types full detail pages: if turned on, each found resource type would have a link for full details which you may update on the website. The full description might be turned off for a specific type (see Full Details Page).
Show resources full details pages: if turned on, each found resource would have a link for full details which you may update on the website. The full description might be turned off for a specific resource (see Full Details Page).
Show services full details pages: if turned on, each found service would have a link for full details which you may update on the website. The full description might be turned off for a specific service (see Full Details Page).
Custom Portal Resource type Filters: allows adding custom filtering options to let a client filter the available resource types to find the ones he/she needs quickly. Can be applied on the first step of the scheduling process on the website (Custom Filters & Search Criteria).
Custom Portal Resource type Search: allows adding custom search options to let a client search among the available resource types to find the ones he/she needs quickly. Can be applied on the first step of the scheduling process on the website (Custom Filters & Search Criteria).
Custom Portal Resource Filters: allows adding custom filtering options to let a client filter the available resources to find the ones he/she needs quickly. Can be applied on the second step of the scheduling process on the website (Custom Filters & Search Criteria).
Custom Portal Resource Search: allows adding custom search options to let a client search among the available resources to find the ones he/she needs quickly. Can be applied on the second step of the scheduling process on the website (Custom Filters & Search Criteria).
Custom Portal Service Filters: allows adding custom filtering options to let a client filter the available services to find the ones he/she needs quickly. Can be applied on the third step of the scheduling process on the website (Custom Filters & Search Criteria).
Custom Portal Service Search: allows adding custom search options to let a client search among the available services to find the ones he/she needs quickly. Can be applied on the third step of the scheduling process on the website (Custom Filters & Search Criteria).
Complementary Products for Reservation: if turned on, the suggested products would be shown for customers after selecting a time slot for reservation (see Offering Complementaries).
Open Order on finishing (): if turned on, Odoo would redirect portal users, if possible, to a linked sale order for payment after finishing the reservation and signing up instead of appointment(s) (see Linking Appointments and Sale Orders).
Pricelists and Prices ( ) : if turned on, service cards would contain price information according to the customer price list (see Prices & Pricelists).