About Password Manager
Password Manager is an Odoo app that helps you securely store passwords and maintain an efficient storage structure.
An innovative single-view interface makes it easy to maintain and update passwords. You can create password bundles for a single user or the entire department.
Manage password access rights and create an additional password to enhance the security of your password vault.
Share passwords with your clients in Odoo's portal.
Search passwords for possible duplicates.
With this app, you will be able to:
Share password vaults for team use
Automatically generate encrypted passwords and check their quality
Share passwords with clients in the portal
Navigate, edit, archive, delete, or renew passwords
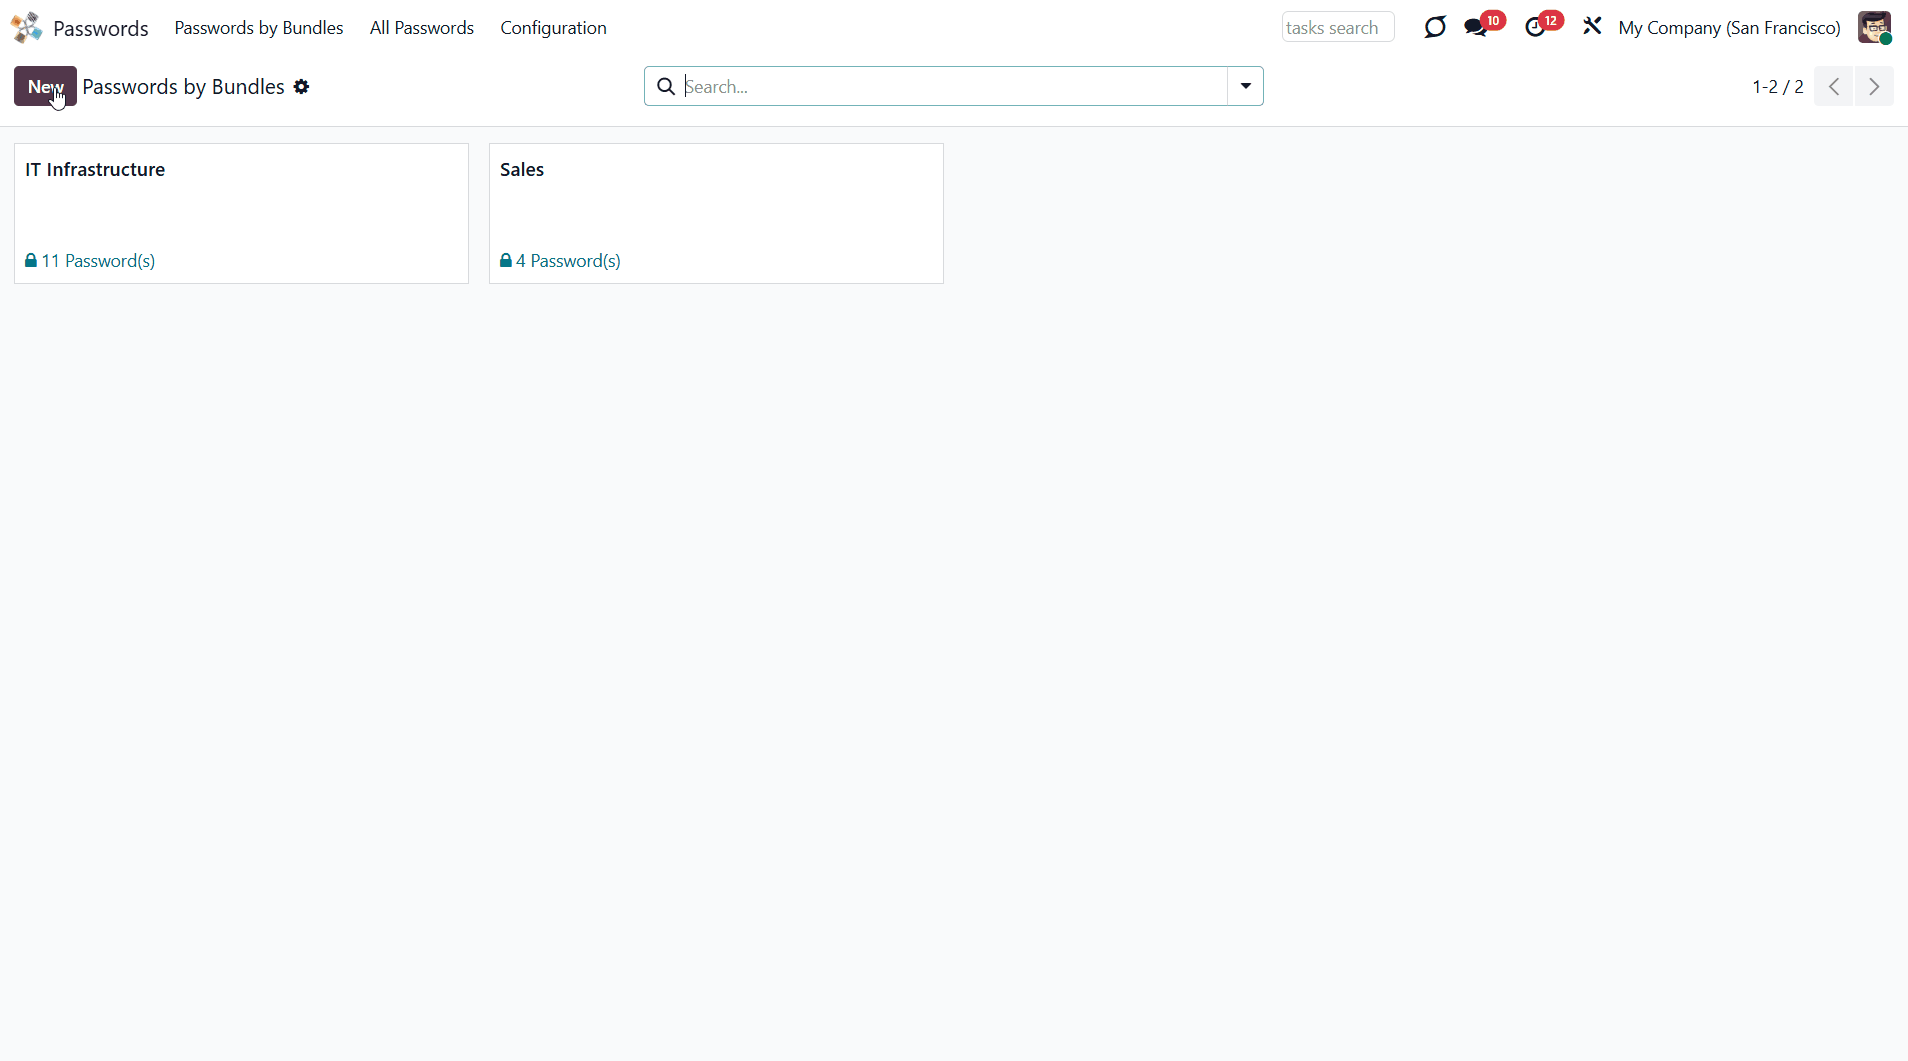
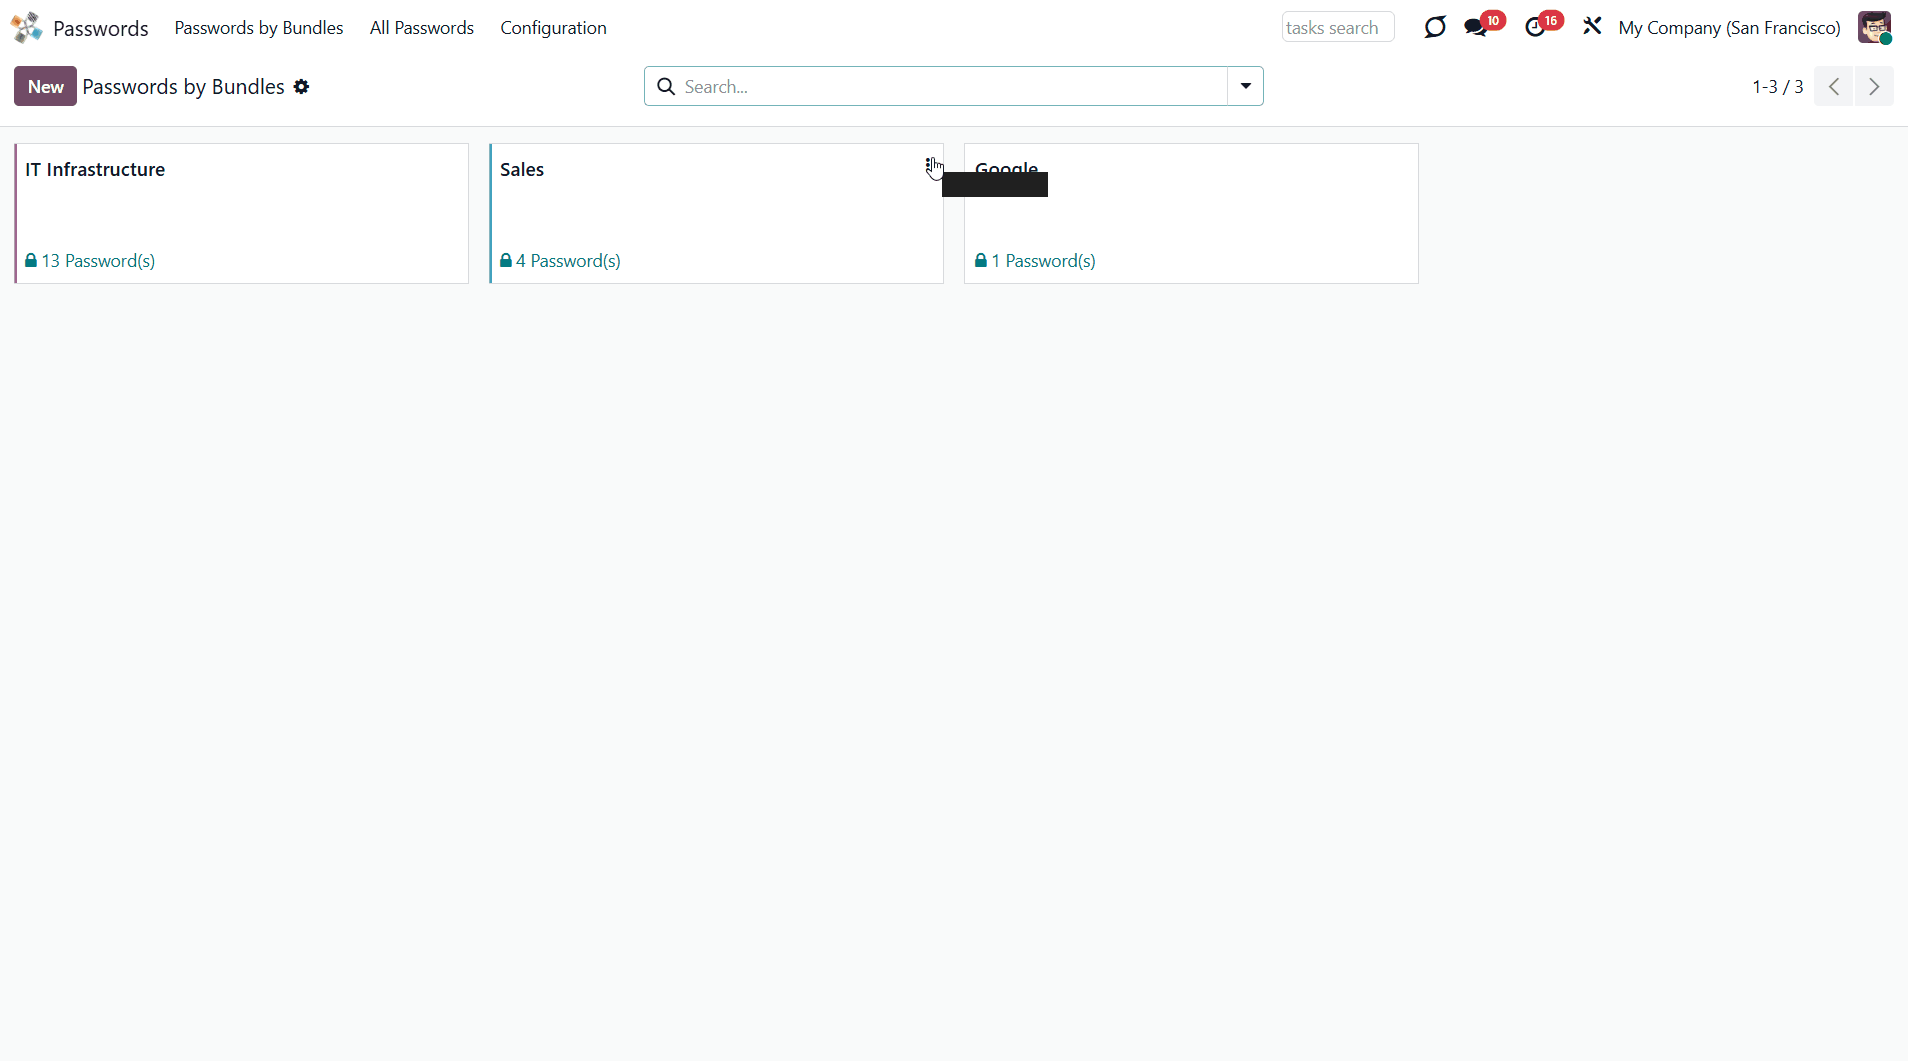
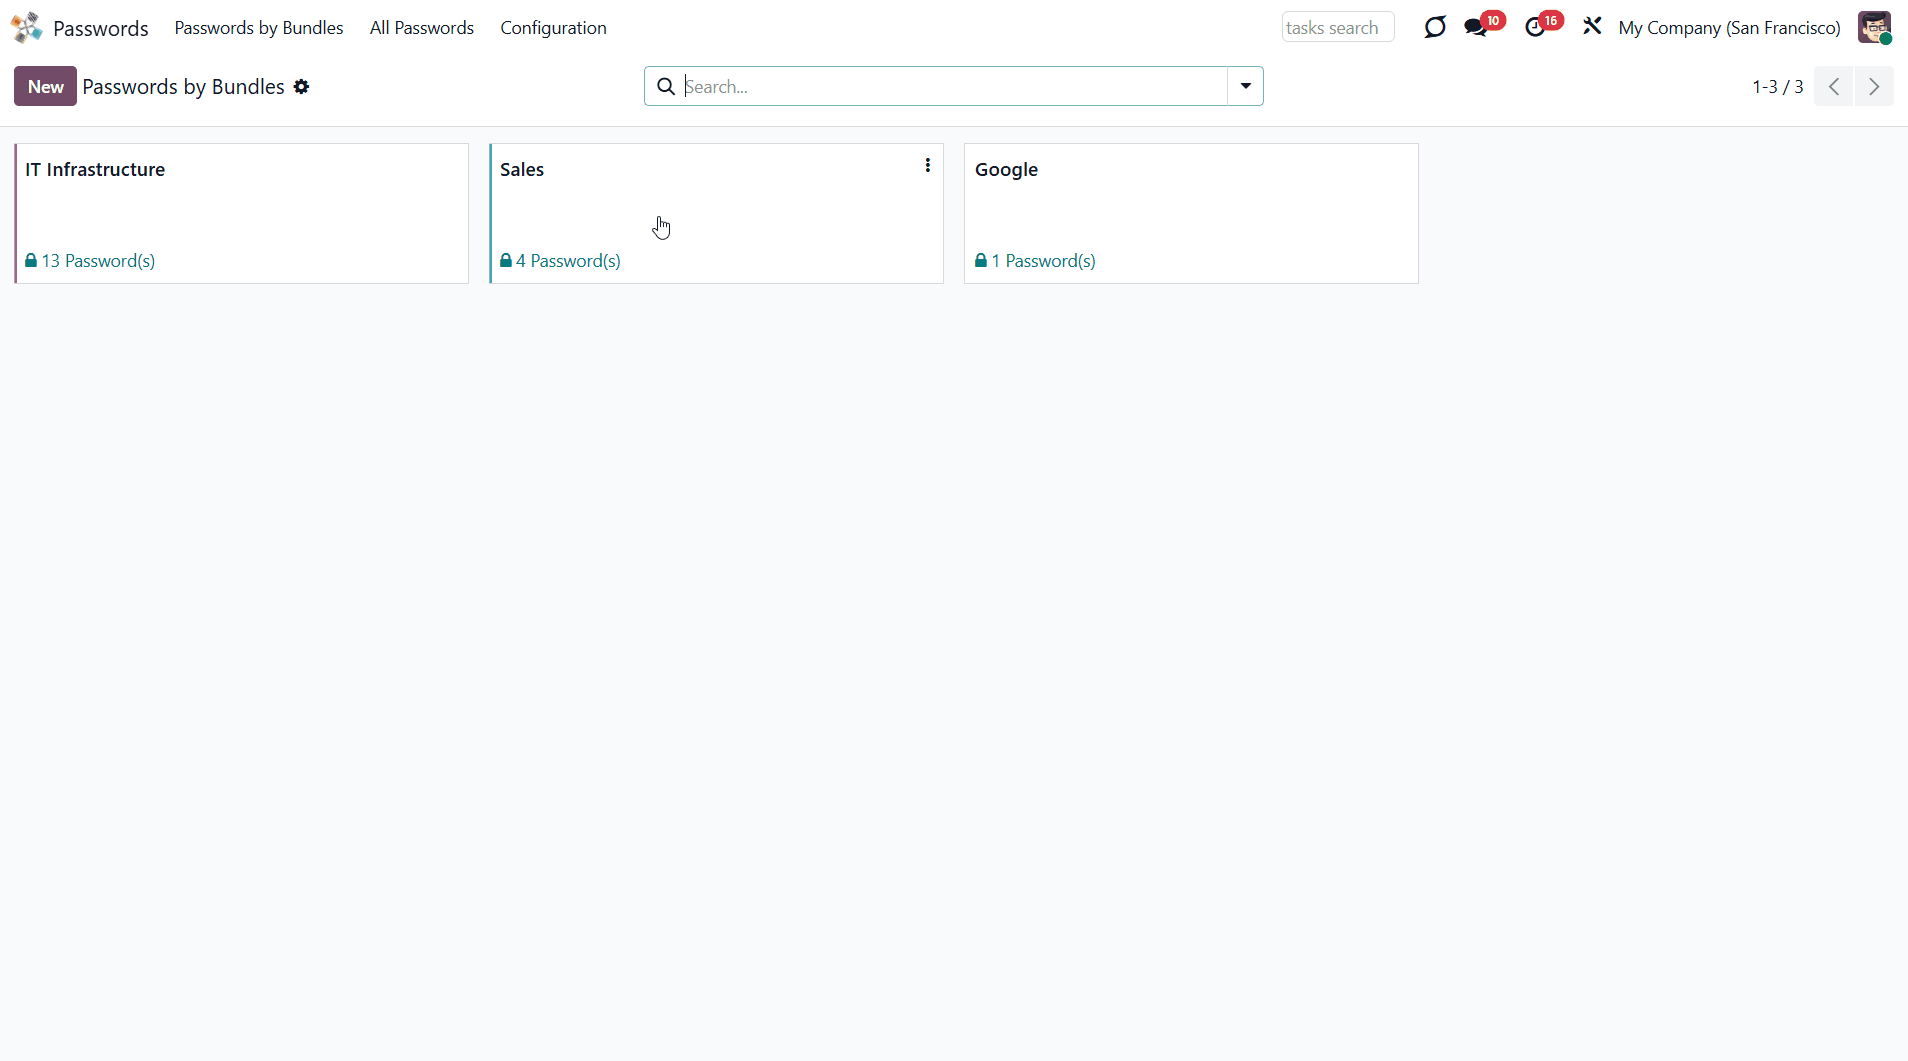
Password Manager Bundles
A password bundle (or password vault) is a set of passwords organized by functional area or by the groups that have access to them. You can create a password vault for the sales team, product managers, technical workers, or any other user group. Anyone can make a bundle for themselves or several employees. While creating a vault, you can also manage a user's access rights and assign someone to update passwords. The creator of a bundle is always its administrator and has access to all its passwords.
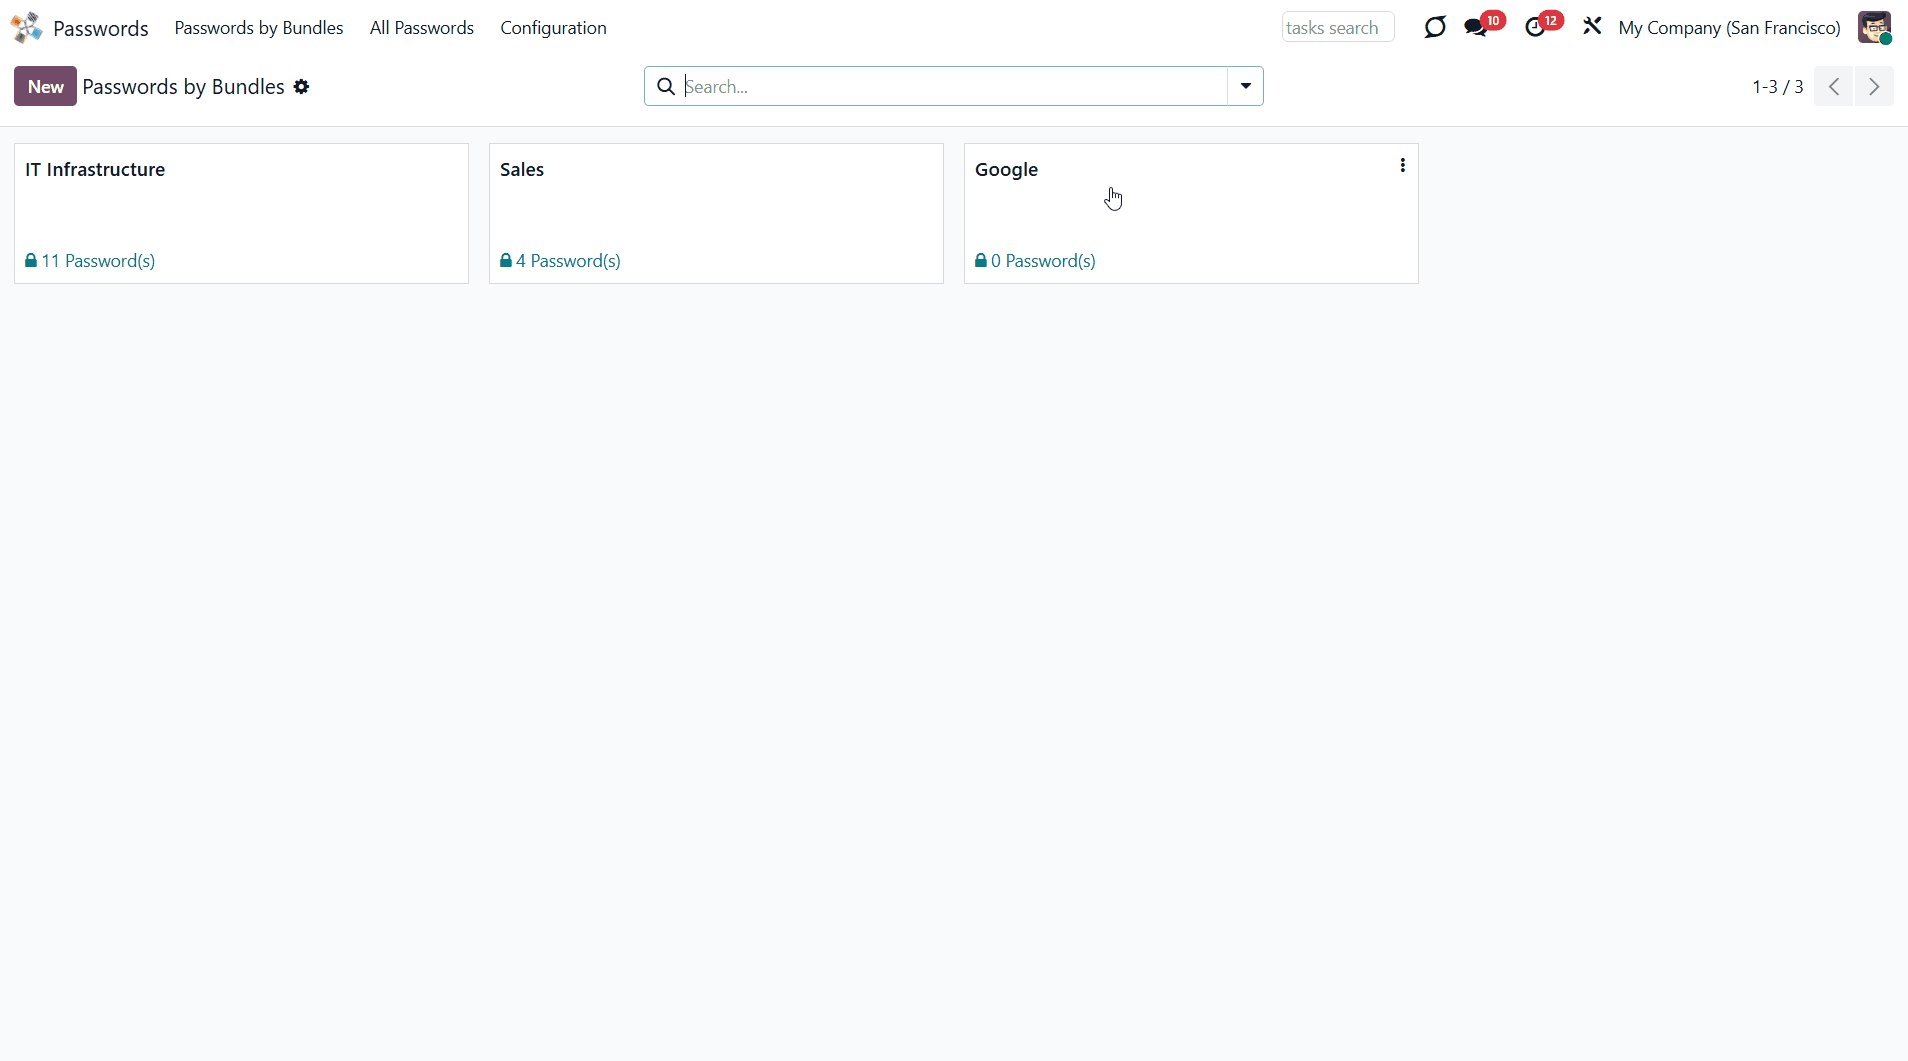
To create a bundle:
1. Open the password manager app
2. Click 'New'
3. Write the vault's title
4. Manage access levels, set an extra password, and add notes.
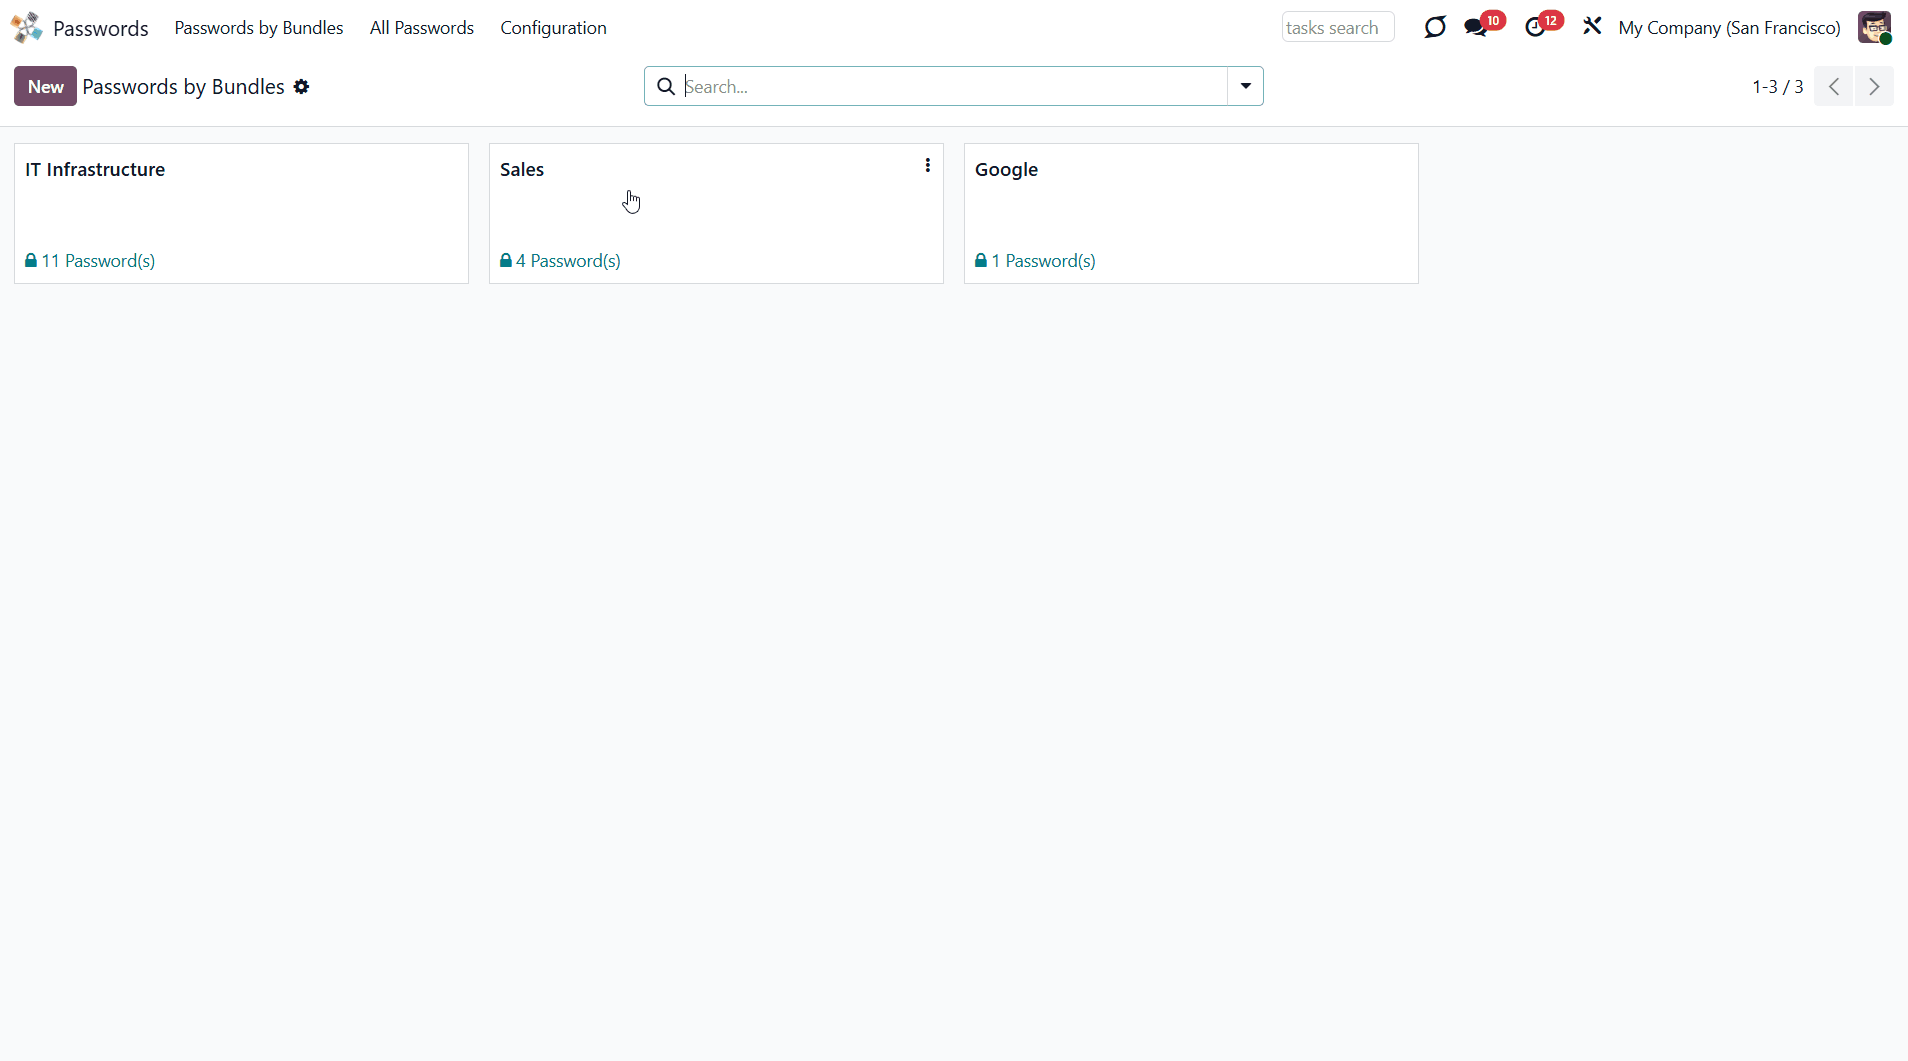
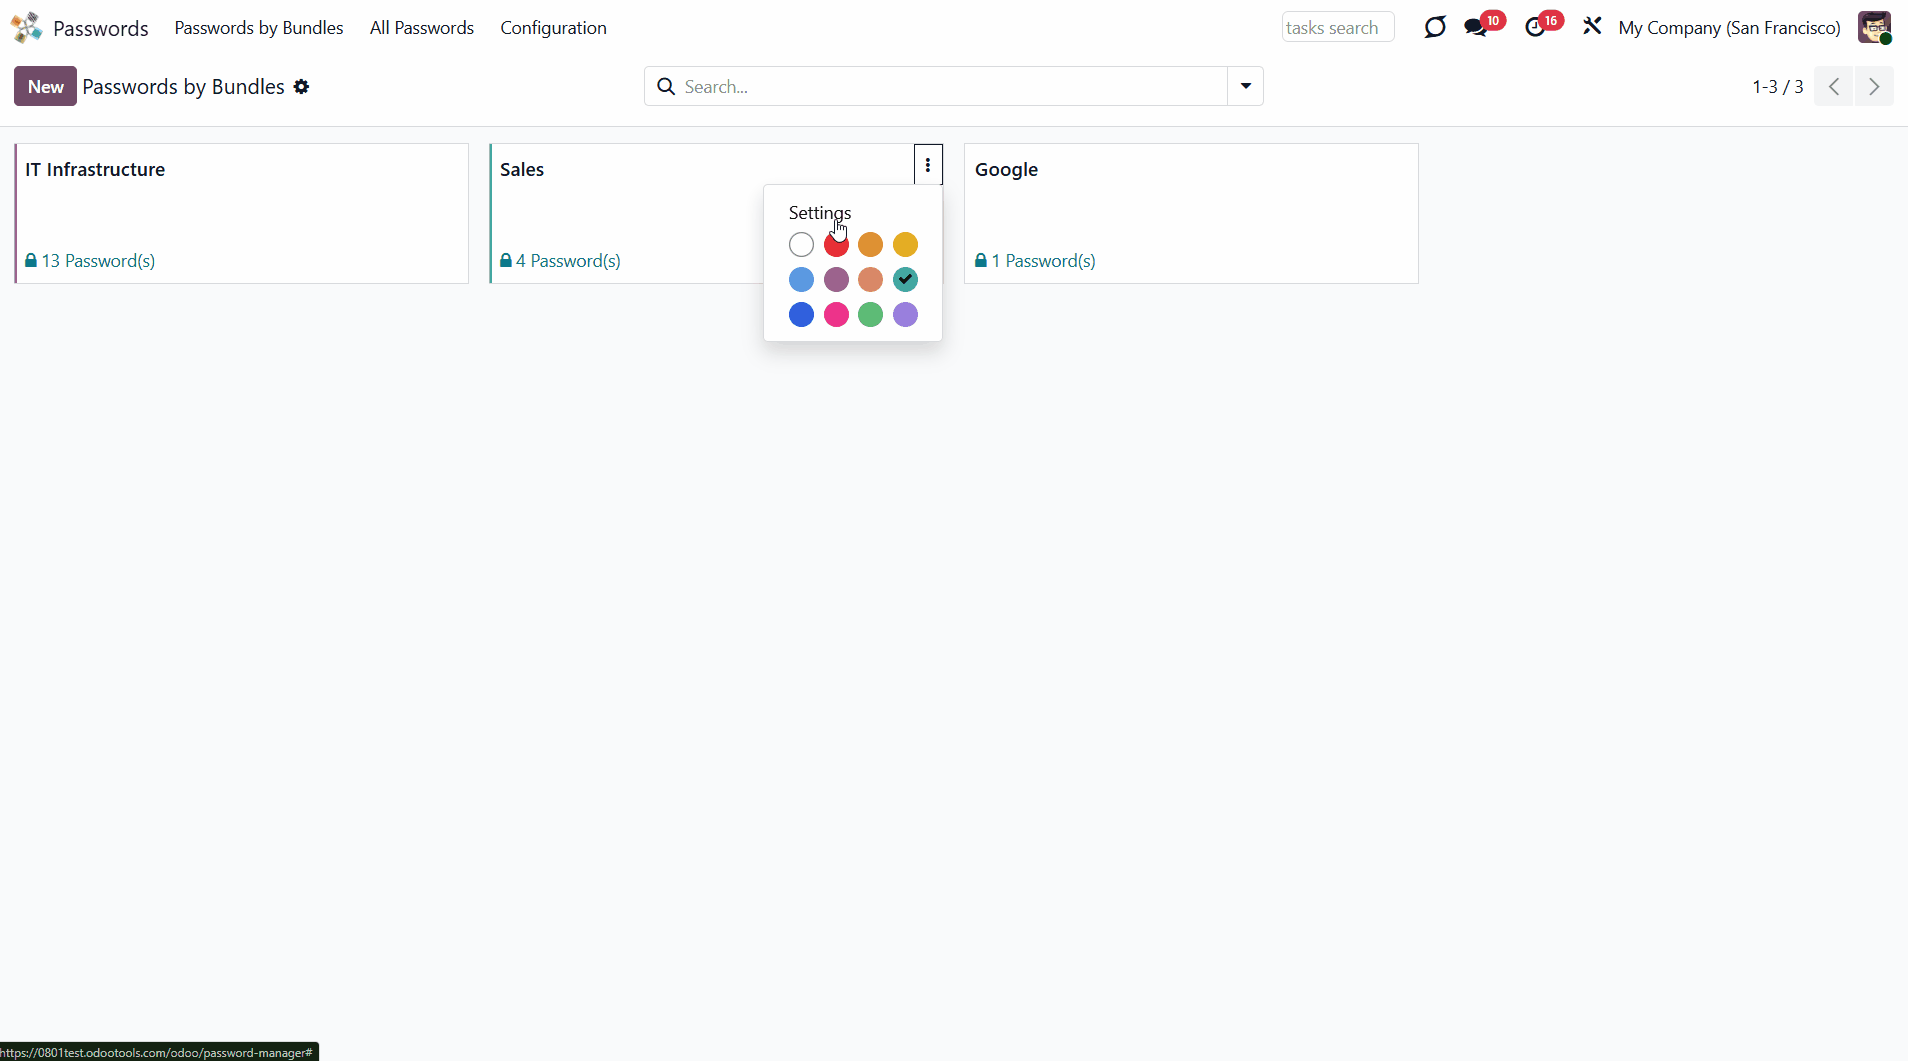
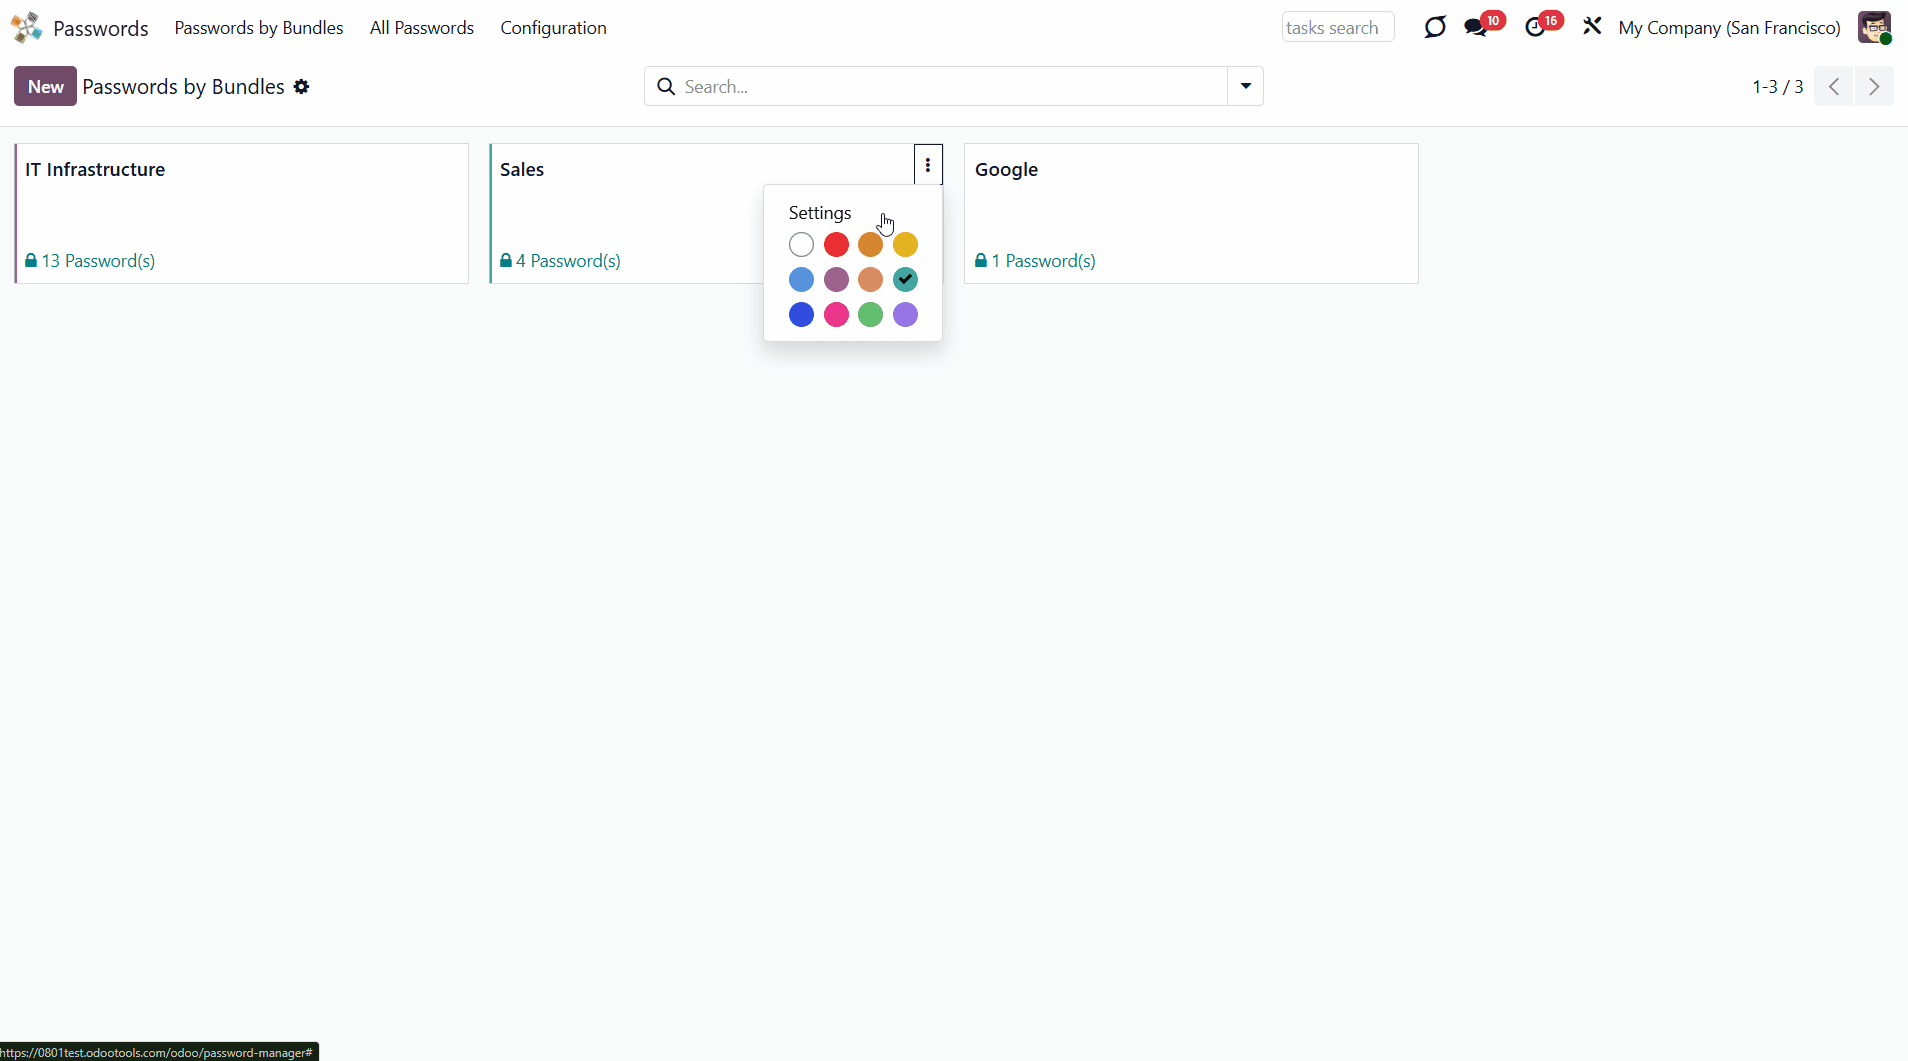
To edit an existing vault, click on the three dots in the top right corner of a vault. Here you can also choose the vault's color for convenient navigation.
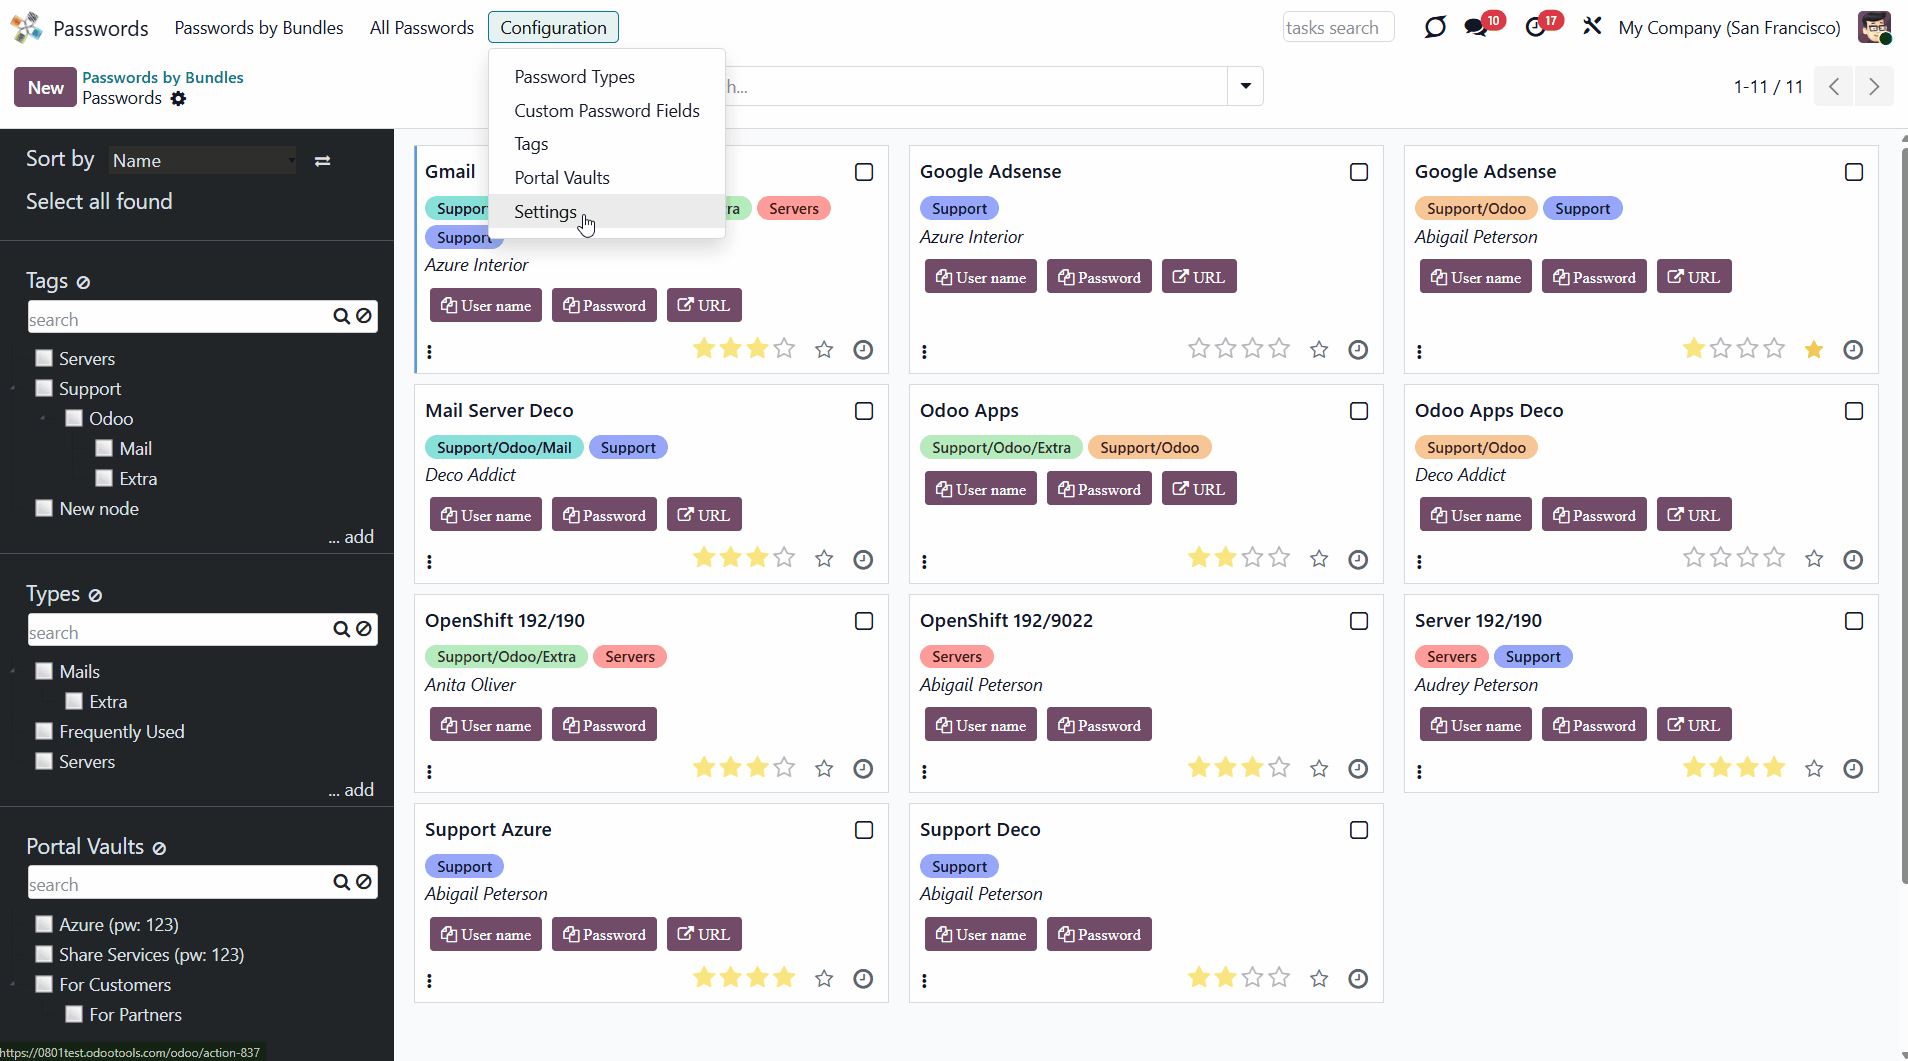
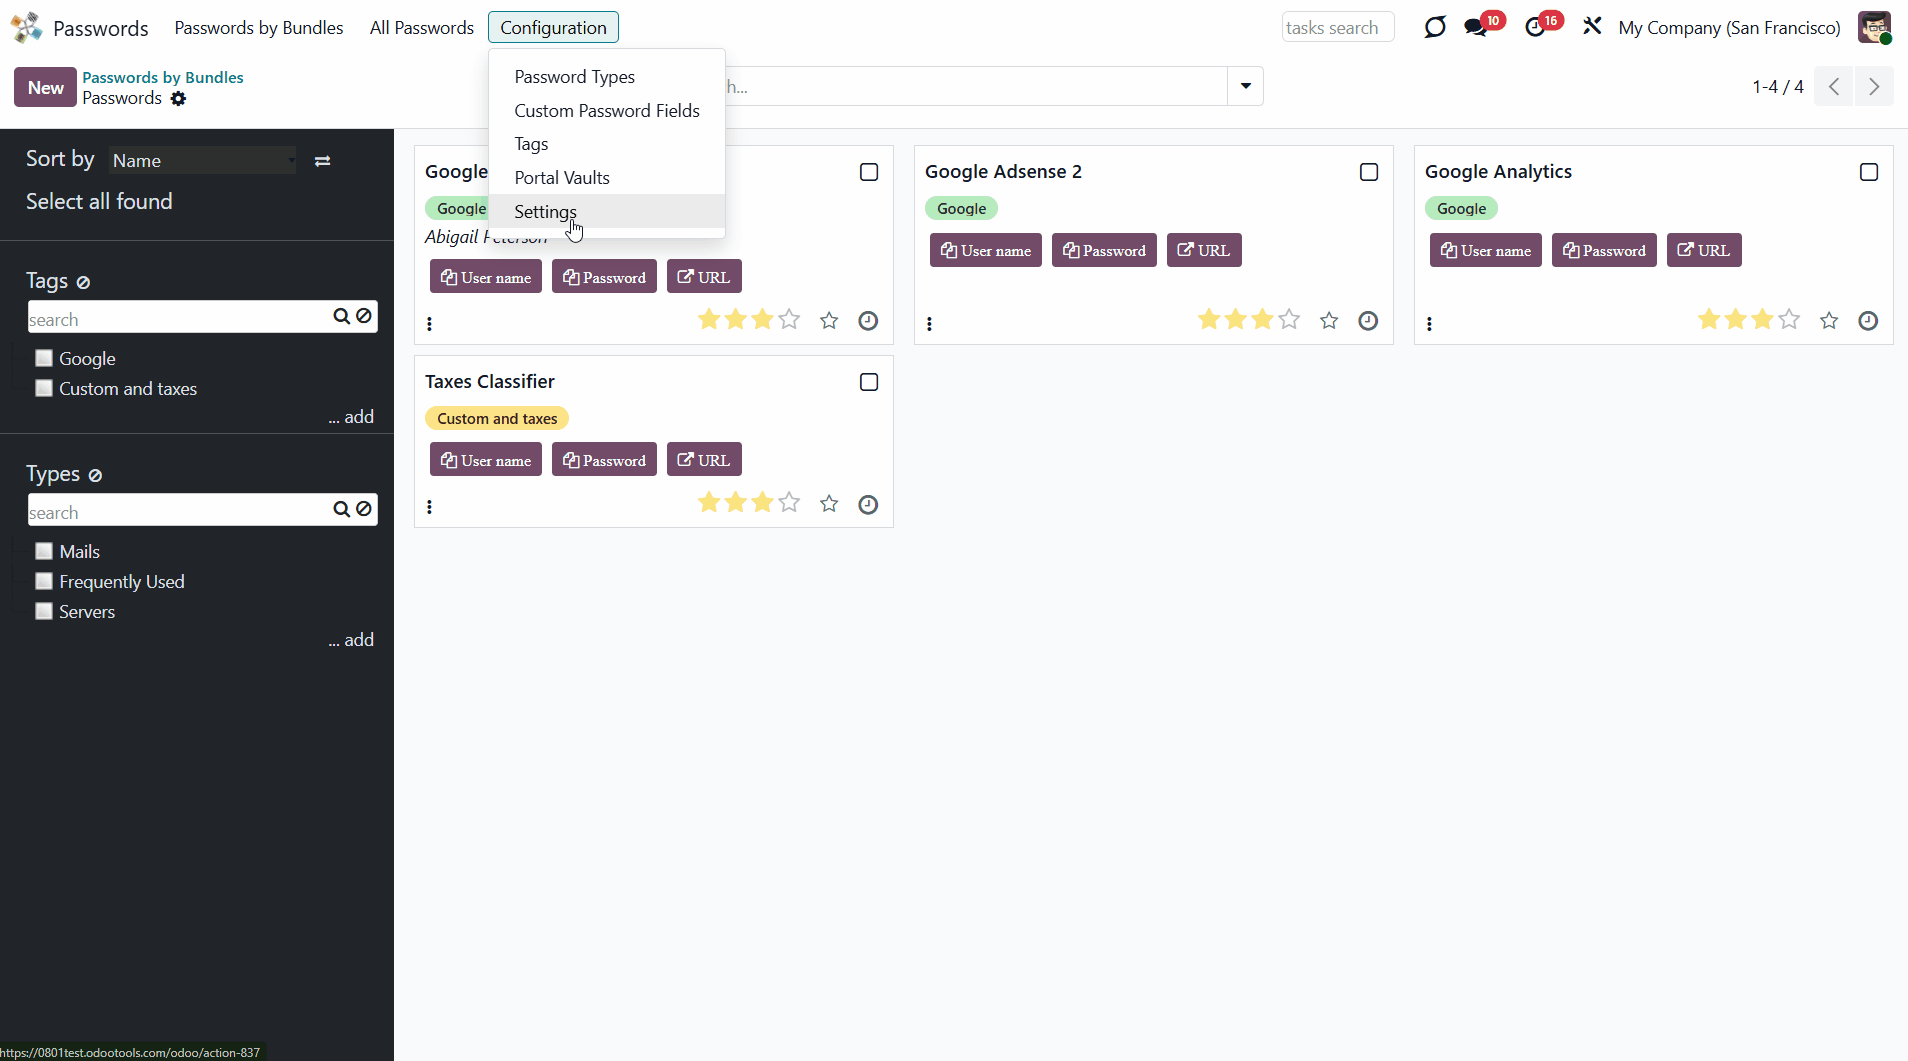
Also, you can open passwords from all bundles. In this case, if some bundles are protected with extra passwords, the system will ask you to enter all of them. To view all passwords and their tags, click 'All passwords' in the interface header.
How to Create a New Password
In a password bundle, you can create as many passwords as you need. There aren't any mandatory fields, so if you don't need some fields or don't have an opportunity to fill them all, you can fill only those fields that you want or need. For example, if you use an email address to sign in rather than a username or phone number, you can leave these fields empty.
To create a password:
1. Open the password manager app
2. Open a password bundle where you want to create a password
3. Click 'New'
4. Write the password's title
5. Choose or add some tags for an easy search
6. Choose or create the type of password (available if you have Password Manager: Custom Fields installed in your Odoo)
7. Write the user name that you use on the site
8. Type your password, if you already registered and have it, or set the auto password generation in the app's settings, or generate it by clicking on the 'Arrow' icon on the right in the password field (Choose the length and contents of the password > Click 'Save&Close')
9. Add a URL of the site, an email, and a phone number used for the site
10. Add a partner, if you want the password to be connected to a contact
11. Optionally, in the tab 'Extra Security', choose users or user groups that will have access to the password. The setting applies only to users with read access to the bundle. If the fields are left empty, the password is considered global and visible to anyone with access to the bundle. If at least one field is filled in, the password will be available only to the stated users or user groups. The user who created the related bundle will have the right to the password regardless of its settings.
12. In the 'Info' tab, tick the box 'No update required ' if you don't want to generate an activity to change this password if you enabled the notifications in the bundle's settings
13. If you remove the tick from the box 'Active', the password will be archived and hidden
14. In the 'Notes' tab, write your notes or attach a file if you want.
As you create a password, its strength is automatically calculated in real time. The strongest passwords get four stars. This allows users to see the security issues and cope with them.
To edit a password:
1. Open a password bundle
2. Click on the password that you want to edit
3. Click on the password's title on the right side of the interface
4. Change anything the way you like.
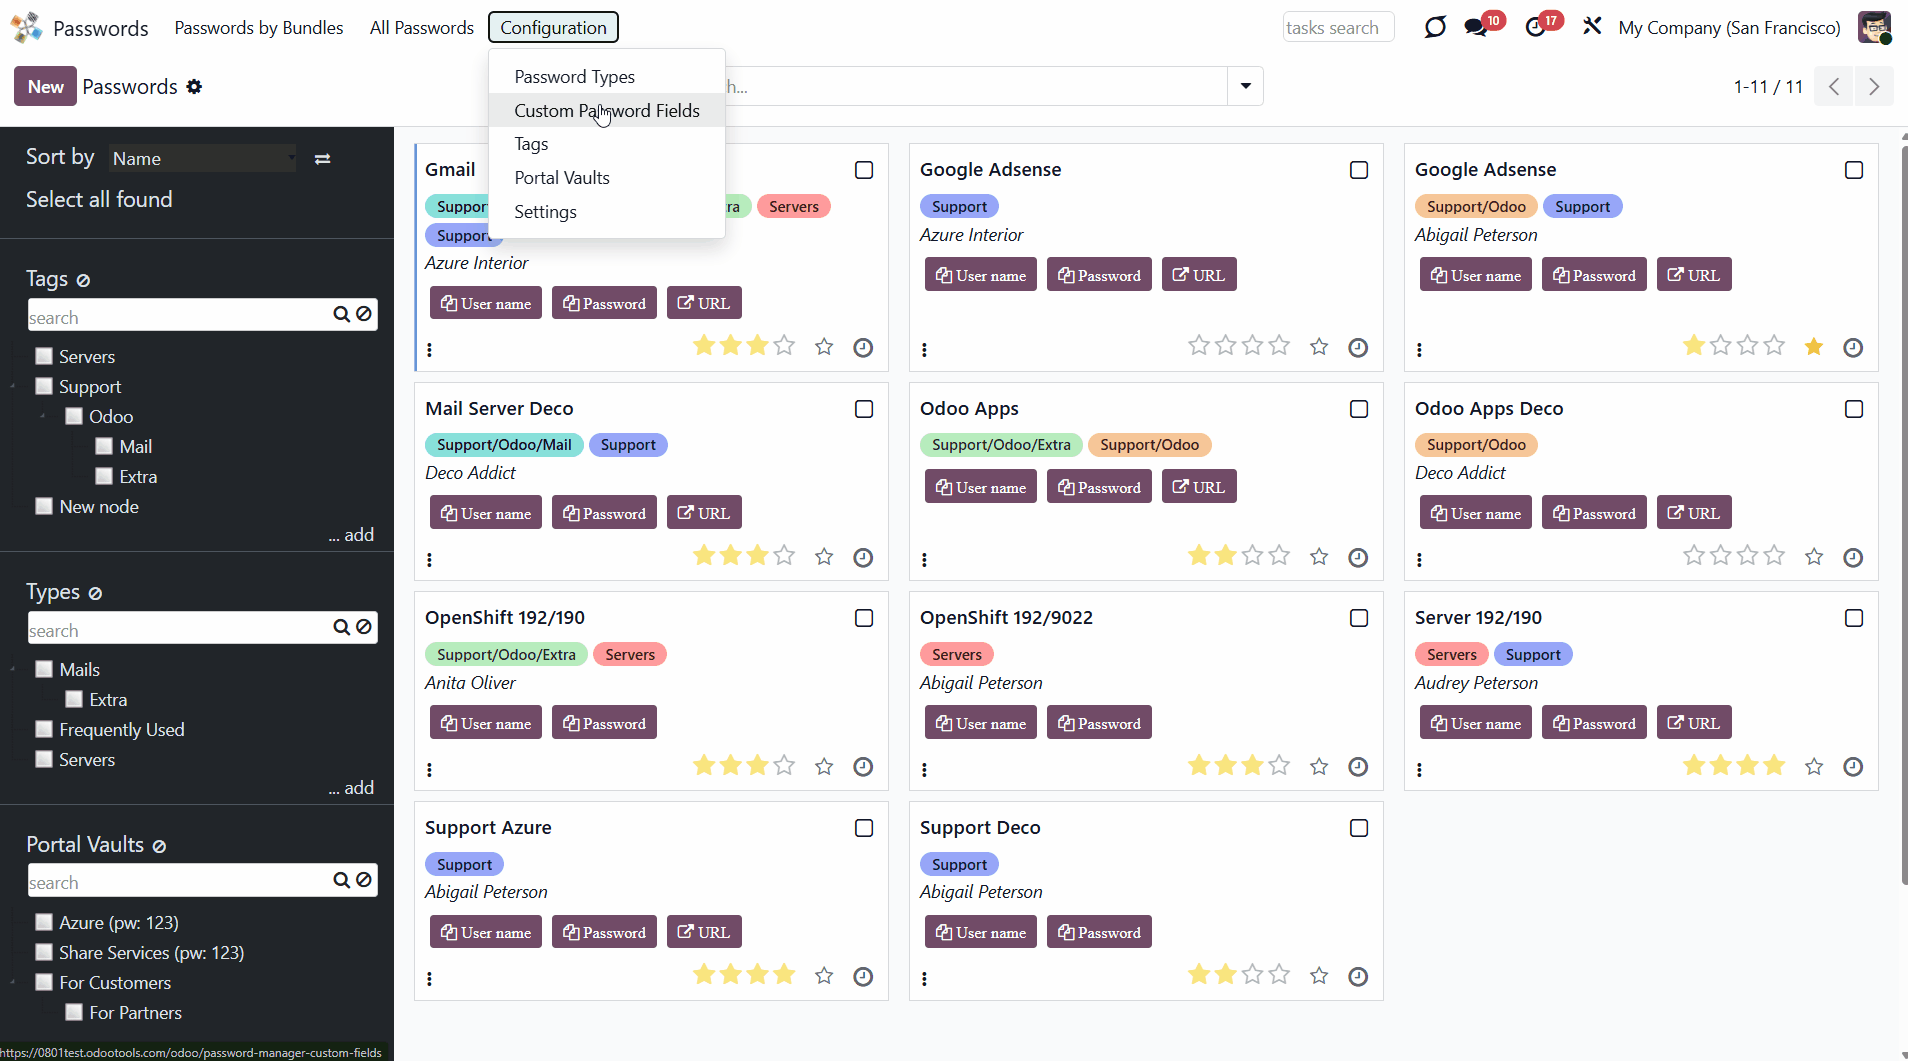
Single View Interface
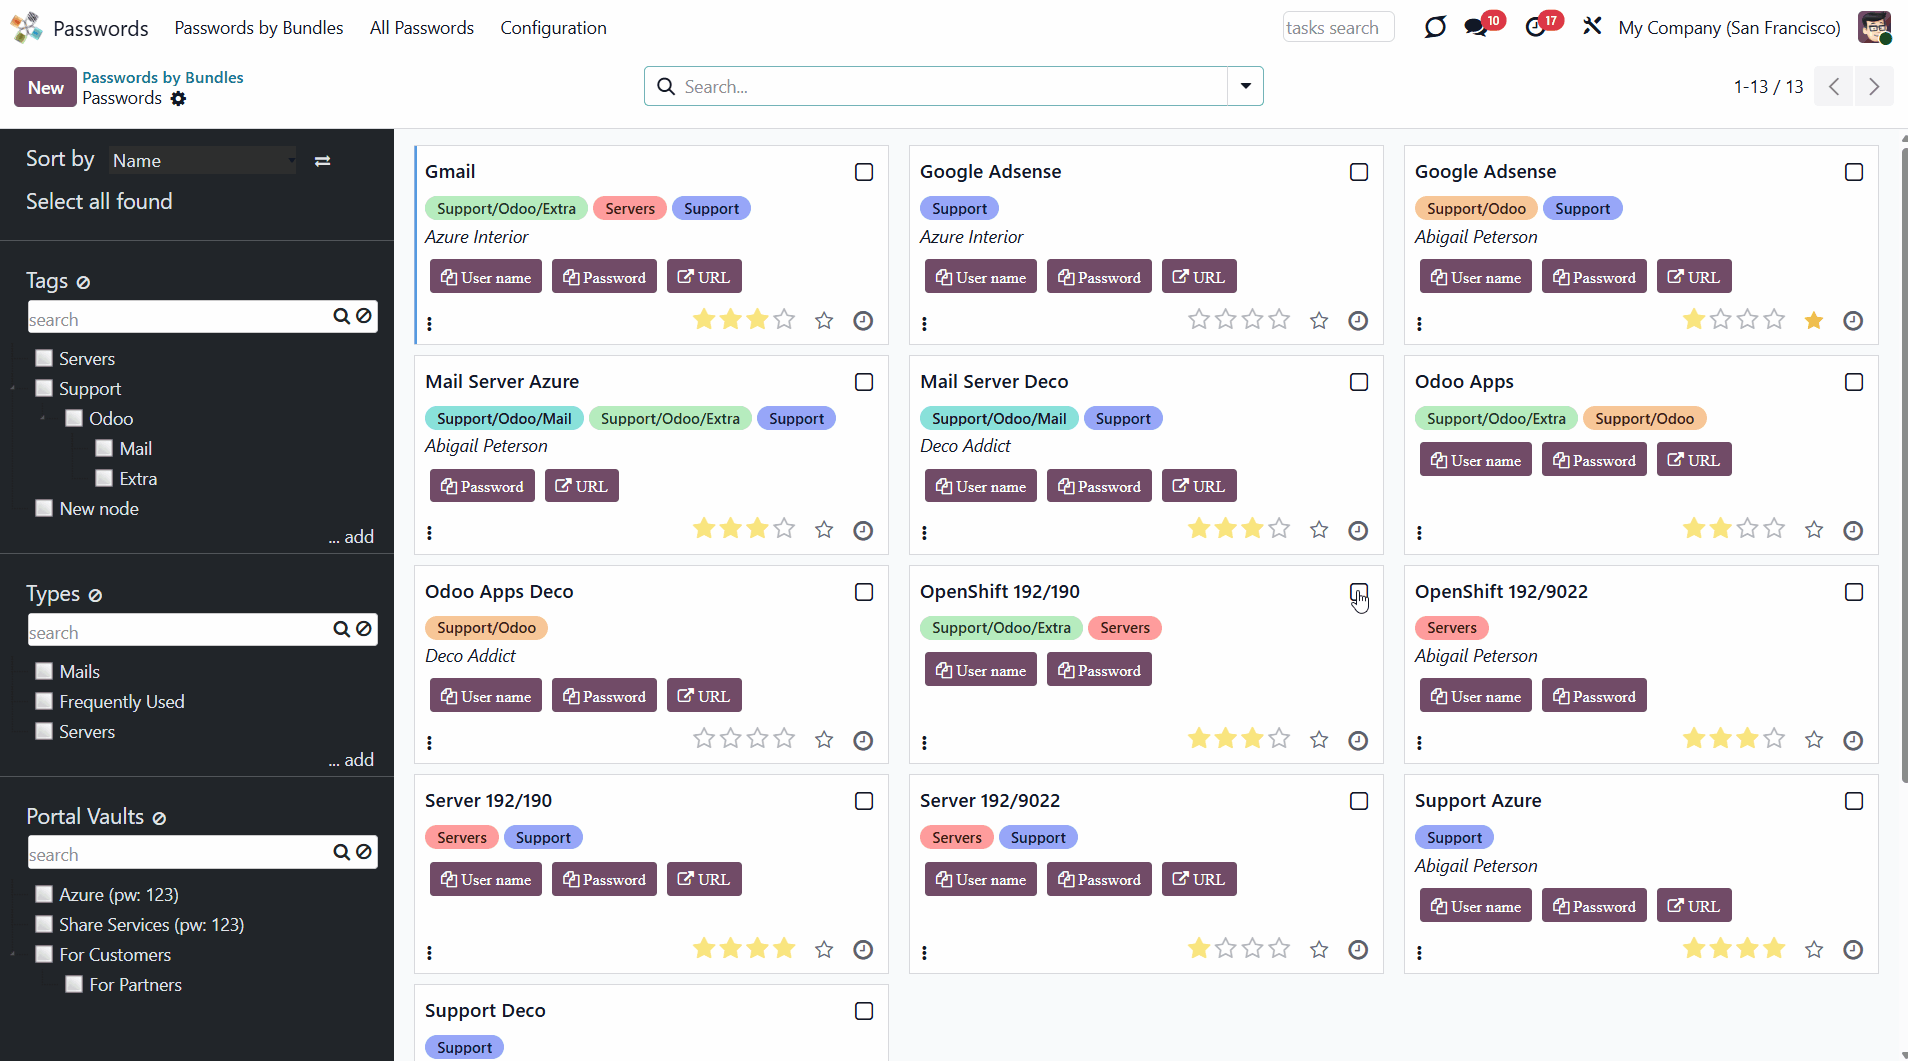
The innovative single-view interface is implemented in the password manager. This allows you to manage passwords and tags, and copy credentials from the same interface without opening the password form.
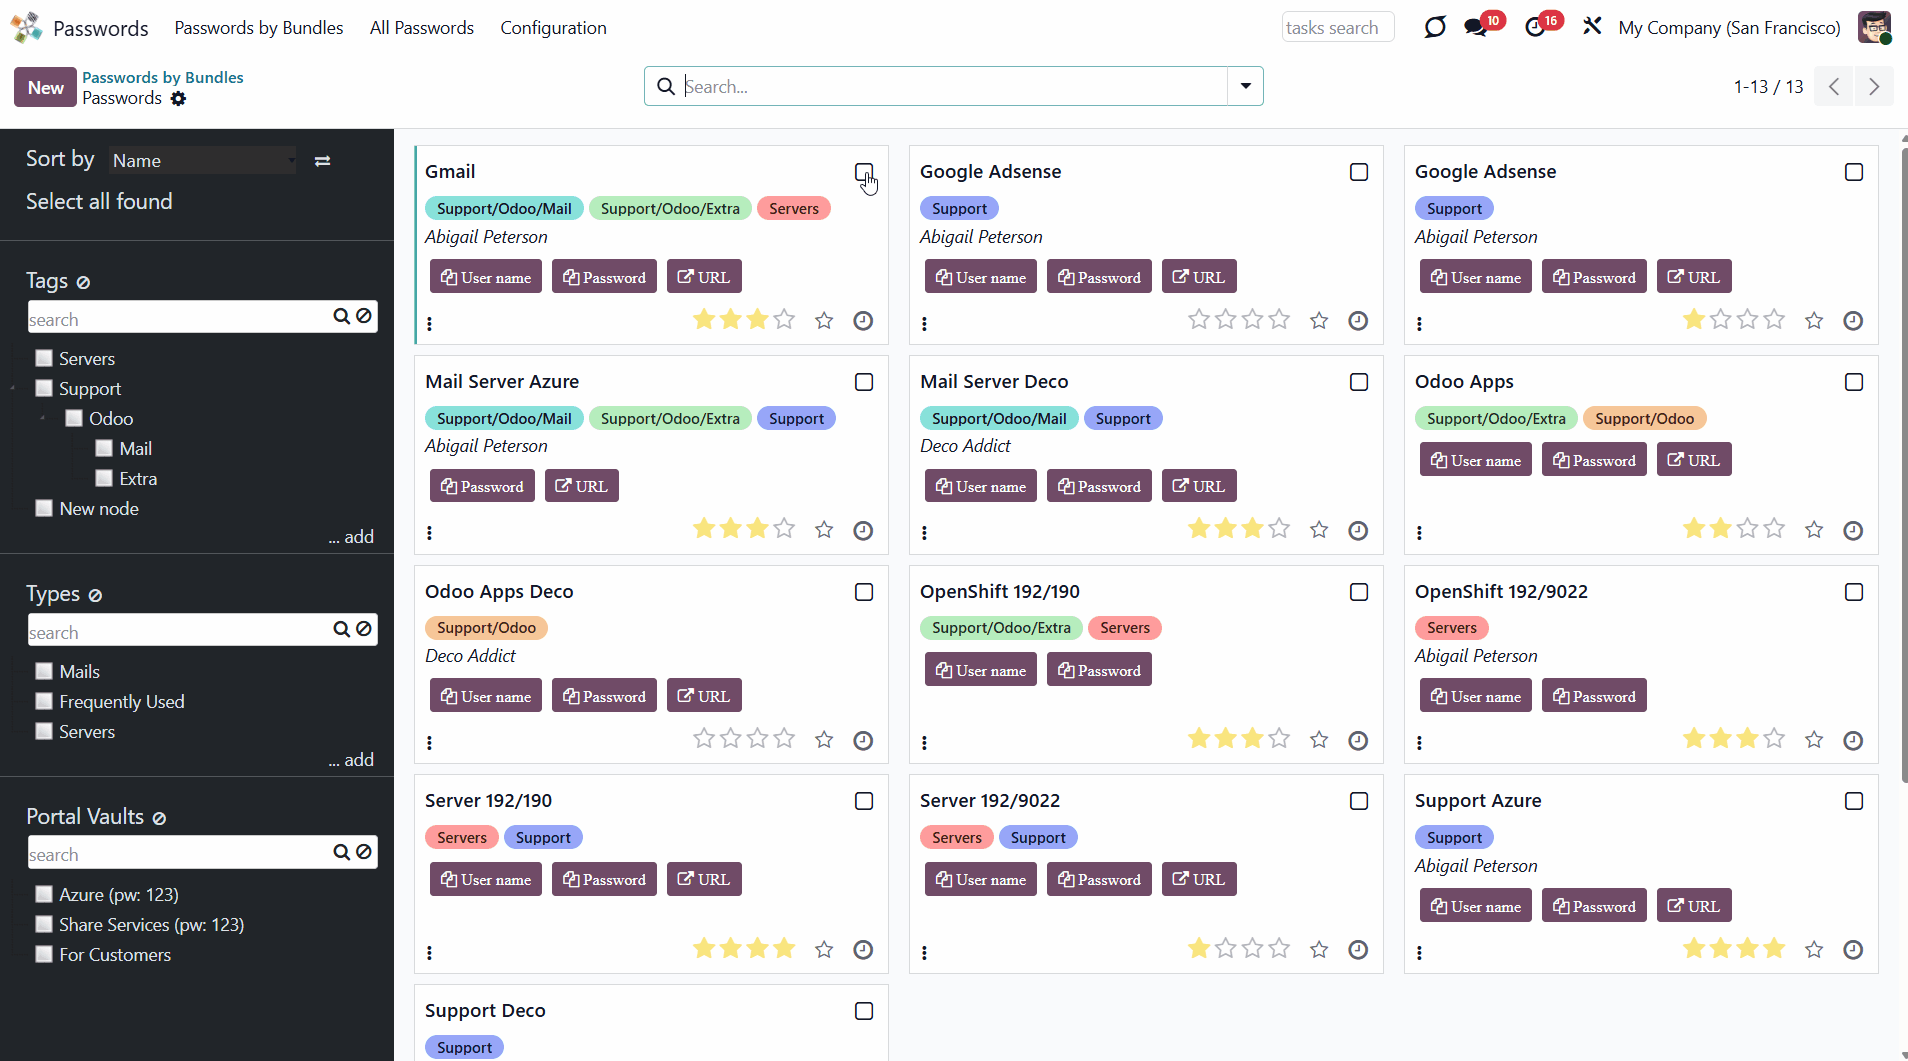
When you open a password bundle and click a password, the interface is divided into three parts: a central part with passwords, and two functional parts with sets of control elements on either side.
The first functional part lets you sort passwords by various criteria, select all found passwords, add tags, and view all passwords by tag.
You can sort passwords by name, creator, partner, create date, and write date.
To sort passwords:
1. Open a password bundle
2. Choose the sorting criterion
3. Click on the 'Arrows' sign to see passwords in the reversed order.
If you click on the 'Select all passwords' button, you will see the details of all these passwords in the third functional part of the interface.
To organize passwords, you can create some tags. To add a tag, click '...add' and write the title. To edit, archive, or delete tags, click on them with the right side of the mouse. Move tags using drag-and-drop. You can add a tag hierarchy. In this case, if you tick the parent tag, you will see the passwords for all tags it includes. Find a specific tag quickly with the tag search bar.
You can manage all available tags from password bundles and create new tags in Configuration > Tags.
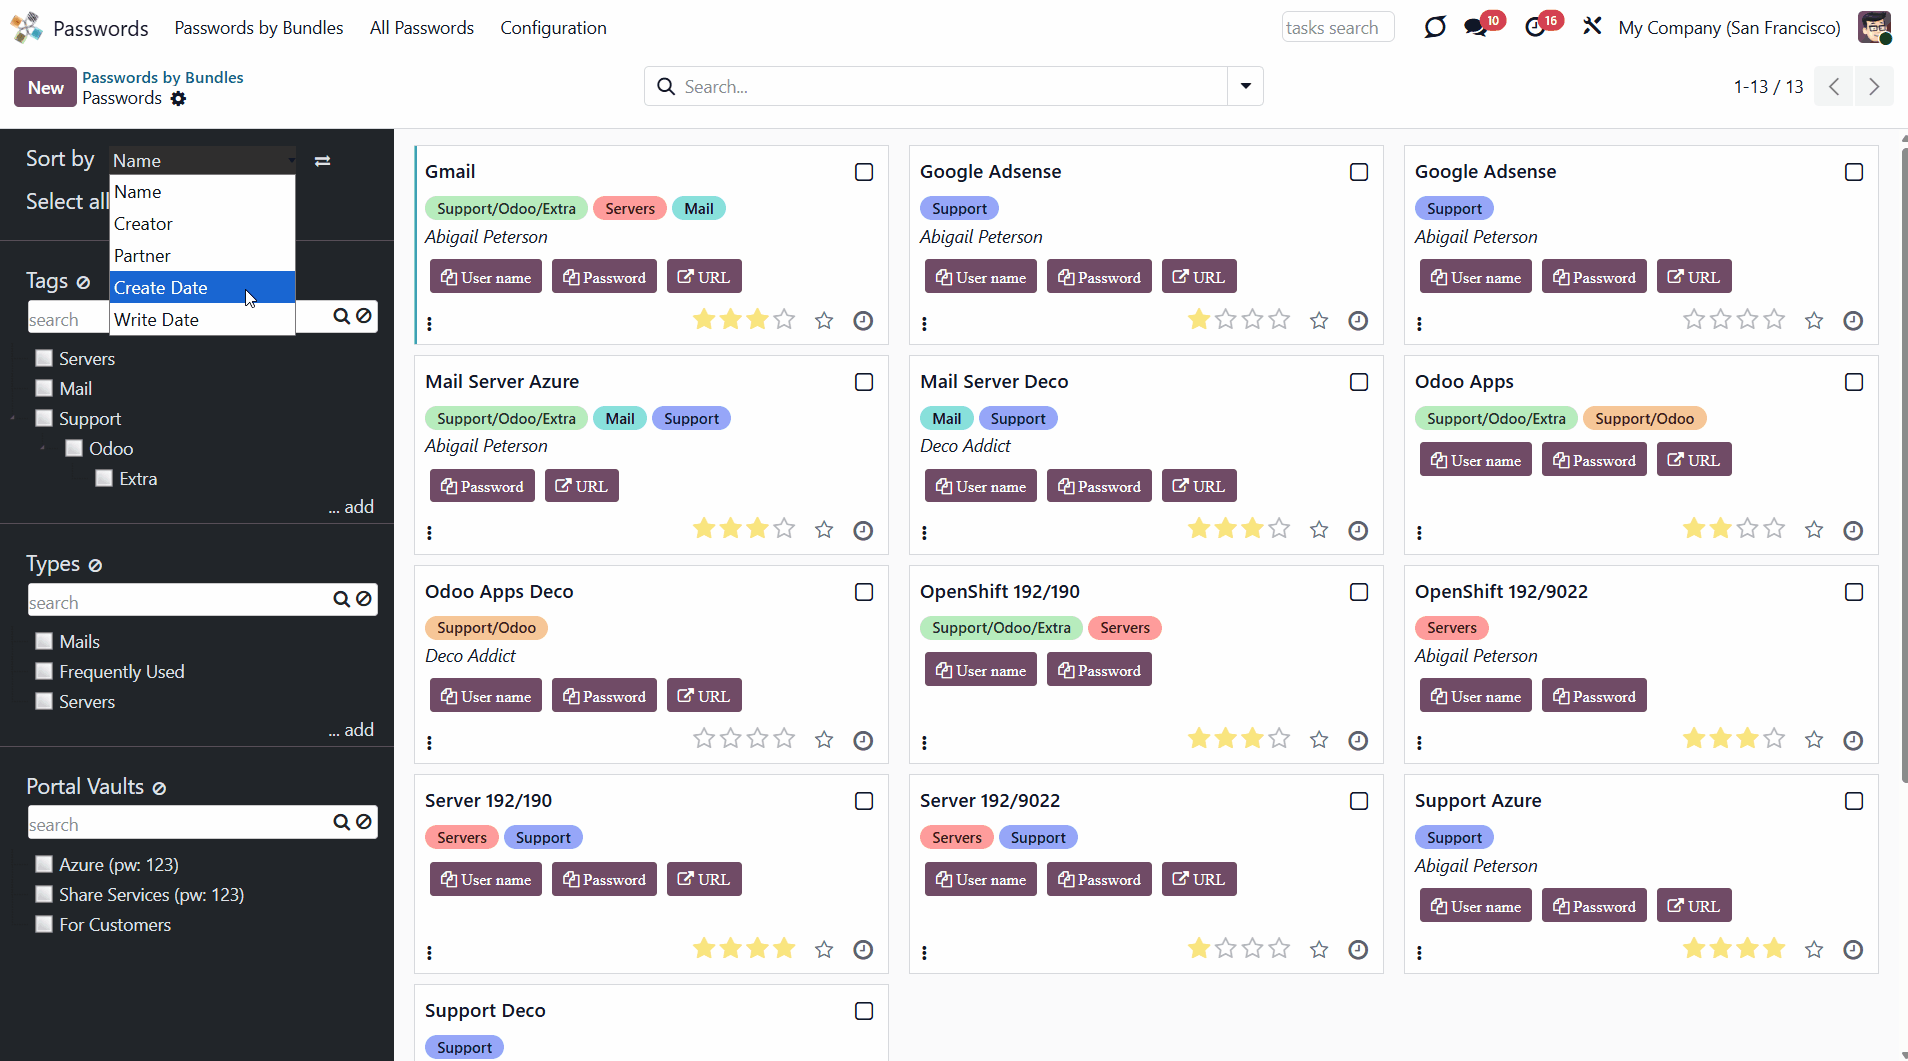
The central part shows password cards, each with the password title, tags, linked contacts, and password strength. Use the buttons on the password cards to quickly copy the credentials and open the related URL in a new tab. Here, you can also add a password to favorites and remove it from favorites to find the most essential passwords quickly and check whether an update is required.
Click the three-dot icon in the bottom-left corner to choose the color and highlight the password.
To add a password to the selection, click the password card or tick the box in the top-right corner. At the same time, the user name will be copied to the clipboard, so you can start filling in the details on the target site straight away.
When you choose several passwords and then open another tag, your choice will not be reset.
You can quickly add a tag to all chosen passwords. To do that, select the passwords and drag and drop them into the required tag. The already assigned tags will not be removed.
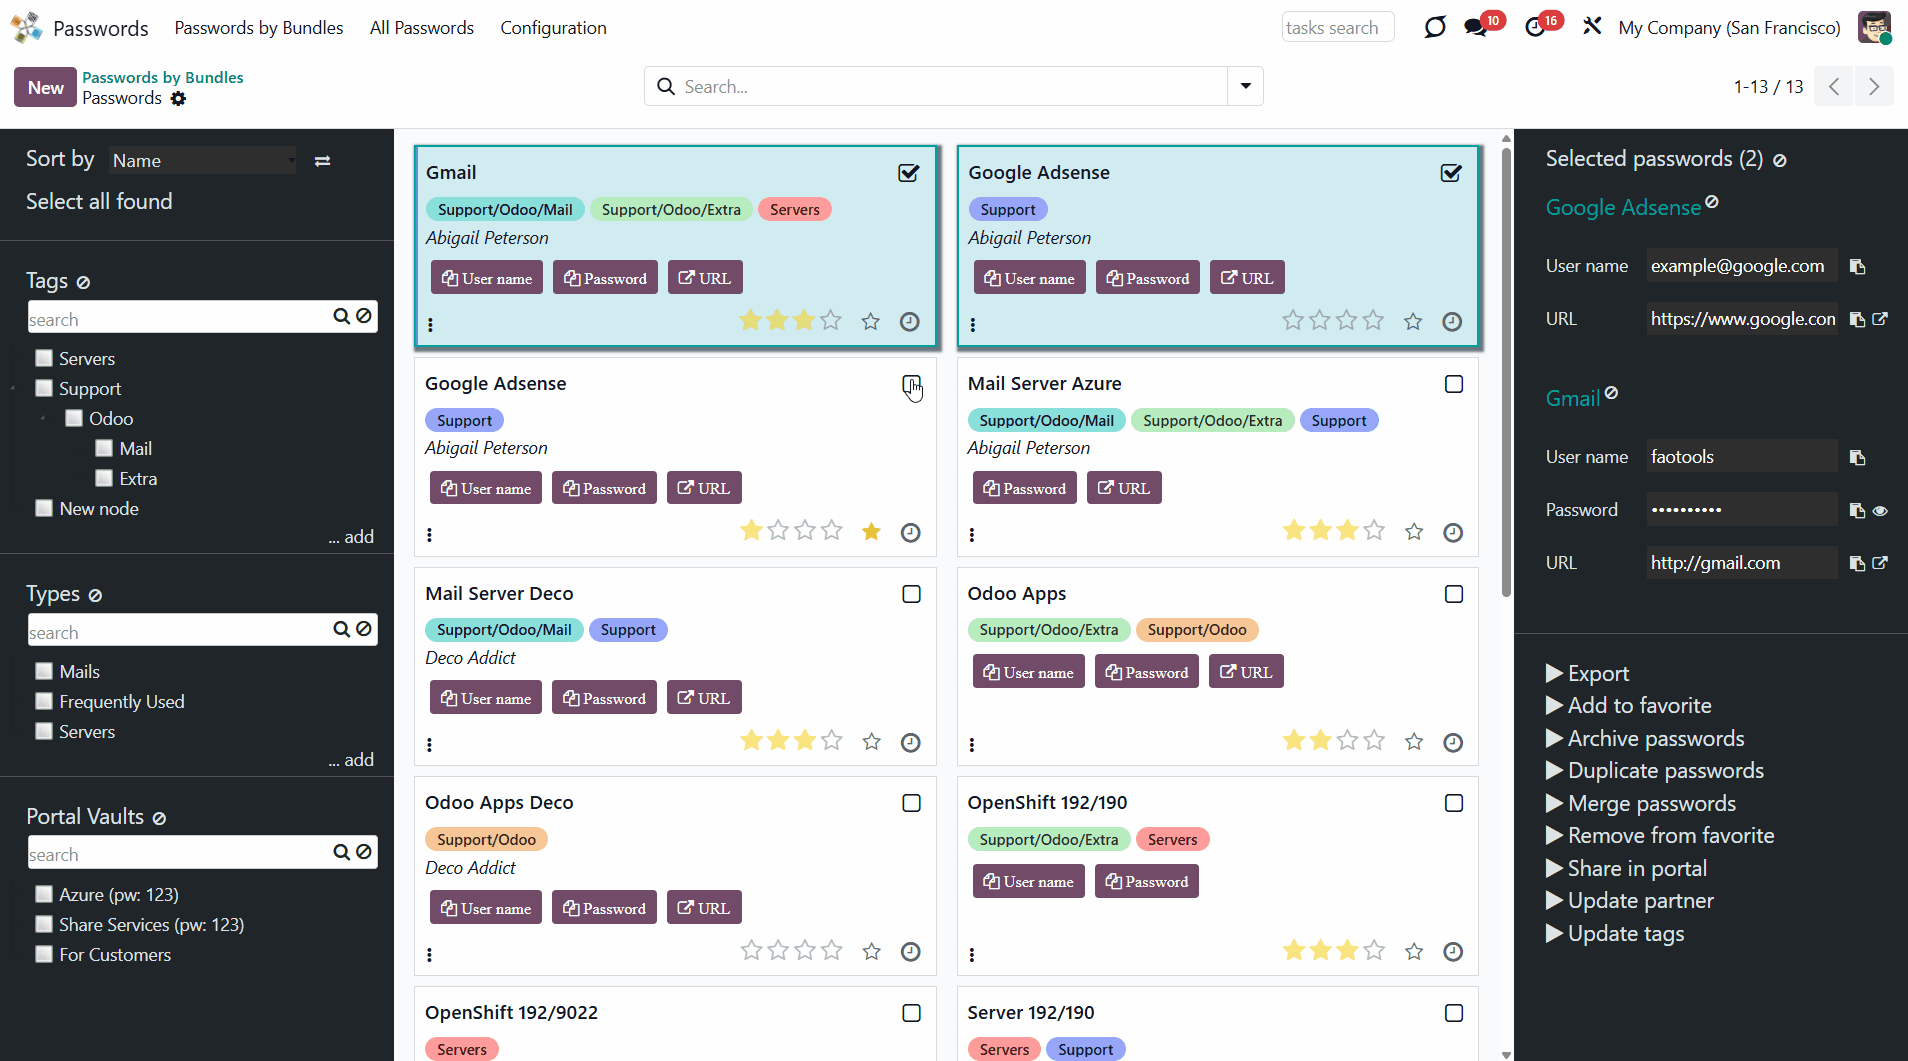
The third functional part, the one on the right side, appears as you click on a password card. Here you can see the usernames, passwords, and URLs for all selected password cards. You can easily copy them from here by clicking on the 'Copy' icon. Click on the 'Eye' icon to see the password. Click the 'Open in a new tab' icon to open the site listed on the password card in a new tab.
It is possible to add some mass actions to the third functional part for extra convenience. For that, go to Configuration > Settings, and scroll to 'Mass actions'. Here you can add actions and delete the ones you don't need. Drag and drop to choose the sequence of mass actions.
Here is the list of the mass actions that can be added:
You can choose the fields to export in .xlsx and .csv formats of all chosen passwords. Let users export found and selected passwords by ticking the box 'Export passwords' on the configuration page.
Add or delete password's tags.
Create a copy of the password card.
Combine passwords to avoid duplicates.
After archiving, all passwords you chose will be hidden from the view, but you can always restore them.
Restore the archived passwords to make them visible again.
Delete the passwords that you do not need.
You can remove all chosen passwords from favorites at once.
If duplicates are found, they can be merged into a single record. To that end, do not forget to add the mass action 'Merge passwords' on the configuration page (see Duplicates detection and passwords merging).
Password Generator
The Password Manager app has a built-in password generator. It is possible to generate passwords based on chosen length and requirements. In the settings, you can choose to generate passwords automatically as soon as you open the password-creating wizard. There, you can also set the default password length and contents. Or, you can do it manually each time you open the password-creating wizard by clicking the 'Arrow' icon on the right side of the password field.
To generate passwords automatically:
1. Open the password manager app
2. Go to 'Configuration' > 'Settings'
3. Find 'Generate passwords on create' and put a tick in the box on its left side
4. Choose the default length and requirements for generated passwords.
As a result, you get an automatically generated password that is evaluated in real time.
You can set any 'Default length for generated password'. You can always change it manually in the password wizard, depending on the site's password requirements. There are several available 'Default requirements for passwords':
DscWk0UBG6pOS53
RwACDdbeHpHMthg (For example, letter O and zero 0)
User Access Rights. Team Use
All internal users can open the password manager app, but they can only see passwords they have access to. Only people mentioned in the bundle settings can see the bundle.
There are three types of access rights:
1. Admin rights (can change the app's settings, create, edit, and delete passwords)
2. Full rights (can't change the settings of the app, but has access to all passwords)
3. Readonly (can only see passwords, to which the access is given, can't edit or delete them).
The creator of a bundle is always its administrator and always has access to it.
You can set users' rights while creating or editing a vault.
To set users' rights to a bundle:
1. Open the bundle wizard
2. Find the tab 'Access levels'
3. Choose the access level of the users or user groups.
It is possible to give access to a user or a group of users, for example, to the Sales managers. In this case, all users on the Sales team will have access to the password bundle. If a person belongs to at least one group of users with access to the password bundle, then they also have access to it.
Security Layers
The tool introduces several security layers to reduce the risk of data leaks. All passwords are symmetrically encrypted. It means that to decrypt a password, plotters should know the exact decryption algorithm and the vault decryption key.
You can add an extra password to a password bundle. This way, you will only need to enter one password to access all the passwords in the bundle. If a user has access to this vault but doesn't know the password, they will not be able to open it.
You can also set the time for which the bundle is accessible without entering the password again. After this period, the password manager will no longer allow you to edit, copy, or view passwords and will prompt you to re-enter the password. The session duration after a successful login is set in minutes. This is especially convenient if you work from someone else's computer.
You can set a different password for each bundle or leave some bundles accessible without entering a password. The Vault extra password is also stored in the database, encrypted, and may be changed by a bundle administrator.
To add an extra password to a password bundle:
1. Click on the three dots icon, choose 'Edit'
2. Click 'Edit'
3. Click on the tab 'Extra security'
4. Tick the box 'Extra password to open this bundle'
5. Enter the password
6. Confirm the password
7. Choose the max. session time (the time after which you need to reconfirm your password to use password cards); the minimum is 3 minutes.
If the bundle password is set, the passwords will be decrypted using the bundle salt, the entered password, and the bundle key. So, although the bundle salt isn't encrypted, to decrypt it, you'll need the entered bundle password and the bundle key (bundle key = the password hashed with the bundle salt).
When the bundle password is changed, all password keys will be re-encrypted.
You can also update the encryption key and salt of the bundle manually by clicking on the button 'Update Encryption Key and Salt' as you edit a bundle.
Additionally, the Password Manager provides an optional user access logging layer. When the “Log users” setting is enabled, the system records every time a password is accessed, whether it is viewed or copied, both in the backend and in the portal password vault. Each access creates a log entry that includes the user and the access date/time.
All access records are displayed on the “Logging” tab of the password card. Above the log table, the system also automatically shows a list of users who have accessed this password at least once. This always makes it possible to see who may know the password.
For extra security, you can set the app to notify you when it's time to change your passwords. This way, for each selected period, the app will generate an activity indicating that a password change is required. You can set this activity to all valid passwords, or only to the most important ones.
To set the activities:
1. Start creating or editing a password vault
2. Tick the box 'Responsible for passwords update' on the right side of a user or a user group
3. Set the period after which the passwords require an update.
To exclude passwords from notifying about:
1. Start creating or editing a password
2. Open the tab 'Info' and tick the box 'No update required'
3. Click 'Save&Close'.
Sharing Portal Vaults
It is possible to combine passwords into an additional portal vault using a password bundle to share them with specific partners. To turn on password sharing with portal users:
1. Open the password manager app
2. Go to Configurations > Settings
3. Tick the option 'Portal vaults'
4. By default, only a password reference, user name, and password key are shown. Choose what other information should be shown. It is possible to share the fields URL, email, phone, and notes
5. Optionally, share any additional fields, both custom and standard ones, of the following types: char, text, html, boolean, selection, integer, float. For that, choose the fields in the section 'Other portal fields'. In the portal, the selected fields will appear as additional columns
6. Scroll down and find the section 'Mass actions'
7. Click 'Add a line' and add the mass action 'Share in portal'
8. Click 'Save'.
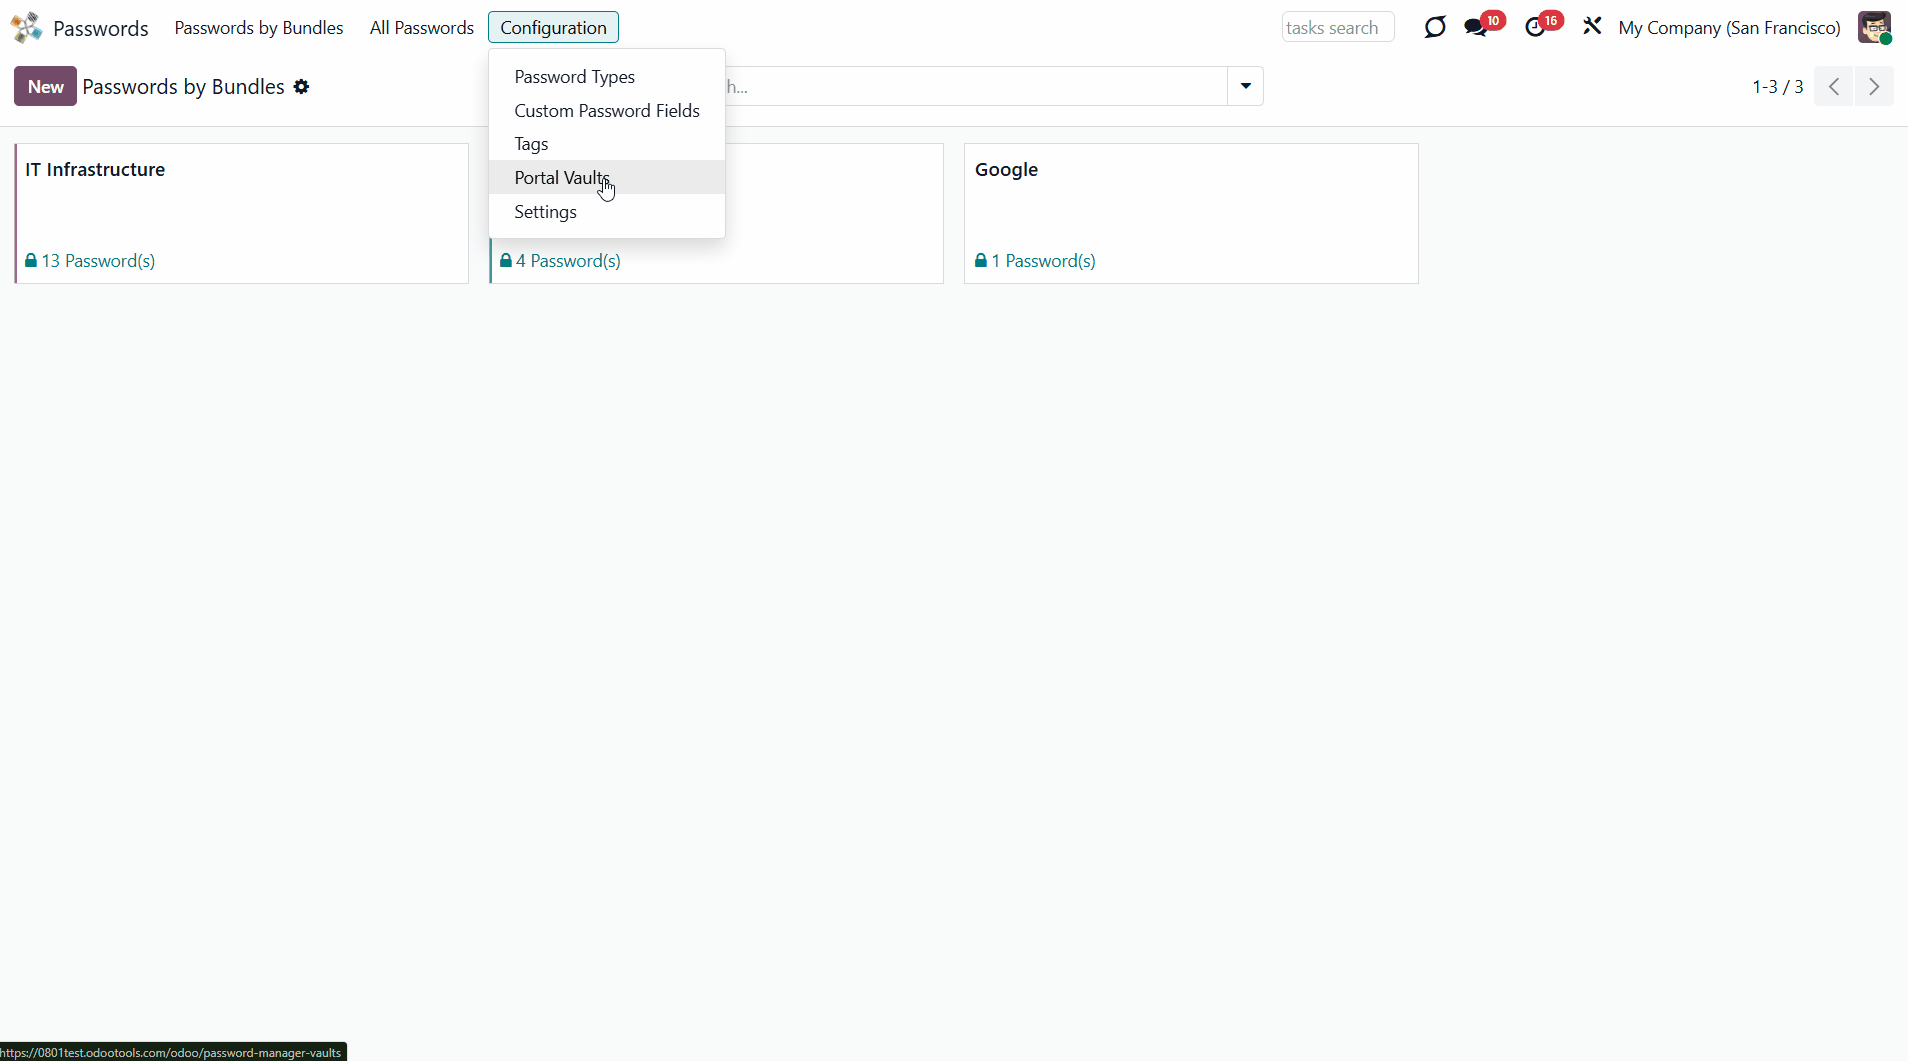
After that, in the left navigation panel, the vaults hierarchy tree and another configuration menu 'Portal Vaults' will be shown as you click 'Configuration' in the systray.
Within a password bundle, you can create an unlimited number of portal password vaults, each of which can be shared with an unlimited number of Odoo partners. There are several ways of creating a portal vault:
1. Through the special menu 'Portal Vaults'
2. As you select the passwords and apply the mass action 'Share in portal'.
To add a portal vault through the special menu Portal Vaults:
1. Go to Configuration > 'Portal Vaults'
2. Click 'New'
3. Type the vault's name
4. Choose the related password bundle. A portal vault is always associated with a single bundle. As you choose the related bundle, the field is hidden and cannot be changed. It isn't possible to add passwords from different bundles into a single portal vault
5. Each portal vault is obligatorily secured with a password. All keys are kept encrypted and can be decrypted only after the vault password is entered. Generate the password for the vault by clicking on the '' icon, or type the password manually and confirm it
6. In the field 'Portal Access', choose portal users who will have access to this vault. Each partner may have access to multiple vaults
7. Optionally, define a validity date for a temporary sharing to auto-archive password vaults
8. Optionally, choose the max. session time (the time after which you need to confirm the password again, to work with password cards), the minimum is 3 minutes
9. Optionally, in the tab 'Shared Passwords', choose the passwords to store in the vault and share from the selected bundle
10. Optionally add notes in the tab 'Notes'.
Each bundle's internal user can create or update any portal vault linked to their bundle. To add a password(s) to a vault, select the passwords and drag and drop them to the related portal vault in the left part of the interface, or trigger the mass action 'Share in portal'. In the latter case, in the opened pop-up window, you will be able to choose an existing portal vault or create a new one.
In the pop-up window, create a new bundle and add partners to share passwords. Optionally, tick the 'Send Invitation' option to send an invitation during sharing. The email template can be edited through the technical settings 'Portal Vault Invitation'. Keep in mind that the action doesn't create portal users. Portal access should be granted from the partner form view (Action > 'Grant portal access').
When the internal password key is changed, the change is automatically applied in the portal as well; all shared passwords are recalculated, and portal users always have access to up-to-date data.
Internal users have full rights to all vaults and the bundles they can read. When an internal user opens a password bundle, the list of portal vaults, if any, appears on the left side of the interface.
Use the search bar above the portal vaults list to quickly find the required ones. Right-click on a portal vault to rename, edit, or archive it. Tick the vault to see the included passwords.

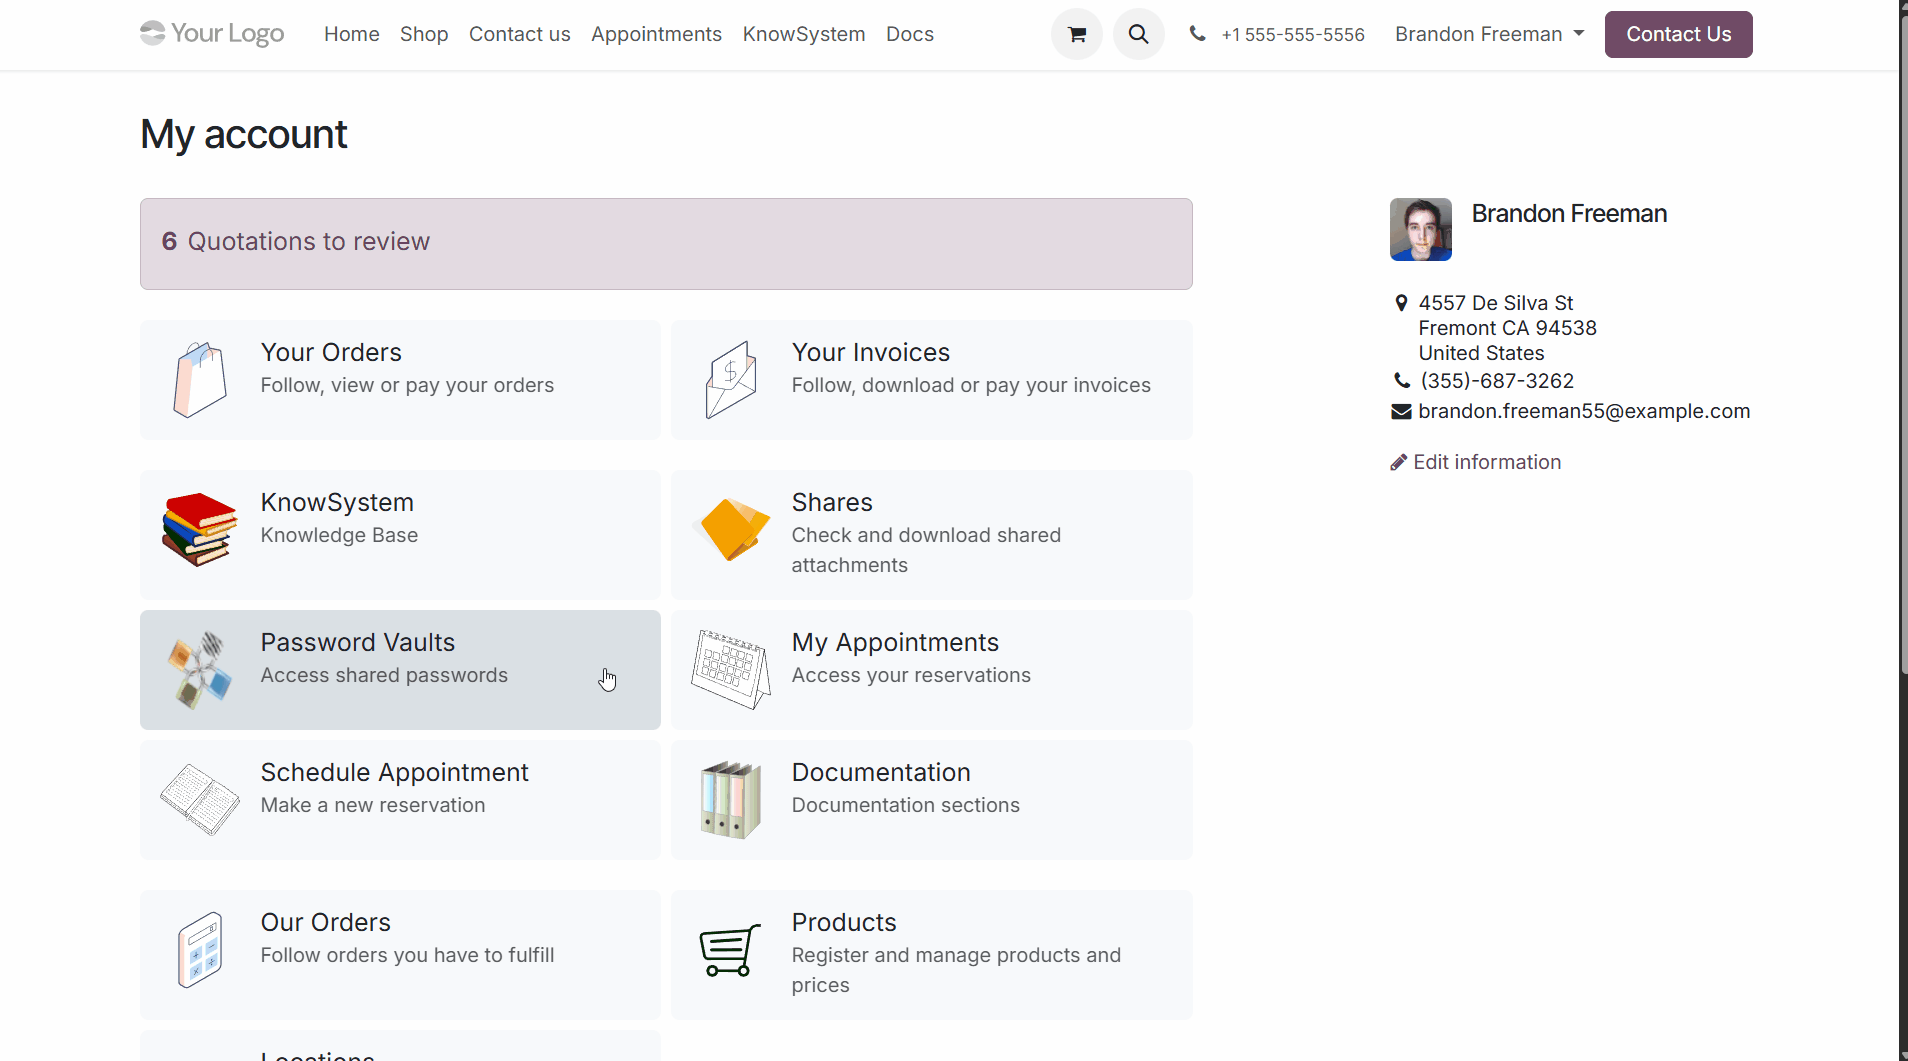
Portal users can open password vaults from the specially introduced 'Password Vaults' entry on the home portal page. Portal users have access to all portal vaults for which they or their parent company is specified in the 'Portal access' field. Note that a user should have portal rights, which may be granted from a partner form view (Action > 'Grant portal access').
For a portal user to open a portal vault, they must not only have the required permissions but also know the vault's password.
The tool lets portal users show/hide password keys, navigate, and search by the displayed columns.
You can find out who accessed a password and when if your clients access passwords from a portal vault. When the “Log users” option is enabled, each time a portal user views or copies a password, the access is recorded and shown in the Logging tab of the corresponding password card (see Security Layers).
Passwords Linked to Odoo Partners
When you create a password, you can link it to the contact it belongs to. This will allow you to search all the users' passwords. Also, you can open all the contact's passwords from the contact profile.
There are two ways to link a contact:
1. Fill in the field 'Partner' when creating or editing a password
2. Choose a password card, click 'Update partner', choose a partner, and click 'Save'.
Keep in mind that linking a contact to a password doesn't mean the contact will have access to it. To grant password access, a portal vault containing the password must be shared with a contact.
To find all passwords linked to a contact:
1. Go to Contacts
2. Choose a partner
3. Click 'More' > 'Passwords' above the contact's card
4. You will be redirected to the Password Manager app and will see all the passwords of this contact.
If the extra password secures any bundle, you will have to enter it before being redirected to the partner's password cards.

Duplicates Detection and Passwords Merging
The app introduces a configurable system to find password duplicates. As you save a new password, the app searches for similarities in existing passwords.
Duplicates are defined by the rule you set up. A rule is a field according to which an item is considered a copy, for example, an email or a name. A password is considered a duplicate if it meets any of the criteria. Any field, or combination of fields, on the password card can be considered to distinguish whether a password is unique or a duplicate.
Define which fields to use for duplicate detection. Choose the fields on the app configuration page, in the 'Duplicates search' section. As duplicate criteria, use any stored field of the following types:
1. Char (reference, user name, email, phone, etc.)
2. Text (notes)
3. Many2one (linked partner, type, etc.)
4. Date and datetime
5. Integer and float.
The module compares the selected fields of each password with those of other passwords and searches for matches. To be considered as a duplicate, the password fields should be identical, for example, '123'='123'. Even a slight difference will be considered a unique password. Only for char fields, this comparison ignores capitalization (for example, 'Server' equals 'serVER').
To choose the fields to consider passwords as duplicates:
1. Open the passwords app and go to Configuration > Settings
2. Find the section 'Duplicates search'
3. Select the fields to search for password duplicates
4. Click 'Save'.
To see all potential duplicates, apply the 'Potential duplicates' filter in the passwords interface. You can search within a specific bundle or across all passwords in the All Passwords menu.
When you register a new password, check for a warning above the title. If it is shown, ensure you do not create a duplicate of an existing key. The warning is highlighted in red. From the warning text, you can find out how many potential duplicates were found according to your criteria. Click on the button 'Potential Duplicates' inside the warning to see the possible duplicates.
If duplicates are found, they can be merged into a single record. To merge passwords:
1. Select all the passwords that you want to merge
2. Choose the mass action 'Merge passwords' in the right navigation panel
3. In the wizard, for the 'Password to merge', choose one that would be the primary source of the details. In case of conflicts, its value would be prioritized
4. Choose keys that would be used as a source of complementary details (for example, details that are missing in the main password)
5. Click 'Save'.
Starting with the 'Password to merge' values, the tool would check the following: reference, bundle, username, email, URL, phone, last password update date, and linked partner. The app would select the first non-null value found.
The app would also accumulate notes, attachments, and tags from all merged records. Values for custom fields would be selected according to the key sequence, starting with 'Password to merge'. Take into account that tables (one2many and many2many fields) would be left as they are in the 'Password to merge'.
As a result, the app would archive all 'Merged passwords' and enrich the 'Password to merge' fields. This way, you can merge any password keys, which aren't necessarily duplicates.
Password Manager: Custom Fields
Password Manager: Custom Fields is an optional add-on that lets you add extra fields to the password form. The tool also introduces a complementary typology of passwords. Show password fields only for specific types, and do not show them for others.
Custom password fields might be imported and exported. The right to create custom fields is reserved for Odoo administrators.
With this tool, you will be able to:
Choose the type of field
Make the field required
Choose the interface location of the field
Show fields for only specific types of passwords
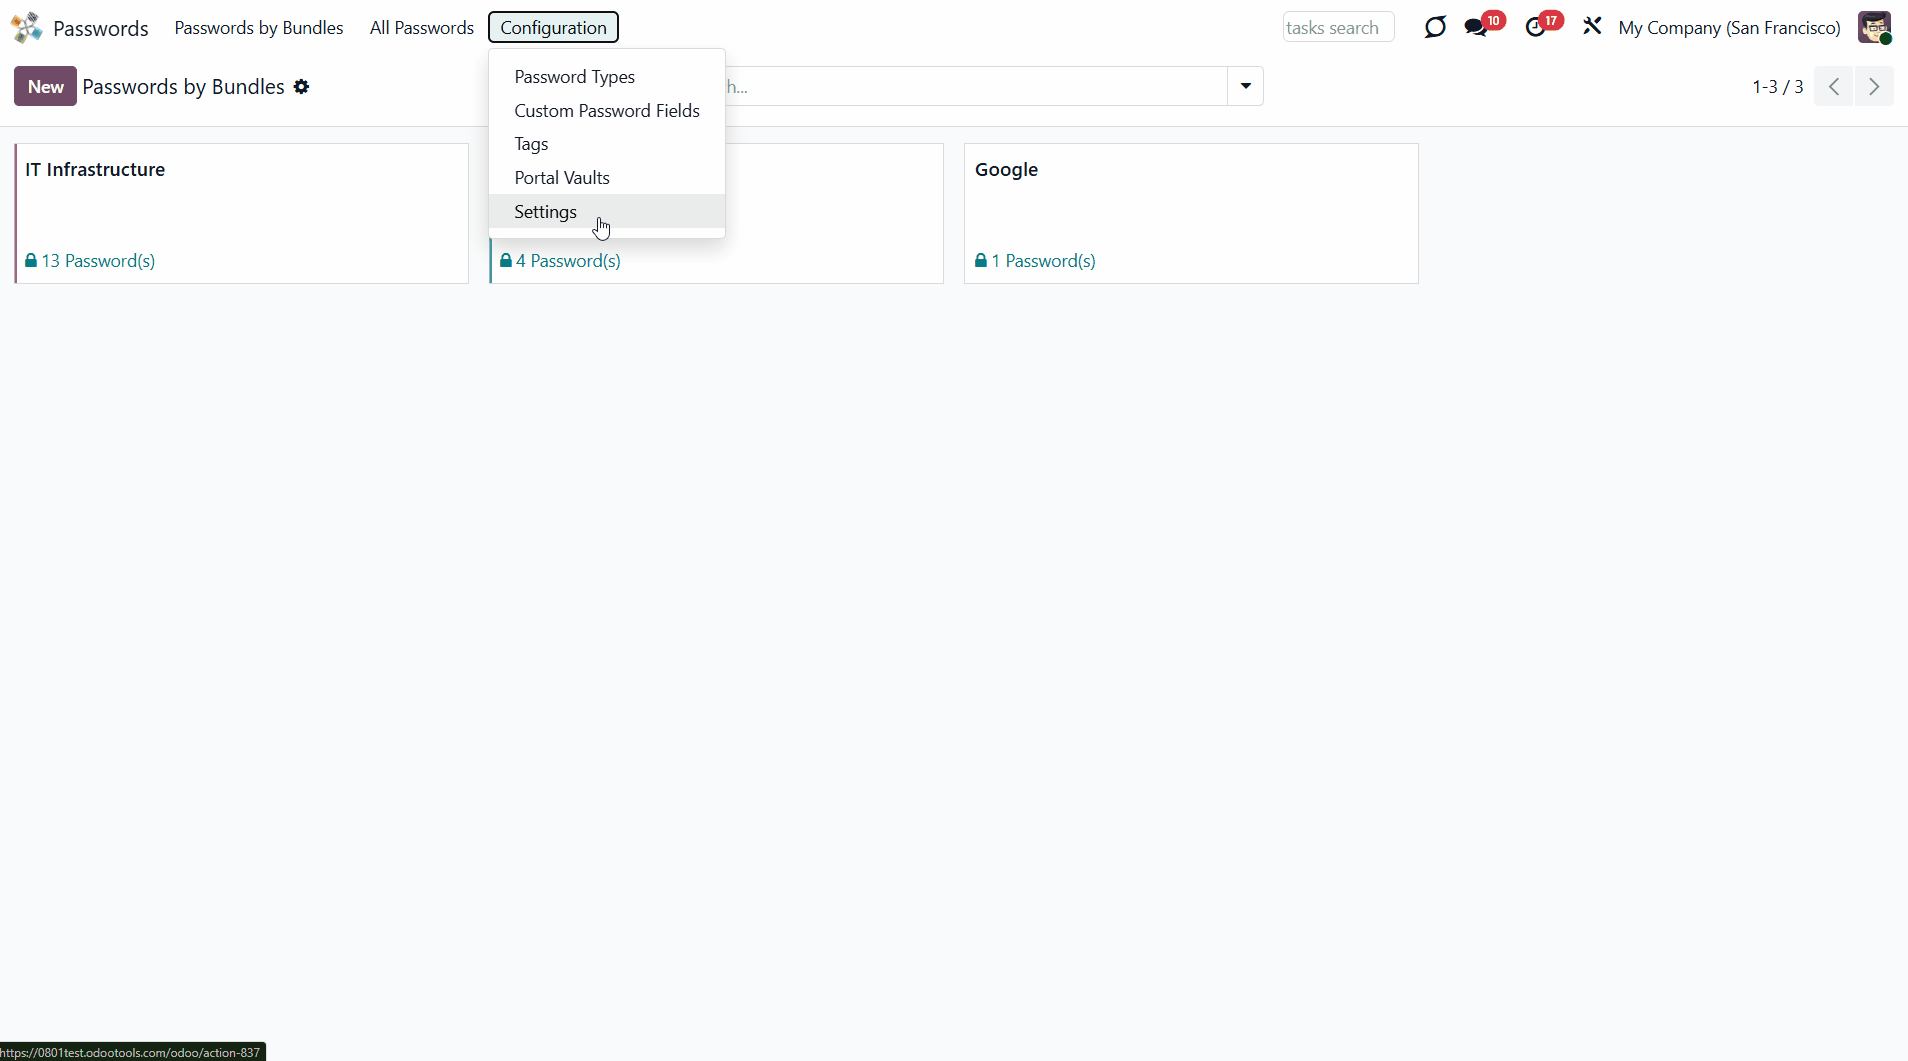
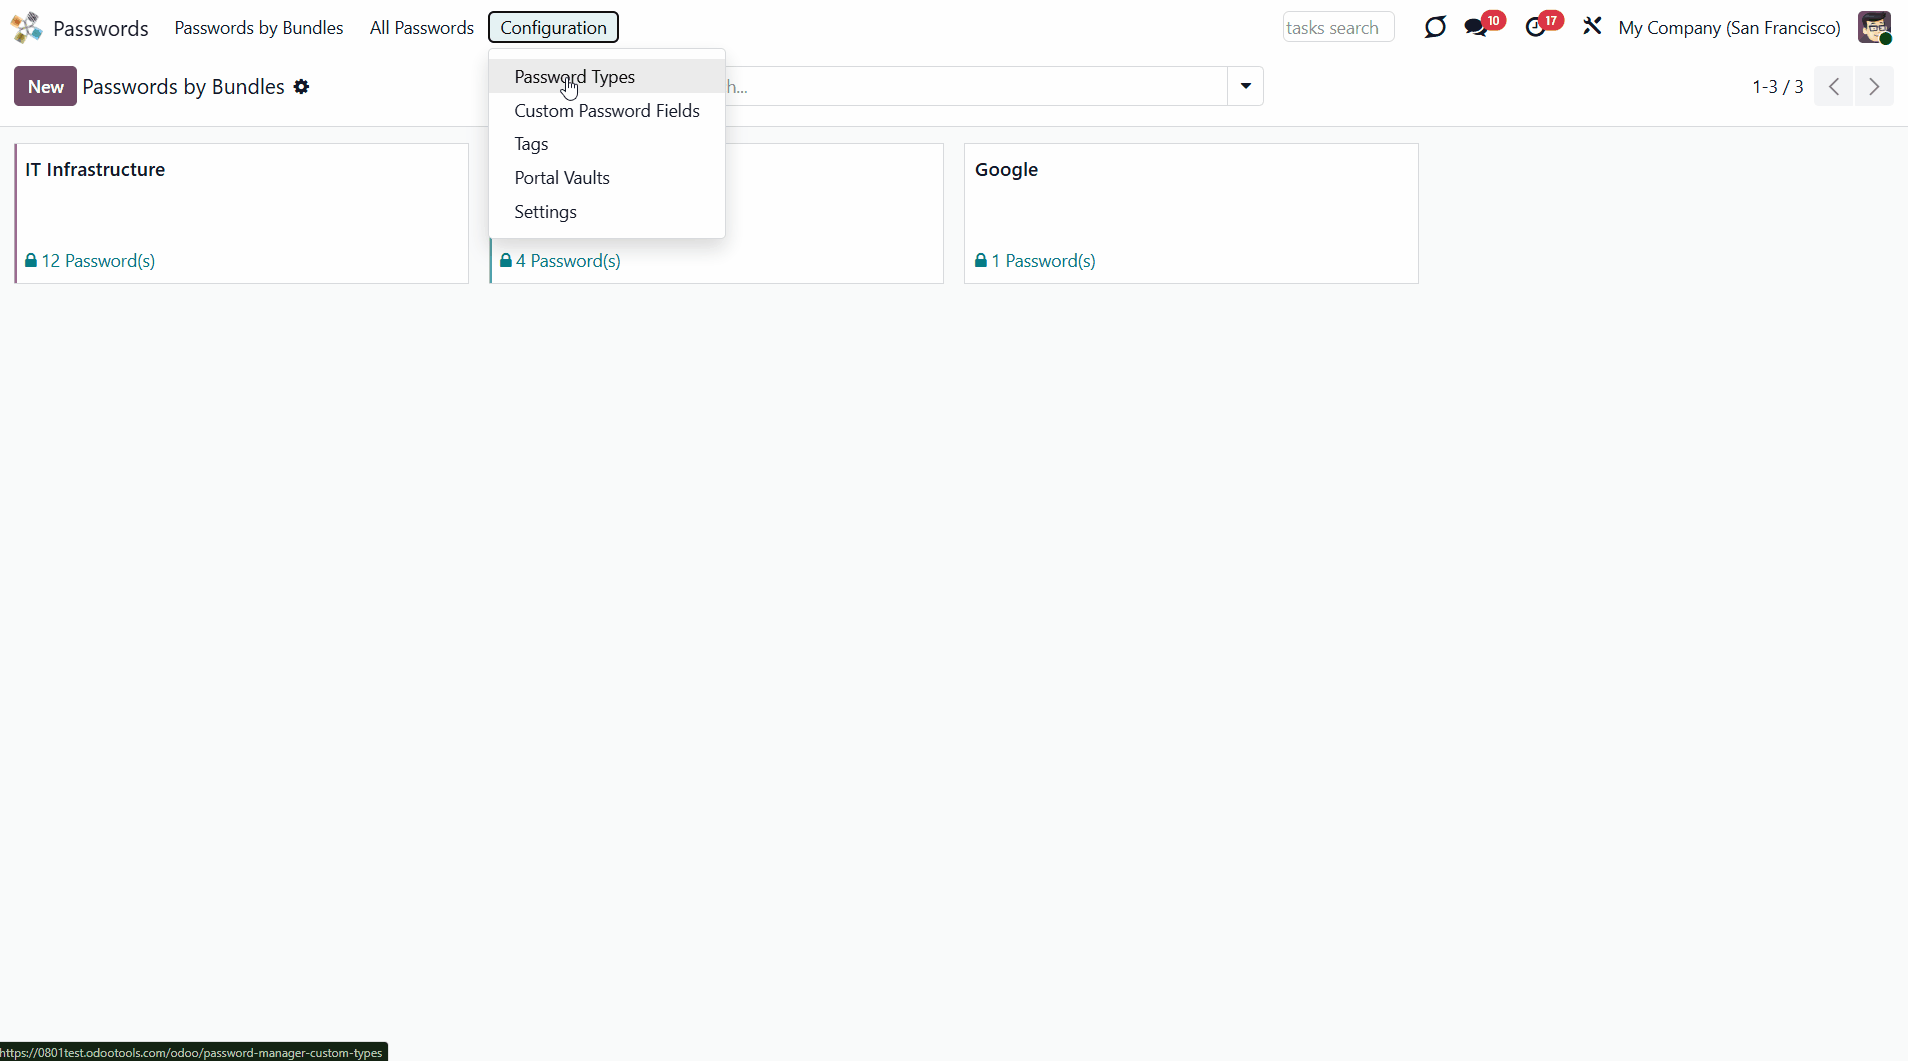
To add a new type of password:
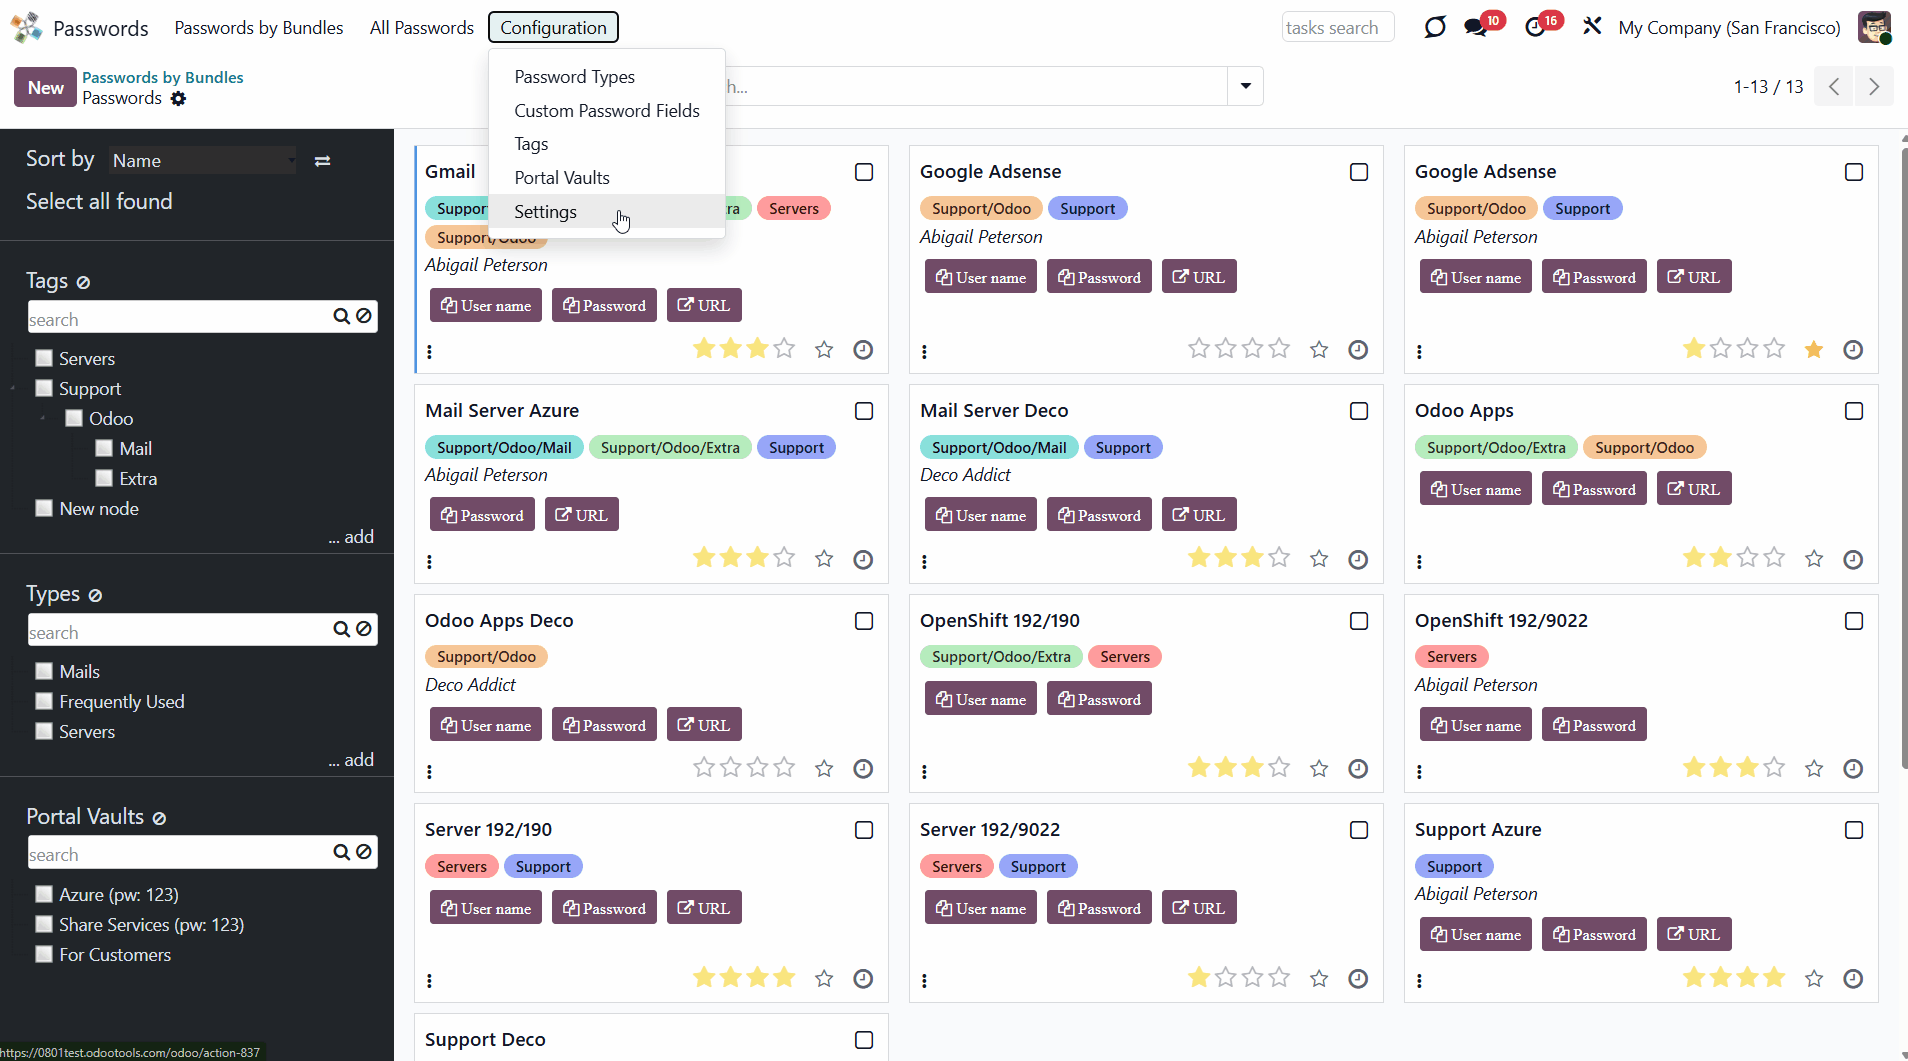
1. Go to Configuration
2. Click 'Password types'
3. Click 'New'
4. Write the type you need
5. Optionally, choose a parent type.
The created type will be added to all existing bundles. You can also add a type right from the single-view interface. For that, click '...add' and write the title. To edit, archive, or delete types, click on them with the right side of the mouse. Move types by using drag-and-drop. This way, you can easily set the type hierarchy. In this case, if you tick the parent type, you will see all related passwords. Find a specific type quickly with the type search bar.
You can quickly assign/change the types of all chosen passwords. To do that, select the passwords and drag and drop them into the required type. After that, the type will be assigned to the chosen passwords without the type, and the type will be changed in the other chosen passwords.

To add a new field to the password form:
1. Go to Configuration
2. Click 'Custom password fields'
3. Click 'New'
4. Write the field label
5. Choose the field's information type
6. Choose the password type
7. Choose the location of the field (custom tab, left column, right column, or after notes)
8. Put a tick in the box 'Required to enter a value' if you want to make the field mandatory.
After creating custom fields, perform a hard refresh (Ctrl+F5 or Ctrl+Shift+R) to apply the changes.
Here are the available information types of fields:
Single line text
Although this Website may be linked to other websites, we are not, directly or indirectly, implying any approval, association, sponsorship, endorsement, or affiliation with any linked website, unless specifically stated herein.
You should carefully review the legal statements and other conditions of use of any website which you access through a link from this Website. Your linking to any other off-site pages or other websites is at your own risk.
Simple text with no formatting
HTML-formatted text
Negative or positive numbers
Not a whole number
Drop-down choice with your own options
As you add a field of the dropdown type, it is possible to add the options one by one by clicking on the button 'Add a line'. Or all options at once by adding the list of options. For that, click on the button 'Add selection values based on a string'.
As you click on the button a pop-up wizard will appear. The options should be divided by a comma. When you are ready click 'Prepare Selection Values' and they will be automatically added to the list of available selection options.
If some of the options were previously added to the list, they will not be removed by the new ones.
Checkbox
Day, month and year
Day, month, year and hour
A file to upload
Links the password with other document
About Password Manager
Password Manager is an Odoo app that helps you securely store passwords and maintain an efficient storage structure.
An innovative single-view interface makes it easy to maintain and update passwords. You can create password bundles for a single user or the entire department.
Manage password access rights and create an additional password to enhance the security of your password vault.
Share passwords with your clients in Odoo's portal.
Search passwords for possible duplicates.
With this app, you will be able to:
Share password vaults for team use
Automatically generate encrypted passwords and check their quality
Share passwords with clients in the portal
Navigate, edit, archive, delete, or renew passwords
Password Manager Bundles
A password bundle (or password vault) is a set of passwords organized by functional area or by the groups that have access to them. You can create a password vault for the sales team, product managers, technical workers, or any other user group. Anyone can make a bundle for themselves or several employees. While creating a vault, you can also manage a user's access rights and assign someone to update passwords. The creator of a bundle is always its administrator and has access to all its passwords.
To create a bundle:
1. Open the password manager app
2. Click 'New'
3. Write the vault's title
4. Manage access levels, set an extra password, and add notes.
To edit an existing vault, click on the three dots in the top right corner of a vault. Here you can also choose the vault's color for convenient navigation.
Also, you can open passwords from all bundles. In this case, if some bundles are protected with extra passwords, the system will ask you to enter all of them. To view all passwords and their tags, click 'All passwords' in the interface header.
How to Create a New Password
In a password bundle, you can create as many passwords as you need. There aren't any mandatory fields, so if you don't need some fields or don't have an opportunity to fill them all, you can fill only those fields that you want or need. For example, if you use an email address to sign in rather than a username or phone number, you can leave these fields empty.
To create a password:
1. Open the password manager app
2. Open a password bundle where you want to create a password
3. Click 'New'
4. Write the password's title
5. Choose or add some tags for an easy search
6. Choose or create the type of password (available if you have Password Manager: Custom Fields installed in your Odoo)
7. Write the user name that you use on the site
8. Type your password, if you already registered and have it, or set the auto password generation in the app's settings, or generate it by clicking on the 'Arrow' icon on the right in the password field (Choose the length and contents of the password > Click 'Save&Close')
9. Add a URL of the site, an email, and a phone number used for the site
10. Add a partner, if you want the password to be connected to a contact
11. Optionally, in the tab 'Extra Security', choose users or user groups that will have access to the password. The setting applies only to users with read access to the bundle. If the fields are left empty, the password is considered global and visible to anyone with access to the bundle. If at least one field is filled in, the password will be available only to the stated users or user groups. The user who created the related bundle will have the right to the password regardless of its settings.
12. In the 'Info' tab, tick the box 'No update required ' if you don't want to generate an activity to change this password if you enabled the notifications in the bundle's settings
13. If you remove the tick from the box 'Active', the password will be archived and hidden
14. In the 'Notes' tab, write your notes or attach a file if you want.
As you create a password, its strength is automatically calculated in real time. The strongest passwords get four stars. This allows users to see the security issues and cope with them.
To edit a password:
1. Open a password bundle
2. Click on the password that you want to edit
3. Click on the password's title on the right side of the interface
4. Change anything the way you like.
Single View Interface
The innovative single-view interface is implemented in the password manager. This allows you to manage passwords and tags, and copy credentials from the same interface without opening the password form.
When you open a password bundle and click a password, the interface is divided into three parts: a central part with passwords, and two functional parts with sets of control elements on either side.
The first functional part lets you sort passwords by various criteria, select all found passwords, add tags, and view all passwords by tag.
You can sort passwords by name, creator, partner, create date, and write date.
To sort passwords:
1. Open a password bundle
2. Choose the sorting criterion
3. Click on the 'Arrows' sign to see passwords in the reversed order.
If you click on the 'Select all passwords' button, you will see the details of all these passwords in the third functional part of the interface.
To organize passwords, you can create some tags. To add a tag, click '...add' and write the title. To edit, archive, or delete tags, click on them with the right side of the mouse. Move tags using drag-and-drop. You can add a tag hierarchy. In this case, if you tick the parent tag, you will see the passwords for all tags it includes. Find a specific tag quickly with the tag search bar.
You can manage all available tags from password bundles and create new tags in Configuration > Tags.
The central part shows password cards, each with the password title, tags, linked contacts, and password strength. Use the buttons on the password cards to quickly copy the credentials and open the related URL in a new tab. Here, you can also add a password to favorites and remove it from favorites to find the most essential passwords quickly and check whether an update is required.
Click the three-dot icon in the bottom-left corner to choose the color and highlight the password.
To add a password to the selection, click the password card or tick the box in the top-right corner. At the same time, the user name will be copied to the clipboard, so you can start filling in the details on the target site straight away.
When you choose several passwords and then open another tag, your choice will not be reset.
You can quickly add a tag to all chosen passwords. To do that, select the passwords and drag and drop them into the required tag. The already assigned tags will not be removed.
The third functional part, the one on the right side, appears as you click on a password card. Here you can see the usernames, passwords, and URLs for all selected password cards. You can easily copy them from here by clicking on the 'Copy' icon. Click on the 'Eye' icon to see the password. Click the 'Open in a new tab' icon to open the site listed on the password card in a new tab.
It is possible to add some mass actions to the third functional part for extra convenience. For that, go to Configuration > Settings, and scroll to 'Mass actions'. Here you can add actions and delete the ones you don't need. Drag and drop to choose the sequence of mass actions.
Here is the list of the mass actions that can be added:
You can choose the fields to export in .xlsx and .csv formats of all chosen passwords. Let users export found and selected passwords by ticking the box 'Export passwords' on the configuration page.
Add or delete password's tags.
Create a copy of the password card.
Combine passwords to avoid duplicates.
After archiving, all passwords you chose will be hidden from the view, but you can always restore them.
Restore the archived passwords to make them visible again.
Delete the passwords that you do not need.
You can remove all chosen passwords from favorites at once.
If duplicates are found, they can be merged into a single record. To that end, do not forget to add the mass action 'Merge passwords' on the configuration page (see Duplicates detection and passwords merging).
Password Generator
The Password Manager app has a built-in password generator. It is possible to generate passwords based on chosen length and requirements. In the settings, you can choose to generate passwords automatically as soon as you open the password-creating wizard. There, you can also set the default password length and contents. Or, you can do it manually each time you open the password-creating wizard by clicking the 'Arrow' icon on the right side of the password field.
To generate passwords automatically:
1. Open the password manager app
2. Go to 'Configuration' > 'Settings'
3. Find 'Generate passwords on create' and put a tick in the box on its left side
4. Choose the default length and requirements for generated passwords.
As a result, you get an automatically generated password that is evaluated in real time.
You can set any 'Default length for generated password'. You can always change it manually in the password wizard, depending on the site's password requirements. There are several available 'Default requirements for passwords':
DscWk0UBG6pOS53
RwACDdbeHpHMthg (For example, letter O and zero 0)
User Access Rights. Team Use
All internal users can open the password manager app, but they can only see passwords they have access to. Only people mentioned in the bundle settings can see the bundle.
There are three types of access rights:
1. Admin rights (can change the app's settings, create, edit, and delete passwords)
2. Full rights (can't change the settings of the app, but has access to all passwords)
3. Readonly (can only see passwords, to which the access is given, can't edit or delete them).
The creator of a bundle is always its administrator and always has access to it.
You can set users' rights while creating or editing a vault.
To set users' rights to a bundle:
1. Open the bundle wizard
2. Find the tab 'Access levels'
3. Choose the access level of the users or user groups.
It is possible to give access to a user or a group of users, for example, to the Sales managers. In this case, all users on the Sales team will have access to the password bundle. If a person belongs to at least one group of users with access to the password bundle, then they also have access to it.
Security Layers
The tool introduces several security layers to reduce the risk of data leaks. All passwords are symmetrically encrypted. It means that to decrypt a password, plotters should know the exact decryption algorithm and the vault decryption key.
You can add an extra password to a password bundle. This way, you will only need to enter one password to access all the passwords in the bundle. If a user has access to this vault but doesn't know the password, they will not be able to open it.
You can also set the time for which the bundle is accessible without entering the password again. After this period, the password manager will no longer allow you to edit, copy, or view passwords and will prompt you to re-enter the password. The session duration after a successful login is set in minutes. This is especially convenient if you work from someone else's computer.
You can set a different password for each bundle or leave some bundles accessible without entering a password. The Vault extra password is also stored in the database, encrypted, and may be changed by a bundle administrator.
To add an extra password to a password bundle:
1. Click on the three dots icon, choose 'Edit'
2. Click 'Edit'
3. Click on the tab 'Extra security'
4. Tick the box 'Extra password to open this bundle'
5. Enter the password
6. Confirm the password
7. Choose the max. session time (the time after which you need to reconfirm your password to use password cards); the minimum is 3 minutes.
If the bundle password is set, the passwords will be decrypted using the bundle salt, the entered password, and the bundle key. So, although the bundle salt isn't encrypted, to decrypt it, you'll need the entered bundle password and the bundle key (bundle key = the password hashed with the bundle salt).
When the bundle password is changed, all password keys will be re-encrypted.
You can also update the encryption key and salt of the bundle manually by clicking on the button 'Update Encryption Key and Salt' as you edit a bundle.
Additionally, the Password Manager provides an optional user access logging layer. When the “Log users” setting is enabled, the system records every time a password is accessed, whether it is viewed or copied, both in the backend and in the portal password vault. Each access creates a log entry that includes the user and the access date/time.
All access records are displayed on the “Logging” tab of the password card. Above the log table, the system also automatically shows a list of users who have accessed this password at least once. This always makes it possible to see who may know the password.
For extra security, you can set the app to notify you when it's time to change your passwords. This way, for each selected period, the app will generate an activity indicating that a password change is required. You can set this activity to all valid passwords, or only to the most important ones.
To set the activities:
1. Start creating or editing a password vault
2. Tick the box 'Responsible for passwords update' on the right side of a user or a user group
3. Set the period after which the passwords require an update.
To exclude passwords from notifying about:
1. Start creating or editing a password
2. Open the tab 'Info' and tick the box 'No update required'
3. Click 'Save&Close'.
Sharing Portal Vaults
It is possible to combine passwords into an additional portal vault using a password bundle to share them with specific partners. To turn on password sharing with portal users:
1. Open the password manager app
2. Go to Configurations > Settings
3. Tick the option 'Portal vaults'
4. By default, only a password reference, user name, and password key are shown. Choose what other information should be shown. It is possible to share the fields URL, email, phone, and notes
5. Optionally, share any additional fields, both custom and standard ones, of the following types: char, text, html, boolean, selection, integer, float. For that, choose the fields in the section 'Other portal fields'. In the portal, the selected fields will appear as additional columns
6. Scroll down and find the section 'Mass actions'
7. Click 'Add a line' and add the mass action 'Share in portal'
8. Click 'Save'.
After that, in the left navigation panel, the vaults hierarchy tree and another configuration menu 'Portal Vaults' will be shown as you click 'Configuration' in the systray.
Within a password bundle, you can create an unlimited number of portal password vaults, each of which can be shared with an unlimited number of Odoo partners. There are several ways of creating a portal vault:
1. Through the special menu 'Portal Vaults'
2. As you select the passwords and apply the mass action 'Share in portal'.
To add a portal vault through the special menu Portal Vaults:
1. Go to Configuration > 'Portal Vaults'
2. Click 'New'
3. Type the vault's name
4. Choose the related password bundle. A portal vault is always associated with a single bundle. As you choose the related bundle, the field is hidden and cannot be changed. It isn't possible to add passwords from different bundles into a single portal vault
5. Each portal vault is obligatorily secured with a password. All keys are kept encrypted and can be decrypted only after the vault password is entered. Generate the password for the vault by clicking on the '' icon, or type the password manually and confirm it
6. In the field 'Portal Access', choose portal users who will have access to this vault. Each partner may have access to multiple vaults
7. Optionally, define a validity date for a temporary sharing to auto-archive password vaults
8. Optionally, choose the max. session time (the time after which you need to confirm the password again, to work with password cards), the minimum is 3 minutes
9. Optionally, in the tab 'Shared Passwords', choose the passwords to store in the vault and share from the selected bundle
10. Optionally add notes in the tab 'Notes'.
Each bundle's internal user can create or update any portal vault linked to their bundle. To add a password(s) to a vault, select the passwords and drag and drop them to the related portal vault in the left part of the interface, or trigger the mass action 'Share in portal'. In the latter case, in the opened pop-up window, you will be able to choose an existing portal vault or create a new one.
In the pop-up window, create a new bundle and add partners to share passwords. Optionally, tick the 'Send Invitation' option to send an invitation during sharing. The email template can be edited through the technical settings 'Portal Vault Invitation'. Keep in mind that the action doesn't create portal users. Portal access should be granted from the partner form view (Action > 'Grant portal access').
When the internal password key is changed, the change is automatically applied in the portal as well; all shared passwords are recalculated, and portal users always have access to up-to-date data.
Internal users have full rights to all vaults and the bundles they can read. When an internal user opens a password bundle, the list of portal vaults, if any, appears on the left side of the interface.
Use the search bar above the portal vaults list to quickly find the required ones. Right-click on a portal vault to rename, edit, or archive it. Tick the vault to see the included passwords.
Portal users can open password vaults from the specially introduced 'Password Vaults' entry on the home portal page. Portal users have access to all portal vaults for which they or their parent company is specified in the 'Portal access' field. Note that a user should have portal rights, which may be granted from a partner form view (Action > 'Grant portal access').
For a portal user to open a portal vault, they must not only have the required permissions but also know the vault's password.
The tool lets portal users show/hide password keys, navigate, and search by the displayed columns.
You can find out who accessed a password and when if your clients access passwords from a portal vault. When the “Log users” option is enabled, each time a portal user views or copies a password, the access is recorded and shown in the Logging tab of the corresponding password card (see Security Layers).
Passwords Linked to Odoo Partners
When you create a password, you can link it to the contact it belongs to. This will allow you to search all the users' passwords. Also, you can open all the contact's passwords from the contact profile.
There are two ways to link a contact:
1. Fill in the field 'Partner' when creating or editing a password
2. Choose a password card, click 'Update partner', choose a partner, and click 'Save'.
Keep in mind that linking a contact to a password doesn't mean the contact will have access to it. To grant password access, a portal vault containing the password must be shared with a contact.
To find all passwords linked to a contact:
1. Go to Contacts
2. Choose a partner
3. Click 'More' > 'Passwords' above the contact's card
4. You will be redirected to the Password Manager app and will see all the passwords of this contact.
If the extra password secures any bundle, you will have to enter it before being redirected to the partner's password cards.
Duplicates Detection and Passwords Merging
The app introduces a configurable system to find password duplicates. As you save a new password, the app searches for similarities in existing passwords.
Duplicates are defined by the rule you set up. A rule is a field according to which an item is considered a copy, for example, an email or a name. A password is considered a duplicate if it meets any of the criteria. Any field, or combination of fields, on the password card can be considered to distinguish whether a password is unique or a duplicate.
Define which fields to use for duplicate detection. Choose the fields on the app configuration page, in the 'Duplicates search' section. As duplicate criteria, use any stored field of the following types:
1. Char (reference, user name, email, phone, etc.)
2. Text (notes)
3. Many2one (linked partner, type, etc.)
4. Date and datetime
5. Integer and float.
The module compares the selected fields of each password with those of other passwords and searches for matches. To be considered as a duplicate, the password fields should be identical, for example, '123'='123'. Even a slight difference will be considered a unique password. Only for char fields, this comparison ignores capitalization (for example, 'Server' equals 'serVER').
To choose the fields to consider passwords as duplicates:
1. Open the passwords app and go to Configuration > Settings
2. Find the section 'Duplicates search'
3. Select the fields to search for password duplicates
4. Click 'Save'.
To see all potential duplicates, apply the 'Potential duplicates' filter in the passwords interface. You can search within a specific bundle or across all passwords in the All Passwords menu.
When you register a new password, check for a warning above the title. If it is shown, ensure you do not create a duplicate of an existing key. The warning is highlighted in red. From the warning text, you can find out how many potential duplicates were found according to your criteria. Click on the button 'Potential Duplicates' inside the warning to see the possible duplicates.
If duplicates are found, they can be merged into a single record. To merge passwords:
1. Select all the passwords that you want to merge
2. Choose the mass action 'Merge passwords' in the right navigation panel
3. In the wizard, for the 'Password to merge', choose one that would be the primary source of the details. In case of conflicts, its value would be prioritized
4. Choose keys that would be used as a source of complementary details (for example, details that are missing in the main password)
5. Click 'Save'.
Starting with the 'Password to merge' values, the tool would check the following: reference, bundle, username, email, URL, phone, last password update date, and linked partner. The app would select the first non-null value found.
The app would also accumulate notes, attachments, and tags from all merged records. Values for custom fields would be selected according to the key sequence, starting with 'Password to merge'. Take into account that tables (one2many and many2many fields) would be left as they are in the 'Password to merge'.
As a result, the app would archive all 'Merged passwords' and enrich the 'Password to merge' fields. This way, you can merge any password keys, which aren't necessarily duplicates.
Password Manager: Custom Fields
Password Manager: Custom Fields is an optional add-on that lets you add extra fields to the password form. The tool also introduces a complementary typology of passwords. Show password fields only for specific types, and do not show them for others.
Custom password fields might be imported and exported. The right to create custom fields is reserved for Odoo administrators.
With this tool, you will be able to:
Choose the type of field
Make the field required
Choose the interface location of the field
Show fields for only specific types of passwords
To add a new type of password:
1. Go to Configuration
2. Click 'Password types'
3. Click 'New'
4. Write the type you need
5. Optionally, choose a parent type.
The created type will be added to all existing bundles. You can also add a type right from the single-view interface. For that, click '...add' and write the title. To edit, archive, or delete types, click on them with the right side of the mouse. Move types by using drag-and-drop. This way, you can easily set the type hierarchy. In this case, if you tick the parent type, you will see all related passwords. Find a specific type quickly with the type search bar.
You can quickly assign/change the types of all chosen passwords. To do that, select the passwords and drag and drop them into the required type. After that, the type will be assigned to the chosen passwords without the type, and the type will be changed in the other chosen passwords.
To add a new field to the password form:
1. Go to Configuration
2. Click 'Custom password fields'
3. Click 'New'
4. Write the field label
5. Choose the field's information type
6. Choose the password type
7. Choose the location of the field (custom tab, left column, right column, or after notes)
8. Put a tick in the box 'Required to enter a value' if you want to make the field mandatory.
After creating custom fields, perform a hard refresh (Ctrl+F5 or Ctrl+Shift+R) to apply the changes.
Here are the available information types of fields:
Single line text
Although this Website may be linked to other websites, we are not, directly or indirectly, implying any approval, association, sponsorship, endorsement, or affiliation with any linked website, unless specifically stated herein.
You should carefully review the legal statements and other conditions of use of any website which you access through a link from this Website. Your linking to any other off-site pages or other websites is at your own risk.
Simple text with no formatting
HTML-formatted text
Negative or positive numbers
Not a whole number
Drop-down choice with your own options
As you add a field of the dropdown type, it is possible to add the options one by one by clicking on the button 'Add a line'. Or all options at once by adding the list of options. For that, click on the button 'Add selection values based on a string'.
As you click on the button a pop-up wizard will appear. The options should be divided by a comma. When you are ready click 'Prepare Selection Values' and they will be automatically added to the list of available selection options.
If some of the options were previously added to the list, they will not be removed by the new ones.
Checkbox
Day, month and year
Day, month, year and hour
A file to upload
Links the password with other document